Advertisement
Table of Contents
- 1 Compliance with Standards
- 2 'Battery Low' Indication
- 3 Quick Charge
- 4 Wet Shaving
- 5 Using the Beard Styler Attachment Without Comb
- 6 Cleaning the Shaving Unit
- 7 Extra-Thorough Cleaning Method
- 8 Ordering Accessories
- 9 Removing the Rechargeable Shaver Battery
- 10 Guarantee Restrictions
- 11 Troubleshooting
- Download this manual
Advertisement
Table of Contents

Subscribe to Our Youtube Channel
Related Manuals for Philips YS524


Summary of Contents for Philips YS524
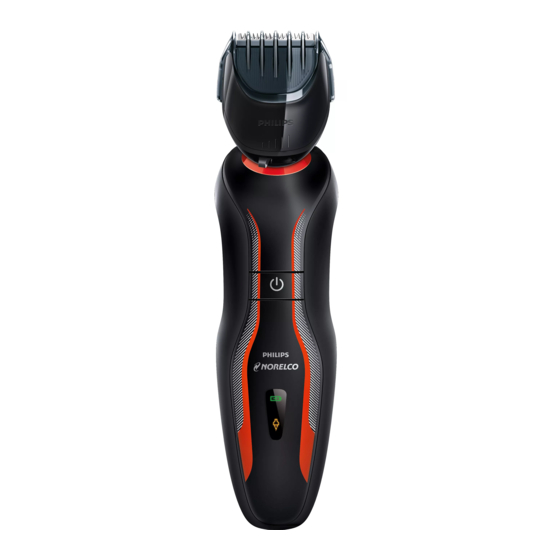
- Page 1 Always here to help you Space for Product image...
- Page 3 TAblE of conTEnT English...
- Page 4 English inTroducTion Congratulations on your purchase and welcome to Philips! To fully benefit from the support that Philips offers, register your product at www.philips.com/ welcome. For additional functionality you can buy click-fit attachments via www.philips.com/shop imporTAnT Read this user manual carefully before you use the appliance and save it for future reference.
-
Page 5: Compliance With Standards
- This Philips appliance complies with all standards regarding electromagnetic fields (EMF). If handled properly and according to the instructions in this user manual, the appliance is safe to use based on scientific evidence available today. - Page 6 Shaving attachment On/off button Display Adapter Small plug Cleaning brush 10 Hair length selector 11 Beardstyler attachment (YS524,YS523 only) 12 Trimming comb (YS524,YS523 only) 13 Bodygroomer attachment (YS524,YS521 only) 14 Bodygroomer comb 15 Shaving head holder 16 Guard 17 Cutter...
-
Page 7: 'Battery Low' Indication
English ’Battery fully charged’ indication - When the battery is fully charged, the battery symbol lights up green continuously. - If you leave the appliance connected to the mains, the light goes out after 30 minutes. ’Battery low’ indication - When the battery is almost empty, the plug symbol starts flashing orange. -
Page 8: Quick Charge
English , The battery symbol on the appliance flashes to show that the appliance is charging (see chapter 4). When you remove the adapter from the wall socket and leave the small plug in the appliance, the appliance may not work for a few seconds. Quick charge After the appliance has charged for 5 minutes, it contains enough energy for a touch up. - Page 9 English Shaving Skin adaptation period Your first shaves may not bring you the result you expect and your skin may even become slightly irritated. This is normal. Your skin and beard need time to adapt to any new shaving system. We advise you to shave regularly (at least 3 times a week) for a period of 3 weeks to allow your skin to adapt to the new shaver.
-
Page 10: Wet Shaving
English Wet shaving To achieve better shaving results you can also use this shaver on a wet face with shaving foam or shaving gel. To shave with shaving foam or shaving gel, follow the steps below: Apply some water to your skin. Apply shaving foam or shaving gel to your skin. - Page 11 Make sure you rinse all foam or shaving gel off the shaving unit (see also chapter 9). using ThE bEArd sTylEr (ys524,ys523,ys511 only) Only use this beard styler attachment to style facial hair. Do not use this attachment to style body hair or scalp hair.
- Page 12 English Using the beard styler attachment with comb You can use the beard styler attachment with the comb attached to trim your beard at one fixed setting, but also at different length settings. The hair length settings on the beard styler attachment correspond to the remaining hair length of your beard after cutting.
-
Page 13: Using The Beard Styler Attachment Without Comb
English Using the beard styler attachment without comb You can use the beard styler attachment without comb to contour or cut shapes in beard hair. Pull the comb off the accessory. Press the on/off button to switch on the appliance. You can now start contouring your beard. - Page 14 English Styling tips - Do not trim a wet beard or moustache. Wet hair is longer. When it dries you may find you have trimmed too much. - A good-sized wall mirror is usually indispensable. You might also benefit from a magnifying mirror and possibly a three-way mirror.
- Page 15 English using ThE bodygroomEr (ys524,ys521,ys512 only) Only use this bodygroomer attachment to groom your body hair. You can use this attachment wet or dry to groom or trim hair on all parts of the body below the neckline. Do not use this attachment to groom or trim facial hair or scalp hair.
- Page 16 English Attaching the trimming comb Make sure the appliance is switched off. Snap the trimming comb onto the appliance. Make sure the teeth of the comb point in the direction in which you are going to move the appliance. - When you move the appliance towards you, the teeth have to point towards you.
- Page 17 English Move the appliance against the direction of hair growth. Make sure that the flat part of the trimming comb is always fully in contact with the skin. Grooming If a trimming comb is still attached, remove it. Press the on/off button to switch on the appliance.
- Page 18 - Clean the appliance and the attachments after every use to prevent pollution of the shaver and blockages. - Clean the shaving heads frequently with Philips Shaving Head Cleaning Spray (HQ110) for optimal shaving performance. - You can clean the outside of the appliance with a damp cloth.
-
Page 19: Cleaning The Shaving Unit
English Cleaning the shaving unit Switch off the appliance. Rinse the shaving attachment under a hot tap for some time. You can also clean the shaving unit with the cleaning brush supplied. After rinsing the appliance under the tap, hold it upright for 10-15 seconds to allow water to run out of the bottom. -
Page 20: Extra-Thorough Cleaning Method
English Extra-thorough cleaning method Switch off the appliance. Press the release buttons on the shaving attachment (1) and pull the shaving unit off the shaving attachment (2). To unlock the orange retaining ring, turn it in the direction of the arrows indicated in and on the retaining ring. - Page 21 English Clean the inside of the shaving guard. After cleaning, place the shaving guard back into the shaving head holder. Make sure the two wings fit exactly into the recesses of the shaving head holder. Place the cutter back into the shaving guard with the cutter legs pointing downwards.
- Page 22 English Cleaning the bodygroomer attachment Switch off the appliance. If the trimming comb is still attached, remove it. You can either push the trimming comb off the appliance or pull it off, depending on how the comb is placed on the appliance. Pull the bodygroomer foil off the appliance.
- Page 23 Replace damaged shaving heads right away. Only replace the shaving heads with original RQ32 Philips shaving heads. See also chapter ‘Ordering accessories’. Switch off the shaver. Press the release buttons on the shaving attachment and pull the shaving unit off the shaving attachment.
- Page 24 English Lift the retaining ring out of the shaving unit. Remove the shaving heads and place new ones in the shaving unit. Make sure the two wings of the shaving heads fit exactly into the recesses. Place the retaining ring back onto the shaving unit (1).
-
Page 25: Ordering Accessories
If the online shop is not available in your country, go to your Philips dealer or a Philips service centre. If you have any difficulties obtaining accessories for your appliance, please contact the Philips Consumer Care Centre in your country. -
Page 26: Removing The Rechargeable Shaver Battery
English Removing the rechargeable shaver battery Only remove the rechargeable battery when you discard the shaver. Make sure the rechargeable battery is completely empty when you remove it. Be careful, the battery strips are sharp. Undo the screw in the back panel of the shaver with a screwdriver (1) and remove the back panel (2). -
Page 27: Guarantee Restrictions
English guArAnTEE And sErvicE If you need service or information or if you have a problem, please visit the Philips website at www.philips.com/support or contact the Philips Consumer Care Centre in your country. You find its phone number in the worldwide guarantee leaflet. If there is no Consumer Care Centre in your country, go to your local Philips dealer. - Page 28 English Problem Possible cause Solution This appliance is not Remove the adapter from appliance designed to be used the wall socket and the does not directly from the mains. small plug from the shaver. work, even You can now switch on though it is the appliance again.
- Page 29 My skin is Your skin needs time to Skin irritation during the irritated after get used to the Philips first 2-3 weeks of use is shaving. shaving system. possible. After this period, the skin irritation usually disappears.
- Page 30 English Problem Possible cause Solution The rotation Too much dirt has Clean the shaving heads. speed of the collected in the shaving See chapter 9. shaving heads heads. is lower than usual. The rechargeable battery Recharge the battery. See is low. chapter 5.
- Page 31 English Problem Possible cause Solution Reduced You use the appliance in Follow the instructions in trimming the wrong way. chapter 6,7 and 8. and/or shaving performance The shaving heads are Clean the shaving heads. dirty. See chapter 9. The battery is running low. Recharge the battery. See chapter 5.
- Page 32 4222.002.5433.1...
Need help?
Do you have a question about the YS524 and is the answer not in the manual?
Questions and answers