Table of Contents
Advertisement
Quick Links
Advertisement
Table of Contents

Related Manuals for Philips cBright I Series


Summary of Contents for Philips cBright I Series
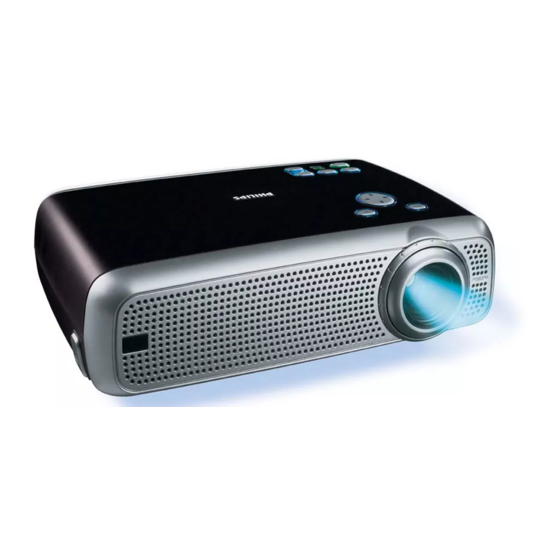
- Page 1 Philips Multimedia projector cBright 1 Series User guide English...
-
Page 2: Controls And Connections
0. Controls and connections Menu Menu Source Source Mute Mute Keystone Keystone Lamp Lamp Stand by Stand by fig. 1 Stand by Left Left MOUSE Mouse Right Right Volume VOLUME MENU Menu Menu Menu Volume Volume Stand by Stand by Mute Mute Mute... -
Page 3: Table Of Contents
We are sure that, used properly, it will bring you years of enjoyment. You Philips Consumer Electronics Company will want to keep this manual handy, as it is a convenient source One Philips Drive of information about your projector. -
Page 4: Important Safeguards
If the projector has been dropped or the cabinet has can adversely affect the unit and peel the paint. been damaged. 3. Do not use attachments not recommended by PHILIPS, as When the projector exhibits a distinct change in they may cause hazards. -
Page 5: Projector Features
The image projected is simultaneously shown on the monitor. 7. High reliability and excellent brightness The Philips UHP lamp guarantees long life, excellent brightness over the lamp’s lifetime and excellent colour reproduction. Furthermore, the projector has an excellent brightness- and... -
Page 6: Functional Overview
5. Functional Overview See illustrations Controls On projector (fig. 1) On compact remote control (SVGA/XGA version) - (fig. 2) 1 Menu 1 Stand by On To activate and deactivate the menu. To switch the projector in or out the the power standby mode. -
Page 7: Connections
5. Functional Overview See illustrations Connections On trackball remote control (XGA Impact version) - (fig. 3) Data source connections (fig. 4) 1 On/off button a Audio out To switch the remote control on and off. Output socket to connect to the Line Input sockets of an Note: The remote control will always use some power, even amplifier or stereo system. -
Page 8: Set Up
6. Set Up Positioning the projector and screen • Place the projector on a stable, level surface, out of direct – The Standby Warning sunlight and away from sources of excessive dust, dirt, heat, screen will appear for water, moisture, vibration and strong magnetic fields. 20 seconds. -
Page 9: Moving The Projector
6. Set Up Inserting the batteries in the compact remote control (SVGA/XGA version) To Lower: • Keep both adjusters (A) pressed and gently lower the projector. P u s h • Use the Focus Ring and Zoom Ring to readjust the focus and size of the image. -
Page 10: Installation
The numbers in the left-hand column correspond with the numbers in the connection diagrams on the following pages. When connecting the projector to a Macintosh computer, a programmable VGA/MAC adapter is available as an optional Philips cable accessory. -
Page 11: Connecting To A Computer
– control the cursor of the computer via the projector remote Mac/PC control, – play audio information from the computer via the projector optional Philips speaker, VGA/MAC adapter – the display settings of the computer will be changed to fit the capability of the projector. -
Page 12: Connecting To Video Equipment
7. Installation Connecting to video equipment Connecting to video equipment Note: The figures in brackets (1) correspond to the figures in the S-VHS accessories diagram. The characters in brackets (a) correspond to the characters in fig. 4 of ‘Controls and connections’. Caution! Audio out Audio out... -
Page 13: Connecting To Audio Equipment
7. Installation Connecting to audio equipment Connecting to audio equipment Note: The characters in brackets (a) correspond to the characters in fig. 4 of ‘Controls and connections’. Caution! Always switch off the projector before making any connections. Always turn down the volume control of the connected amplifier before switching it on, to prevent damage to the speakers. -
Page 14: Connecting To An External Monitor
7. Installation Connecting to an external monitor Connecting to an external monitor Note: The characters in brackets (a) correspond to characters in fig. 4 of ‘Controls and connections’. Caution! Monitor cable Always switch off PC, external monitor and projector before (optional) making any connections. -
Page 15: Operation
8. Operation Preparation Preparation General Some examples: 1. Press the Stand by On button to switch on the projector. – The lamp indicator flashes green and the start up screen appears for several seconds. – When the average lamplife time has almost expired and less than 100 hours remain, the message ‘Warning:... - Page 16 8. Operation Preparation/Display and picture control 2. Use Cursor Control left Tip for Windows users: and/or right to move the To adjust size and phase correctly: cursor to any other item 1. Select ‘Start’ and then ‘Shut down’. in the menu bar. 2.
-
Page 17: Display And Picture Control
8. Operation Display and picture control Note: A(audio)/V(video)-mute can only be selected with the Shift AV mute button on the projector or on the remote control. The Shift function adjusts the computer image in horizontal and A/V mute then appears on the screen. vertical direction to center it on the screen. -
Page 18: Audio Control
8. Operation Display and picture control/Audio control Audio Control Mirror The projector’s sound is set to standard specifications at the The projector can be used in various positions with respect to factory. However, you can adjust the sound to suit your own the viewers and the projection screen. -
Page 19: Other Settings
The projector is equipped with the following functions to optimize its use and handling: Start-up screen This function allows you to display or suppress the default Philips start-up screen upon the projector’s start up. 1. Press Menu. – The menu bar appears on the screen. -
Page 20: Maintenance
9. Maintenance Cleaning Caution! 8. Replace the filter. Switch off and disconnect the projector before cleaning. Firmly press the filter edges in place. 1. When the cabinet is dusty, clean it by gently wiping with a Check if the filter is firmly soft cloth. -
Page 21: Lamp
9. Maintenance Lamp Lamp Replacement When operation time 1. Press the Stand by On button to switch off the projector. reaches the last 100 hours – The standby indicator lights up red. of the average lamplife, the 2. Wait 5 minutes for the lamp to cool down and the cooling fan message ‘Warning: lamplife to stop and disconnect the mains lead and all other cables. -
Page 22: Resetting The Lamplife Time
9. Maintenance Resetting the lamplife time Caution! 1. Press Menu. – For cooling purposes the lamp is open. When removing the – The menu bar appears on the screen. lamp do not tilt. If the inner tube is broken glass particles may 2. -
Page 23: Troubleshooting
10. Troubleshooting Image is blurred If a fault occurs, first check the points listed below – Image is not focused. before taking the projector for repair. If you are unable to remedy • Adjust focus ring. a problem by following these hints, consult your dealer or service organisation.
Need help?
Do you have a question about the cBright I Series and is the answer not in the manual?
Questions and answers