
Subscribe to Our Youtube Channel
Related Manuals for Panasonic NV-GX7B


Summary of Contents for Panasonic NV-GX7B
-
Page 1: Operating Instructions
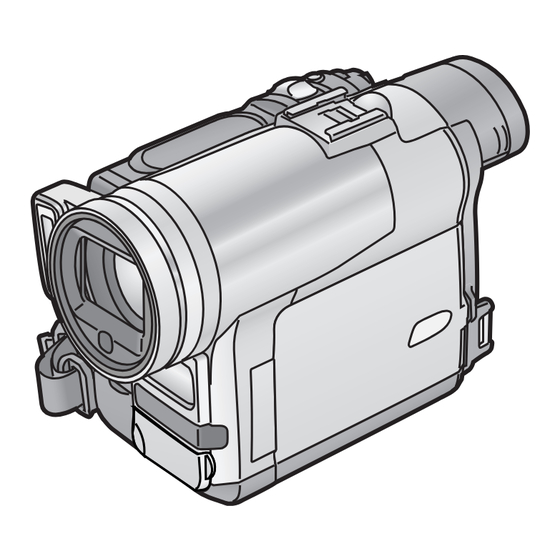
Digital Video Camera Operating Instructions NV-GX7B Model No. Before use, please read these instructions completely. VQT9799... -
Page 2: Information For Your Safety
Dear Customer, We would like to take this opportunity to thank you for purchasing this Panasonic Movie Camera. Please read these Operating Instructions carefully and keep them handy for future reference. Please note that the actual controls and components, menu items, etc. -
Page 3: Table Of Contents
Contents CARD Mode Information for Your Safety......2 Using a Card..........28 Before Use Recording on a Card........28 Playing Back a Card ........30 Standard Accessories........4 Recording Pictures on a Card to a Tape ..31 Optional Accessories........4 Slide Show............. -
Page 4: Before Use Standard Accessories
≥By attaching the supplied Lens Hood for Card Mode ≥All enquiries transactions and distribution facilities are Recording that blocks direct sunlight in Card Mode provided directly by Panasonic UK Ltd. ≥It couldn’t be simpler! Recording, you can get better image. However, Lens Cap cannot be attached. -
Page 5: Controls And Components
Before Use Controls and Components (17) Viewfinder -10- -45- ª Movie Camera ≥Due to limitations in LCD production technology, there may be some tiny bright or dark spots on the Viewfinder screen. However, this is not a malfunction and does not affect the recorded picture. - Page 6 Before Use (41) S-Video Input/Output Socket [S-VIDEO IN/OUT] Direction Buttons for Playback Zoom Function -25- [π, ∫, ∑, ∏] -24- START/ DATE/ PHOTO STOP (46) TIME SHOT COUNTER RESET TITLE ZOOM (42) MULTI/ A.DUB P-IN-P ¥ (67) /REW PLAY (62) STILL ADV PAUSE STILL ADV...
-
Page 7: The Remote Controller
Using the AC Adaptor battery. WARNING “THE LITHIUM BATTERY IS A CRITICAL COMPONENT (TYPE NUMBER CR2025 MANUFACTURED BY PANASONIC). IT MUST NEVER BE SUBJECTED TO EXCESSIVE HEAT OR DISCHARGE. IT MUST THEREFORE ONLY BE FITTED IN EQUIPMENT DESIGNED SPECIFICALLY FOR ITS USE. -
Page 8: Charging Time And Available Recording Time
Before Use ≥Since the Battery will not be charged when the DC Input ≥The times shown in the table are for continuous recording Lead is connected to the AC Adaptor, disconnect it from at a temperature of 20oC and humidity of 60%. If the the AC Adaptor. -
Page 9: Attaching The Shoulder Strap
Before Use ª To Use as the Free Style Grip Belt Insert a Cassette. Using the Grip Belt as the Free Style Grip Belt makes it easier to handle and carry the Movie Camera. It is more convinient to use with the Free Style Controller. Close the Cassette Holder by pressing the [PUSH CLOSE] Button (33) -
Page 10: Using The Viewfinder/Lcd Monitor
Before Use Using the Viewfinder/LCD Monitor To Adjust Press the [PUSH] Dial and select the item to be adjusted, ª Using the Viewfinder and then turn the [PUSH] Dial to raise or lower the number of Before using the Viewfinder, adjust the field of view so that vertical bars in the Bar Indication. -
Page 11: List Of Menus
Before Use ≥The selected file is marked by a frame. [P-IN-P] Position of Small Picture inside Normal Picture -21- PICTURE [5. RECORDING SETUP] Recording Setup Sub-Menu [REC SPEED] Recording Speed Mode -13- [AUDIO REC] No.25 100-0012 Audio Recording Mode -13- [SCENEINDEX] (21) Press the [PUSH] Dial... - Page 12 Before Use ≥When recording proceeds with no input signals ª [VCR FUNCTIONS] supplied. VCR Mode Main-Menu ≥When recording involves the use of the S-Video or AV Input Socket. VCR FUNCTIONS 1.PLAYBACK FUNCTIONS ≥When pictures with no camera data are recorded using 2.DIGITAL EFFECT 3.CARD SETUP the DV Terminal.
-
Page 13: Setting Date And Time
ONLY BE REPLACED BY QUALIFIED PERSONNEL. [EXIT] WHEN NECESSARY, CONTACT YOUR LOCAL It is for terminating the Short-Cut Menu. PANASONIC SUPPLIER. Setting Date and Time Since the internal clock of the Movie Camera has a slight LP Mode imprecision, make sure to check the time before recording. -
Page 14: Camera Mode
Camera Mode Camera Mode ª To Check the Recording By pressing the [S] Button briefly in the Recording Recording Pause Mode, you can play back the last few seconds of the recorded scene. When recording with the [AUTO/MNL/FOCUS] Switch (50) set to [AUTO], the Movie Camera automatically adjust the focus and white balance. -
Page 15: Photoshot
Camera Mode (28) ª Digital Still Picture Set the [OFF/ON/MODE] Switch to [OFF]. ≥The Quick Start Recording Lamp remains lit. When the [STILL] Button (13) is pressed, images become still pictures. When the button is pressed again, the Digital Still Picture Mode is cancelled. (28) (13) (28) -
Page 16: Digital Zoom Function
Camera Mode ≥For other notes concerning this item, see Fade In/Out Functions -38- Digital Zoom Function Fade In Fade In brings out images and sounds gradually from a black This function is useful when you want to record close-up screen at the beginning of a scene. shots of subjects located beyond a normal zoom range of 1k to 10k magnification. -
Page 17: Colour Night View Function
Camera Mode ≥The [ª] Indication flashes and then is displayed. ≥Black bars appear at the top and bottom of the screen. ≥The entire screen becomes brighter. CINEMA ª To Cancel the Cinema Mode Set [CAMERA FUNCTIONS] >> [CAMERA SETUP] >> To Resume Normal Recording [CINEMA] >>... -
Page 18: Adjusting White Balance Manually
Camera Mode (21) out natural colours. In such a case, the white balance can be Press the [PUSH] Dial adjusted manually. When the Movie Camera is turned on with the Lens Cap on, W.B/SHUTTER/IRIS/ MF/VOL/JOG the Automatic White Balance Adjustment may not function PUSH properly. -
Page 19: Manual Shutter Speed Adjustment
Camera Mode ≥For other notes concerning this item, see The value to which idB is attached indicates a Gain-up -39- value. If this value is too large, the quality of the image Manual Shutter Speed Adjustment deteriorates. It is useful for recording fast-moving subjects. To Resume Automatic Adjustment Set the [AUTO/MNL/FOCUS] Switch (50) -
Page 20: Digital Effect Functions
Camera Mode ≥Adjust focus manually when using this mode. (13) Press the [STILL] Button -19- 7) Trailing Effect Mode [TRACER] ≥It records images with a trailing effect. (13) 8) Mosaic Mode [MOSAIC] ≥It produces a mosaic-like image. STILL 9) Mirror Mode [MIRROR] ≥Video Flash is lighted. - Page 21 Camera Mode (26) Press the Recording Start/Stop Button to start You can capture and record 9 consecutive small still recording. pictures. Manual Multi-Picture Mode: (26) You can manually capture and record 9 small still pictures. (26) Press the Recording Start/Stop Button to pause Set [CAMERA FUNCTIONS] >>...
-
Page 22: Vcr Mode
VCR Mode VCR Mode Finding a Scene You Want to Play Back Playing Back ª Cue/Review Playback The recorded scene can be played back immediately after the recording. SEARCH (28) Rotate the [OFF/ON/MODE] Switch and set the Movie Camera to the VCR Mode. (12) ≥The [VCR] Lamp (27) -
Page 23: Still Playback/Still Advance Playback
VCR Mode Index Search Functions Scenes recorded in the SP Mode are played back at approximately 1/5th of the normal speed. To facilitate searching of desired scene, this Movie Camera Scenes recorded in the LP Mode are played back at automatically records index signals during recording, as approximately 1/3rd of the normal speed. -
Page 24: Playback Zoom Function
VCR Mode ≥When the [SELECT] Button is pressed repeatedly, the several-second intervals. (To cancel, press the [1] Button (77) or the [∫] Button (75) digital effect selection changes. ≥The same setting can be done using [DIGITAL EFFECT] /REW PLAY (77) Sub-Menu on the [VCR FUNCTIONS] Main-Menu. -
Page 25: Playing Back On Your Tv
VCR Mode (63) approximately 2 seconds, and at [SLOW] within Press the [:] or [9] Button on the Remote approximately 3 seconds. Controller. ≥If you set [SWING] to [ON], the intervals at which the /REW PLAY 9 still pictures are taken are longer at the beginning and end than in the middle of the swing strobe period, and it STILL ADV PAUSE... -
Page 26: Copying On An S-Vhs (Or A Vhs) Cassette
VCR Mode ≥If your TV is not equipped with AV Input Sockets, the 21-pin Set [VCR FUNCTIONS] >> [AV IN/OUT SETUP] >> [AV JACK] >> [IN/OUT]. Adaptor (purchase separately) is necessary. Consult your dealer. W.B/SHUTTER/IRIS/ (21) ≥Be sure to press the [OSD] Button ( ) on the Remote MF/VOL/JOG PUSH... -
Page 27: Using The Dv Cable For Recording
VCR Mode ≥For more details on the operating environment, Movie Camera: While pressing the [REC] Button (59) , press the connections, and procedures, please refer to Personal [PLAY] Button (77) Computer Connection Kit’s operating instructions. MULTI/ USB Connection Kit A.DUB (59) P-IN-P ¥... -
Page 28: Card Mode
CARD Mode CARD Mode the [TAPE/CARD/CARD MODE] Selector until the [VOICE] Indication 3 appears (Voice Recording). Using a Card TAPE CARD CARD MODE A Card can be used to record still pictures. ≥Use genuine Card only. ª Inserting a Card Before inserting a Card, be sure to turn off the Movie Camera. - Page 29 CARD Mode ≥During copying, the Indication appears. Recording from a Cassette (VCR Mode) Set the [TAPE/CARD/CARD MODE] Selector [CARD]. T A P E C A R D TAPE CARD NOW WRITING CARD MODE ≥Search starts from the current Tape position, and images with Photo Index signals are recorded onto the Card sequentially.
-
Page 30: Playing Back A Card
CARD Mode ≥When you set the Movie Camera to Card Playback Mode, Recording from a Cassette (VCR Mode) the Card Contents are displayed to inform you which Set the [TAPE/CARD/CARD MODE] Selector kind(s) of data (still picture, moving picture and/or voice [CARD]. -
Page 31: Recording Pictures On A Card To A Tape
CARD Mode 1 Folder-File Number (When the picture is played back) Using File Search Mode File Name (When the MPEG4 data is played back) Set [CARD FUNCTIONS] >> [CARD EDITING] >> 2 Picture Size (When the picture is played back) ( [FILE SEARCH] >>... -
Page 32: Slide Show
CARD Mode To Select Pictures to Play Back in Your Slide Show Set [CARD FUNCTIONS] >> [CARD EDITING] >> [RECORD TO TAPE] >> [YES]. Set [CARD FUNCTIONS] >> [CARD EDITING] >> ≥During the copying, the Indication appears. [SLIDE SHOW] >> [YES] >> [EDIT] >> [YES]. R E C W.B/SHUTTER/IRIS/ (21) -
Page 33: Creating A Title
CARD Mode ≥The dark portion of the image is missing 1, and the To Delete the Selected Picture colours of the bright portion change in order of black, Set [CARD FUNCTIONS] >> [CARD EDITING] >> blue, green, cyan, red, magenta, yellow and white, after [SLIDE SHOW] >>... -
Page 34: Protecting The Files On A Card
CARD Mode ≥If [NO] is selected, the file selection is cancelled. Protecting the Files on a Card ≥To erase 2 files or more, repeat 2–4 steps. (Lock Setting) Precious files recorded on a Card can be locked (to prevent To Select and Delete All Files accidental erasure). - Page 35 CARD Mode Slide the [TAPE/CARD/CARD MODE] Selector [CARD MODE] until the [PICTURE] Indication appears. TAPE CARD CARD MODE Set [CARD FUNCTIONS] >> [CARD EDITING] >> [DPOF SETTING] >> [YES] >> [VARIABLE]. W.B/SHUTTER/IRIS/ (21) MF/VOL/JOG PUSH (19) DPOF SETTING (PRINT QUANTITY) PRESS MENU TO EXIT ≥To print all pictures one at a time, select [ALL 1].
-
Page 36: Others
Others Others 1/500: When you adjust shutter speed manually, this indication appears. -19- Indications SLIDE!: Slide Show Playback -32- SLIDE;: Slide Show Playback Pause -32- Various functions and the Movie Camera status are shown M.SLIDE!: Manual Slide Show Playback -32- on the screen. -
Page 37: Owner Id
Others £: Red Eye Reduction UNPLAYABLE TAPE -20- (OTHER FORMAT): ª To Change the Counter Display Mode You are attempting to play back a tape section that has By changing [C.DISPLAY] on the [DISPLAY SETUP] been recorded with a different TV system. Sub-Menu, you can change the Counter Display Mode to UNABLE TO A. - Page 38 Others 10 Beeps When [PROGRESSIVE] is [ON]: ≥If you perform a wrong operation before or during recording You can use the Progressive Photoshot Function at any time. In this case, however, the following functions are ª Recording disabled. ≥Before turning on the power, remove the Lens Cap. If the ≥Digital Effect Modes in [EFFECT1] -20- Lens Cap is still attached when the power is turned [ON],...
- Page 39 Others ≥When recording with the Colour Night View Function, it is In the following cases, the [1] Indication flashes: ≥The flashing indicates that the previously adjusted White recommended to use the tripod. ≥When using the Card Photoshot Function, the Balance setting is still kept. This setting will be kept until [PICTURE SIZE] on the [CARD SETUP] Sub-Menu will White Balance is adjusted again.
- Page 40 Others ≥When [PROGRESSIVE] on the [CAMERA SETUP] ≥Scene Index Search may not function properly if the Sub-Menu is set to [ON] or the Colour Night View Mode is interval between 2 scene index signals is shorter than set, the digital modes of [EFFECT1] on the 1 minute.
- Page 41 Others ≥During the recording with analog input, a Card Photoshot ª Playing Back a Card ≥If a blank (nothing recorded) Card is played, the screen Function cannot be used. Analog-Digital Conversion becomes white and the [NO FILE] Indication appears. ≥When the Movie Camera is connected with other digital ≥If you attempt to play back a file recorded in a different video equipment through its DV Terminal, images recorded format or a file data is defective, the [k] Indication and the...
-
Page 42: Cautions For Use
Others ≥Regardless of the [PICTURE SIZE] setting, the size of the MultiMediaCard: created pictures is [640k480]. ≥If the [PICTURE SIZE] is set to [1280k960] and [TAPE/ CARD/CARD MODE] Selector is set to [CARD], title cannot be created. ≥Even if the contrast of the Title is adjusted, the portions where there is little difference between light and dark and where the boundary between light and dark is unclear may not appear. - Page 43 Others ≥If the Cassette is left in the Movie Camera, the tape sags ª Cautions for Use and deteriorates. When you use your Movie Camera in a rainy or snowy ≥If the Battery is left on the Movie Camera for a long time, day or on a beach, make sure that no water enters inside the voltage drops excessively, and the Battery will not the Movie Camera.
- Page 44 Others Causes of Dirty Heads Attaching a deformed Battery to the Movie Camera or AC ≥Large quantity of dust in the air Adaptor may damage the Movie Camera or AC Adaptor. ≥High-temperature and high-humidity environment ª Cautions for Storage ≥Damaged tape Before storing the Movie Camera, take the Cassette out ≥Long operating hours and detach the Battery.
-
Page 45: Before Requesting Repair (Problems And Solutions)
Others ª LCD Monitor/Viewfinder/Lens Hood Before Requesting Repair (Problems and LCD Monitor Solutions) ≥In a place with drastic temperature changes, condensation Power may form on the LCD Monitor. Wipe it with soft dry cloth. 1: The Movie Camera power cannot be turned on. ≥If your Movie Camera is extremely cold when you turn its •... -
Page 46: Explanation Of Terms
Others 3: The Remaining Tape Time Indication does not match 4: Even if a Card is formatted, it cannot be used. the actual remaining tape time. • Either the Movie Camera or the Card may be damaged. • If scenes of less than 15 seconds are continuously Please consult a dealer. - Page 47 Others ª Time Code Time Code signals are data that indicate time measured in hours, minutes, seconds, and frames (25 frames per second). If this data is included in a recording, an address is assigned to each image on the tape. ≥The Time Code is automatically recorded as a part of the sub-code at each recording.
-
Page 48: Specifications
Specifications Specifications Weight: Approx. 550 g (without Battery and DV cassette) Approx. 630 g (with CGR-D08R and DVM60) Specifications Operating Temperature: C–40 Operating Humidity: Digital Video Camera 10%–80% Information for your safety Card Memory Functions Recording Media: Power Source: MultiMediaCard, SD Memory Card DC 7.9/7.2 V Image Compression: Power Consumption:... - Page 49 Specifications Maximum number of still pictures recordable on an SD Memory Card (optional) PICTURE 640t t t t 480 1280t t t t 960 SIZE PICTURE FINE NORMAL ECONOMY FINE NORMAL ECONOMY QUALITY 16MB 32MB 64MB 1760 128MB 1760 3520 256MB 1760 3520...
-
Page 50: Index
Index ª Numerics ª P 1.3 Times Tele Jump Zoom......15 Photoshot..........15, 28 ª A Picture Size............ 31 Playback Digital Effects ......... 24 AC Adaptor ..........7, 43 Playback Zoom ..........24 Audio Dubbing ..........25 Portrait Mode ..........17 Auto Focus ............ - Page 51 -51-...
- Page 52 VQT9799 F0402Me0 ( 500 A ) Matsushita Electric Industrial Co., Ltd. Web site: http://www.panasonic.co.jp/global/...
Need help?
Do you have a question about the NV-GX7B and is the answer not in the manual?
Questions and answers