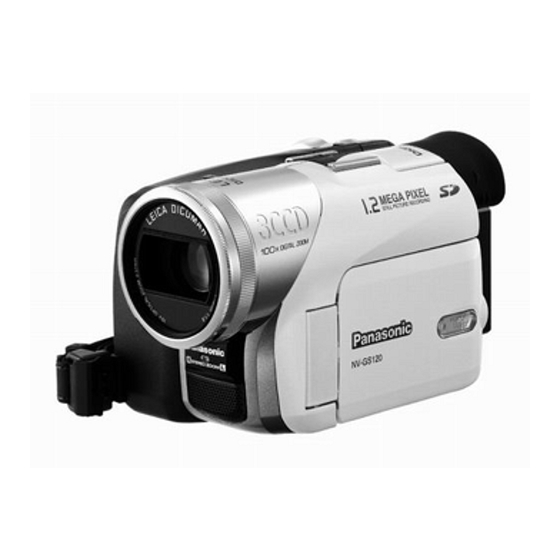
Panasonic NV-GS120 Operating Instructions Manual
Digital video camera nv-gs120; nv-gs120eb; nv-gs200; nv-gs200eb
Hide thumbs
Also See for NV-GS120:
- Brochure & specs (8 pages) ,
- Operating instructions manual (72 pages) ,
- Operating instructions manual (67 pages)

Related Manuals for Panasonic NV-GS120


Summary of Contents for Panasonic NV-GS120
-
Page 1: Operating Instructions
Operating Instructions Digital Video Camera NV-GS120EB Model No. NV-GS200EB Before use, please read these instructions completely. VQT0H94... -
Page 2: Information For Your Safety
Dear Customer, We would like to take this opportunity to thank you for purchasing this Panasonic Movie Camera. Please read these Operating Instructions carefully and keep them handy for future reference. Please note that the actual controls and components, menu items, etc. of your Movie Camera may look somewhat different from those shown in the illustrations in these Operating Instructions. - Page 3 To prevent electric shock, do not remove the cover (or back); there are no user serviceable parts inside. (NV-GS200 only) Do not remove the cover (or back); there are no user serviceable parts inside. (NV-GS120 only) Refer servicing to qualified service personnel.
-
Page 4: Table Of Contents
Contents Information for Your Safety......2 Playback Mode Playing Back a Tape ........36 Before Use Finding a Scene You Want to Play Back..36 Slow Motion Playback ........37 Standard Accessories........5 Still Playback/Still Advance Playback.... 37 Optional Accessories........5 Index Search Functions......... -
Page 5: Before Use
≥Most major credit and debit cards accepted. 12) Light Bulb for Video DC Light (VZ-LL10E) ≥All enquiries transactions and distribution 13) Light Bulb for Video DC Light (VW-LL3E) facilities are provided directly by Panasonic UK 14) Stereo Zoom Microphone (VW-VMH3E) Ltd. 15) Shoe Adaptor (VW-SK11E) ≥It couldn’t be simpler! -
Page 6: Controls And Components
Before Use Controls and Components (11) Colour Night View Button [COLOUR NIGHT VIEW] -28- ª Movie Camera (12) Soft Skin Button [SOFT SKIN] -28- (13) Tele Macro Button [TELE MACRO] -26- (14) Menu Button [MENU] -15- (15) Pause Button [;] -39- Still Button [STILL] -22-... - Page 7 Cassette Eject Lever [OPEN/EJECT] -13- optional tripod. (55) DV Terminal [DV] -48- ≥Connect this to the digital video equipment. (39) (44) (56) S-Video Input/Output Socket NV-GS200 NV-GS120 [S-VIDEO IN/OUT] (Input function on (45) NV-GS200 Model only) -44- QUICK START (40) (46) (41) (42)
-
Page 8: Remote Controller
Before Use ª Remote Controller Using the wireless Remote Controller that is supplied with the Movie Camera, most of the (72) (78) START/ Movie Camera functions can be operated from a DATE/ PHOTO STOP TIME SHOT (73) distance. (79) DISPLAY RESET TITLE ZOOM... -
Page 9: The Remote Controller
Set [REMOTE] on the [INITIAL] Sub-Menu to the WARNING desired Remote Controller Mode. ( -17- “THE LITHIUM BATTERY IS A CRITICAL Setup on the Remote Controller: COMPONENT (TYPE NUMBER CR2025 MANUFACTURED BY PANASONIC). STILL ADV PAUSE STILL ADV IT MUST NEVER BE SUBJECTED TO INDEX STOP INDEX P.B. -
Page 10: Power Supply
-56- that Power Lamp is not lit. ª Using the Battery Before use, fully charge the Battery. ≥We recommend using Panasonic’s Battery. ≥We cannot guarantee the quality of this Movie Camera when batteries of other companies are used. Attach the Battery to the AC Adaptor and charge it. -
Page 11: Charging Time And Available Recording Time
“1h10min.” indicates 1 hour and 10 minutes. ≥Battery CGA-DU14 is supplied. (NV-GS200 only) ≥Battery VSB0471 is supplied. (NV-GS120 only) ª To Use as a Hand Strap ≥The times shown in the table are approximate Using the Grip Belt as the hand strap makes it times. -
Page 12: Attaching The Lens Cap
Before Use (31) Attaching the Lens Cap Open the Lock Cover by holding the tabs on both sides 1, press the Lock To protect the Lens surface, attach the Lens Cap. (30) Button and detach the Grip Belt. Pass the end of the Lens Cap Cord through the hole in the Grip Belt Attachment part and the Lens Cap through the Lens Cap Cord. -
Page 13: Inserting A Cassette
Before Use ≥Attach the other end of the Shoulder Strap to Using a Card the other Shoulder Strap Holder in the same A Card can be used to record pictures. way. ª Caution before inserting/removing a Card Be sure to turn off the Movie Camera. ≥Otherwise, the Movie Camera may not function properly or it may cause the loss of recorded data in a Card. -
Page 14: Turning On The Movie Camera
Before Use Turning on the Movie Camera : PC Mode Use this mode when you want to connect the When the Movie Camera is turned on with the Movie Camera to your Personal Computer. Lens Cap on, the Automatic White Balance Using the Viewfinder/LCD Monitor Adjustment may not function properly. -
Page 15: Using The Menu Screen
Before Use To Increase the Brightness of the Entire LCD Adjust the LCD Monitor angle according to the desired recording angle. Monitor ≥The LCD Monitor can rotate a maximum of Press the [POWER LCD] Button. 180o 1 from the vertical position upwards When you press the [POWER LCD] Button, the and a maximum of 90o 2 to the downward LCD monitor becomes bright about twice as... -
Page 16: List Of Menus
Before Use ≥The Menu corresponding to the Mode (17) Press the [ENTER] Button to confirm (39) selected by using the Mode Dial the selection of the file. ≥After the above File Selection Procedure, carry displayed. out the various Menu Operations. (The above procedure will not be repeated in the following instructions.) (39) - Page 17 Before Use 4) [RECORDING] To terminate the Demonstration Mode, insert a Recording Setup Sub-Menu Cassette or set the [DEMO MODE] to [OFF]. [REC SPEED] [AV JACK] Recording Speed Mode AV Socket -20- -68- [AUDIO REC] [REMOTE] Audio Recording Mode Remote Controller Mode -20- [SCENE INDEX] [REC LAMP]...
- Page 18 ≥This function reduces the low sound to avoid a Initial Setup Sub-Menu wind noise when using the Stereo Zoom [BLANK SEARCH] Microphone (VW-VMH3E; optional). Blank Search -22- 5) [DISPLAY] [AV JACK] (NV-GS120 only) Display Setup Sub-Menu AV Socket -68- [DISPLAY] [REMOTE] Display Mode -54-...
- Page 19 Before Use 6) [LCD/EVF] 5) [DISPLAY] Adjusting Brightness and Colour Level Display Setup Sub-Menu ≥All of the items on the [LCD/EVF] Sub-Menu are ≥All of the items on the [DISPLAY] Sub-Menu are the same as those on the [LCD/EVF] Sub-Menu the same as those on the [DISPLAY] Sub-Menu of the [TAPE RECORDING MENU].
-
Page 20: Setting Date And Time
BY QUALIFIED PERSONNEL. WHEN [MONTH], [DAY], [HOUR] or [MIN.] and NECESSARY, CONTACT YOUR LOCAL press the [6/5] Button to set it to the PANASONIC SUPPLIER. desired value. ≥Year will cycle in the order shown below. LP Mode 2000, 2001, ..., 2089, 2000, ... -
Page 21: Recording Mode
Recording Mode Recording Mode Recording on a Tape Set the [OFF/ON] Switch (43) to [ON]. About Recording ≥The Power Lamp (41) lights up. When recording pictures on a tape, set the Mode (41) Dial to Tape Recording Mode [ When recording still pictures or moving pictures on a card, set the Mode Dial to Card Recording Mode [ ]. -
Page 22: Recording A Still Picture On A Card (Photoshot)
The size of images that are recorded using this Movie Camera is approximately 2.3 million pixels Movie Camera stops at the end of the tape. (NV-GS200)/1.7 million pixels (NV-GS120), and To Cancel Blank Search Before Completion recording of images with a size that is larger than Press the [∫] Button. - Page 23 2 sizes are available for Photoshot. PHOTO Set [CARD RECORDING MENU] >> [CARD] SHOT (47) >> [PICTURE SIZE] >> [1760k1320] (NV-GS200)/[1520k1152] (NV-GS120) or [640k480]. ≥The aperture value and gain are fixed and the STILL Movie Camera automatically focuses on the ENTER subject.
-
Page 24: Recording A Moving Picture On A Card (Mpeg4)
Recording Mode ≥When the Mode Dial (39) When the picture size is 640k480: is set to Card [FINE] (high image quality): Recording Mode, you cannot record to the approximately 44 pictures Tape. (39) [NORMAL] (normal image quality): Set the Mode Dial to Card Recording approximately 85 pictures Mode. -
Page 25: Quick Start
Recording Mode (43) Maximum recording time on the supplied Set the [OFF/ON] Switch to [ON]. ≥The Movie Camera will be ready for recording Card (8 MB) [SUPERFINE]: approximately 1 minute in approximately 1.7 seconds. [FINE]: approximately 2 minutes To Cancel the Quick Start [NORMAL]: approximately 3 minutes Keep the [QUICK START] Button pressed for [ECONOMY]: approximately 8 minutes... -
Page 26: Digital Zoom Function
Recording Mode ≥Zoom Magnification Indication is displayed for ≥Set [TAPE RECORDING MENU] >> a few seconds. [RECORDING] >> [ZOOM MIC] >> [ON]. (The [Z.MIC] Indication is displayed.) 10tW Z.MIC Z.MIC ≥For other notes concerning this item, see -58- ª To Take Close-up Shots of Small Digital Zoom Function Subjects (Macro Close-up Function) -
Page 27: Fade In/Out Functions
Recording Mode Set [TAPE RECORDING MENU] >> When the image is completely gone, press (42) [CAMERA] >> [SIS] >> [ON]. the Recording Start/Stop Button start recording. STILL ENTER FADE (42) (14) MENU ≥The [[] Indication appears. Release the [FADE] Button (18) about 3 seconds after starting recording. -
Page 28: Night View Functions
Recording Mode ≥The [ª] Indication flashes and then is ≥The screen becomes white and the displayed. Viewfinder turns on. ≥The entire screen becomes brighter. ≥The available range of the LCD Monitor light is within approximately 1.2 metre. ª To Cancel the Night View Functions Press the [COLOUR NIGHT VIEW] Button repeatedly until neither the [C.NIGHT VIEW] Indication nor the [0LUX NIGHT VIEW] Indication... -
Page 29: Cinema Function
Recording Mode ≥The Indication of the selected Mode appears. To Cancel the Wind Noise Reduction Function Set [TAPE RECORDING MENU] or [CARD RECORDING MENU] >> [RECORDING] >> [WIND CUT] >> [OFF]. ≥For other notes concerning this item, see -58- Cinema Function This function is for recording in a cinema-like screen. -
Page 30: Adjusting White Balance Manually
Recording Mode (17) Press the [ENTER] Button Set the [AUTO/MANUAL/FOCUS] Switch (35) to [MANUAL]. STILL (17) AUTO MANUAL ENTER FOCUS (35) FADE ≥The [AWB] Indication appears. Press the [5] Button (16) or [6] Button (19) to select a desired White Balance ≥The [MNL] Indication appears. -
Page 31: Manual Shutter Speed Adjustment
Even within the effective range 1/25–1/500 s in Card Recording Mode of Automatic White Balance Adjustment, the (NV-GS120) Automatic White Balance Adjustment may not The standard shutter speed is 1/50 s. function properly if there is more than one light Selecting a speed closer to [1/8000] causes the source. -
Page 32: Manual Iris Adjustment
(35) to [MANUAL]. ≥The [MF] Indication (Manual Focus Mode) AUTO MANUAL FOCUS appears. (NV-GS200) (35) ≥The [1MF] Indication (Manual Focus Mode) appears. (NV-GS120) ≥The [MNL] Indication appears. Press the [ENTER] Button (17) until the Iris Indication appears. NV-GS200 NV-GS120 STILL... -
Page 33: Using The Built-In Video Flash
Recording Mode ≥For other notes concerning this item, see Using the Built-in Video Flash -59- Red Eye Reduction Function (NV-GS200 only) The Built-in Video Flash enables you to record This function reduces a phenomenon which still pictures in a dark place. The Video Flash causes the subject’s eyes to turn red when you lights twice to detect the surrounding luminosity record pictures with a flash such as built-in Video... - Page 34 Recording Mode 5) Strobe Mode [STROBE] Manual Multi-Picture Mode: ≥It records images with a stroboscopic effect. 6) Trailing Effect Mode [TRAIL] ≥It records images with a trailing effect. 7) Mosaic Mode [MOSAIC] ≥It produces a mosaic-like image. You can manually capture and record 9 small still 8) Mirror Mode [MIRROR] ≥The right half of an image becomes a mirror pictures.
- Page 35 Recording Mode (42) Set [TAPE RECORDING MENU] >> Press the Recording Start/Stop Button [DIGITAL] >> [EFFECT1] >> [P-IN-P]. to start recording. STILL ENTER FADE (42) (14) MENU (42) Press the Recording Start/Stop Button to pause the recording. Aim the Movie Camera at the scene you ≥The last scene is stored in memory.
-
Page 36: Playback Mode
Playback Mode ª Adjusting the Sound Volume Playback Mode To adjust the volume, push the [`VOL/JOG_] Playing Back a Tape (46) Lever to display the [VOLUME] Indication. Push the [`VOL/JOG_] Lever towards [T] to The recorded scene can be played back increase the volume or push the [`VOL/JOG_] immediately after the recording. -
Page 37: Slow Motion Playback
Playback Mode ≥The [1k!] Indication appears. To Resume Normal Playback Press the [1] Button (79) ≥If the Movie Camera is left in the Slow Playback STILL Mode for more than 12 minutes, the Movie (17) ENTER Camera switches to the Stop Mode to protect FADE the video heads from excessive wear and tear. -
Page 38: Index Search Functions
Playback Mode ≥When the corresponding button is pressed Index Search Functions once, the [S 1] Indication appears, and To facilitate searching for desired scenes, this searching for the subsequent scene marked Movie Camera automatically records index with an index signal starts. Each time the button signals during recording, as explained in the is pressed after the start of Scene Index following. -
Page 39: Playback Digital Effect Functions
Playback Mode To Change the Enlarging Area of an Image (66) Press the [SELECT] Button on the Press the Arrow Button (π, ∑, ∏, ∫) Remote Controller and select [WIPE] or (63) [MIX]. on the Remote Controller that points to the ∫... -
Page 40: Slide Show
Playback Mode ∫: ≥The files recorded on the Card are displayed Stop playing back Pause playing back in Multi-Picture Mode. When you select MPEG4 Playback Mode at PICTURE Step 1 (NV-GS200 only) ≥File is numbered in hexadecimal. ≥When the object is moving fast or zoom operation is performed, picture may appear to No.25 100-0014... -
Page 41: Creating A Title
Playback Mode To Pause the Slide Show Select [LUMINANCE] and press the (17) [ENTER] Button , then press the [5] Press the [;] Button. ≥The [SLIDE;] Indication is displayed. (16) (19) Button or [6] Button to adjust the title contrast and press the [ENTER] SLIDE (17) Button... -
Page 42: Writing Printing Data On A Card
Playback Mode ≥A list of titles is displayed. Set [PICTURE PLAYBACK MENU] >> [EDITING] >> [DPOF SET] >> [YES] >> TITLE [VARIABLE]. STILL ENTER USR00002.TTL FADE ≥File Name 1 (14) Press the [;/∫/6/5] Button to select a MENU desired title. DPOF SETTING STILL ENTER... -
Page 43: Protecting The Files On A Card
Playback Mode Protecting the Files on a Card Select the file you wish to delete and press (17) the [ENTER] Button (Lock Setting) ≥The selected picture is marked with a frame. Precious files recorded on a Card can be locked to ≥To erase 2 files or more, repeat this step. -
Page 44: Enlarging A Movie Picture Size
Playback Mode ≥A confirmation message appears, select To Resume Normal Moving Picture Size [YES] and formatting will be carried out. Set [MPEG4 PLAYBACK MENU] >> [DISPLAY] >> [SCREEN] >> [NORMAL]. CARD FORMAT FORMAT WILL DELETE MPEG4 ALL FILES AND PRESET TITLES MOL-001.ASF ;... - Page 45 Playback Mode To Make the Indications Appear on the TV Screen (58) Press the [OSD] Button on the Remote Controller. START/ DATE/ PHOTO STOP TIME SHOT (58) DISPLAY RESET TITLE ZOOM ≥If your TV is not equipped with AV Input Sockets, the 21-pin Adaptor (purchase separately) is necessary.
-
Page 46: Editing Mode
Editing Mode Editing Mode (47) Press the [PHOTO SHOT] Button Recording from a Tape onto a Card PHOTO SHOT (47) Still pictures or moving pictures can be recorded on the Memory Card from scenes that have already been recorded on a cassette. (moving pictures on NV-GS200 Model only) ≥During the copying, the following Indication (39) -
Page 47: Copying On An S-Vhs (Or A Vhs) Cassette
Editing Mode (76) Copying on an S-VHS (or a VHS) Press the [;] Button on the Remote Controller where you want to add new Cassette sound. (Dubbing) MULTI/ ¥ A.DUB P-IN-P After connecting the Movie Camera and the (62) VCR as illustrated, start the following /REW PLAY procedures. -
Page 48: Recording The Contents Of Other Equipment
Editing Mode Recording the Contents of Other Movie Camera: (61) While pressing the [¥REC] Button Equipment (79) press the [1] Button on the Remote (NV-GS200 only) Controller. After connecting the Movie Camera and the Or while pressing the [REC] Button other equipment as illustrated, start the press the [BACK LIGHT] Button on the... -
Page 49: Printing Pictures With Directly Connecting To The Printer (Pictbridge)
Editing Mode Player: Connect the printer with the supplied USB (79) Press the [1] Button to start playback. Cable. MULTI/ ¥ A.DUB P-IN-P (61) /REW PLAY (79) STILL ADV PAUSE STILL ADV (76) REMOTE/MIC INDEX STOP INDEX P.B. ZOOM (PLUG IN POWER) (77) ∫... - Page 50 Editing Mode When printing with date: Set [PICTURE PLAYBACK MENU] >> [PRINT] >> [DATE] >> [ON]. STILL ENTER FADE (14) MENU ≥You cannot set date printing when the printer does not support it. ≥Proceed to the next step if you do not need date printing.
-
Page 51: With A Pc
With a PC With a PC When using as a Web Camera: Set [CAMERA] or [PLAYBACK] >> USB Connection Kit [USB FUNCTION] >> [WEB CAMERA]. When using with DV STUDIO: Using the supplied USB Connection Kit, you can Set [CAMERA] or [PLAYBACK] >> import still pictures onto your personal computer. - Page 52 With a PC ≥Moving Picture format (MPEG4) that can be ≥[DCIM], [IM01CDPF], [PRIVATE], [VTF], played back on this device is ASF. (Depending [SD_VIDEO], etc. are necessary items in the on the file, it may not be able to be played back folder structure.
-
Page 53: Others
Others Others Low Light Mode (Programme AE) -29- Indications Ω: Spotlight Mode (Programme AE) -29- Various functions and the Movie Camera status º: Surf & Snow Mode (Programme are shown on the screen. -29- Remaining Battery Power REC: Recording -21- ≥When the battery power becomes low, the PAUSE: Recording Pause... -
Page 54: Initializing The Modes
(NV-GS200 only) ª Progressive Photoshot [1520k1152] Image size 1520 You cannot use the Progressive Photoshot (NV-GS120 only) Function in the following cases. [640k480] Image size When using Tape Recording Mode ≥For images not recorded with this Movie ≥Digital Effect Modes in [EFFECT1] Camera, the size display is determined as ≥Digital Zoom [D.ZOOM]... -
Page 55: Warning/Alarm Indications
Others Warning/Alarm Indications COPY INHIBITED: Because the medium is protected by a copy If any one of the following indications lights up or guard, images cannot be recorded flashes, please check the condition of the Movie correctly. Camera. INCORRECT OPERATION: 3DEW (DEW DETECT/EJECT TAPE): The Recording Start/Stop Button is pressed Condensation has occurred. -
Page 56: Notes And Hints
Others UNABLE TO WRITE 2 Beeps ≥When you pause recording (WIDE MODE): You are attempting to record pictures of S1 2 Beeps for 4 times ≥If you operate a wrong operation before or signal (with aspect ratio 16:9) by pressing the [PHOTO SHOT] Button. - Page 57 Standby Mode is cancelled. (In the case of and bottom of screen. NV-GS120, the Self-timer Standby Mode is not ≥MPEG4 moving pictures recorded in cancelled even if you press the Recording [SUPERFINE] cannot be recorded in the Start/Stop Button in the Card Recording Mode.)
- Page 58 Others ª Zoom In/Out Functions ≥When using the Night View Function, you ≥When you are zooming on a faraway subject, a cannot use the Built-in Video Flash. (NV-GS200 only) sharper focus is achieved if the recording ≥White Balance cannot be set. subject is 1.2 metres or further from the Movie ≥The shutter speed cannot be adjusted.
-
Page 59: White Balance
Others ≥Because the colour and brightness of the ≥If you are using Night View Mode ( ) or -28- playback image may change, avoid Programme AE Mode ( ), you cannot adjust -29- recording under fluorescent light, mercury the shutter speed. light or sodium light. -
Page 60: Playing Back
Repeat Playback Video Flash VW-FLH3E (optional) or other If you continue to press the [1] Button for accessories. (NV-GS120 only) 5 seconds or longer, the Movie Camera switches to Repeat Playback Mode, and the [R !] Using the Video Flash VW-FLH3E (optional) ≥When using the Video Flash VW-FLH3E... - Page 61 Others ≥If you turn off the Movie Camera power or if you ≥If you try to play back on other Panasonic operate the Mode Dial, Playback Zoom Mode is cameras an MPEG4-recorded image for which automatically cancelled. the [MPEG4 MODE] was set to a mode other ≥Even if Playback Zoom Functions are being...
- Page 62 Others ª Adding a Title ≥We recommend you to set [SCREEN] on the ≥When setting to MPEG4 Playback Mode, Title [DISPLAY] Sub-Menu to [NORMAL] when playing back MPEG4 on TV. (NV-GS200 only) In Function is not possible. (NV-GS200 only) ≥Original titles are added after the preset titles. ª...
-
Page 63: Cautions For Use
Others ≥To DV-output analog video signals sent from ≥If sea water splashes onto the Movie Camera, other equipment, set [DV OUT] on the wet a soft cloth with tap water, wring it well, and [AV IN/OUT] Sub-Menu to [ON]. (Normally, use it to wipe the camera body carefully. - Page 64 Others ≥Before cleaning, detach the Battery or pull out Remove the tape if it is inserted. ≥It takes about 20 seconds to open the the AC Mains Lead from the AC mains socket. ≥Wipe the Movie Camera with a soft dry cloth. To Cassette Holder.
-
Page 65: Cautions For Storage
Others Using Mini-DV Format Digital Video Head Be Sure to Detach the Battery after Use Cleaner Be sure to detach the Battery from the Movie Insert the Head Cleaner into the Movie Camera. (If it is left attached to the Movie Camera in the same manner as a Video Camera, a minute amount of current is consumed Cassette. - Page 66 Cassette is left for 1 year or longer without the recorded picture. winding or rewinding, temperature and humidity changes may cause the Cassette to deform due (NV-GS120) to swelling, shrinking, and so forth. The wound tape may stick to itself. Extremely high precision technology is ≥Do not place a Cassette near highly magnetic...
-
Page 67: Before Requesting Repair (Problems And Solutions)
Others ≥When you wish to attach the Tele Conversion • Are you using the Battery in an extremely cold Lens (VW-LT3714M2E; optional) or Wide place? In cold places, the operating time of the Conversion Lens (VW-LW3707M3E; optional), Battery becomes shorter. ( -65- first of all, turn the Lens Hood counterclockwise •... -
Page 68: Explanation Of Terms
Others Playback (Pictures) 4: Sounds cannot be played back. 1: Pictures cannot be played back even when • Although a Cassette with no audio dubbing is the [1] Button is pressed. being played, is [12bit AUDIO] on the 0 Is the Mode Dial set to Playback Mode? If not, [PLAYBACK] Sub-Menu of the [TAPE PLAYBACK MENU] set to [ST2]? To the playback function cannot be used. -
Page 69: Time Code
Others ª Time Code Compatibility with S-VHS or VHS Cassettes Because this Movie Camera employs a digital Time Code signals are data that indicate time system for recording image and sound data, it is measured in hours, minutes, seconds, and not compatible with conventional S-VHS or VHS frames (25 frames per second). -
Page 70: Specifications
Exif 2.2 standard), DPOF corresponding Filter Diameter: Still Image Size: 37 mm Mega-Pixel Recording; Zoom: (NV-GS200) 1760k1320 (2.3 million pixels) 10:1 Power Zoom (NV-GS120) 1520k1152 (1.7 million pixels) Monitor: VGA Recording; 640k480 2.5-inch LCD Video Compression (NV-GS200 only): Viewfinder: MPEG4 Colour Electronic Viewfinder... - Page 71 Specifications Frame rate: approximately 6 fps AC Adaptor Information for your safety Power Source: AC 110–240 V, 50/60 Hz Power Consumption: 19 W DC Output: DC 7.9 V, 1.4 A (Movie Camera Operation) DC 8.4 V, 0.65 A (Battery Charging) Dimensions: 61 (W) 32 (H)
- Page 72 Specifications Maximum number of still pictures recordable on an SD Memory Card (optional) PICTURE SIZE 640k480 1760k1320 (NV-GS200) 1520k1152 (NV-GS120) PICTURE FINE NORMAL ECONOMY FINE NORMAL ECONOMY FINE NORMAL ECONOMY QUALITY 8 MB 16 MB 32 MB 64 MB 1760...
-
Page 73: Index
Index ª Numerics ª M 0 Lux Night View Function ......28 Macro Close-up ..........26 Manual Focus ..........32 ª A Memory Stop ..........69 AC Adapter ..........10, 64 Microphone ............ 26 Audio Dubbing ..........46 Mirror Mode ........... 34 Auto Focus ............ - Page 74 ª T Tape Playback Mode ........36 Tape Recording Mode ........21 Tele-Macro Function ........26 Time Code ............. 69 Trailing Effect Mode ........34 ª V Variable Speed Search ........36 Video Head Clogging ........64 Viewfinder ..........14, 66 ª...
- Page 75 -75-...
- Page 76 VQT0H94 4000 A ) F0204Re0( Matsushita Electric Industrial Co., Ltd. Web site: http://www.panasonic.co.jp/global/...
Need help?
Do you have a question about the NV-GS120 and is the answer not in the manual?
Questions and answers