Table of Contents
Advertisement
Advertisement
Table of Contents

Related Manuals for Technics SL-DZ1200


Summary of Contents for Technics SL-DZ1200
-
Page 1: Ac Mains Lead
Operating Instructions Direct Drive Digital Turntable SL-DZ1200 Model No. Note: “EB” on the packaging indicates the United Kingdom. Before connecting, operating or adjusting this prod- uct, please read these instructions completely. Please keep this manual for future reference. EB EP... -
Page 2: Table Of Contents
Parts and supplied accessories Dear customer Thank you for purchasing this product. Please check and identify the parts and sup- For optimum performance and safety, please read these instructions plied accessories. carefully. For the United Kingdom only: Use the numbers indicated in parentheses when asking for replacements parts. - Page 3 CLASS 1 LASER PRODUCT (Back of product) (Inside of product) CAUTION! THIS PRODUCT UTILIZES A LASER. USE OF CONTROLS OR ADJUSTMENTS OR PERFORM- ANCE OF PROCEDURES OTHER THAN THOSE SPECI- FIED HEREIN RESULT HAZARDOUS RADIATION EXPOSURE. DO NOT OPEN COVERS AND DO NOT REPAIR YOUR- SELF.
-
Page 4: Caution For Ac Mains Lead
Caution for AC Mains Lead Safety precautions (For United Kingdom) Placement (“EB” area code model only) Set the unit up on an even surface away from direct sunlight, high For your safety, please read the following text carefully. temperatures, high humidity, and excessive vibration. These condi- tions can damage the cabinet and other components, thereby short- This appliance is supplied with a moulded three pin mains plug for ening the unit’s service life. -
Page 5: Main Features
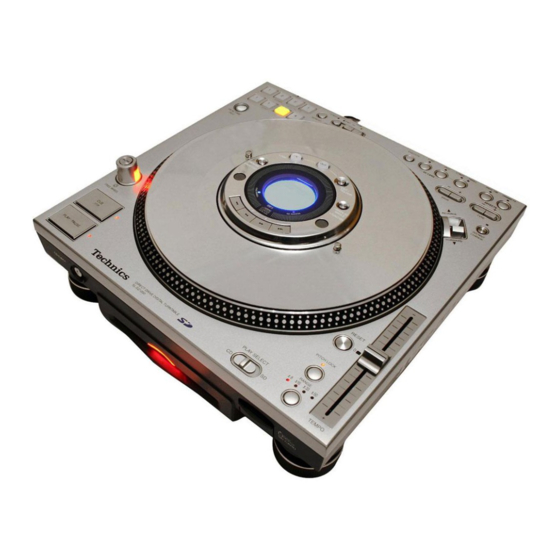
Main features This direct drive digital turntable is designed for DJs to play digital media (CDs and SD audio) giving an analogue-like feeling. Having the feeling of an analogue turntable, this unit delivers digitally robust functions and performance realizing a new style of play. Control panel VINYL SIM SAMPLE PADS... -
Page 6: Component Part Names
Component part names The unshaded numbers etc, correspond to the numbered illustrations. The shaded numbers etc, are reference pages. Control panel Track skip, search, setting buttons ) ..........Platter ............... Strobo dot reflectors ..........Play pause button, lamp (PLAY/PAUSE) ....Cue setting, load and stop button, lamp (CUE STOP) ................ -
Page 7: Platter Setup
Platter setup Setup The stoppers are used to lock the platter, protecting the unit from Place the unit on a flat and stable surface that is not subject to shock during shipping. vibrations or movement. 1. Remove the 3 platter lock stoppers from the platter Note •Do not place this unit on top of amplifiers emitting hot air or place Platter lock stoppers... -
Page 8: Connections
(not included) to connect the main unit with the DJ mixer. Turn off all power when connecting component equipment. Connect the AC mains lead after all other connections have been connected. Connection to the SL-DZ1200 rear panel CONTROL terminal Stereo phono cable... -
Page 9: Connecting The Control Terminals For Relay Play
Connecting the control terminals for relay play Use the control terminals of the two units to connect for relay play. ( page 23) Rear panel Rear panel Direct drive digital turntable 2 Direct drive digital turntable 1 Control cable (not included) Type: 3.5 mm stereo Connecting with the stereo amplifier (Not using the DJ mixer) Do not connect with the PHONO terminal. -
Page 10: Inserting-Removing A Disc Or Sd Memory Card
Inserting-removing a disc or SD Memory Card Rear panel Front panel Front panel SD ACCESS indicator With the label face up Power lamp SD Memory Card With the label face up Inserting a SD Memory Card 1. Open the SD Memory Card slot lid 2. -
Page 11: Display Indicator
Display indicator Displayed when using CD, SD audio Displayed when using MP3 files on CD-R and CD-RW Displaying the remaining time While playing a CD, SD Memory Card Press [•REMAIN –AUTO CUE] •“REMAIN” appears and the remaining play time of the track is displayed. -
Page 12: Playing A Cd Or Sd Memory Card (Basic Play)
Playing a CD or SD Memory Card (basic play) Rear panel Adjusting volume when using the headphones Turn [VOLUME] Front panel Front panel With the label face up SD ACCESS indicator With the label SD Memory Card face up Auto Cue function Playing CD-R and CD-RW discs (TURNTABLE mode only) When one of the media has been set, or when a track has been... - Page 13 Press [POWER •The unit display will come on once the power is turned on. Switch [MODE] to TURNTABLE •Functions are limited when using the CD PLAYER mode. page 14) Switch [PLAY SELECT] to select the me- dia to be used •When there is no media inserted, "NO DISC"...
-
Page 14: Basic Function Settings
Basic function settings Instant play (INSTANT CHANGE) When in the TURNTABLE mode and Instant Change is off, the sound when starting and pausing is synchronized with the starting and stop- ping of the platter. When Instant Change is on, just like pressing [PLAY/ PAUSE] on a normal CD player, play is paused or starts instantly. -
Page 15: Platter Operations
Platter operations Basic play for DJs Using the platter slip surface, you can improvise play with the platter slip surface speed and direction of play using your hand. Platter slip surface Braking Stop the platter slip surface with your hand during play •The audio being played will stop corresponding to the speed of the platter slip surface. -
Page 16: Changing Tempo And Direction Of Play
Changing tempo and direction of play Tempo reset Press [RESET] •The RESET lamp lights and play instantly returns to normal play when playing. •Tempo reset automatically turns off when the power is turned off. Checking tempo •The change in tempo Change in rate appears in the dis- tempo rate... -
Page 17: Playing From Memory
Playing from memory Setting the cue point at any point You can set a cue point at any point of a track and easily recall any desired cue point. You can save up to 10 cue points from one CD or one SD Memory Card to cue bank memory. -
Page 18: Storing To The Cue Pads And Playing
Playing from memory Playing from the CUE PADS Press one of the lit [CUE PADS 1-4] •Even if you are playing, play immediately begins from the point stored to the CUE PADS . When paused in the TURNTABLE mode, the platter begins to turn and play. -
Page 19: Recording To The Sample Pads And Playing
Note Playing from the SAMPLE PADS Storing panel data to this unit (TURNTABLE mode only) Press one of the lit [SAMPLE PADS 1-4] •The unit stores following panel data for each CD or SD Memory •The lamp of the pad you pressed begins to flash and play begins. Card. -
Page 20: Changing The Sound
Changing the sound To select the type Press [– + TYPE] to select the type •Special effect types: TYPE 1 to TYPE 8 1 ONE WAY: Generates sound only when the platter slip surface is operated in the forward direction. 2 TT DIST: Distorts the sound. -
Page 21: Saving To A Sd Memory Card, Recalling
Saving to a SD Memory Card, Recalling •If you save the panel data for the same media previously set to a SD Memory Card, the previously saved data is overwritten. If you save CD panel data and don’t want to overwrite, you can use a new SD Memory card to save. -
Page 22: Formatting The Sd Memory Card
Saving to a SD Memory Card, Recalling Panel data automatic loading (TURNTABLE mode only) The unit automatically loads panel data for each CD or SD Memory Card to its memory from the SD Memory Card. 1. Switch [PLAY SELECT] to select the media to be used and turn the MODE switch on the rear panel to TURN- TABLE side 2. -
Page 23: Using With Other Equipment
Using with other equipment •You can alternate play by back cueing unit 2 connected to CH4. Push the cross fader all the way toward CH4 Play CH4 CH1 Back cue Push the cross fader all the way toward CH1 Play CH1 CH4 Back cue Using two units for relay play You can relay play by connecting the control terminals of the two units. -
Page 24: Linking Different Tracks
Using with other equipment On unit 2 (track B), Stop the platter slip surface and press [CUE STOP] to return to the cue point Match with track A again, on unit 2 (track B) Press [PLAY/PAUSE] and play track B Checking the audio through the moni- tor (headphones), gradually slide the mixer’s cross fader towards the CH4... -
Page 25: Handling Sd Memory Cards
•AAC Concerning CDs A compression standard that makes recording and play of high qual- ity audio possible including MPEG2 (an international standard). Used in SD Audio and broadcast satellite digital signals. With this system, you can only play CDs having this mark. -
Page 26: Q&A (Frequently Asked Questions)
Q&A (Frequently asked questions) Reference Question Answer page Connecting How do I connect an analogue player? An analogue player cannot be connected directly. It must be Other connected through a DJ mixer. Devices How do I connect speakers? Speakers cannot be connected directly. Speakers must be connected through DJ Mixer or amplifier. -
Page 27: Error Messages
Error messages Message Description Action CAN NOT EJECT Cannot eject the CD. Pause the unit and eject the CD. CUE BANK ERROR After setting the auto cue point, you tried to set Select the cue bank first. the cue setting without selecting the cue bank. DATA ERROR There is a problem with the data. - Page 28 Matsushita Electric Industrial Co., Ltd. Web Site : http://www.panasonic.co.jp/global/ RQT7115-B M0304TK2054...