Table of Contents
Advertisement
OPERATORS MANUAL
Midas
Klark Teknik Building,
Walter Nash Road,
Kidderminster.
Worcestershire.
DY11 7HJ.
England.
Tel:+44 1562 741515
Fax:+44 1562 745371
Email: midas.info@u.telex.com
Website: midasconsoles.com
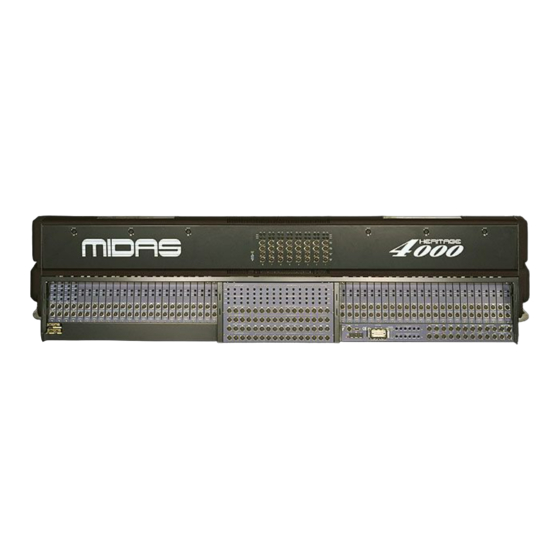
MIDAS Heritage 4000 Console
Operators Manual
DOC02-H4000
Issue 1.1 - February 2004
Due to a policy of continual product improvement, specification
and features
may be subject to change without notice.
Advertisement
Table of Contents

Related Manuals for Midas HERITAGE 4000


Summary of Contents for Midas HERITAGE 4000
- Page 1 DY11 7HJ. England. Tel:+44 1562 741515 Fax:+44 1562 745371 Email: midas.info@u.telex.com Website: midasconsoles.com MIDAS Heritage 4000 Console Operators Manual DOC02-H4000 Issue 1.1 - February 2004 Due to a policy of continual product improvement, specification and features may be subject to change without notice.
-
Page 3: Important Safety Instructions
IMPORTANT SAFETY INSTRUCTIONS CAUTION RISK OF ELECTRIC SHOCK DO NOT OPEN WARNING: TO REDUCE THE RISK OF FIRE OR ELECTRIC SHOCK, DO NOT EXPOSE THIS APPLIANCE TO RAIN OR MOISTURE AVIS: RISQUE DE CHOC ELECTRIQUE. NE PAS OUVRIR These symbols are internationally accepted symbols that warn of potential hazards with electrical products. -
Page 5: Declaration Of Conformity
Klark Teknik Building, Walter Nash Road, Kidderminster, Worcestershire, DY11 7HJ. Declare that a sample of the following product:- Product Type Number Product Description Nominal Voltage (s) Current Freq Heritage 4000 Professional Audio 115V AC 8.0A 50/60Hz Mixing Desk 230V AC 4.0A... -
Page 7: Table Of Contents
Heritage 3000. Offering a total of forty (40) aux sends plus stereo masters, the Heritage 4000 is a comprehensive monitor console. With it’s flexible assignable buss routing, the Heritage 4000 can be quickly configured making the Heritage 4000 just as comfortable at the Front of House. - Page 8 ONLY be carried out by a qualified engineer. Connections To ensure the correct and reliable operation or your Midas Heritage 4000 console, only high quality balanced screened twisted pair audio cable and metal bodied connectors should be used. Female XLR...
-
Page 9: Mono Input Module
Mono Input Module Operators Manual- Page 4... -
Page 10: Mono Input Channels
It is worthy of note that in either state, the direct output is PRE-MUTE and hence is unaffected by changes in channel mute. GAIN - The input gain of the Heritage 4000’s input is continuously variable from +15dB to +60dB. direct o/p... -
Page 11: Mono Input Module
Stereo Auxillary Stereo Group This enables the Heritage 4000 to be used as an FOH, Monitor or FOH & Monitor console depending upon the MONO requirements of the user. Essentially the uses are endless, and offer the maximum flexibility to the engineer. -
Page 12: Pan And Routing
Mono Input Module Mono Input Module In MONO AUX mode: The buss send pot is a dual purpose switching pot: Pressing the pot will enable/disable the buss send for that channel. When depressed, the buss active LED will light to indicate that the buss send is active and also whether the send is pre or post-fader. - Page 13 Mono Input Module Mono Input Module IMAGE - When the spacial imaging system is active the IMAGE control can modify the action of the pan control so as to place the channel within a three speaker system. When the image control is fully clockwise the pan control will operate in full left, centre, right such that a centre panned signal will route to the centre speaker only and will not appear in either of the left or right outputs.
- Page 14 Input Fader Input Fader safe’s FADER MANUAL RECALL AND NULL MUTE In this mode, the STATUS LEDs are used to prompt the operator where to move the fader. If the fader is not at the position stored in the current recalled snap shot, one/two LEDs will flash to indicate where the fader should be.
- Page 15 Stereo Input Module Operators Manual- Page 10...
-
Page 16: Stereo Input Module
In the process of describing the stereo input channel, controls will be described in order Send Left of signal flow. The Heritage 4000’s stereo input channels each have two (2) balanced microphone inputs and one gain insert point per input (i.e. two inserts per channel) on conventionally wired TRS quarter-inch balance (0.25”) jack plugs. - Page 17 Stereo Group This enables the Heritage 4000 to be used as an FOH, Monitor or FOH & Monitor console depending upon the requirements of the user. The control over the assignable buss sends will change according to the status of the buss output modules.
- Page 18 Stereo Input Module Stereo Input Module st aux 1 gain st aux 2 gain In STEREO AUX mode: st aux 3 gain The buss send pot is a dual function switching pot. Pressing the odd or even numbered pot will st aux 4 enable the buss send gain...
- Page 19 Stereo Input Module Stereo Input Module st aux 1 gain st aux 2 gain safe’s st aux 3 The input fader panel can be used as a conventional channel fader or as part of the gain automation system. MUTE st aux 4 gain Safe switches disable any remote control over the channel as selected:...
- Page 21 Auxtender Pod Operators Manual- Page 16...
-
Page 22: Mono/Stereo Pod Module
Mono Pod Module Mono Pod Module The mono input pod is connected to the mono channel strips on the main Heritage 4000 console internally, hence there are no connections directly to it on the rear of the pod. The mono pod module allows the routing of signal to the 8 stereo auxes (outputs on the rear of the auxtender pod). - Page 23 XLR plugs conventionally wired (one left one right). Connections To ensure the correct and reliable operation or your Midas Heritage 4000 console, only high quality balanced screened twisted pair audio cable and metal bodied connectors should be used. The following diagrams are included as a guide for audio connections only, wiring for specialist cables or connections may vary.
- Page 25 VCA Master Fader Operators Manual- Page 20...
-
Page 26: Vca Master Faders
VCA Master Fader VCA Master Fader MUTE safe solo AUTO The VCA Master Fader panel contains ten (10) long-throw assignable VCA Faders. The Heritage 4000’s input channels may be assigned to any of the ten VCA’s. The Auxtender and Assignable Buss Outs may be assigned to VCA’s 9 and 10 only. - Page 27 Input Fader Input Fader safe’s MUTE solo AUTO To assign a channel to a VCA fader or the automute system, the automation system must be unlocked and the correct assign mode selected (VCA or Mute). Select the desired automute or VCA using the assign keys (see above) and press the channel SET key. The channel SET key can be used in two ways: Long Press - A long press will erase the previous VCA or automute settings for the channel and take the new...
-
Page 29: Group Output Module
Group Output Module Operators Manual- Page 24... -
Page 30: Matrix Sends
Send Return Send The Heritage 4000’s assignable buss (group) outputs are located together on the rear of the console main body. Return Pairs of group outputs and their corresponding insert points and direct input are located together The group insert point is provided by two balanced TRS quarter-inch jack sockets, one send and one return per output. - Page 31 Group Module Group Module Send Return Send Return VCA Assign - Each of the groups may be assigned to either VCA 9 or VCA 10 control. To Masters to masters - When depressed, the ST switch causes the group output to be routed to the master stereo buss.
-
Page 33: Matrix Module
Matrix Module Operators Manual- Page 28... -
Page 34: Matrix Output Module
Send Return The Heritage 4000’s matrix outputs are located together on the rear of the console main body. Pairs of matrix outputs and their corresponding insert points and direct input are located together The matrix insert point is provided by two balanced TRS quarter-inch jack sockets, one send and one return per output. -
Page 35: Master Output Module
Master Output Module Operators Manual- Page 30... - Page 36 RETURN SEND The Heritage 4000 main outputs are located on the rear of the console. Six (6) male XLR sockets conventionally wired are provided - two (2) each for Left, Right and Mono (centre). Six (6) balanced TRS quarter-inch jack sockets provide the send and return sockets for the master output inserts (two (2) for each Left, Right and Mono).
- Page 37 Master Module Master Module Balance - The balance (Pan) control gives continuous and reciprocal adjustment of the balance stereo left and right signals by +3dB to off. This allows fine adjustment of the left, right power levels and imaging. Talk - The left/right talk switch connects the left/right output to the monitor module so that TALK TALK...
-
Page 39: Monitor Module
Monitor Module Operators Manual- Page 34... -
Page 40: Monitor Output Module
Monitor Connections The Heritage 4000 local outputs are located on the rear of the console. Six male XLR sockets conventionally wired are provided - two (2) each for Left, Right and Mono (centre). The local ouputs are labelled ‘Local Ouputs’ and ‘B Speaker’. -
Page 41: Mono Output
Monitor Module Monitor Module Mono source Talk (input) - The talk input switch connects the external talk input to the local mono monitor TALK output. input Level - The level of the external talk inputs is continuously variable from off (-inf) to +10dB. level MONO masters... - Page 42 Monitor Module Monitor Module Mute (left) - toggles the mute on the left hand side of the local monitor outputs. Mute (right) - toggles the mute on the right hand side of the local monitor outputs. mute mute Solo (add mode) - The solo add mode switch changes the behaviour of the consoles solo operation.
-
Page 43: Console Automation
Console Automation Operators Manual- Page 38... - Page 44 Automation VCA and Mute assignment LOCK assign mode To make assignments to any of the Heritage 4000’s VCA or automutes, the system must keys switches first be unlocked by pressing the lock key (mode switches). lock Pressing the lock key will toggle the console lock between off and on. When the switch is illuminated, changes are not permitted.
- Page 45 (i.e. is not empty). Backup virtual fader The Heritage 4000 automation and assignment system uses an on-board micro card to control recall mode the function of the console. In fact, the H4000 has a redundant micro card should a fault occur on the other. For reliability, changes to the console are stored to both micro cards so that the information held on each is identical.
-
Page 46: Snapshot Automation
Automation Snapshot automation Snapshots of the consoles automation controls can be stored as SCENES or as ACTS. automation Essentially, there is no difference between an act and a scene memory except the way in system which they are numbered. system store midi As in a play or script, scenes are subsets within an act. - Page 47 When a new scene is recalled, the fader adjustment is removed forcing the user to ‘pick up’ the fader again before making further adjustments. Access levels The Heritage 4000’s automation system can be locked so that it’s memories cannot be system changed, erased or overwritten by mistake.
- Page 48 Automation Virtual fader recall vs store The differences between virtual fader recall and virtual fader store modes are discussed in more detail:- Recall Mode Store Mode Recall a new scene and leds will indicate the current Recall a new scene and leds will indicate the current virtual fader positions.
- Page 49 Using fader modes The Heritage 4000 has a flexible fader mode system which, used properly, will allow the user to benefit from the full functionality of the console. There is no right or wrong way to use the fader modes as this will be largely dictated by the environment in which the console is being used and the application.
- Page 50 Automation Operators Manual- Page 45...
- Page 51 Automation & Linking Walkthrough Operators Manual- Page 46...
-
Page 52: Unlocking The Console
Automation and Linking Automation and Linking Unlocking the Console: To unlock the mixing console press the SYSTEM menu button. Using the up/down keys scroll through the menu until LOCK is displayed, press CONFIRM. Using the up/down keys scroll through the menu until the desired level of unlock is displayed on the screen, then press the confirm button. - Page 53 Automation and Linking Automation and Linking If the scene already exists then the display will read over_str and you will need to press the confirm button. The screen will then read done. Editing Midi (Program Change): Pressing the MIDI button places you in the MIDI menu. Using the UP and DOWN buttons scroll through OUT01 to 04 until the required message is reached.
- Page 54 Automation and Linking Automation and Linking Halting a Cross fade: To Pause a crossfade during recall press the CANCEL button. The crossfade can be resumed again by pressing the CONFIRM button. Bypassing a Cross fade: A crossfade can be bypassed by pressing the confirm button as the crossfade is being applied, this will immediately take you to the finished scene.
-
Page 55: Midi
Automation and Linking Automation and Linking Midi In Assignment: Setting The Console to Respond to MIDI Changes: The console settings can be accessed via the “AUTO” submenu after pressing the “System” button. This submenu option is only available when in “SYS” Lock-Mode. After selecting “AUTO”, there are two further sub-menus: ENAB -(ENABle), this is the master switch for this function and can be set to “YES”... - Page 56 Automation and Linking Automation and Linking MIDI Sysex Dumps: To store the recall a memory between the console and a midi device (such as an Yamaha MDF3 midi Filer) or the windows software available from Midas, select the SYSTEM menu, using the UP and DOWN keys select DATA and press CONFIRM.
- Page 57 Automation and Linking Automation and Linking Note 1 All scene memory information remains local to the console so when saving or loading memories to or from the console by either computer file or midi sysex dump, each console must be done individually. When setting up a multiple console system it is recommended that programming is done from the start with all consoles linked.
-
Page 58: Canbus
Can Bus Can Bus Operators Manual- Page 53... - Page 59 We i g h t s a n d D i m e n s i o n s Operators Manual- Page 54...
-
Page 60: Weights And Dimensions
Weights and Dimensions Weights and Dimensions (14.29”) 363.00mm (22.28”) 566.05mm (7.44”) 189.00mm Operators Manual- Page 55... -
Page 61: Rear Panel
Rear Panel Description Rear Panel Description Operators Manual- Page 56... -
Page 63: Block Diagrams
B l o c k D i a g r a m s Operators Manual- Page 58... - Page 64 PREVIEW SCENE Operators Manual- Page 59...
- Page 65 MIX BUS 12 MIX BUS 13 MIX BUS 14 MIX BUS 15 MIX BUS 16 DIRECT OUTPUT direct o/p OPTIONAL TRANSFORMER BALANCING SIGNAL PATH KEY ANALOGUE SIGNALS D.C. SIGNALS HERITAGE 4000 AUXTENDER INPUT MODULE BLOCK DIAGRAM Operators Manual- Page 60...
- Page 66 Operators Manual- Page 61...
- Page 67 Operators Manual- Page 62...
- Page 68 +21+ +21+ HERITAGE 4000 MATRIX MODULE +18+ +18+ +15+ +15+ +12+ +12+ BLOCK DIAGRAM -12- -12- -15- -15- -18- -18- -21- -21- -24- -24- METERS PRE -27- -27- TALK -30- -30- SELECTED -33- -33- -36- -36- TALK ALL MATRIX 1...
- Page 69 Operators Manual- Page 64...
- Page 70 Operators Manual- Page 65...
- Page 71 C r i b S h e e t Operators Manual- Page 66...
-
Page 72: Crib Sheet
Crib sheet Mono input plus pod MIDAS MIDAS MIDAS MIDAS MIDAS MIDAS MIDAS MIDAS H4002 H4002 H4002 H4002 H4002 H4002 H4002 H4002 Inputs gain gain gain gain gain gain gain gain direct o/p direct o/p direct o/p direct o/p direct o/p direct o/p direct o/p direct o/p... -
Page 73: Features And Specifications
F e a t u r e s a n d S p e c i f i c a t i o n s Operators Manual- Page 68... -
Page 74: Overview
Overview Based on a 48 channel Frame (44 Mono + 4 Stereo channels) Output 'Assignable buss' outputs 'Stereo aux' outputs Total 40 aux outputs Stereo master 2 (L/R) Mono master 1 (M) Matrix Channel Direct Outputs Local Outputs 3 (Output 'a' LCR) 3 (Ouput 'b' LCR) SOLO Outputs 4 (LR AFL) -
Page 75: Technical Specification
Technical Specification Technical Specification Input impedance 2k ohms Balanced Line 20k ohms Balanced Input Gain Continuously variable+15 to +60 dB Mic + Pad Continuously variable-10 to +35 dB Line Level Inputs Maximum Input Level +6dBu Mic + Pad +31dBu Line Level Inputs +21dBu CMR @ 100Hz Mic (gain +40dB) - Page 76 Technical Specification Technical Specification Equaliser Hi-Pass Slope 12dB / Oct. High Pass Frequency Continuously variable -3dB Point from 20Hz to 400Hz Treble Gain Continuously variable-15 to +15dB Centre detent @ 0dB Treble Shelving Freq. Continuously variable -3dB point from 1kHz to 20kHz Treble Bell Freq.
Need help?
Do you have a question about the HERITAGE 4000 and is the answer not in the manual?
Questions and answers