Table of Contents
Advertisement
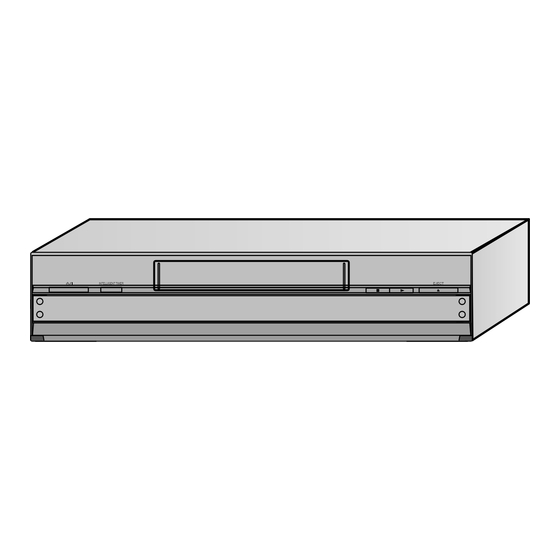
Video Cassette Recorder
NV-FJ730B
NV-FJ780B
Operating Instructions
INTELLIGENT TIMER
AUDIO
A.DUB
AV3 IN
L MONO
R
CVC
EXT LINK
www.panasonic.co.uk
Before attempting to connect, operate or adjust this
product, please read these instructions completely.
VQT9547
EJECT
TIMER REC
6
6
REC/OTR
/
/
Contents
Dear Customer...............................................................................2
Caution...........................................................................................3
Controls and Connectors ...............................................................4
Checking the Accessories/Preparing the Remote Control .............5
Connections (with Scart leads) ......................................................6
Connections (without Scart leads) .................................................7
Auto Setup (For TV and VCR with Q Link Functions) ....................8
Removing Interference ................................................................10
Checking the Settings for Auto Setup .........................................11
Connecting the VCR to a Stereo Amplifier ................................12
Setting the Remote Control to Operate Your TV..........................13
VIDEO Plus+ Codes for Satellite Receivers/Cable TV.................14
When You Insert a Video Cassette (For NV-FJ780B)..................15
Playback.......................................................................................16
• Playback - Off Timer Function ...............................................16
(SQPB=S-VHS Quasi Playback) ...........................................17
• Adjusting the Playback Picture ..............................................17
Recording.....................................................................................18
• (One Touch Record) ..............................................................19
• (Direct TV Recording) ............................................................19
• (AV2 EXT LINK Settings).......................................................20
The Menu System ........................................................................21
Timer Recording...........................................................................22
• Programming with the On Screen Display (OSD)..................22
• Programming with the VIDEO Plus+ Function.......................23
Other Timer Recordings and Convenient Functions ....................24
Intelligent Timer Function.............................................................25
Tape Library System (For NV-FJ780B)
Tape Library System (For NV-FJ780B)........................................27
Desired Programme Is Recorded ..........................................29
• To Manually Enter or Editing a Title.......................................30
• To Delete the Tape Library Data ...........................................31
Manual Setup
Manual Tuning .............................................................................32
External Equipment (For NV-FJ780B) ...................................33
To Delete, Add or Move a Programme Position ..........................33
To Restart the Auto Setup ...........................................................34
To Restart the Download ............................................................34
To Return the VCR to the Shipping Condition ............................34
To Change the Owner ID ............................................................35
Setting the VCR's Clock...............................................................36
Other Convenient Functions (Various Settings)...........................37
• Settings for the Main Menu Item [Other settings] ..................38
Search Functions .........................................................................40
• Timer Record Confirmation (For NV-FJ730B) .......................40
• Intro-Jet Scan (For NV-FJ730B) ............................................40
• VISS=VHS Index Search System (For NV-FJ730B)..............40
• VISS=VHS Index Search System (For NV-FJ780B)..............41
• To Find space to record (For NV-FJ780B) ............................41
• Intro-Jet Scan (For NV-FJ780B) ............................................41
Editing ..........................................................................................42
• Assemble Editing ...................................................................42
• Audio Dubbing .......................................................................43
• Album Function ......................................................................44
Helpful Hints
Glossary .......................................................................................45
Trouble Shooting..........................................................................46
Specifications ...............................................................................47
Index ............................................................................. Back Cover
Advertisement
Table of Contents

Related Manuals for Panasonic NV-FJ730B


Summary of Contents for Panasonic NV-FJ730B
-
Page 1: Table Of Contents
• Settings for the Main Menu Item [Other settings] ....38 Advanced Operations www.panasonic.co.uk Search Functions .................40 • Timer Record Confirmation (For NV-FJ730B) .......40 • Intro-Jet Scan (For NV-FJ730B) ..........40 • VISS=VHS Index Search System (For NV-FJ730B)....40 • VISS=VHS Index Search System (For NV-FJ780B)....41 •... -
Page 2: Safety Information
Safety Information Dear Customer May we take this opportunity to thank you for purchasing this Panasonic Video Cassette Recorder. We would particularly advise that you carefully study the Operating Instructions before attempting to operate the unit and that you note the listed precautions. -
Page 3: Caution
Caution Be sure to read the cautions carefully before you operate this VCR. Do not cover the ventilation holes The ventilation holes prevent excessive heat build-up inside the VCR during extended periods of use. Do not block these holes; especially avoid covering them with soft materials such as paper or cloths. -
Page 4: Controls And Components
AV1 ( TV ) AC I N L /G SECTEUR AUDIO SORTIE R /D AV2 ( DECODER/DECODEUR/EXT ) OUT/SORTIE NV-FJ730B AV LINK DIRECT TV REC TV ASPECT TV / TEXT AUDIO Í OUT/SORTIE TRACKING/V-LOCK AV2 ( DECODER/DECODEUR/EXT ) AV1 ( TV ) -
Page 5: Quick Start Guide
• Or go on line through our Internet Accessory ordering application at www.panasonic.co.uk. • Most major credit and debit cards accepted. • All enquires transactions and distribution facilities are provided directly by Panasonic UK Ltd. • It couldn’t be simpler! 1 To Prevent Accidental Erasure of Recording Break out the tab or the rear side of the tape. -
Page 6: Connections (With Scart Leads)
Connections (with Scart leads) Follow the step-by-step guide below. RF Input socket Example of NV-FJ780B RF Output socket Aerial AV1 21-pin Scart socket TV [with or without Q Link function] (not supplied) (not supplied) AV2 21-pin Scart socket Aerial Input socket AC Input socket RF lead... -
Page 7: Connections (Without Scart Leads)
Connections (without Scart leads) If you do not have any scart leads and your TV is not Q Link type, you can connect your VCR to a TV and Satellite Receiver using RF leads. Using this connection method may however be difficult to obtain a clear picture from the Satellite Receiver. For this reason it is not recommended for inexperienced users. -
Page 8: Auto Setup (For Tv And Vcr With Q Link Functions)
In this case, select the AV input on your TV if you want to see the [Download] indication. Notes: • The explanations in this book refer to Panasonic Q Link TV and VCR, however they may also apply to other makes of TV and VCR with similar functions to Q Link. (See page 45 for details.) •... -
Page 9: Auto Setup (For Tv And/Or Vcr Without Q Link Functions)
Auto Setup (page 34). On Screen Display • If you want to cancel Auto Setup before it has finished, EXIT press the [EXIT] button. You can restart Auto Setup Panasonic VCR Auto-Setup AV LINK again, see page 34. Tuning... -
Page 10: Removing Interference
Press the [Cursor] buttons (3421) to set the correct On Screen Display STILL ALBUM REPLAY time and date. MENU Panasonic VCR EXIT Clock setting Clock setting : MAN. - - - - - - - - - - - - - - - - - - - - - - - - - - - - - - - - - - - - - - - - - - - - - - - - - - - - - - - - - - - - - - - - - - - - - - - - - - - - - - - - - - - - - - - - - - - - - - - - - - - - - - - - - - - - - - - - - - - -... -
Page 11: Checking The Settings For Auto Setup
Checking the Settings for Auto Setup To Confirm that the TV Stations Have Been Tuned Correctly by Auto Setup On Screen Display Press the [MENU] button to display the OSD Main Panasonic VCR MENU Main menu DIRECT TV REC TV ASPECT TV / TEXT menu on the TV screen. -
Page 12: Connecting The Vcr To A Decoder/Connecting The Vcr To A Stereo Amplifier
Connecting the VCR to a Decoder/Connecting the VCR to a Stereo Amplifier To connect this VCR to a decoder or a stereo amplifier, make the connections shown in the illustration below. For the connection to the TV, see pages 6–7. For details about the connection, also read the operating instructions of the decoder or stereo amplifier. -
Page 13: Setting The Remote Control To Operate Your Tv
To switch the screen format between the wide-screen and other formats. List of TVs Compatible with the VCR’s Remote Control Brand Name Code Brand Name Code Brand Name Code Panasonic 01-04 IRRADIO SABA AIWA SALORA AKAI 27, 30 17, 39... -
Page 14: Video Plus+ Codes For Satellite Receivers/Cable Tv
Í Select video playback channel on the TV. Panasonic VCR Video Plus+ - - - - - - - - - - - - - - - - - - - - - - - - - - - - - - - - - - - - - - - - - - - - - - - - - - - - - - - - - - - - - - - - - - - - - - - - - - - - - - - - - - - - - - - - - - - - - - - - - - - - - - - - - - - - - - - - - - - - –... -
Page 15: Playback
Cassette Number Check. the VCR display. (See page 29.) • If you cancel the Cassette Panasonic VCR Content of tape: 5 Number Check midway and Title Date then perform recording, a Tape ID could not 2 BBC2 (18:58) We 18.04.01... -
Page 16: Playback
Playback VCR Display For Normal Playback: Press the [Play] button. AV LINK - - - - - - - - - - - - - - - - - - - - - - - - - - - - - - - - - - - - - - - - - - - - - - - - - - - - - - - - - - - - - - - - - - - - - - - - - - - - - - - - - - - - - - - - - - - - - - - - - - - - - - - - - - - - - - - - - - - - DIRECT TV REC TV ASPECT TV / TEXT For Cue or Review Playback:... -
Page 17: To Play Back S-Vhs Cassette Tape (Sqpb=S-Vhs Quasi Playback)
To Play back a Recorded Part Repeatedly Press the [Play] button (26) on the remote control for more than 5 seconds. The [R] indication appears on the On Screen Display. • If [OSD] is set to [OFF] (See page 39), the [R] indication will not appear in repeat playback mode. To Cancel the Repeat Playback Mode: Press the [Stop] button (9). -
Page 18: Recording
Recording Recording Insert a video cassette with an intact erasure AUDIO A.DUB TIMER REC prevention tab. AV3 IN VIDEO L MONO EXT LINK REC/OTR Í • If it has already been inserted, press the [VCR-ON/ OFF] button to turn the VCR on. VCR Display - - - - - - - - - - - - - - - - - - - - - - - - - - - - - - - - - - - - - - - - - - - - - - - - - - - - - - - - - - - - - - - - - - - - - - - - - - - - - - - - - - - - - - - - - - - - - - - - - - - - - - - - - - - - - - - - - - Select the TV station using the [Channel] button or... -
Page 19: (One Touch Record)
To Display the Approximate Remaining Tape Time The remaining tape time can be displayed in the VCR display. 1 Select the correct cassette tape length. See page 38. 2 Press the [OSD/DISPLAY] button (18) repeatedly until the Remaining Tape Time appears on the VCR display. •... -
Page 20: (Av2 Ext Link Settings)
When the VCR is switched off, a tape can be ejected by pressing the [EJECT] button (41). The VCR will eject the cassette and automatically turn itself off again. VCR-off Search (For NV-FJ730B) When the VCR is off, with the tape left in, Intro-Jet Scan can be performed by pressing the [SEARCH] button (4). -
Page 21: The Menu System
------ Page 36 : AUTO Clock setting Time : 20:30:24 Date : 16.10.05 Panasonic VCR Other settings (For NV-FJ730B) ------ Page 38 Tape length : AUTO (2 E-240) ------ Page 38 Audio playback : NORMAL ------ Page 38 SQPB : AUTO... -
Page 22: Timer Recording
Programming the timer recording of a TV programme broadcast on programme position 2 (BBC2) from 20:00 to 21:30 on 27 October. •Insert a video cassette. On Screen Display Panasonic VCR Press the [PROG./CHECK] button to display the Timer recording PROG. / CHECK... -
Page 23: Programming With The Video Plus+ Function
The VIDEO Plus+ system is manufactured under license from Gemstar Development Corporation. Example: Programming a timer recording of a TV programme with the Video On Screen Display Plus+ Code 920126 Panasonic VCR Video Plus+ Press the [SV/V+]([VIDEO Plus+]) button to display SV/V + 9 2 0 1 2 6 the menu for entering the PlusCode on the TV. -
Page 24: Other Timer Recordings And Convenient Functions
Press the [DATE] button to select the recording date (1 to 31), daily timer On Screen Display recording date (Su-Sa, Mo-Sa or Mo-Fr) or weekly timer recording date DATE Panasonic VCR Timer recording (Su to Sa) in operation step 3 (see page 22) when programming a timer PROG. / CHECK... -
Page 25: Intelligent Timer Function
EXIT I-TIMER Press the [I-TIMER] button to display the menu. Panasonic VCR INTELLIGENT TIMER 27/ 10/ 02 - - - - - - - - - - - - - - - - - - - - - - - - - - - - - - - - - - - - - - - - - - - - - - - - - - - - - - - - - - - - - - - - - - - - - - - - - - - - - - - - - - - - - - - - - - - - - - - - - - - - - - - - - - - - - - - - - - - -... - Page 26 Protecting programmes I-TIMER Press the [I-TIMER] button to display the menu. On Screen Display Panasonic VCR INTELLIGENT TIMER 27 / 10 / 02 Press the [Cursor] buttons 43 to select the programme details that you Name Date Start Stop want to protect, then press the [Cursor] button 1 to lock it. A lock symbol...
-
Page 27: Tape Library System (For Nv-Fj780B)
In case of a TV station with Teletext information, the title Cassette Number of the TV programme is entered automatically, provided the [Title page] is correctly set. Panasonic VCR TV Station Name: Recording Start Time Content of tape: 5 For a TV programme that was broadcast with Teletext... -
Page 28: To Check What Programmes Are Recorded On The Inserted Video Cassette And To Play Back A Desired Programme
- - - - - - - - - - - - - - - - - - - - - - - - - - - - - - - - - - - - - - - - - - - - - - - - - - - - - - - - - - - - - - - - - - - - - - - - - - - - - - - - - - - - - - - - - - - - - - - - - - - - - - - - - - - - - - - - - - - - DIRECT TV REC TV ASPECT TV / TEXT Then press the [Cursor] buttons (34) to select the Panasonic VCR Í Content of tape: 30 TRACKING/V-LOCK... -
Page 29: To Check On Which Cassette A Desired Programme Is Recorded
If you press the [LIBRARY/SEARCH] button (4), operation steps 1, 2 are not necessary. In this case, start from the operation step 3. Press the [MENU] button and then press the [Cursor] On Screen Display MENU AV LINK buttons (34) to select [Tape Library]. Panasonic VCR DIRECT TV REC TV ASPECT TV / TEXT Main menu Í TRACKING/V-LOCK Timer recording Tape Library –... -
Page 30: To Manually Enter Or Editing A Title
If you press the [LIBRARY/SEARCH] button (4), operation steps 1, 2 are not necessary. In this case, start from the operation step 3. On Screen Display Press the [MENU] button and then press the [Cursor] MENU Panasonic VCR buttons (34) to select [Tape Library]. Main menu Timer recording Tape Library... -
Page 31: To Delete The Tape Library Data
AV LINK DIRECT TV REC TV ASPECT TV / TEXT Panasonic VCR Library for tape: 5 Í - - - - - - - - - - - - - - - - - - - - - - - - - - - - - - - - - - - - - - - - - - - - - - - - - - - - - - - - - - - - - - - - - - - - - - - - - - - - - - - - - - - - - - - - - - - - - - - - - - - - - - - - - - - - - - - - - - - - TRACKING/V-LOCK Press the [OK] button. -
Page 32: Manual Tuning
Follow the steps below: On Screen Display MENU Press the [MENU] button to display the Main menu on Panasonic VCR Tuning the TV screen. Manual - - - - - - - - - - - - - - - - - - - - - - - - - - - - - - - - - - - - - - - - - - - - - - - - - - - - - - - - - - - - - - - - - - - - - - - - - - - - - - - - - - - - - - - - - - - - - - - - - - - - - - - - - - - - - - - - - - - -... -
Page 33: To Record The Title When Recording From An External Equipment (For Nv-Fj780B)
- - - - - - - - - - - - - - - - - - - - - - - - - - - - - - - - - - - - - - - - - - - - - - - - - - - - - - - - - - - - - - - - - - - - - - - - - - - - - - - - - - - - - - - - - - - - - - - - - - - - - - - - - - - - - - - - - - - - Panasonic VCR... -
Page 34: To Restart The Auto Setup
To Restart the Auto Setup On Screen Display Press the [MENU] button to display the Main menu on MENU Panasonic VCR Tuning the TV screen. Manual STILL ALBUM REPLAY - - - - - - - - - - - - - - - - - - - - - - - - - - - - - - - - - - - - - - - - - - - - - - - - - - - - - - - - - - - - - - - - - - - - - - - - - - - - - - - - - - - - - - - - - - - - - - - - - - - - - - - - - - - - - - - - - - - -... -
Page 35: To Change The Owner Id
- - - - - - - - - - - - - - - - - - - - - - - - - - - - - - - - - - - - - - - - - - - - - - - - - - - - - - - - - - - - - - - - - - - - - - - - - - - - - - - - - - - - - - - - - - - - - - - - - - - - - - - - - - - - - - - - - - - - Í Press the [Cursor] buttons 34 to select [Tuning] then TRACKING/V-LOCK Panasonic VCR Tuning press the [OK] button. Manual –... -
Page 36: Setting The Vcr's Clock
TV / TEXT Panasonic VCR - - - - - - - - - - - - - - - - - - - - - - - - - - - - - - - - - - - - - - - - - - - - - - - - - - - - - - - - - - - - - - - - - - - - - - - - - - - - - - - - - - - - - - - - - - - - - - - - - - - - - - - - - - - - - - - - - - - - Main menu Í... -
Page 37: Other Convenient Functions (Various Settings)
Other Convenient Functions (Various Settings) On Screen Display Press the [OSD/DISPLAY] button (18), the following information will appear on the TV screen. AV LINK DIRECT TV REC TV ASPECT TV / TEXT (1) TV station name Í TRACKING/V-LOCK BBC1 NICAM –... -
Page 38: Settings For The Main Menu Item [Other Settings]
TV screen. Example of NV-FJ730B - - - - - - - - - - - - - - - - - - - - - - - - - - - - - - - - - - - - - - - - - - - - - - - - - - - - - - - - - - - - - - - - - - - - - - - - - - - - - - - - - - - - - - - - - - - - - - - - - - - - - - - - - - - - - - - - - - - -... - Page 39 VCR 2: Select this setting on both the VCR and the Remote : VCR 1 remote control when using this VCR and another Panasonic VCR in the same place. This ensures that you can operate both VCRs independently with their respective remote control.
-
Page 40: Advanced Operations
To Cancel the Intro-Jet Scan or to Stop Playback: Press the [Stop] button. VISS=VHS Index Search System (For NV-FJ730B) Each programme recorded on the tape must be at least 5 minutes long. To search for the beginning of a recording, press the... -
Page 41: Viss=Vhs Index Search System (For Nv-Fj780B)
If a cassette is already in the VCR, press the INPUT SELECT On Screen Display – SV/V + LIBRARY/SEARCH INDEX [LIBRARY/SEARCH] button. Panasonic VCR LIBRARY/SEARCH Content of tape: 30 STILL ALBUM REPLAY • As soon as the cassette is inserted, the Cassette Number Title Date MENU EXIT Check starts. -
Page 42: Editing
Editing Assemble Editing Assemble editing is the process of copying scenes from an external source such as a movie camera, to this VCR. These scenes can be assembled in the order of your choice to create your own unique composition. Preparations: •... -
Page 43: Audio Dubbing
Audio Dubbing The audio dubbing function lets you record new sound onto the normal (mono) audio track. Although this erases the original sound on the normal audio track, the sound on the Hi-Fi audio tracks remains unchanged. Use this function to add narration or background music to previously made recordings. INTELLIGENT TIMER A.DUB AV3 IN... -
Page 44: Album Function
Album Function The album function lets you collect desired scenes (both moving and still pictures) and create the equivalent of a photo album on a video cassette. The pictures can be copied onto the cassette from a video movie camera, a digital still camera or another VCR for a desired time that you can select (3–20 seconds). -
Page 45: Glossary
VCR to your TV with a fully-wired 21-pin Scart lead (not supplied). Depending on the manufacturer, the equivalent of the Q Link function has a different name and may not work exactly the same. [Q Link] is a registered trademark of Panasonic. [DATA LOGIC] is a registered trademark of Metz. -
Page 46: Trouble Shooting
Trouble Shooting I HAVE AN ON SCREEN MESSAGE. You have attempted to carry out a function, which is not possible at this time. It may be that no tape is inserted and you have pressed the (26) [Play] button , or that you tried to change the details of a timer recording whilst it was being carried out. Please follow the instructions as given on the display. -
Page 47: Specifications
Power Consumption: 18 W (NV-FJ780B) This type of socket is also called Peritel, Euro 18 W (NV-FJ730B) Connector and Euro AV. Video Recording System: 2 rotary heads, helical scanning system 11 13 15 17 19... -
Page 48: Index
MONO ................37 VIDEO Plus+ ............14, 23 ª VISS ............... 40, 41 NICAM ..............37, 45 NTSC playback ............. 17 ª OSD ..............37, 39, 45 OTR ................19 Owner ID ............... 35 Matsushita Electric Industrial Co., Ltd. http://www.panasonic.co.jp/global/...
Need help?
Do you have a question about the NV-FJ730B and is the answer not in the manual?
Questions and answers