Table of Contents
Advertisement
Quick Links
Advertisement
Table of Contents

Related Manuals for Panasonic KX-FP701FX


Summary of Contents for Panasonic KX-FP701FX
-
Page 1: Operating Instructions
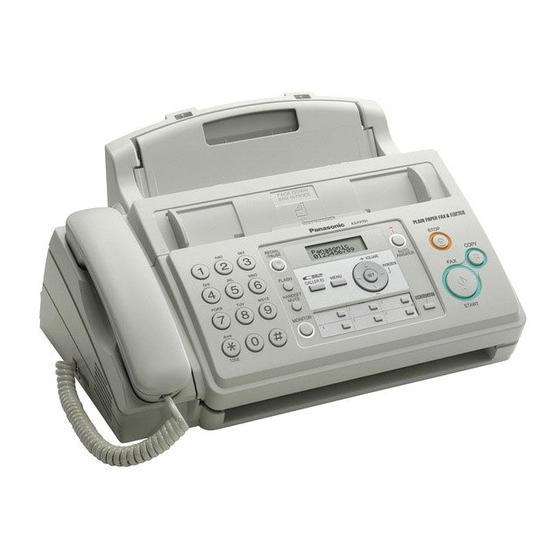
Operating Instructions Plain Paper Fax with Copier KX-FP701FX Model No. Please read these operating instructions before using the unit and save for future reference. This unit is compatible with Caller ID. To use this feature, you must subscribe to the appropriate service of your service provider. - Page 2 Winsbergring 15, 22525 Hamburg, Germany Copyright: L This material is copyrighted by Panasonic Communications Co., Ltd., and may be reproduced for internal use only. All other reproduction, in whole or in part, is prohibited without the written consent of Panasonic Communications Co., Ltd.
-
Page 3: Important Information
Important Information Important Information Safety Instructions For your safety To prevent severe injury and loss of life/property, read this section carefully before using the unit to ensure proper and safe operation of your unit. Power and ground connection Use only the power source marked on the L The following symbols are used to classify and unit. - Page 4 Important Information Operating safeguards Unplug this unit from power outlets before cleaning. Do not use liquid or aerosol cleaners. Installation and relocation Do not cover slots and openings on the unit. Never install telephone wiring during a They are provided for ventilation and lightning storm.
-
Page 5: Important Safety Instructions
Important Information If you wish to discard this product, please contact your local authorities or dealer and ask for the correct method Important safety instructions of disposal. When using this unit, basic safety precautions should always be followed to reduce the risk of fire, electric For best performance shock, or personal injury. -
Page 6: Table Of Contents
Table of Contents 1. Introduction and Installation Receive polling (retrieving a fax placed on 1. Table of Contents another fax machine) ........26 Accessories 4.10 Junk fax prohibitor (preventing fax reception Included accessories........7 from undesired callers).........26 Accessory information ........7 Finding the Controls 5. -
Page 7: Introduction And Installation
FA57E): 70 m × 1 roll (prints about 210 A4-sized pages.) *1 To ensure the unit operates properly, we recommend using the Panasonic replacement film. The ink film is not reusable. Do not rewind and use the ink film again. -
Page 8: Button Descriptions
1. Introduction and Installation {FAX START} Finding the Controls L To send or receive a fax. 1.3 Button descriptions {COPY} L To copy a document (page 27). L To access special telephone services or for transferring extension calls. L The recall time can be changed (feature #72 on page 34). -
Page 9: Product View And Installation
1. Introduction and Installation Installation 1.4 Overview 1.5 Ink film The included film roll is a starter ink film. 4 56 7 Open the front cover by pulling up the centre part. Release the back cover by pushing the green button (1). - Page 10 1. Introduction and Installation Correct Insert the blue gear of the ink film roll into the front left slot of the unit (3) and the white gear of the ink film roll into the rear left slot of the unit (4). 1 turn L The ink film is safe to touch and will not rub off on your hands like carbon paper.
-
Page 11: Handset Cord
1. Introduction and Installation 1.6 Handset cord 1.8 Paper support Connect the handset cord (1). Insert the paper support (1) into the slot to the right of the recording paper exit (2), then into the left slot (3). 1.7 Paper tray Insert the tabs (1) on the paper tray (2) into the slots on the back of the unit (3). -
Page 12: Recording Paper
1. Introduction and Installation 1.9 Recording paper The unit can hold up to 50 sheets of 64 g/m to 80 g/m paper. Please refer to page 50 for more information on recording paper. Fan the paper to prevent paper jams. Pull the tension plate forward (1) and insert the paper gently, print-side down (2). -
Page 13: Preparation
2. Preparation 2 Preparation Connections and Setup 2.1 Connections 2.2 Dialling mode If you cannot dial (page 16, 20), change this setting Caution: depending on your telephone line service. L When you operate this product, the power outlet should be near the product and easily {MENU} {SET} accessible. -
Page 14: Adjusting Volume
2. Preparation Volume Initial Programming 2.3 Adjusting volume 2.4 Date and time {SET} {MENU} {SET} {A}{B} {<}{>} {MENU} i {#}{0}{1} i {SET} Ringer volume 0 1/M:01/Y:07 While the unit is idle, press {A} or {B}. TIME: 00:00 L If there are any documents in the document entrance, you cannot adjust the volume. -
Page 15: Your Logo
2. Preparation 2.5 Your logo 2.6 Your fax number You can program your logo (name, company name, etc.) You can program your fax number so that it appears on so that it appears on the top of each page sent. the top of each page sent. -
Page 16: Telephone
3. Telephone L If you do not need to edit the name, skip to step 3 Telephone Automatic Dialling 3.1 Storing names and telephone Edit the name. For further details, see the storing numbers into the phonebook procedure on page 16. The unit provides a phonebook (106 items including 6 {SET} one touch dial items). -
Page 17: Caller Id
3. Telephone Enter the name, up to 16 characters (see page 36 for Caller ID instructions). i {SET} 3.6 Caller ID service Enter the telephone number, up to 24 digits. i This unit is compatible with the Caller ID service {SET} offered by your local telephone company. -
Page 18: Viewing And Calling Back
3. Telephone Example: The same person called 3 times. 3.7 Viewing and calling back SAM LEE 10:30 20 Jul.×3 Important: L If the area code of the received telephone To stop viewing number is the same as yours, the area code may Press {STOP}. -
Page 19: Storing Caller Information Into The Phonebook/One Touch Dial
3. Telephone 3.10 Storing caller information into the phonebook/one touch dial {CALLER ID} Press {A} or {B} repeatedly to display the desired item. {MENU} Select the phonebook or station key. Using phonebook: Press {PHONEBOOK}. Using one touch dial: Press the desired station key. If a name is required, enter up to 16 characters for the name (page 36). -
Page 20: Fax
4. Fax 4 Fax Sending Faxes To send more than 10 pages at a time 4.1 Sending a fax manually Insert the first 10 pages of the document. Add the other pages (up to 10 at a time) on top of the previously inserted pages while the last page is being fed into the unit. -
Page 21: Document Requirements
4. Fax L To send a document with a width of less than 210 mm, we recommend using a copy machine to copy 4.2 Document requirements the original document onto A4 or letter-sized paper, Minimum document size then sending the copied document. 4.3 Sending a fax using the phonebook and one touch dial feature... -
Page 22: Broadcast Transmission
4. Fax If necessary, press {A} or {B} repeatedly to select the desired resolution (page 20). 4.4 Broadcast transmission {BROADCAST} By storing the phonebook items (page 16) into the L After transmission, the unit will automatically broadcast memory, you can send the same document to print a report (Broadcast sending report). -
Page 23: Selecting The Way To Use Your Fax Machine
4. Fax Note: Receiving Faxes L Make sure feature #73 is set to “TEL” (page 34) 4.5 Selecting the way to use your beforehand. fax machine How to receive phone calls and faxes Depending on your situation, select the way you prefer to You have to answer all calls manually. -
Page 24: Receiving A Fax Manually - Auto Answer Off
4. Fax – document reception is required, – a fax calling tone (slow beep) is heard, or 4.6 Receiving a fax manually – – no sound is heard, Auto answer OFF press {*}{#}{9} (default fax activation code) firmly. Note: L By default, the unit reduces the size of the received 3. -
Page 25: Receiving A Fax Automatically - Auto Answer On
4. Fax depending on the type of an extension telephone. Press {STOP} on the fax machine to talk with the 4.8 Using the unit with an calling party. answering machine 4.7 Receiving a fax automatically 4.8.1 Setting up the unit and an answering –... -
Page 26: Receive Polling (Retrieving A Fax Placed On Another Fax Machine)
4. Fax Receiving a voice message and fax document in one 4.10.1 Activating the junk fax prohibitor call The caller can leave a voice message and send a fax Press {MENU} repeatedly to display “JUNK FAX document during the same call. Inform the caller of the PROH.”... -
Page 27: Copy
5. Copy 5 Copy Copying To stop copying 5.1 Making a copy Press {STOP}. 5.1.1 More copying features To enlarge a document 1. Insert the document. 2. {COPY} i {>} 3. Press {A} repeatedly to select “150%” or “200%”. i {START} L The unit will enlarge the centre of the upper part of the document. - Page 28 5. Copy Example: Making 2 copies of a 4-page original document Collated pages Uncollated pages Note: L The unit will store the documents into memory while collating the copies. If memory becomes full while storing, the unit will only print out the stored pages.
-
Page 29: Programmable Features
6. Programmable Features 6 Programmable Features Features Summary 6.1 Programming {MENU} {SET} {MENU} Press {#} and the 2-digit code. Press the desired command to display the desired setting. L This step may be slightly different depending on the feature. {SET} To exit programming, press {MENU}. -
Page 30: Basic Features
6. Programmable Features 6.2 Basic features Feature Feature code Selection Setting the date and Enter the date and time using the dial keypad. See page 14 for {#}{0}{1} time details. Setting your logo Enter your logo using the dial keypad. See page 15 for details. {#}{0}{2} Setting your fax Enter your fax number using the dial keypad. -
Page 31: Advanced Features
6. Programmable Features 6.3 Advanced features Feature Feature code Selection Setting the journal {0} “OFF”: The unit will not print a journal report, but will keep a {#}{2}{2} report to print record of the last 30 fax transmissions and receptions. automatically {1} “ON”... - Page 32 6. Programmable Features Feature Feature code Selection Setting the quick scan This feature is helpful when you want to remove the document for {#}{3}{4} other uses, because the unit will release the document before sending or copying. {0} “OFF” (default): Deactivates this feature. {1} “ON”: The unit will scan the document and store it into memory first, then the unit will start sending or copying the documents.
- Page 33 6. Programmable Features Feature Feature code Selection Setting the memory To alert you with a beeping sound when a received fax document {#}{4}{4} reception alert is stored into memory due to some existing problem. {0} “OFF”: Deactivates this feature. {1} “ON” (default): You will hear a beeping sound. Note: L The slow beeps will continue until you clear the printing problem and make sure the unit is supplied with enough paper...
- Page 34 6. Programmable Features Feature Feature code Selection Setting recall time The recall time depends on your telephone exchange or host {#}{7}{2} PBX. {1} “900ms” {2} “700ms” {3} “600ms” (default) {4} “400ms” {5} “300ms” {6} “250ms” {7} “200ms” {8} “160ms” {9} “110ms” {*} “100ms”...
- Page 35 6. Programmable Features Feature Feature code Selection Resetting advanced {0} “NO” (default) {#}{8}{0} features to their default {1} “YES” settings To reset the advanced features: 1. {MENU} i {#}{8}{0} 2. Press {1} to select “YES”. i {SET} i {SET} i {MENU} Note: L The language setting (feature #48 on page 33) and ECM...
-
Page 36: Useful Information
7. Useful Information 7 Useful Information 7.1 Character entry The dial keys are used to enter characters and numbers. Each dial key has multiple characters assigned to it. The available character entry modes are Alphabet (ABC), Numeric (0-9), Greek (F), Extended 1 (G), Extended 2 (H), and Cyrillic (I). - Page 37 7. Useful Information Extended 2 character table (O) L The following are used for both uppercase and lowercase: Cyrillic character table (P)
-
Page 38: Help
8. Help 8 Help 8.1 Error messages – Reports If a problem occurs during fax transmission or reception, one of the following messages will be printed on the sending and journal reports (page 20). Message Code Cause & Solution COMMUNICATION ERROR 40-42 L A transmission or reception error occurred. -
Page 39: Error Messages - Display
L The other party’s fax machine is busy or has run out of recording paper. Try again. “OPEN CABINET L Please use genuine Panasonic replacement film (page 7). CHECK FILM SLACK” L The ink film is empty. Replace the ink film with a new one (page 9). -
Page 40: When A Function Does Not Work, Check Here
8. Help Display Cause & Solution “PAPER JAMMED” L A recording paper jam occurred. Remove the jammed paper (page 45). L You forced the recording paper into the paper tray too strongly. Remove all of the installed paper, and re-install it gently. “PHONEBOOK FULL”... - Page 41 8. Help Problem Cause & Solution The unit displays “CHECK L The paper is inserted halfway. Insert it correctly (page 46) and press {SET} PAPER” even though paper is to clear the message. inserted. The other party complains L FAX ONLY mode is set. Tell the other party the number is only used for they only hear a fax tone and faxes.
- Page 42 Check with the other party. The printing quality is poor. Please do not reuse the ink film! Please use genuine Panasonic replacement film. Refer to page 7 for further details. L The thermal head is dirty. Clean it (page 48).
- Page 43 The printing quality is poor. Please do not reuse the ink film! Please use genuine Panasonic replacement film. Refer to page 7 for further Original details. L The thermal head is dirty. Clean it (page 48). A B C L Some paper has instructions recommending which side to print on.
-
Page 44: Using An Answering Machine
8. Help 8.3.6 Using an answering machine Problem Cause & Solution I cannot receive documents L Your greeting message on the answering machine is too long. Shorten the automatically. message. Record a message up to 10 seconds long. L The answering machine rings too many times. Set to 1 or 2 rings. I cannot receive voice L Check if the answering machine is turned ON and connected to the unit messages. -
Page 45: Maintenance
9. Maintenance Open the back cover. 9 Maintenance Jams 9.1 Recording paper jams 9.1.1 When the recording paper has jammed in the unit The display will show the following. PAPER JAMMED Open the front cover by pulling up the centre part. Remove the jammed recording paper (3). -
Page 46: Document Jams
9. Maintenance Correct 9.1.2 When the recording paper was not fed into the unit properly 1 turn The display will show the following. Tight CHECK PAPER Remove the recording paper and straighten. Pull the Incorrect tension plate (1) forward and hold open while inserting paper, then press {SET} to clear the message. -
Page 47: Document Feeder/Scanner Glass Cleaning
9. Maintenance Close the front cover securely. Cleaning 9.3 Document feeder/scanner glass cleaning Clean the document feeder/scanner glass when: – Documents frequently misfeed. – Smudges or black/white lines appear on the original document when sending or copying. Disconnect the power cord and the telephone line cord. -
Page 48: Thermal Head Cleaning
9. Maintenance Open the back cover. Remove the ink film (3). 9.4 Thermal head cleaning If smudges or black/white lines appear on a copied/received document, check whether there is dust on the thermal head. Clean the thermal head to remove the dust. -
Page 49: General Information
10. General Information 10 General Information Printed Repor ts Specifications 10.1 Reference lists and reports 10.2 Specifications You can print out the following lists and reports for your ■ Applicable lines: reference: Public Switched Telephone Network – “SETUP LIST” ■ Document size: –... - Page 50 10. General Information *1 Transmission speed depends on the contents of the L Some paper only accepts print on one side. Try using pages, resolution, telephone line conditions and the other side of the paper if you are not happy with capability of the other party’s machine.
-
Page 51: Index
11. Index Error messages: 38 11. Index Extension telephone: 24 11.1 Index F Fax activation code (Feature #41): 32 # #01 Date and time: 14 Fax number (Feature #03): 15 #02 Your logo: 15 FAX ONLY mode: 23, 25 #03 Your fax number: 15 Friendly reception (Feature #46): 33 #04 Sending report: 20 Ink film: 9... - Page 52 11. Index One touch: 21 Phonebook: 21 Sending report (Feature #04): 20 Setup list: 49 Storing Broadcast: 22 One touch: 16 Phonebook: 16 T Telephone number list: 49 TEL/FAX mode: 23, 24 TEL mode: 23, 24 V Volume: 14...
- Page 53 Notes...
- Page 54 Notes...
- Page 55 Notes...
- Page 56 0682 Panasonic Communications Co., Ltd. 1-62, 4-chome, Minoshima, Hakata-ku, Fukuoka 812-8531, Japan Global web site: http://panasonic.net PFQX2792ZA CM0707PN0...
Need help?
Do you have a question about the KX-FP701FX and is the answer not in the manual?
Questions and answers