
Related Manuals for Labconco 3970202


Summary of Contents for Labconco 3970202
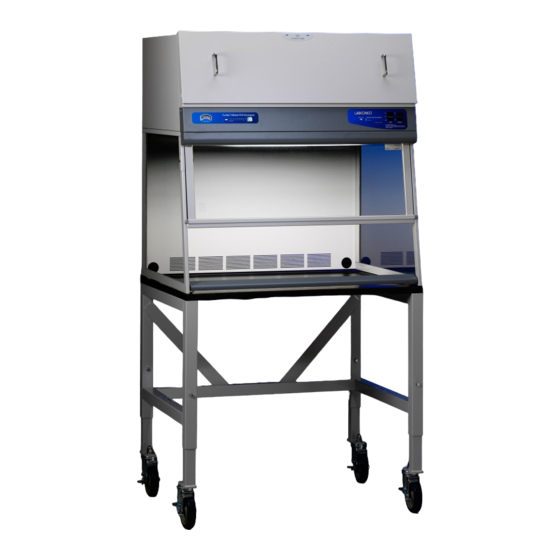
- Page 1 User’s Manual Purifier ® Filtered PCR Enclosures Models 3970202, 3970205, 3970222, 3970225, 3970302, 3970305, 3970322, 3970325, 3970402, 3970405, 3970422, 3970425 Labconco’s Mascot, Labby the LABster...
- Page 2 For more information, please contact us: ExpotechUSA 10700 Rockley Road Houston, Texas 77099 281-496-0900 [voice] 281-496-0400 [fax] E-mail: sales@expotechusa.com Website: www.ExpotechUSA.com...
- Page 3 The warranty for all Labconco products will expire one year from date of installation or two years from date of shipment from Labconco, whichever is sooner, except the following: Purifier®...
-
Page 4: Table Of Contents
CHAPTER 1: INTRODUCTION ISO Class 5 Definition Polymerase Chain Reaction Definition About This Manual Typographical Conventions CHAPTER 2: PREREQUISITES Support, Vibration & Movement Requirements Location and Air Current Requirements Airflow Specifications Electrical Requirements Space Requirements CHAPTER 3: GETTING STARTED Unpacking Your Enclosure Installing the Filtered PCR Enclosure on a Supporting Structure and Work Surface Verifying HEPA Filter Integrity... - Page 5 HEPA Filter Leak Test Setting the Downflow Velocity with the Speed Control Adjustment 32 Calibrate and Operate the Airflow Monitor Initial Certification Re-Certification Fluorescent Light Replacement UV Light Replacement Motorized Impeller Replacement Speed Control Replacement CHAPTER 7 ACCESSORIZING & MODIFYING YOUR FILTERED PCR ENCLOSURE CHAPTER 8 TROUBLESHOOTING &...
- Page 6 Congratulations on your purchase of a Labconco Purifier® Filtered PCR Enclosure. Your enclosure provides a particulate free environment for Polymerase Chain Reaction experiments. It is the result of Labconco’s more than 30 years experience in manufacturing filtered enclosures. These enclosures will effectively provide product protection from airborne particulate matter.
-
Page 7: Chapter 1: Introduction
Chapter 1: Introduction ISO Class 5 Definition Airborne particulate cleanliness inside any PCR Enclosure is designated by ISO Class 5, which is equivalent to 3520 particles 0.5 µm or larger per cubic meter of air per ISO Standard 14644-1. ISO Class 5 cleanliness is illustrated in the table to follow and is equivalent to Class 100 air conditions as defined by Federal Standard 209E. -
Page 8: About This Manual
Chapter 1: Introduction strand by joining the free nucleotide bases to the primers. When this process is repeated, a strand that was formed with one primer binds to the other primer, resulting in a new strand that is restricted solely to the desired segment. Thus, the region of DNA between the primers is selectively replicated. -
Page 9: Typographical Conventions
Chapter 1: Introduction Chapter 8: Troubleshooting contains a table of problems you may encounter while using the Filtered PCR Enclosure including probable causes and suggested corrective actions. Appendix A: Components and Replacement Parts contains labeled diagrams of all of the components of the Filtered PCR Enclosure. Appendix B: Dimensions contains comprehensive diagrams showing all of the dimensions for the Filtered PCR Enclosure. - Page 10 Before you install the Filtered PCR Enclosure, you need to prepare your site for installation. You must be certain that the area is level and of solid construction. In addition, a dedicated source of electrical power should be located near the installation site to power the Filtered PCR Enclosure, and other apparatus.
-
Page 11: Chapter 2: Prerequisites
Chapter 2: Prerequisites Support, Vibration and Movement Requirements At a minimum, the supporting structure usually consists of a base cabinet or base stand and chemically-resistant work surface. Location and Air Current Requirements The Purifier Filtered PCR Enclosures have been designed to provide particulate free air meeting ISO Class 5 conditions by negating typical cross drafts and turbulence within the opening. -
Page 12: Electrical Requirements
Chapter 2: Prerequisites Out- Average Flow Outflow Exhaust Face Downflow Noise Enclosure Velocity Volume Pressure Velocity Width Model Description (fpm) (CFM) db(A) (fpm) 53-57 2' Filtered PCR Enclosure 58-60 60-61 62-63 3' Filtered PCR Enclosure 58-60 60-62 61-63 63-54 4' Filtered PCR Enclosure 60-62 62-64 66-69... -
Page 13: Chapter 3: Getting Started
Now that the site for your Filtered PCR Enclosure is properly prepared, you are ready to unpack, inspect, install, and validate your enclosure. Read this chapter to learn how to: Unpack and move the enclosure. Set up the enclosure with the proper supporting structure and work surface. -
Page 14: Unpacking Your Enclosure
(15) days of delivery. DO NOT RETURN GOODS WITHOUT THE PRIOR AUTHORIZATION OF LABCONCO. UNAUTHORIZED RETURNS WILL NOT BE ACCEPTED. IF ENCLOSURE WAS DAMAGED IN TRANSIT, YOU MUST FILE A CLAIM DIRECTLY WITH THE FREIGHT CARRIER. - Page 15 Chapter 3: Getting Started to properly support it. The front of the enclosure should be aligned within 0.30" (8mm) of the front of the work surface. Mounting holes are provided in the Labconco accessory work surfaces to secure the enclosure. Work Surface Specifications The work surface should be smooth, rigid and durable, such as a chemical-resistant epoxy resin.
- Page 16 Chapter 3: Getting Started Figure 3-1 Filtered PCR Enclosure Installation Product Service 1-800-522-7658...
-
Page 17: Verifying Hepa Filter Integrity
The HEPA filter is shipped installed with the gasket on the HEPA downstream side. The HEPA filter is leak checked at Labconco. A second leak check is recommended before using the enclosure and at least annually thereafter. Consult your Safety Officer and Chapter 6 for the HEPA Filter Leak Test. -
Page 18: Setting The Downflow Velocity With Speed Control
Validation should be completed by a certified technician. The Purifier Filtered PCR Enclosures have been tested at Labconco before shipment and provide ISO Class 5 clean air conditions inside the enclosure. Labconco also performed extensive performance testing to validate the Filtered PCR’s for product protection under ISO Class 5 conditions. -
Page 19: Sealing The Filtered Pcr Enclosure To The Work Surface
Chapter 3: Getting Started Sealing the Filtered PCR Enclosure to the Work Surface When the Filtered PCR Enclosure has been set in place and wired, it may be sealed at the work surface to prevent materials from collecting under the walls. A bead of silicone sealant is recommended to seal the Filtered PCR Enclosure to the work surface. - Page 20 The Purifier Filtered PCR Enclosure is designed to provide particulate free protection from airborne matter. During operation, room air is drawn from the top and filtered by the HEPA filter providing Class 5 conditions inside the enclosure. The Purifier Filtered PCR Enclosure delivers Class 5 air conditions when operating at downflow velocities of 30 to 65 feet per minute.
-
Page 21: Chapter 4: Performance Features And Safety Precautions
Chapter 4: Performance Features and Safety Precautions Located Behind Located Behind Control Panel Figure 4-1... - Page 22 Chapter 4: Performance Features and Safety Precautions Airflow Switch with Adjustment Screw UV Light (Not Shown) 16, (Not Shown) Figure 4-2 Filtered PCR Enclosure Airflow Diagram...
- Page 23 Chapter 4: Performance Features and Safety Precautions Figure 4-3 UV Sash Closure...
- Page 24 Chapter 4: Performance Features and Safety Precautions 1. Aerodynamic Lower Air Foil allows air to sweep the work surface and promote ISO Class 5 air conditions inside the enclosure. See Figure 4-1. 2. Ergonomic Slope of 10 degrees provides maximum visibility and comfort, reduces glare, thereby minimizing operator fatigue.
-
Page 25: Safety Precautions
Chapter 4: Performance Features and Safety Precautions 11. Filter Clamping Bolt evenly seals the HEPA filter to the frame of the enclosure. See Figure 4-1 and 4-2. 12. Control Panel. The control panel, which is located above the sash, contains the filter pressure gauge, control switches and the electronics. - Page 26 Chapter 4: Performance Features and Safety Precautions sure that the blower is operating and periodically ensure that air is flowing through the enclosure at its specified downflow velocity of 30 to 65 fpm. The use of an airflow monitor is recommended to alert the user to a problem with airflow.
- Page 27 HEPA filter during maintenance. If you suspect that a HEPA filter has been damaged DO NOT use the enclosure; contact a local certification agency or Labconco. 16. The HEPA filter will gradually accumulate airborne particulate matter from the room. The rate of accumulation will depend upon the cleanliness of the room air, and the amount of time the enclosure is operating.
-
Page 28: Routine Daily Work Procedures
Now that the installation of your Filtered PCR Enclosure is completed, you are ready to use it. Read this chapter to learn about: 1. Routine Daily Work Procedures. 2. Suitable Applications. 3. Appropriate HEPA Filter Applications, Suitability and Guidelines. Routine Daily Work Procedures Planning Arrange for minimal disruptions, such as room traffic or entry into the room while the enclosure is in use. -
Page 29: Suitable Applications
Chapter 5: Using Your Filtered PCR Enclosure and Appropriate Application Wear a long sleeved lab coat, rubber gloves and use protective eyewear. Wear a protective mask if appropriate. Consult your Safety Officer for additional personal protective equipment recommendations. Wipe down interior surfaces with a mild household detergent or disinfectant. -
Page 30: Hepa Filter Applications, Suitability & Guidelines
Chapter 5: Using Your Filtered PCR Enclosure and Appropriate Application Listed below are suitable applications for HEPA filters. HEPA Filter Applications, Suitability and Guidelines Procedures traditionally performed on an open bench where a clean Class 5 air environment is now required. The HEPA filtered enclosure provides product protection from particulate matter. - Page 31 Monitoring airflow and changing the filters is the primary maintenance required. Certification and recertification is also reviewed in Chapter 6. Review this chapter on maintenance for the following: 1. Routine Maintenance. 2. Determination of when to replace the HEPA filters. 3.
-
Page 32: Chapter 6 Maintaining Your Filtered Pcr Enclosure
Chapter 6: Maintaining Your Filtered PCR Enclosure Routine Maintenance Schedule Weekly Wipe down the interior surfaces of the enclosure with a disinfectant or cleaner, depending upon the usage of the unit and allow to dry. Using a damp cloth, clean the exterior surfaces of the enclosure, particularly the front and top to remove any accumulated dust. -
Page 33: How To Install A New Hepa Filter
Chapter 6: Maintaining Your Filtered PCR Enclosure when downflow velocity drops below the recommended 30-65 fpm velocity and the speed control is adjusted to full speed. Replace HEPA filter if it fails the HEPA Filter Leak Test in Chapter 6. How to Install a New HEPA Filter NOTE: Only a qualified certifier should service the HEPA filter. - Page 34 Chapter 6: Maintaining Your Filtered PCR Enclosure Prefilter HEPA Filter Sealing Surface HEPA Filter Filter Clamp Bolt Gasket Side Down as Shown Gasket Front Panel Speed Control Adjustment Screw Figure 6-1 HEPA Filter Changing Diagram & Filter Leak Test Diagram...
-
Page 35: Hepa Filter Leak Test
Chapter 6: Maintaining Your Filtered PCR Enclosure HEPA Filter Leak Test HEPA Purpose After installing the new HEPA filter, the HEPA filter should be leak checked. This test is performed to determine the integrity of the HEPA filter, the filter housing, and the filter seal. Leak testing must be done by a qualified technician with calibrated equipment. - Page 36 Chapter 6: Maintaining Your Filtered PCR Enclosure 4. Using the “^” or “ν” keypads, respectively, increase or decrease the numerical value until it equals 30 (2'), 20 (3'). 15 (4') for the Purifier Filtered PCR enclosure at 55 fpm downflow velocity. 5.
-
Page 37: Setting The Downflow Velocity With The Speed Control Adjustment
Optional Guardian Airflow Monitor Options Refer to Figure 6-2 for operation and calibration. Labconco Airflow Monitor / Airflow Switch Operation The Guardian Airflow Monitor consists of a circuit board and an airflow switch. This switch indicates airflow as safe or low. It... - Page 38 Night Setback allows an external signal to prevent a “low” airflow alarm from occurring (not any different from Alarm Disable above other than the terminology.) Contact Labconco for ordering information on this special PCB. Calibration 1. Ensure the flow switch and alarm circuit board are installed and operational.
- Page 39 Chapter 6: Maintaining Your Filtered PCR Enclosure 6. Over time the HEPA filter will load and eventually slow the downflow velocity. Once the alarm condition is met, simply increase the speed control as outlined in Chapter 6 or replace the HEPA filter if the speed control is maximized.
- Page 40 Chapter 6: Maintaining Your Filtered PCR Enclosure Speed Control Light Reflector Airflow Monitor LED Circuit Board Airflow Switch with Adjustment Screw Control Panel Green “Safe” LED Red “Alert” LED Silence Alarm Button with Audible Alarm with Test/Reset Figure 6-2 Guardian Airflow Monitor with Airflow Switch...
-
Page 41: Initial Certification
Chapter 6: Maintaining Your Filtered PCR Enclosure Initial Certification The Purifier Filtered PCR Enclosure has been certified at the factory for an average downflow velocity of 55±10 fpm along with the HEPA Filter Leak Test. The Purifier Filtered PCR Enclosures should be certified for the proper downflow velocity required by your Safety Officer. -
Page 42: Uv Light Replacement
Chapter 6: Maintaining Your Filtered PCR Enclosure UV Light Replacement 1. Disconnect the power. 2. Locate the UV lamp located inside the enclosure. 3. Rotate and remove the old UV lamp. 4. Reinstall the new UV lamp. 5. Power the unit up and try the new UV lamp. Motorized Impeller Replacement The motorized impeller must be replaced as a complete unit. - Page 43 Chapter 6: Maintaining Your Filtered PCR Enclosure 2' Model HEPA Filter Mounting Screws for Motorized Impeller Motorized Impeller Capacitor Mounted here on Electrical Subassembly located behind the Control Wire Access Panel Hole Impeller Mounting Bracket Hardware Front Panel Motorized Impellers Wire Access Holes 3' or 4' Models...
-
Page 44: Speed Control Replacement
Chapter 6: Maintaining Your Filtered PCR Enclosure Speed Control Replacement 1. Remove the bracket that the speed control is attached to. See Figures 6-1, and 6-2. 2. Remove the two screws holding the speed control using a Phillips screwdriver. Refer to Appendix A for Replacement Parts Diagram. -
Page 45: Filtered Pcr Enclosure
There are several ways to accessorize and modify the Filtered PCR Enclosure for your individual requirements. These include the addition of accessory work surfaces, airflow monitors, filters, and storage cabinets or stands. 1. Work Surfaces An optional dished work surface is available to attach to the Filtered PCR Enclosure. -
Page 46: Chapter 7 Accessorizing & Modifying Your Filtered Pcr Enclosure
Chapter 7: Accessorizing and Modifying Your Filtered PCR Enclosure 2. Guardian™ Airflow Monitor The Guardian Airflow Monitor allows you to continuously monitor airflow through the enclosure. The Guardian monitor can be placed on any Purifier Filtered PCR Enclosure. Description Order Part #’s Individual Parts Required Guardian Airflow Monitor 115V or 230V... - Page 47 Chapter 7: Accessorizing and Modifying Your Filtered PCR Enclosure 4. Storage Cabinets and Stands SOLVENT ACID Size/Description Dual Doors Right Hinge Left Hinge Dual Doors Right Hinge Left Hinge 48" 9902000 9901000 36" 9902100 9901100 30" 9902200 9901200 24" 9902300 9902400 9901300 9901500...
- Page 48 Refer to the following table if your Filtered PCR Enclosure fails to operate properly. If the suggested corrective actions do not solve your problem, contact Labconco for additional assistance. PROBLEM CAUSE CORRECTIVE ACTION Class 100 (ISO Class Improper user See “Certifying the Enclosure” Chapter...
-
Page 49: Chapter 8 Troubleshooting & Servicer
Chapter 8: Troubleshooting PROBLEM CAUSE CORRECTIVE ACTION Blower won’t Circuit breaker(s) Reset circuit breaker. operate. or Ground Fault Interrupter. Blower wiring is Inspect blower wiring. disconnected. Blower switch is Replace switch. defective. Motorized impeller Replace motorized impeller or blower. or blower is See Chapter 6. - Page 50 Chapter 8: Troubleshooting PROBLEM CAUSE CORRECTIVE ACTION Airflow Monitor Wrong alarm set Airflow monitor was not properly Malfunction point. adjusted. Repeat calibration steps (Continued) outlined in this manual in Chapter 6. Constant audible Check airflow and calibration of alarm. airflow monitor. See Chapter 6. Continuous alarm.
- Page 51 Chapter 8: Troubleshooting Service Operating Record Log Customer Name Model Number Date Installed Serial Number Unit Location Date Comments...
- Page 52 The components that are available for your Filtered PCR Enclosure are listed. The parts shown are the most commonly requested. If other parts are required, please contact Product Service.
- Page 53 Appendix A: Replacement Parts Item Qty. Part Number Description 3911000 Glass, Side 3911900 Glass, Sash 2' 3911901 Glass, Sash 3' 3911902 Glass, Sash 4' 3938900 Sash Assembly, 2' 3938901 Sash Assembly, 3' 3938902 Sash Assembly, 4' 3905600 Lower Air Foil, 2' 3905601 Lower Air Foil, 3' 3905602...
- Page 54 Appendix A: Replacement Parts Item Qty. Part Number Description 3937900 Wiring Harness Main, 115V, 2' 3937901 Wiring Harness Main, 230V, 2' 3938000 Wiring Harness Main, 3' and 4' 115V 3938000 Wiring Harness Main, 3' and 4' 230V 3811500 Guardian Airflow Monitor Printed Circuit Board 1885405 Screw Mach #6-32 x .31 PH Phil.
- Page 55 Appendix A: Replacement Parts Item Qty. Part Number Description 1893712 Screw, #10 x .75 PH Phil. Thd. Forming 1881196 Capscrew, 3/8 –16 x 6.0 Lg. Hx. Hd. 1911018 Washer, Flat 3/8 1906925 Nut, Hex 3/8 Nylon Lock 3707900 HEPA Filter (2') 18 x 18 x 3.32 w/ Gasket 3707901 HEPA Filter (3') 30 x 18 x 3.32 w/ Gasket 3707902...
- Page 56 Appendix A: Replacement Parts Fluorescent 35, 36 Shown 8, UV Light Timer Located Behind Control Panel 12, Not Shown Figure A-1 Replacement Parts, Purifier Filtered PCR...
-
Page 57: Appendix B: Dimensions
See the following dimensions for the Purifier Filtered PCR Enclosures. - Page 58 Appendix B: Dimensions and Exhaust Options Figure B-1 Purifier Filtered PCR Enclosure...
-
Page 59: Appendix C: Filtered Pcr Enclosure Specifications
This Appendix contains technical information about all Purifier Filtered PCR Enclosures including electrical specifications, environmental operating conditions and wiring diagrams. 5 Amps, 115V, 60 Hz or 3 Amps, 230V, 50/60 Hz, Purifier Filtered PCR Enclosure. Environmental Conditions Indoor use only. Maximum altitude: 6562 feet (2000 meters). - Page 60 Appendix C: Filtered Enclosure Specifications...
- Page 61 Appendix C: Filtered Enclosure Specifications...
- Page 62 Appendix C: Filtered Enclosure Specifications...
- Page 63 Appendix C: Filtered Enclosure Specifications...
-
Page 64: Appendix D: References
Many excellent reference texts and booklets are currently available. The following is a brief listing: Bryan, D., and R.C. Marback. 1984. Laminar-airflow equipment certification: What the Pharmacist needs to Know. American Journal of Hospital Pharmacy. 41.1343- 1348. General Services Administration. 1988. FED-STD-209E Federal Standard –... - Page 66 For more information, please contact us: ExpotechUSA 10700 Rockley Road Houston, Texas 77099 281-496-0900 [voice] 281-496-0400 [fax] E-mail: sales@expotechusa.com Website: www.ExpotechUSA.com...
Need help?
Do you have a question about the 3970202 and is the answer not in the manual?
Questions and answers