Table of Contents
Advertisement
It is of vital importance, before attempting to operate
your engine, to read the general 'SAFETY
INSTRUCTIONS AND WARNINGS' section on pages
2-6 of this booklet and to strictly adhere to the advice
contained therein.
Also, please study the entire contents of this
instruction manual, so as to familiarize yourself
with the controls and other features of the engine.
Keep these instructions in a safe place so that you
may readily refer to them whenever necessary.
It is suggested that any instructions supplied with
the aircraft, radio control equipment, etc., are
accessible for checking at the same time.
2-6
7
8
9
10-13
14-16
ENGINE EXPLODED VIEW & PARTS LIST
17-18
19
20
21
MEMO
1
CONTENTS
22-23
24-26
27-28
29-30
31-33
34-35
36-37
38
39
40
Advertisement
Table of Contents

Subscribe to Our Youtube Channel
Related Manuals for O.S. engine FSA-72


Summary of Contents for O.S. engine FSA-72
-
Page 1: Table Of Contents
It is of vital importance, before attempting to operate your engine, to read the general 'SAFETY INSTRUCTIONS AND WARNINGS' section on pages 2-6 of this booklet and to strictly adhere to the advice contained therein. Also, please study the entire contents of this instruction manual, so as to familiarize yourself with the controls and other features of the engine. -
Page 2: Safety Instructions And Warnings About Your O.s. Engine
SAFETY INSTRUCTIONS AND WARNINGS ABOUT YOUR O.S. ENGINE Remember that your engine is not a "toy", but a highly efficient internal- combustion machine whose power is capable of harming you, or others, if it is misused. As owner, you, alone, are responsible for the safe operation of your engine, so act with discretion and care at all times. - Page 3 NOTES This engine was designed for model If you remove the glowplug from the engine aircraft. Do not attempt to use it for any and check its condition by connecting the other purpose. battery leads to it, do not hold the plug with bare fingers.Use an appropriate tool or a Mount the engine in your model securely, folded piece of cloth.
-
Page 4: Notes When Applying An Electtric Starter
NOTES Adjust the throttle linkage so that the engine For their safety, keep all onlookers stops when the throttle stick and trim lever (especially small children) well back (at on the transmitter are fully retarded. least 20 feet or 6 meters) when preparing Alternatively, the engine may be stopped by your model for flight. -
Page 5: About The Engine
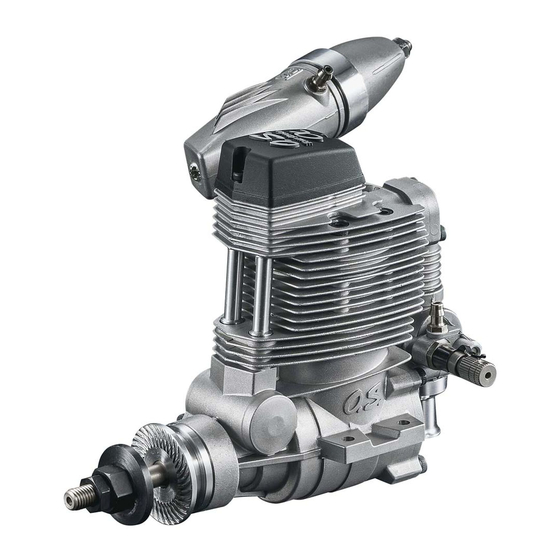
ABOUT THE ENGINE This is the fourth model from the new FS series of the single cylinder overhead valve STANDARD ACCESSORIES four cycle engines. It features a sharp and modern look and Glowplug TypeF broad power band to suit a variety of model types. -
Page 6: Before Starting
BEFORE STARTING Tools, accessories, etc. The following items Warning: are necessary for operating the engine. Make sure that the propeller is well balanced. An unbalanced propeller and/or Propellers spinner can cause serious vibration which may weaken parts of the airframe or affect The choice of propeller depends on the design the safety of the radio-controlled system. - Page 7 Fuel Tank Electric Starter and Electric Starter Starter Battery A fuel tank of approximately 220cc capacity is suggested. Required when starting This allows around 12 minutes flying time, the engine. 12-Volt lead-acid battery dependent upon the type of fuel used, the size of propeller and on the amount of full-throttle to O.S.
-
Page 8: Installation
INSTALLATION It is suggested to use as heavy and rigid as possible engine mounting for highest performance and safe running. Conventional wooden mounting beams should be of rigid hardwood and of at least 15mm or 5/8-in square section. Use at least 3mm steel screws, such as Allen type, with locknuts, for bolting the engine to the bearers.. -
Page 9: Installing Silencer
THROTTLE LINKAGE NEEDLE-VALVE EXTENSION The needle-valve supplied with this engine is Before connecting the throttle to its servo, designed to incorporate an extension so that, make sure that the throttle arm and linkage when the engine is enclosed within the safely clear any adjacent part of the airframe fuselage, the needle-valve may be adjusted structure, etc., as the throttle is opened and... -
Page 10: Fuel Tank & Lines
The exhaust outlet of the silencer can be rotated to any desired position in the following manner: Assembly screw Loosen the locknut and assembly screw. Set the exhaust outlet at the required posi- Exhaust pressure nipple tion by rotating the rear part of the silencer. Re-tighten the assembly screw, followed by the locknut. -
Page 11: Propeller
PROPELLER There is a risk, particularly with powerful four- stroke engines, of the propeller flying off if the prop loosens detonation Propeller washer ("knocking") in the combustion chamber when the engine is operated too lean, or under an excessively heavy load. Locknut Propeller nut Obviously, this can be very hazardous. -
Page 12: Mixture Controls
MIXTURE CONTROLS RELOCATION OF CARBURETOR CONTROLS The carburetor can be turned 180 reverse the needle-valve and throttle lever position. Intake Manifold Retaining Screw Remove the intake manifold retaining screws and carburetor retaining screws. Rotate the intake manifold 180 gently without removing the carburetor from the intake manifold. -
Page 13: Starting
STARTING The FS -72 is not equipped with manual Element glows when energized. choke controls, as it is intended for use Pliers with an electric starter only. A high-torque electric starter not only makes starting the engine easier, it dispenses with the need for a choke valve by turning the engine over fast enough to Replace the plug when the element does not glow or is... -
Page 14: Running-In ("Breaking-In")
Now disconnect current to the glowplug and Make sure that the gradually close the needle-valve so that the direction or rotation rpm increases. is correct. Make adjustments to the needle in small steps. Abrupt changes at this stage are likely to cause the engine to stall. -
Page 15: Idle Mixture Adjustment
WARNING: With each successive flight, close the When ground running the engine, avoid needle-valve very slightly until, at the end of dusty or sandy locations. If dust or grit is about 10 flights, the needle is set for full drawn into the engine, this can have a power. -
Page 16: Care And Maintenance
CARBURETOR CARE & MAINTENANCE REALIGNMENT OF MIXTURE CONTROL VALVE In the course of making carburetor If you experience difficulty in obtaining a adjustments, it is just possible that the consistent mixture setting it could be due to Mixture Control Valve may be inadvertently foreign debris in the carburetor. - Page 17 Install an in-line fuel filter between the tank Do not close the needle-valve and mixture and carburetor to prevent dirt and foreign in control valve too far as this will cause a lean the tank from entering the carburetor. setting and over heating of the engine. This can, in turn, create nitromethane oxide Clean these filters periodically.
-
Page 19: Carburetor Exploded Views
CARBURETOR EXPLODED VIEW S.M3X3 N.+M3x22 S.M3x3 10-1 Type of screw C...Cap Screw M...Oval Fillister-Head Screw N.+M3x6 F...Flat Head Screw N...Round Head Screw S...Set Screw CARBURETOR PARTS LIST Code No. Description 44881970 Needle Assembly 24981837 "O" Ring (2pcs.) 26381501 Set Screw 27381940 Needle Valve Holder Assembly 26711305... -
Page 20: O.s. Genuine Parts & Accessories
O.S. GENUINE PARTS & ACCESSORIES RADIAL MOTOR MOUNT BOOSTER IN-COWL EXHAUST HEADER PIPE TERMINAL KIT (71905010) (72200130) M11 IN-COWL HEADER PIPE PROPELLER LOCKNUT SIDE 60D (72109680) SET FOR SPINNER 1/4"-M4 M11 IN-COWL HEADER PIPE (45810200) INVERTED 80D (72109690) 1/4"-M5 (45810300) Needle Valve NON-BUBBLE VALVE ADJUSTING... - Page 21 6-15 3-Chome Imagawa Higashisumiyoshi-ku Osaka 546-0003, Japan TEL. (06) 6702-0225 URL : http://www.os-engines.co.jp FAX. (06) 6704-2722 Copyright 2008 by O.S.Engines Mfg. Co., Ltd. All rights reserved. Printed in Japan. 60092140 110901...
Need help?
Do you have a question about the FSA-72 and is the answer not in the manual?
Questions and answers