Table of Contents
Advertisement
Advertisement
Table of Contents

Subscribe to Our Youtube Channel
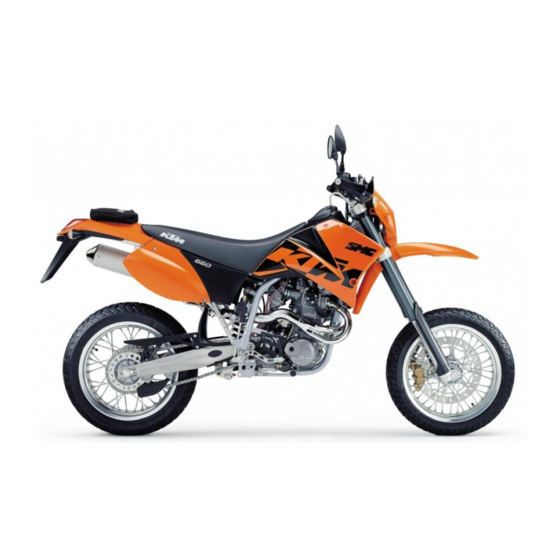
Related Manuals for KTM 660 SMC 2003


Summary of Contents for KTM 660 SMC 2003
- Page 2 (b) the use of the vehicle after such device or element of design has been removed or rendered inoperative by any person. KTM S PORTMOTORCYCLE RESERVES THE RIGHT TO MODIFY ANY EQUIPMENT...
- Page 3 If maintenance work should become necessary during a competition it should be performed by a trained mechanic. KTM strongly recommends that all service work to your KTM should be performed by a qualified KTM dealer.
-
Page 4: Limited Guarantee Information
IMPORTANT LIMITED WARRANTY AND LIMITED GUARANTEE INFORMATION The KTM 660 SMC is designed and constructed to resist the usual wear and tear of normal use in competitions. The motorcycles comply with the regulations and categories currently in effect with the leading international motorcycle associations. -
Page 5: Table Of Contents
Correct chain tension............25 Chain maintenance............25 TECHNICAL SPECIFICATIONS - ENGINE ......46 Chain wear..............25 General informations about KTM disc brakes....26 TECHNICAL SPECIFICATIONS - CHASSIS......48 Adjusting of free travel at the hand brake lever ....27 Checking brake fluid level - front brake ......27 HEAD WORD INDEX ............50... -
Page 6: Serial Number Locations
SERIAL NUMBER LOCATIONS Chassis number The chassis number is stamped on the right side of the steering head tube. Write this number into the relevant area on page 1. Engine number, engine type The engine number and engine type are stamped on the right hand side of the engine below the chain sprocket. -
Page 7: Indicator Lamps
The operating hour counter starts to count as soon as you start the engine. The displayed figure cannot be cleared. Service intervals are indicated in operating hours for some KTM offroad motorcycles, making the operating hour counter a very practical function. -
Page 8: Tripmaster Switch
Tripmaster switch – The switch has 3 buttons: MODE, + (plus) and – (minus). The switch can also be mounted on the outer end of the handlebar with a clamp (SP.NO. 583.14.069.350). WARNING O NOT TRY TO CHANGE THE MODE OR READ THE SETTINGS WHILE DRIVING ATTENTION WILL BE DISTRACTED FROM THE TRAFFIC WHICH CAN EASILY LEAD TO AN MODE ACCIDENT... - Page 9 The operating hour counter starts to count as soon as you start the engine. The displayed figure cannot be cleared. Service intervals are indicated in operating hours for some KTM offroad motorcycles, making the operating hour counter a very practical function.
- Page 10 SPEED/TRP2 (trip 2) display mode The TRP2 trip meter is always active and counts to 999.9. Contrary to TRP1, the displayed figure can be changed using the + and – buttons. This is a very useful function for trips taken according to a roadbook. TRP2 is activated by the first impulse received from the wheel sensor and stops automatically 3 seconds after the last impulse is received.
-
Page 11: Overview Of Tripmaster Functions
OVERVIEW OF TRIPMASTER FUNCTIONS – Display Press Press Press MODE Hold MODE for 3 sec no function no function SPEED / ODO no function next display mode no function resets MAX to 0 SPEED / MAX no function next display mode starts / stops LAP clears all LAP figures SPEED / LAP... -
Page 12: Combination Switch
Combination switch The light switch has 3 switch positions. = Light off = Low beam light = High beam light The red short circuit button serves to switch off the engine. Leave the switch pressed, until the engine stops. With the button the horn will sound. -
Page 13: Hot Start Device
Hot start device If you pull the hot start device out as far as possible, a bore in the carburetor will be opened through which the engine may take in additional air. The result is a „lean“ fuel-air mixture of the type needed for hot starts. To deactivate the hot start device, push the hot start button back into its basic position. -
Page 14: Compression Damping Of Fork
Compression damping of fork The compression damping is to be set at the lower end of the fork tubes. It only regulates the degree of damping during compression. Remove closing . By using the knob (COM), the degree of damping of the compression can be adjusted. -
Page 15: General Tips And Warnings For Starting The Motorcycle
GENERAL TIPS AND WARNINGS FOR STARTING THE MOTORCYCLE Instructions for initial operation WARNING – Verify that your KTM dealer performed the PREPARATION – W EAR SUITABLE CLOTHING WHEN DRIVING A MOTORCYCLE LEVER OF VEHICLE jobs (see Customer Service Manual). DRIVERS ALWAYS WEAR A HELMET... -
Page 16: Driving Instructions
If the level of brake fluid falls below the minimum value, this indicates a leak in the braking system or completely worn out brake pads. Arrange for the braking system to be checked by a KTM specialist, as complete failure of the braking system can be avoided. - Page 17 Starting when the engine is cold 1 Open the fuel tap 2 Swing up the side stand 3 Put the gear in neutral 4 Operate the choke 5 Go to the left of your motorbike. DO NOT open the throttle, and briskly kick the kickstarter ALL THE WAY.
-
Page 18: Stopping And Parking
WARNING CAUTION – A – C VOID ABRUPT LOAD CHANGES WHILE RIDING AROUND BENDS AND LOSE THE FUEL TAP WHEN LEAVING YOUR VEHICLE THERWISE THE ON WET OR SLIPPERY GROUND THERWISE YOU MIGHT EASILY LOSE CARBURETTOR CAN FLOOD AND FUEL WILL ENTER THE ENGINE –... -
Page 19: Periodic Maintenance-Schedule
PERIODIC MAINTENANCE SCHEDULE 2003 660 SMC 1. Service after after / every after / every 1000 km 2500 km 5000 km A washed motorcycle can be checked more quickly which saves money! 10 hours 25 hours once a year Change engine oil, oil filter, and micro-filter Clean oil screens and magnet of drain plug Check oil lines for damage and kink-less arrangement Check and adjust spark plug, replace every 10,000 km... - Page 20 VITAL CHECKS AND CARE PROCEDURES TO BE CONDUCTED BY THE OWNER OR THE MECHANIC before each after every for cross once a year start cleaning country use Check oil level Check brake fluid level Check brake pads for wear Check lighting system for proper operation Check horn for proper operation Lubricate and adjust actuating cables and nipples Bleed fork legs in regular intervals...
-
Page 21: Maintenance Work On Chassis And Engine
WARNING ALL MAINTENANCE AND ADJUSTEMENT OPERATIONS THAT ARE MARKED WITH A * REQUIRE SPECIALIST KNOWLEDGE. FOR YOUR OWN SECURITY, LET THESE TASKS BE CARRIED OUT BY A KTM-DEALER. AT KTM YOUR MOTORCYCLE WILL RECIEVE OPTIMAL SERVICING BY SPECIALLY TRAINED MECHANICS. -
Page 22: Check And Adjust Steering Head Bearing
Check and adjust steering head bearing * Check steering head bearing for play periodically. To check this put motorcycle on a stand so that the front wheel is off the ground. Now try to move the fork forward and backward. To adjust, loosen the five pinch bolts of the top triple clamp and turn steering stem bolt clockwise... -
Page 23: Basic Suspension Setup For The Weight Of The Driver
At delivery, KTM's offroad motorcycles are set to accommodate a driver weighing 70 - 80 kg (wearing full protective clothing). If your weight exceeds or falls short of this range, you will need to adjust the basic setup for the suspension components accordingly. - Page 24 The standard spring is shown in bold print. The type number of the telescopic fork is embossed on the caps on the top of the telescopic fork. If you are uncertain which spring to use, contact your KTM workshop. 4,6 N/mm...
-
Page 25: Changing The Spring Preloading Of The Shock Absorber
Changing the spring preloading of the shock absorber KTM sets the shock absorber for a driver with a weight of approximately 75 kg (165 lb). If the weight of the driver is more or less than 75 kg (165 lb), you should change the spring preloading accordingly. -
Page 26: Correct Chain Tension
Correct chain tension Loosen collar nut , loosen lock nuts , and turn right and left adjusting screws equally far. Tighten lock nuts Before tightening the collar nut, verify that the chain adjusters sitting close to the adjusting screws and that the rear wheel has been aligned with the front wheel. -
Page 27: General Informations About Ktm Disc Brakes
BRAKE FLUID: KTM fills the brake systems with „Motorex Brake Fluid DOT 5.1“ brake fluid, one of the best brake fluids that is currently available. We recommend that you continue to use it. DOT 5.1 brake fluid is based on glycol ether and of an amber color. -
Page 28: Adjusting Of Free Travel At The Hand Brake Lever
Adjusting of free travel at the hand brake lever Free travel at the hand brake lever may be readjusted by using adjustment screw . In this way, the position of the point of pressure (i.e., the resistance you feel on the hand brake lever when the brake pads are pressed against the brake disc) can be adjusted for any hand size. -
Page 29: Replacing Front Brake Pads
Replacing front brake pads * Remove the retainer , pull out the bolt and detach the locating spring Carefully press against the brake pads with a screwdriver to move the brake pistons into their basic position. Remove the brake pads from the brake caliper and clean the brake caliper with compressed air. -
Page 30: Changing The Basic Position Of The Brake Pedal
Changing the basic position of the brake pedal * The basic setting of the foot brake pedal can be changed by turning the end stop roller . Using the push rod , the free play on the foot brake pedal must be set. -
Page 31: Dismounting And Mounting The Front Wheel
Dismounting and mounting the front wheel To remove the front wheel, jack the motorcycle up on its frame so that the front wheel no longer touches the ground. To remove the front brake caliper, remove both screws and pull the caliper backwards from the brake disc. -
Page 32: Tires-Air Pressure
(see photo). A clear tone must be the result. Dull tones are indicators of loose spokes. If necessary, have the spokes retightened and the wheel centered by a KTM dealer. WARNING –... -
Page 33: Kilometers Or Miles
Kilometers or miles The unit (kilometers or miles) can also be changed. The ODO figure will be retained and converted accordingly. The TRP1, AVS1, STP1, TRP2 and AVS2 figures will be cleared. To select the unit, select the SPEED/H mode and hold the MODE button for 3 seconds to access the SETUP menu. -
Page 34: Replacing Headlight Lamp/Parking Light Lamp
Replacing headlight lamp/parking light lamp Loosen both rubber bands and tilt headlight mask to the front. Pull the parking light lamp with holder carefully out of the reflector. Pull connector off the headlamp and remove rubber cap . Disengage retaining clip and take bulb out of reflector. When changing the parking- light lamp, simply pull it out of the holder. -
Page 35: Cooling System
Cooling system Coolant is circulated by a water pump located in the engine. When the engine is cold the coolant circulates only through the cylinder and the cylinder head. After the engine has reached its operating temperature (about 70°C, 158°F), the thermostat opens and the coolant is also pumped through both aluminum radiators. -
Page 36: Cleaning Air Filter
To replace the rear glass fiber yarn pack, drill the rivets open and remove the rear cap NOTE: Always renew the O-rings Glass fiber yarn packs are available in your KTM store. WARNING HE EXHAUST SYSTEM BECOMES VERY HOT WHILE THE MOTORCYCLE IS RUNNING AVOID BURNS... -
Page 37: Adjusting The Throttle Cable
Adjusting the throttle cable * The throttle grip should always provide for a backlash of 3-5 mm 3-5 mm (0,12-0,20 in). Besides, with the engine running, the idling speed must not change if you turn the handlebar all the way to the left or right. To adjust the throttle cables, dismount the seat and the tank together with spoilers. -
Page 38: Checking The Oil Level Of The Hydraulic Clutch
SAE 10 hydraulic oil. Refill oil until oil is discharged from the bore the master cylinder in a bubble-free state. Make sure that the oil does not overflow. The bleeder syringe can be purchased from your KTM dealer. Having completed the bleeding procedure, you have to verify that the oil level in the master cylinder is correct.If necessary, fill up with... -
Page 39: Carburetor - Adjust Idling
CARBURETOR – Adjust idling (Keihin-FCRMX 41) * Idling adjustment of the carburetor strongly affects the engine’s starting behavior. That is, an engine whose idling speed is adjusted correctly will be easier to start than one whose idling speed has not been adjusted correctly. The idle speed is controlled by means of the adjusting wheel and the mixture control screw... -
Page 40: Engine Oil
Engine oil API: SG, SH Only use synthetic high-quality oils (Motorex Power Synt 4T) meeting or surpassing the quality requirements of API classes SG, or SH (for TEMPERATUR specifications see containers). – 0°C CAUTION 32°F NSUFFICIENT OIL OR POOR QUALITY OIL RESULTS IN PREMATURE WEAR OF THE ENGINE 10W 40 15W 40 10W 50... -
Page 41: Changing The Engine Oil
Changing the engine oil * The engine oil change is to be carried out when the engine is still warm. WARNING N ENGINE HAVING BEEN RUN WARM AND THE ENGINE OIL IN IT ARE VERY HOT NOT BURN YOURSELF Place the motorbike on a horizontal surface. Remove the plugs ( and drain oil into a container. -
Page 42: Changing Oil Filter
Changing oil filter * Replace the oil filter when changing the engine oil. Press the foot brake pedal and place a screwdriver or similar between foot brake pedal and stopper roll so that the oil filter cover is more accessible. Remove banjo bolt and the three screws. -
Page 43: Trouble Shooting
We would like to point out that many operations cannot be performed by oneself. In case of uncertainty, please contact a KTM-dealer. - Page 44 TROUBLE CAUSE REMEDY Engine does not rev high Loose carburetor jets Tighten jets Electronical ignition timing faulty Have ignition system checked Engine will not reach full Fuel supply partically interrupted or Clean and check fuel system as well as carburetor power carburetor dirty float is not tight...
-
Page 45: Cleaning
CLEANING Clean your motorcycle regularly in order to maintain the beauty of its plastic surfaces. The best manner would be to use warm water that has been mixed with a normal trade washing detergent and a sponge. The hard dirt can be removed before with the help of a soft water jet. CAUTION EVER CLEAN YOUR MOTORCYCLE WITH A HIGH PRESSURED CLEANER OR A HIGH... -
Page 47: Technical Specifications - Engine
TECHNICAL SPECIFICATIONS – ENGINE 660 SMC 2003 Engine 660 SMC Design Liquid-cooled single cylinder 4-stroke engine with balancer shaft Displacement 653 ccm Bore / Stroke 102 / 80 mm Ratio 11,5 : 1 Fuel unleaded premium gasoline with a least RON 95... - Page 48 BASIC CARBURATOR SETTING 660 SMC Type Keihin FCR-MX 41 Carburator-setting number 4138A Main jet Jet needle OBDVT Idling jet Main air jet Idling air jet Needle position 5. rd from top Starting jet Mixture control screw open Slide Performance restrictor Slide stop Stop pump membrane 858 / 2,15 mm...
-
Page 49: Technical Specifications - Chassis
TECHNICAL SPECIFICATIONS - CHASSIS 660 SMC 2003 660 SMC Frame Central chrome-moly-steel frame Fork White Power 4860 MXMA Wheel travel front/rear 265 / 310 mm (10,6 / 12,4 in) Rear suspension Central shock absorber (WP BAVP4681) with PRO-LEVER linkage to rear- swing-arm with needle bearing... - Page 50 TIGHTENING TORQUES - CHASSIS 660 SMC 2003 Collar nut front axle M24x1,5 40 Nm Collar nut rear axle M20x1,5 80 Nm Shock absorber top M10 (10.9) 45 Nm Shock absorber bottom M10 (10.9) 45 Nm Collar screws brake disk front M6 (10.9)
-
Page 51: Head Word Index
Chain wear .................25 Fuel tap ................11 Changing and bleeding the microfilter ........40 General informations about KTM disc brakes ......26 Changing oil filter ...............41 General Tips and warnings for starting the motorcycle ..14 Changing the basic position of the brake pedal ....29 Hand brake lever ..............5... - Page 53 660 SMC 2003...
- Page 54 KTM 660 SMC 2003...
- Page 55 321054...
Need help?
Do you have a question about the 660 SMC 2003 and is the answer not in the manual?
Questions and answers