Advertisement
Advertisement

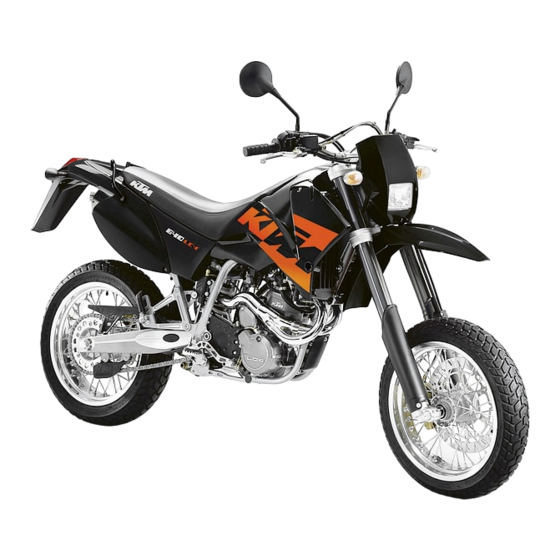
Related Manuals for KTM 400LC4


Summary of Contents for KTM 400LC4
- Page 1 BEDIENUNGSANLEITUNG BEDIENUNGSANLEITUNG 400/640 LC4 400/640 LC4 SUPERMOTO OWNER’S HANDBOOK OWNER’S HANDBOOK ‘99 ‘99 MANUALE D’USO MANUALE D’USO MANUEL D’UTILISA TION MANUEL D’UTILISA TION MANUAL DE INSTRUCCIONES MANUAL DE INSTRUCCIONES . NR. 3.205.60 . NR. 3.205.60 10.98 10.98...
- Page 3 IMPORTANT WE STRONGLY SUGGEST THAT YOU READ THIS MANUAL CAREFULLY AND COMPLETELY BEFORE GOING ON YOUR FIRST RIDE. IT CONTAINS A GREAT DEAL OF INFORMATION AND ADVICE WHICH WILL HELP YOU USE AND HANDLE YOUR BIKE PROPERLY. IN YOUR OWN INTEREST, PLEASE PAY PARTICULAR ATTENTION TO NOTICES THAT ARE MARKED AS FOLLOWS: WARNING IGNORING THESE INSTRUCTIONS, CAN ENDANGER YOUR...
- Page 4 Introduction We would like to congratulate you on your purchase of a KTM motorcycle. You are now owner of a sporty and modern motorcycle which you are bound to have a great time with, provided you care for it properly. This manual will furnish you with important information on how to operate and maintain your new KTM motorcycle.
-
Page 5: Table Of Contents
Chain maintenance............16 Re-initation after time of storage........32 Chain wear..............17 TECHNICAL SPECIFICATIONS - CHASSIS......33 General information on KTM disc brakes ......17 TECHNICAL SPECIFICATIONS - ENGINE ......34 Adjisting of free travel at the hand brake lever ....17 WIRING DIAGRAM..........APPENDIX Checking of brake fluid level - front brake......18... -
Page 6: Serial Number Locations
SERIAL NUMBER LOCATIONS Chassis number The chassis number is stamped on the right side of the steering head tube. Write this number into the relevant area on page 1. Engine number, engine type The engine number and engine type are stamped on the right hand side of the engine below the chain sprocket. -
Page 7: Choke Lever
Choke lever If the choke lever is pulled backwards, a bore will be opened in the carburetor through which the engine may draw in additional fuel. This produces a „rich“ fuel/air mixture necessary for cold start. If the choke lever is pushed forward up to the stop, the bore will be closed again. -
Page 8: Combination Switch
Combination switch The rocker switch LIGHTS actuates the high beam or low beam. = High-beam light = Low-beam light The indicator switch returns to central position after actuation. Press flasher switch towards switch housing to switch off the flasher. The horn is sounded with button The light signal (high beam) is actuated with button Starter tip switch, emergency OFF switch Use the starter tip switch... -
Page 9: Fuel Tap
Fuel tap OFF In this position the fuel tap is closed. No fuel may flow to the carburetor. ON When using the motorcycle, the twist grip must be set to the ON position. Now fuel may flow to carburetor. In this position the tank empties down to the fuel reserve of approx. -
Page 10: Compression Damping Of Fork
Compression damping of fork The compression damping mechanism is built into the left fork tube. It only regulates the degree of damping during compression. By using the knob (COM), the degree of damping of the compression can be adjusted. Turn the knob clockwise to increase damping, turn it counterclockwise to reduce damping during compression. -
Page 11: Driving Instructions
Arrange for the braking system to be checked – Motorcycle ready for operation and tank full by a KTM specialist garage, as complete failure of the – Luggage braking system can be expected. - Page 12 – If this is not the case, refill the tank – if sufficient fuel is in the tank, proceed as described in the „Trouble- shooting“ section or contact a KTM dealer. NOTE: HIS MOTORCYCLE IS EQUIPPED WITH A SAFETY STARTER SYSTEM...
-
Page 13: Starting Off
AND CHECK THE COOLING LIQUID LEVEL – D O NOT DRIVE ON UNTIL THERE IS SUFFICIENT LIQUID IN THE COO KTM’ LING SYSTEM OWEVER CALL ON ONE OF S DEALERS AS SOON AS POSSIBLE IN ORDER TO HAVE THE DEFECT REMEDIED... - Page 14 NOTE REGARDING THE CENTER STAND: We advise the following procedure to place the motorcycle on the center stand as effortlessly as possible: a) press main stand to ground using foot b) swing out kickstarter and pull motorcycle backwards at an angle as illust- rated (see illustration).
-
Page 15: Periodic Maintenance-Schedule
PERIODIC MAINTENANCE SCHEDULE rider dealer 400/640 LC4 ’99 400/640 LC4 ’99 620 LC4 Comp. ’99 Supermoto ‘99 10. 98 IF THE MOTORCYCLE IS USED FOR COMPETITIVE RACING, THE 5000 KM (3000 MILES) SERVICE NEEDS TO BE CARRIED OUT AFTER EVERY RACE Check engine oil level Change engine oil Clean oil screen and magnet of the drain plugs whenever you exchange the engine oil... -
Page 16: Maintenance Work On Chassis And Engine
MAINTENANCE WORK ON CHASSIS AND ENGINE WARNING ALL MAINTENANCE AND ADJUSTEMENT OPERATIONS THAT ARE MARKED WITH A * REQUIRE SPECIALIST KNOW- LEDGE. FOR YOUR OWN SAFETY, LET THESE TASKS BE CARRIED OUT BY A KTM-DEALER CAUTION – W HEN CLEANING THE MOTORCYCLE... -
Page 17: Checking And Adjusting Steering Head Bearing
At least once a year, the steering head bearings should be greased. Changing the spring preload of the shock absorber KTM sets the shock absorber for a driver only, weighing approximately 75 kg (165 lb). If you want to take a passenger with you, of if you weigh considerably more or less than 75 kg (165 lb), you should change the spring preload accordingly. -
Page 18: Checking Rubber Ring On The Rear Shock Absorber
Measure the distance between the two discs at various points around their min. 2,5 mm circumferences. The space should be at least 2.5 mm (0,1 in) wide. Have the rubber ring replaced by an KTM dealer when compaction due to wear has exceeded this lower limit. CAUTION... -
Page 19: Chain Wear
In this case, consult an authorized KTM dealer immediately. BRAKE FLUID: KTM fills the brake systems with Shell Advance Brake DOT 5.1 brake fluid, one of the best brake fluids that is currently available. We recommend that you continue to use it. DOT 5.1 brake fluid is based on glycol ether and of an amber color. -
Page 20: Checking Of Brake Fluid Level - Front Brake
Checking of brake fluid level - front brake The brake fluid reservoir is linked with the hand brake cylinder at the handlebar and the reservoir is provided with an inspection glass. With the reservoir in a horizontal position, the brake fluid level should not go below middle of the glass. -
Page 21: Check The Rear Brake Fluid Level
Checking rear brake fluid level The reservoir for the rear disc brake is located on the left-hand side of the vehicle next to the carburetor carburetor connection boot. The brake fluid level may not drop below the „MlN” marking when the vehicle is in an upright position. -
Page 22: Dismounting And Mounting The Front Wheel
Dismounting and mounting the front wheel – To remove the front wheel, jack the motorcycle up on its frame so that the front wheel no longer touches the ground. – Loosen the collar screw and unscrew it approx. 5 turns. –... -
Page 23: Checking The Shock Absorbtion Rubbers In The Rear Hub
(see illustration). A clear tone must be the result. Dull tones indicate loose spokes. If necessary, have the spokes retightened and the wheel centered by a KTM dealer. WARNING... -
Page 24: Battery
Battery The battery is mounted under the seat (remove the seat, see page 14) The battery has a closed system and therefore requires no maintenance. It is not necessary to check the electrolyte level or to refill water. Simply keep the battery poles clean and slightly grease them with an acid-free grease if necessary. -
Page 25: Main Fuse
Replace a blown fuse only with an equivalent one. If a new fuse that has just been set in gets blown again, you are strongly advised to have it inspected by a KTM dealer. The fuse capacity is 20 Ampere. -
Page 26: Replacing The Brake Light And Tail Light Bulb
Exchanging the brake light and tail light bulb – Remove the cap on the underside of the license plate retainer. – Turn the lamp socket approximately 30° counterclockwise and pull it out of the tail light housing. – Slightly depress the bulb, turn it approx. 30° counterclockwise and pull it out of the socket. -
Page 27: Checking The Cooling Liquid Level
Checking the cooling liquid level The cooling liquid should be 10 mm (0,4 in) above the cooling elements when the engine is cold (cf. diagram). In the event of the cooling liquid being drained, always fill the system before hand, then top off while the engine is running. -
Page 28: Adjusting The Choke Cable
Adjusting the choke cable* At the choke cable, there must always exist a play of approx. 2 mm (0.1 in). To check this, push choke lever fully forward and pull protective cover from the adjuster piece . Now, it must be possible to lift the outer covering of the cable by approx. -
Page 29: Oil Circuit
Therefore, we recommend that you have the engine oil changed by your authorized KTM mechanic. During the guaranty period, the oil change must be performed by an authorized KTM mechanic. Otherwise, the guarantee will become void. -
Page 30: Changing The Fine Screen Filter
Allow the engine to run until warm. Then, turn off the engine, and place the motorbike on a flat, level surface in an upright position (center stand). Wait for 5 minutes. Unscrew and remove the oil dipstick, and wipe it clean with a cloth. -
Page 31: Trouble Shooting
We would like to point out that many operations cannot be performed by oneself. In case of uncertainty, please contact a KTM-dealer. - Page 32 Replace the float Defective membrane of slide Replace membrane Air filter very dirty Clean or replace air filter, contact a KTM dealer Have valve clearance adjusted Valve clearance to small Loss of compression because hand Check setting of the hand decompression cable...
- Page 33 Recharge the battery according to the relevant instructions. The battery is discharged hasn’t been switched off The battery isn’t charged by the Remove seat and check voltage regulator connections; voltage generator because regulator and generator should be checked by a KTM dealer.
-
Page 34: Cleaning
CLEANING Clean your motorcycle regularly in order to maintain the beauty of its plastic surfaces. The best manner would be to use warm water that has been mixed with a normal trade washing detergent and a sponge. The hard dirt can be removed before with the help of a soft water jet. CAUTION EVER CLEAN YOUR MOTORCYCLE WITH A HIGH PRESSURED CLEANER OR A HIGH... -
Page 35: Technical Specifications - Chassis
TECHNICAL SPECIFICATIONS - CHASSIS 400 LC4 / 640 LC4 ( R ) / SUPERMOTO ‘99 400 LC4 / 640 LC4 640 Supermoto 400 LC4 / 640 LC4 Frame Central chrome-moly-steel frame Fork WP Extreme Wheel travel front/rear 280 / 320 mm (11 / 12.6 in) 250 / 290 mm (10 / 11.4 in) Rear suspension Central shock absorber (WP) with PRO-LEVER linkage to rear- swing-arm with needle bearing... -
Page 36: Technical Specifications - Engine
TECHNICAL DATA – ENGINE 400 / 640 LC4 ‘99 Engine 400 LC4 640 LC4 Design Liquid-cooled single cylinder 4-stroke engine with balancer shaft and electric starter Displacement 398 ccm 625 ccm Bore / Stroke 89 / 64 mm 101 / 78 mm Ratio 10,8 : 1 11 : 1... - Page 37 BASIC CARBURETOR SETTING 400 LC4 400 LC4 25 kW 31 kW Carburetor PHM 38 ND PHM 38 ND Carburetor setting number 100197 100197 Main jet Needle jet AR 264 AR 264 Idling jet Jet needle K 23 K 23 Needle position from top 2 nd 2 nd Mixture.adju.
- Page 43 K T M - S P O R T M O T O R C Y C L E A-5230 Mattighofen • Postfach 91 • Austria I n t e r n e t : h t t p : / / w w w . k t m . c o . a t FN 102019 d - Landesgericht Ried im Innkreis 3.205.60...
Need help?
Do you have a question about the 400LC4 and is the answer not in the manual?
Questions and answers