Table of Contents
Advertisement
Advertisement
Table of Contents

Related Manuals for Sapido RB-1602


Summary of Contents for Sapido RB-1602
- Page 1 User Manual 1.0...
-
Page 2: Fcc Statement
IMPORTANT NOTE FCC Radiation Exposure Statement: This equipment complies with FCC radiation exposure limits set forth for an uncontrolled environment. This equipment should be installed and operated with minimum distance20cm between the radiator & your body. http://www.sapido.com.tw/ User Manual 1.0... - Page 3 "Council Directive on the Approximation of the Laws of the Member Sates relating to Electromagnetic Compatibility" (89/336/EEC; 92/31/EEC; 93/68/EEC). The Declaration of Conformity can be found at the Sapido regional website. www.sapidotech.de CE Information of Disposal The electric and electronic equipment or unit which is labeled with crossed-out wheeled bin may not be disposed of with household waste.
- Page 4 An adjustable chair that provides firm, comfortable support is best. Adjust the height of the chair so your thighs are horizontal and your feet flat on the floor. The back of the chair should support your lower back (lumbar region). http://www.sapido.com.tw/ User Manual 1.0...
-
Page 5: Copyright Statement
Copyright Statement The products, including accessories and software are the property of SAPIDO Technology Inc. It is prohibited to reproduced, transcribed, transmitted and stored without authorization from SAPIDO. SAPIDO may update, revise, and change the contents of this manual without further notice. -
Page 6: Table Of Contents
1.5.2 Testing with Internet Browser ................. 16 Chapter 2 Hardware Installation....................19 Diagram of Connecting Hardware to SAPIDO Light N+ Broadband Router ..19 2.1.1 Hardware Connection and Application for Router Mode ......19 2.1.2 Hardware Connection and Application for AP Mode ........20 2.1.3... - Page 7 Wireless Access Control ................100 6.2.5 WDS Settings ....................101 6.2.6 WPS ......................... 106 System Management ....................110 6.3.1 Change Password ..................111 6.3.2 Upgrade Firmware..................111 6.3.3 Save / Reload Settings................... 113 6.3.4 Time Zone Setting ..................117 http://www.sapido.com.tw/ User Manual 1.0...
- Page 8 Chapter 8 DDNS Service Application..................152 Installation ....................... 158 LED ........................... 158 IP Address........................ 159 OS Setting........................ 159 SAPIDO Light N+ Broadband Router Setup ............161 Wireless LAN ......................163 Support ........................165 Others........................166 Chapter 9 Appendices......................167 Operating Systems ....................167 Browsers........................
- Page 9 Communications Regulation Information ............167 http://www.sapido.com.tw/ User Manual 1.0...
-
Page 10: Chapter 1 Introduction
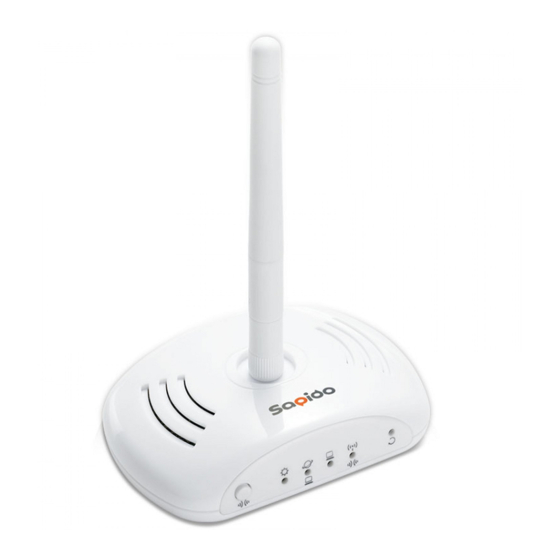
Introduction Overview SAPIDO Light N+ Broadband Router might be small in size, but is huge in functionality. It supports multiple operation modes, including Access Point (AP) mode, Router mode, and WiFi AP mode. You can switch among these modes easily by using its 3-way configuration switch. -
Page 11: Specifications
88mm (L) x 58mm (W) x 26.5mm (H) Application Power Power Adapter DC5V/0.5A with mini-USB B type male connector 1.2.1 Six Views of Product Appearance Power Plug Power Adapter DC5V/0.5A with mini-USB B type male connector http://www.sapido.com.tw/ User Manual 1.0... -
Page 12: Led Indicator Status Description
Operation OK Power on System Requirements To begin with RB-1602, you must have the following minimum system requirements. If your system can’t correspond to the following requirements, you might get some unknown troubles on your system. XDSL/Cable Modem and broadband Internet Account. -
Page 13: Wan Network Plug And Play
If there is no setting from user, it will detect ISP and load corresponding settings. Get Your IP Automatically or Setup IP Manually Step 1. Go to Start>Settings> Network Connections and then select Local Area Connection. http://www.sapido.com.tw/ User Manual 1.0... - Page 14 Step 2. Click on Properties Step 3. Double click on Internet Protocol (TCP/IP). Step 4-1. Select Obtain an IP address automatically and Obtain DNS server address automatically and then click on OK. http://www.sapido.com.tw/ User Manual 1.0...
- Page 15 100 to be the example.) Subnet Mask: 255.255.255.0 Gateway: 192.168.1.1 (this is the IP address of SAPIDO Light N+ Broadband Router in Router Mode) DNS: 192.168.1.1 (use N+ Broadband Router’s IP address or make on your own one) Note: IP address and Default gateway cannot be the same.
-
Page 16: Network Testing
Open an Internet Browser, such as Internet Explore or Netscape. Input a valid web address, http://www.yahoo.com for example, in the web address blank and then press enter. If the website appears, that means your Internet works regularly. http://www.sapido.com.tw/ User Manual 1.0... - Page 17 192.168.1.100, for example, and Default Gateway equally. Step 4. Ping a legal WAN Address such as 192.168.1.1. If Internet works, it will show Reply from 192.168.1.1: bytes = 32 time = 3ms TTL =64, for example. http://www.sapido.com.tw/ User Manual 1.0...
- Page 18 If it can’t work, it will show Request timed out. http://www.sapido.com.tw/ User Manual 1.0...
-
Page 19: Chapter 2 Hardware Installation
2.1.1 Hardware Connection and Application for Router Mode When switching SAPIDO Light N+ Broadband Router to Router Mode, there will be one WAN port and one LAN port, the administrator can do the Quick Setup including WAN Setup, LAN Setup, Wireless Setup, Time Server Setup, Password Setup, Firewall Setup, QoS Setup. -
Page 20: Hardware Connection And Application For Ap Mode
2.1.2 Hardware Connection and Application for AP Mode Under AP Mode, it supports 2 LAN ports as Bridge, and user can connect to SAPIDO Light N+ Broadband Router via LAN port. The administrator can set up quickly, including LAN Setup, Wireless Setup, Time Server Setup, and Password Setup. -
Page 21: Chapter 3 One Button Setup
“Finished” button. One Button Setup configuration for Router Mode Step 1. Please switch to Router mode and plug in power. The default UPnP of SAPIDO Light N+ Broadband Router is ON. http://www.sapido.com.tw/ User Manual 1.0... - Page 22 Step 2. Click the Internet Gateway Device to open the login page. Step 3. Click One Button Setup on the left of the main menu under router mode. http://www.sapido.com.tw/ User Manual 1.0...
- Page 23 WAN Interface Setup: Select the WAN Interface from the drop-down list. WAN Type Setup: Please choose the access type. Wireless Setup: Fill in the ESSID if it is blank, and your prefer Encryption type. The default is 11N_Mini_Router. http://www.sapido.com.tw/ User Manual 1.0...
-
Page 24: One Button Setup Configuration For Ap Mode
Please switch to AP mode and plug in power. Step 2. Click the Internet Gateway Device to open the login page. Step 3. Click One Button Setup on the left of the main menu under AP mode. http://www.sapido.com.tw/ User Manual 1.0... -
Page 25: One Button Setup Configuration For Wifi Ap Mode
Wireless Setup: Define the SSID, and Encryption type. Finished: Please click finished button to complete the setting. One Button Setup configuration for WiFi AP Mode Step 1. Please switch to WiFi AP mode and plug in power. http://www.sapido.com.tw/ User Manual 1.0... - Page 26 Step 2. Click the Internet Gateway Device to open the login page. Step 3. Click One Button Setup on the left of the main menu under WiFi AP mode. http://www.sapido.com.tw/ User Manual 1.0...
- Page 27 Extended Wireless Setup: Define the ESSID, and Encryption type. Finished: Please click finished button to complete the setting. Note: One Button Setup is not completed unless users finish all settings and click Finished button. http://www.sapido.com.tw/ User Manual 1.0...
-
Page 28: Chapter 4 Basic Setup
Note: If the homepage doesn’t appear, please check if the TCP/IP configuration is obtaining IP address automatically or not. If you don’t know how to do it, please refer to “1.5 Get your IP Automatically & Manually”. http://www.sapido.com.tw/ User Manual 1.0... -
Page 29: Ap Mode
NAT function is disabled under AP mode. The SAPIDO Light N+ Broadband Router connects the upper level device only through the Ethernet port and gets its assigned IP address. If not, the SAPIDO Light N+ Broadband Router will use the default IP or assigned by the user. -
Page 30: Wifi Ap Mode
LAN. NAT function is disabled under WiFi AP mode. The SAPIDO Light N+ Broadband Router connects the upper level device wirelessly and gets its assigned IP address. If not, the SAPIDO Light N+ Broadband Router will use the default IP or assigned by the user. -
Page 31: Chapter 5 Advanced Configuration For Router Mode
Internet. 5.1.1 Select WAN under the IP Config menu. SAPIDO Light N+ Broadband Router supports 3 interfaces and 4 access types. Follow the instructions below for each to set up accordingly. Choose your WAN Interface and WAN type, and click Next, its associated settings will show http://www.sapido.com.tw/... - Page 32 If you are connecting the internet via wireless, please select Wireless and its associated settings will show up underneath at the same time. You can see a list of available Wireless networks. Select you preferred one to connect and the Encryption type form the drop-down list. http://www.sapido.com.tw/ User Manual 1.0...
- Page 33 User Manual 1.0...
- Page 34 Input Subnet Mask, normally it is 255.255.255.0. Default Gateway Input ISP Default Gateway Address. If you don’t know, please check with your ISP. MTU Size MTU stands for Maximum Transmission Unit. For Static IP connection, the default MTU http://www.sapido.com.tw/ User Manual 1.0...
- Page 35 This option is to enable Web Server Access function on WAN. 10. Apply Changes & Reset Click on Apply Changes to save the setting data. Or you may click on Reset to clear all the input data. http://www.sapido.com.tw/ User Manual 1.0...
- Page 36 Host Name The host name is optional; but if your ISP requires you to input a specific host name, please put it in, for example, SAPIDO Light N+ Broadband Router applied from ISP. Generally, Cable Modem will provide the hostname information.
- Page 37 This option is to enable Web Server Access function on WAN. Apply Changes & Reset Click on Apply Changes to save the setting data. Or you may click on Reset to clear all the input data. http://www.sapido.com.tw/ User Manual 1.0...
- Page 38 WAN connection. User Name Input your user name supplied by ISP. If you don’t know, please check with your ISP. Password Input your Password supplied by ISP. Service Name Input the service name supplied by ISP. http://www.sapido.com.tw/ User Manual 1.0...
- Page 39 Internet users. It is a common way for hacker to ping public WAN IP address, to see is there any WAN IP address available. 11. Enable Web Server Access on WAN This option is to enable Web Server Access function on WAN. http://www.sapido.com.tw/ User Manual 1.0...
- Page 40 If you have applied for a PPTP connection type from ISP, please follow the steps to set up your WAN connection. IP Address Input your IP Address supplied by ISP. If you don’t know, please check with your ISP. http://www.sapido.com.tw/ User Manual 1.0...
- Page 41 The Internet Group Management Protocol (IGMP) is a communications protocol used to manage the membership of Internet Protocol multicast groups. IGMP is used by IP hosts and adjacent multicast routers to establish multicast group memberships. You can choose to enable IGMP Proxy to provide service. http://www.sapido.com.tw/ User Manual 1.0...
- Page 42 This option is to enable Web Server Access function on WAN. 13. Apply Changes & Reset Click on Apply Changes to save the setting data. Or you may click on Reset to clear all the input data. http://www.sapido.com.tw/ User Manual 1.0...
- Page 43 If you have applied for a L2TP connection type from ISP, please follow the steps to set up your WAN connection. Server IP Address Input your Server IP Address supplied by ISP. If you don’t know, please check with your ISP. User Name Input the L2TP Account. Password Input the Password. http://www.sapido.com.tw/ User Manual 1.0...
- Page 44 This option is to enable Web Server Access function on WAN. 10. Apply Changes & Reset Click on Apply Changes to save the setting data. Or you may click on Reset to clear all the input data. http://www.sapido.com.tw/ User Manual 1.0...
-
Page 45: Lan Interface Setup
Input ISP Default Gateway Address. If you don’t know, please check with your ISP. DHCP Enable or disable DHCP services. The DHCP server will automatically allocate an unused IP address from the IP address pool to the requesting computer if enabled. http://www.sapido.com.tw/ User Manual 1.0... - Page 46 Copy the MAC address from the device you had registered to your ISP if your ISP asks for the specific MAC Address. Apply Changes & Reset Click on Apply Changes to save the setting data. Or you may click on Reset to clear all the input data. http://www.sapido.com.tw/ User Manual 1.0...
-
Page 47: Dynamic Dns Setting
ChangeIP, Eurodns, OVH, NO-IP, ODS, Regfish embedded in 11N Mini Router. Domain Name This field represents the host name you register to Dynamic-DNS service and expect to export to the world. User Name /Email User name is used as an identity to login Dynamic-DNS service. http://www.sapido.com.tw/ User Manual 1.0... -
Page 48: Wireless Setup
Click on Apply button to continue. Click on Cancel button to clear the setting on this page. Wireless Setup SAPIDO Light N+ Broadband Router enables fastest 300 Mbps IEEE802.11g wireless transmissions and keeps compatibility with existing IEEE 802.11n devices. SAPIDO Light N+ Broadband Router complies with IEEE 802.11b/g standard. Please select Wireless under the main menu. -
Page 49: Wireless Basic Settings
This field indicates the 802.11x interface mode. For example, “2.4GHz(G)” prevents the 802.11b clients from accessing the router. “2.4GHz(B+G)” allows both 802.11b and 802.11g clients to access the router. There are 6 options, 2.4 GHz (B/G/N/B+G/G+N/B+G+N) from the drop down list. http://www.sapido.com.tw/ User Manual 1.0... - Page 50 (7.) Apply Changes: Please click Apply Changes to initiate or click Reset to cancel. Network Type: : : : Please select “Infrastructure” or “Ad hoc.” The default is “Infrastructure.” The selection is disabled when wireless mode is selected to AP. http://www.sapido.com.tw/ User Manual 1.0...
- Page 51 Root AP (any AP) and uses AP function to service all wireless stations within its coverage. All the stations within the coverage of SAPIDO Light N+ Broadband Router can be bridged to the Root AP. It can help user to extend the coverage of wireless network.
- Page 52 AP (the upper level device) in the field of SSID of Extended Interface. 15. Apply Changes & Reset Click on “Apply Changes” to save the setting data. Or you may click on “Reset” to clear all the input data. http://www.sapido.com.tw/ User Manual 1.0...
-
Page 53: Wireless Advanced Settings
Fill the range from 0 to 2347 into this blank. Beacon Interval Beacons are packets sent by an access point to synchronize a wireless network. Specify a beacon interval value. The allowed setting range is 20-1024 ms. http://www.sapido.com.tw/ User Manual 1.0... - Page 54 User can adjust the RF output power to get the best wireless connection. There are 5 power types available: 100%, 70%, 50%, 35%, and 15%. 10. Apply Changes & Reset Click on “Apply Changes” to save the setting data. Or you may click on “Reset” to clear all the input data. http://www.sapido.com.tw/ User Manual 1.0...
-
Page 55: Wireless Security Setup
Enabling WEP can protect your data from eavesdroppers. If you do not need this feature, select “None” to skip the following setting. SAPIDO Light N+ Broadband Router supports both 64-bit and 128-bit encryption using the Wired Equivalent Privacy (WEP) algorithm. - Page 56 8 to 63 characters. If the coding is in Hex, the key length is 64 characters. Apply Changes & Reset Click on Apply Changes to save the setting data. Or you may click on Reset to clear all the input data. http://www.sapido.com.tw/ User Manual 1.0...
-
Page 57: Wireless Access Control
Click on “Apply Change” to save the setting data. Or you may click on “Reset” to clear all the input data. Current Access Control List In this list, all the MAC info you input will be displayed. http://www.sapido.com.tw/ User Manual 1.0... -
Page 58: Wds Settings
APs communicate both with each other and with wireless stations (at the expense of half the throughput). Wireless Connection AP Router AP Router Internet Wired Connection Please follow the instructions to setup WDS connections. http://www.sapido.com.tw/ User Manual 1.0... - Page 59 WDS with 11N Mini Router. Step 2. Get back to the menu “Wireless Basic Settings” of 11N Mini Router. Select AP+WDS mode, and then select the Channel Number. Click Apply Changes to save the setting data. http://www.sapido.com.tw/ User Manual 1.0...
- Page 60 When the time counts down to 0, you will see the MAC address of the paired device displaying on Current WDS AP List. Step 5. Head back to LAN Interface, disable DHCP option, and then click Apply Changes to save the setting data. http://www.sapido.com.tw/ User Manual 1.0...
- Page 61 Apply Changes to save the setting data. Input the MAC address here. Step 7. After initiating the paired device, please check Local Area Connections. Click Supports to check out the IP address which is assigned by the paired device. http://www.sapido.com.tw/ User Manual 1.0...
- Page 62 Step 8. You can input http://192.168.9.9 in IE browser to enter the GUI page of the paired device and make sure the connection. http://www.sapido.com.tw/ User Manual 1.0...
-
Page 63: Wps
Wi-Fi Protected Setup (WPS) is an easy way to establish a secured wireless network between SAPIDO Light N+ Broadband Router and wireless card. Users do not need to manually entering a creative, yet predictable security key on both Wi-Fi devices to prevent unwanted access to their wireless network. - Page 64 (2.) Open the “Wireless Utility” of your wireless card, and click its “PBC” button, to start auto pairing. (3.) While scanning is successful, the information of the wireless card appears in the windows below. http://www.sapido.com.tw/ User Manual 1.0...
- Page 65 PIN number. Write it down. (2.) Open menu “Wi-Fi Protected Setup” of 11N Mini Router, input the PIN number from the wireless card then click Start PIN. Enter the PIN Code you got from the wireless card. http://www.sapido.com.tw/ User Manual 1.0...
-
Page 66: Nat
IP address to the server. Then, add the IP address and network protocol type, port number, and name of the service in the following list. Based on the list, the gateway will forward service request from outside users to the corresponding local server. http://www.sapido.com.tw/ User Manual 1.0... - Page 67 You can add comments for this port forwarding rule. Apply Changes & Reset Click on Apply Changes to save the setting data. Or you may click on Reset to clear all the input data. Current Port Forwarding Table http://www.sapido.com.tw/ User Manual 1.0...
- Page 68 You can click Reset to cancel. Port Forwarding The following figure shows the ip forwarding configuration of your web on a local area network. The web server is located on 192.168.1.100, forwarding port is 80, and type is TCP+UDP. http://www.sapido.com.tw/ User Manual 1.0...
-
Page 69: Visual Dmz
This field stands for the destination IP address that you like to redirect the matched packet to. Apply Changes & Reset Click on Apply Changes to save the setting data. Or you may click on Reset to clear all the input data. http://www.sapido.com.tw/ User Manual 1.0... -
Page 70: Firewall
This function allows users to filter and manage specific ports; to limit the use of certain applications to transmit through a specific port. Port filtering helps users to improve the security of your network. Enable Port Filtering http://www.sapido.com.tw/ User Manual 1.0... - Page 71 You can click Reset to cancel. Port Filtering The following figure shows a user limits some applications to use the 80 port. *All clients inside the local area network can’t open the 80 port through this router. http://www.sapido.com.tw/ User Manual 1.0...
-
Page 72: Ip Filtering
Comment You can add comments for this regulation. Apply Changes & Reset Click on Apply Changes to save the setting data. Or you may click on Reset to clear all the input data. Current Filter Table http://www.sapido.com.tw/ User Manual 1.0... -
Page 73: Mac Filtering
You can manually add a MAC address that is currently connected to 11N Mini Router. Enable MAC Filtering Check enable or disable to apply MAC Filter function. MAC Address Enter the MAC address manually that you want to filter. Comment You can add comments for this MAC Filtering rule. http://www.sapido.com.tw/ User Manual 1.0... -
Page 74: Url Filtering
URL’s. Any URL containing one or more of these keywords will be blocked. This is a policy independent feature i.e. it cannot be associated to ACL rules. This feature can be independently enabled / disabled, but works only if firewall is enabled. http://www.sapido.com.tw/ User Manual 1.0... - Page 75 Click Delete Selected will delete the selected item. Click Delete All will delete all items in this table. Reset You can click Reset to cancel. Note: URL Filtering cannot work when the Visual Server is enabled. Please disable Visual Server before activate filter. http://www.sapido.com.tw/ User Manual 1.0...
-
Page 76: System Management
System Management SAPIDO Light N+ Broadband Router provides system management including password changing, firmware upgrade, time setting, user’s account setting and other detail settings. Following is detail explanation for each. 5.5.1 Change Password Users can set or change their password in this section. -
Page 77: Upgrade Firmware
There is certain risk while upgrading firmware. Upgrading firmware is not recommended unless the significant faulty is found. You can upgrade the firmware of SAPIDO Light N+ Broadband Router on this page. Make sure the firmware you want to use is on the local hard drive of the computer. -
Page 78: Save / Reload Settings
5.5.3 Save / Reload Settings To back up the current configuration setting or load the backup data, also you can restore SAPIDO Light N+ Broadband Router to default setting by this function. Save Settings To File Step 1. Click on Save button for saving the configuration setting into assigned location. - Page 79 A pop window will show up and ask to save config.dat file. Step 2. Please select the location, for example: the desktop. Step 3. The file you just saved will appear on the desktop. http://www.sapido.com.tw/ User Manual 1.0...
- Page 80 Upload button to load all the settings into the router. Step 2. Select the config.dat file. Step 3. Click Upload to retrieve. Step 4. When you see the screen below, the updating is completed. Please click OK to http://www.sapido.com.tw/ User Manual 1.0...
- Page 81 After you have tried other methods for troubleshooting your network, you may choose to restore SAPIDO Light N+ Broadband Router to the factory default settings. When you see the screen below, the resetting is completed. Please click OK and return to the main menu.
-
Page 82: Time Zone Setting
5.5.4 Time Zone Setting The System time is the time used by SAPIDO Light N+ Broadband Router for scheduling services. You can manually set the time or connect to a NTP (Network Time Protocol) server. If a NTP server is set, you will only need to set the time zone. If you manually set the time, you may also set Daylight Saving dates and the system time will automatically adjust on those dates. -
Page 83: Upnp Setting
The automatic discovery feature enables the device to obtain an IP address, present and describe itself to other devices and PCs on the network without having to install drivers, but to configure and use those devices. http://www.sapido.com.tw/ User Manual 1.0... -
Page 84: Log & Status
After enabling UPNP, click My Network Places, and user can open the web GUI by just clicking on the Internet Gateway Device icon. Log & Status SAPIDO Light N+ Broadband Router provides the log list and connection status for user to check. http://www.sapido.com.tw/... -
Page 85: Network Config
5.6.1 Network Config Network Configuration shows the firmware version and the connection status of LAN, WAN and Wireless. http://www.sapido.com.tw/ User Manual 1.0... -
Page 86: Event Log
5.6.2 Event Log SAPIDO Light N+ Broadband Router provides system logs for review. Enable Log Select Enable Log to record the system log system all, wireless & DoS Select Wireless, DoS or system all to record Enable Remote Log You may choose to enable the remote event log or not. -
Page 87: Logout
After clicking Apply Changes to record the event log, it will be shown as the example below. Logout Click Logout on the bottom menu to exit and go back to GUI login home page. http://www.sapido.com.tw/ User Manual 1.0... -
Page 88: Chapter 6 Advance Configuration For Ap Mode
Use this page to set up the local IP address and subnet mask for your router. Please select LAN under the IP Config menu and follow the instructions below to enter the LAN setting page to configure the settings you want. 6.1.2 LAN Interface Setup http://www.sapido.com.tw/ User Manual 1.0... - Page 89 Copy the MAC address from the device you had registered to your ISP if your ISP asks for the specific MAC Address. Apply Changes & Reset Click on Apply Changes to save the setting data. Or you may click on Reset to clear all the input data. http://www.sapido.com.tw/ User Manual 1.0...
-
Page 90: Wireless Setup
Wireless Setup Please select Wireless under the main menu. 6.2.1 Wireless Basic Settings Follow the instructions to configure the Wireless settings. http://www.sapido.com.tw/ User Manual 1.0... - Page 91 (4.) Data Rate: please select the data transmission rate. (5.) Access: defined the access type. a. LAN+WAN: the client can access to the Internet and connect to 11N Mobile Router’s GUI to setup. b. WAN: the client can only access to the Internet. http://www.sapido.com.tw/ User Manual 1.0...
- Page 92 13. Enable Universal Repeater Mode (Acting as AP and Client simultaneously) Enable Universal Repeater Mode, SAPIDO Light N+ Broadband Router will act as a wireless AP and AP client at the same time, and able to link to another AP.. It uses AP client function to connect to a Root AP (any AP) and uses AP function to service all wireless http://www.sapido.com.tw/...
- Page 93 All the stations within the coverage of SAPIDO Light N+ Broadband Router can be bridged to the Root AP. It can help user to extend the coverage of wireless network. How to Enable URM (Universal Repeater Mode) User could enable URM in wireless basic setting page as shown in following figures.
- Page 94 AP (the upper level device) in the field of SSID of Extended Interface. 15. Apply Changes & Reset Click on “Apply Changes” to save the setting data. Or you may click on “Reset” to clear all the input data. http://www.sapido.com.tw/ User Manual 1.0...
-
Page 95: Wireless Advanced Settings
Fill the range from 0 to 2347 into this blank. Beacon Interval Beacons are packets sent by an access point to synchronize a wireless network. Specify a beacon interval value. The allowed setting range is 20-1024 ms. http://www.sapido.com.tw/ User Manual 1.0... - Page 96 User can adjust the RF output power to get the best wireless connection. There are 5 power types available: 100%, 70%, 50%, 35%, and 15%. 10. Apply Changes & Reset Click on “Apply Changes” to save the setting data. Or you may click on “Reset” to clear all the input data. http://www.sapido.com.tw/ User Manual 1.0...
-
Page 97: Wireless Security Setup
Enabling WEP can protect your data from eavesdroppers. If you do not need this feature, select “None” to skip the following setting. SAPIDO Light N+ Broadband Router supports both 64-bit and 128-bit encryption using the Wired Equivalent Privacy (WEP) algorithm. - Page 98 Enterprise (RADIUS): Please input the port, IP address, and password of authentication RADIUS Server. Personal (Pre-Shared Key): Pre-Shared Key type is coding in ASCII, and the length is between 8 to 63 characters. If the coding is in Hex, the key length is 64 characters. http://www.sapido.com.tw/ User Manual 1.0...
- Page 99 Apply Changes & Reset Click on Apply Changes to save the setting data. Or you may click on Reset to clear all the input data. http://www.sapido.com.tw/ User Manual 1.0...
-
Page 100: Wireless Access Control
Click on “Apply Change” to save the setting data. Or you may click on “Reset” to clear all the input data. Current Access Control List In this list, all the MAC info you input will be displayed. http://www.sapido.com.tw/ User Manual 1.0... -
Page 101: Wds Settings
APs communicate both with each other and with wireless stations (at the expense of half the throughput). Wireless Connection AP Router AP Router Internet Wired Connection Please follow the instructions to setup WDS connections. http://www.sapido.com.tw/ User Manual 1.0... - Page 102 WDS with 11N Mini Router. Step 2. Get back to the menu “Wireless Basic Settings” of 11N Mini Router. Select AP+WDS mode, and then select the Channel Number. Click Apply Changes to save the setting data. http://www.sapido.com.tw/ User Manual 1.0...
- Page 103 Step 3. Enter the WDS Settings page, select Enable WDS, and then input the MAC address of the paired device. Click Apply Changes to save the setting data. http://www.sapido.com.tw/ User Manual 1.0...
- Page 104 Step 5. Head back to LAN Interface, disable DHCP option, and then click Apply Changes to save the setting data. Step 6. Doing the same way to setup the MAC address in the paired device. Launch the http://www.sapido.com.tw/ User Manual 1.0...
- Page 105 Supports to check out the IP address which is assigned by the paired device. Step 8. You can input http://192.168.9.9 in IE browser to enter the GUI page of the paired device and make sure the connection. http://www.sapido.com.tw/ User Manual 1.0...
-
Page 106: Wps
Wi-Fi Protected Setup (WPS) is an easy way to establish a secured wireless network between SAPIDO Light N+ Broadband Router and wireless card. Users do not need to manually entering a creative, yet predictable security key on both Wi-Fi devices to prevent unwanted access to their wireless network. - Page 107 (2.) Open the “Wireless Utility” of your wireless card, and click its “PBC” button, to start auto pairing. http://www.sapido.com.tw/ User Manual 1.0...
- Page 108 (3.) While scanning is successful, the information of the wireless card appears in the windows below. Start PIN: (1.) Open the “Wireless Utility” of your wireless card. Follow its PIN instruction to get a new PIN number. Write it down. http://www.sapido.com.tw/ User Manual 1.0...
- Page 109 (2.) Open menu “Wi-Fi Protected Setup” of 11N Mini Router, input the PIN number from the wireless card then click Start PIN. (3.) Back to “Wireless Utility” and press the “Start PIN” button to complete the auto-paring process. http://www.sapido.com.tw/ User Manual 1.0...
-
Page 110: System Management
(4.) When you can see the IP information below, the connection is established System Management SAPIDO Light N+ Broadband Router provides system management including password changing, firmware upgrade, time setting, user’s account setting and other detail settings. Following is detail explanation for each. -
Page 111: Change Password
There is certain risk while upgrading firmware. Upgrading firmware is not recommended unless the significant faulty is found. You can upgrade the firmware of SAPIDO Light N+ Broadband Router on this page. Make sure the firmware you want to use is on the local hard drive of the computer. - Page 112 Note: 1. To prevent the firmware upgrading interrupted by other wireless signals and caused failure. We recommend using wired connection to do the upgrading. 2. Before upgrading the firmware, please remove any USB device which connected with this router. The firmware upgrade will not remove your previous settings. http://www.sapido.com.tw/ User Manual 1.0...
-
Page 113: Save / Reload Settings
6.3.3 Save / Reload Settings To back up the current configuration setting or load the backup data, also you can restore SAPIDO Light N+ Broadband Router to default setting by this function. Save Settings To File Step 1. Click on Save button for saving the configuration setting into assigned location. - Page 114 A pop window will show up and ask to save config.dat file. Step 2. Please select the location, for example: the desktop. Step 3. The file you just saved will appear on the desktop. http://www.sapido.com.tw/ User Manual 1.0...
- Page 115 Click on “Browse…” button for searching the saving configuration from hard drive, and then click on Upload button to load all the settings into the router. Step 2. Select the config.dat file. Step 3. Click Upload to retrieve. http://www.sapido.com.tw/ User Manual 1.0...
- Page 116 After you have tried other methods for troubleshooting your network, you may choose to restore SAPIDO Light N+ Broadband Router to the factory default settings. When you see the screen below, the resetting is completed. Please click OK and return to the main menu.
-
Page 117: Time Zone Setting
6.3.4 Time Zone Setting The System time is the time used by SAPIDO Light N+ Broadband Router for scheduling services. You can manually set the time or connect to a NTP (Network Time Protocol) server. If a NTP server is set, you will only need to set the time zone. If you manually set the time, you may also set Daylight Saving dates and the system time will automatically adjust on those dates. -
Page 118: Upnp Setting
After enabling UPNP, click My Network Places, and user can open the web GUI by just clicking on the Internet Gateway Device icon. http://www.sapido.com.tw/ User Manual 1.0... -
Page 119: Log & Status
Log & Status SAPIDO Light N+ Broadband Router provides the log list and connection status for user to check. 6.4.1 Network Config Network Configuration shows the firmware version and the connection status of LAN, WAN and Wireless. http://www.sapido.com.tw/ User Manual 1.0... -
Page 120: Event Log
6.4.2 Event Log SAPIDO Light N+ Broadband Router provides system logs for review. Enable Log Select Enable Log to record the system log system all, wireless & DoS Select Wireless, DoS or system all to record Enable Remote Log You may choose to enable the remote event log or not. -
Page 121: Logout
Logout Click Logout on the bottom menu to exit and go back to GUI login home page. http://www.sapido.com.tw/ User Manual 1.0... -
Page 122: Chapter 7 Advance Configuration For Wifi Ap Mode
Use this page to set up the local IP address and subnet mask for your router. Please select LAN under the IP Config menu and follow the instructions below to enter the LAN setting page to configure the settings you want. 7.1.2 LAN Interface Setup http://www.sapido.com.tw/ User Manual 1.0... - Page 123 Define the DHCP client range and then the DHCP server will assign an IP to the requesting computer from this range. The Show Client will display every assigned IP address, MAC address, and expired time. The default range is 192.168.1.100 - 192.168.1.200. http://www.sapido.com.tw/ User Manual 1.0...
-
Page 124: Wireless Setup
MAC Address. Apply Changes & Reset Click on Apply Changes to save the setting data. Or you may click on Reset to clear all the input data. Wireless Setup Please select Wireless under the main menu. http://www.sapido.com.tw/ User Manual 1.0... -
Page 125: Wireless Basic Settings
This field indicates the 802.11x interface mode. For example, “2.4GHz(G)” prevents the 802.11b clients from accessing the router. “2.4GHz(B+G)” allows both 802.11b and 802.11g clients to access the router. There are 6 options, 2.4 GHz (B/G/N/B+G/G+N/B+G+N) from the drop down list. http://www.sapido.com.tw/ User Manual 1.0... - Page 126 (7.) Apply Changes: Please click Apply Changes to initiate or click Reset to clear all the input data. Network Type: : : : Please select “Infrastructure” or “Ad hoc.” The default is “Infrastructure.” The selection is disabled when wireless mode is selected to AP. http://www.sapido.com.tw/ User Manual 1.0...
- Page 127 Root AP (any AP) and uses AP function to service all wireless stations within its coverage. All the stations within the coverage of SAPIDO Light N+ Broadband Router can be bridged to the Root AP. It can help user to extend the coverage of wireless network.
- Page 128 Click on Apply Changes to save the setting Note: The DHCP server should be disabled under menu “LAN Interface Setup” and then the URM could be enabled. Step 3. Check the AP connectors and the Wireless connecting status. http://www.sapido.com.tw/ User Manual 1.0...
-
Page 129: Wireless Advanced Settings
RTS threshold size, the RTS/CTS mechanism will not be enabled. The router sends Request to Send (RTS) frames to a particular receiving station and negotiates the sending of a data frame. After receiving an RTS, the wireless station http://www.sapido.com.tw/ User Manual 1.0... - Page 130 User can adjust the RF output power to get the best wireless connection. There are 5 power types available: 100%, 70%, 50%, 35%, and 15%. 10. Apply Changes & Reset Click on “Apply Changes” to save the setting data. Or you may click on “Reset” to clear all the input data. http://www.sapido.com.tw/ User Manual 1.0...
-
Page 131: Wireless Site Survey
Enabling WEP can protect your data from eavesdroppers. If you do not need this feature, select “None” to skip the following setting. SAPIDO Light N+ Broadband Router supports both 64-bit and 128-bit encryption using the Wired Equivalent Privacy (WEP) algorithm. - Page 132 The WPA, WPA2 & WPA2 Mixed encrypt each frame transmitted from the radio using the pre-shared key (PSK) which entered from this panel or a key got dynamically through 802.1x. WPA Authentication Mode Enterprise (RADIUS): Please input the port, IP address, and password of authentication RADIUS Server. http://www.sapido.com.tw/ User Manual 1.0...
- Page 133 8 to 63 characters. If the coding is in Hex, the key length is 64 characters. Apply Changes & Reset Click on Apply Changes to save the setting data. Or you may click on Reset to clear all the input data. http://www.sapido.com.tw/ User Manual 1.0...
-
Page 134: Wireless Access Control
Click on “Apply Change” to save the setting data. Or you may click on “Reset” to clear all the input data. Current Access Control List In this list, all the MAC info you input will be displayed. http://www.sapido.com.tw/ User Manual 1.0... -
Page 135: Wps
Wi-Fi Protected Setup (WPS) is an easy way to establish a secured wireless network between SAPIDO Light N+ Broadband Router and wireless card. Users do not need to manually entering a creative, yet predictable security key on both Wi-Fi devices to prevent unwanted access to their wireless network. - Page 136 (2.) Open the “Wireless Utility” of your wireless card, and click its “PBC” button, to start auto pairing. (3.) While scanning is successful, the information of the wireless card appears in the windows below. http://www.sapido.com.tw/ User Manual 1.0...
- Page 137 Start PIN: (1.) Open the “Wireless Utility” of your wireless card. Follow its PIN instruction to get a new PIN number. Write it down. http://www.sapido.com.tw/ User Manual 1.0...
- Page 138 Start PIN. (3.) Back to “Wireless Utility” and press the “Start PIN” button to complete the auto-paring process. (4.) When you can see the IP information below, the connection is established http://www.sapido.com.tw/ User Manual 1.0...
-
Page 139: System Management
System Management SAPIDO Light N+ Broadband Router provides system management including password changing, firmware upgrade, time setting, user’s account setting and other detail settings. Following is detail explanation for each. http://www.sapido.com.tw/ User Manual 1.0... -
Page 140: Change Password
There is certain risk while upgrading firmware. Upgrading firmware is not recommended unless the significant faulty is found. You can upgrade the firmware of SAPIDO Light N+ Broadband Router on this page. Make sure the firmware you want to use is on the local hard drive of the computer. - Page 141 5 seconds with a stick. The router will reboot and all settings will be restored to factory default settings. If the problem still exists, you can visit our web site to see if there is any firmware for download to solve the problem. http://www.sapido.com.tw/ User Manual 1.0...
-
Page 142: Save / Reload Settings
7.3.3 Save / Reload Settings To back up the current configuration setting or load the backup data, also you can restore SAPIDO Light N+ Broadband Router to default setting by this function. Save Settings To File Step 1. Click on Save button for saving the configuration setting into assigned location. - Page 143 Step 2. Please select the location, for example: the desktop. Step 3. The file you just saved will appear on the desktop. http://www.sapido.com.tw/ User Manual 1.0...
- Page 144 Load Settings From File Step 1. Click on “Browse…” button for searching the saving configuration from hard drive, and then click on Upload button to load all the settings into the router. Step 2. Select the config.dat file. http://www.sapido.com.tw/ User Manual 1.0...
- Page 145 When you see the screen below, the updating is completed. Please click OK to return to the main menu. Reset Setting to Default After you have tried other methods for troubleshooting your network, you may choose to restore SAPIDO Light N+ Broadband Router to the factory default settings. http://www.sapido.com.tw/ User Manual 1.0...
-
Page 146: Time Zone Setting
7.3.4 Time Zone Setting The System time is the time used by SAPIDO Light N+ Broadband Router for scheduling services. You can manually set the time or connect to a NTP (Network Time Protocol) server. If a NTP server is set, you will only need to set the time zone. If you manually set the time, you may also set Daylight Saving dates and the system time will automatically adjust on those dates. - Page 147 Please click on Apply Changes to save the setting data. Or you may click on Reset to clear all the input data. Or you may click on Refresh to update the system time on the screen. http://www.sapido.com.tw/ User Manual 1.0...
-
Page 148: Upnp Setting
After enabling UPNP, click My Network Places, and user can open the web GUI by just clicking on the Internet Gateway Device icon. http://www.sapido.com.tw/ User Manual 1.0... -
Page 149: Log & Status
Log & Status SAPIDO Light N+ Broadband Router provides the log list and connection status for user to check. 7.4.1 Network Config Network Configuration shows the firmware version and the connection status of LAN, WAN and Wireless. http://www.sapido.com.tw/ User Manual 1.0... -
Page 150: Event Log
7.4.2 Event Log SAPIDO Light N+ Broadband Router provides system logs for review. Enable Log Select Enable Log to record the system log system all, wireless & DoS Select Wireless, DoS or system all to record Enable Remote Log You may choose to enable the remote event log or not. -
Page 151: Logout
After clicking Apply Changes to record the event log, it will be shown as the example below. Logout Click Logout on the bottom menu to exit and go back to GUI login home page. http://www.sapido.com.tw/ User Manual 1.0... -
Page 152: Chapter 8 Ddns Service Application
If you don’t have a DDNS account, please follow the steps to complete your DDNS with Dynamic IP settings. Step 1. First access the Internet and fill http://www.dyndns.com/ into the address field of your web browser, then click Create Account. http://www.sapido.com.tw/ User Manual 1.0... - Page 153 Step 2. Fill in the form as required, and then click on Create Account button. http://www.sapido.com.tw/ User Manual 1.0...
- Page 154 When you got this account created message, close it, and check your mailbox. You would get a mail from DynDNS website. Step 4. Click on the indicated address within your mail to confirm. Step 5. Click on login. http://www.sapido.com.tw/ User Manual 1.0...
- Page 155 Step 6. Click Add New Hostname. Step 7. Put in your favorite hostname and service type, and then click Create Host after finished. http://www.sapido.com.tw/ User Manual 1.0...
- Page 156 Step 8. Your hostname has been created when you see the following page. http://www.sapido.com.tw/ User Manual 1.0...
- Page 157 “Activate Service” Step 9. Click Step 10. Filish http://www.sapido.com.tw/ User Manual 1.0...
-
Page 158: Installation
Router after verifying the IP address and LAN cable, the changes cannot be made, or password is lost. A: In case SAPIDO Light N+ Broadband Router is inaccessible; you can try to restore its factory default settings. Please press the “Reset” button and keep it pressed for over 7 seconds and the light of STATUS will vanish. -
Page 159: Ip Address
Verify network configuration by ensuring that there are no duplicate IP addresses. Power down the device in question and ping the assigned IP address of the device. Ensure no other device responds to that address. Check that the cables and connectors or use another LAN cable. http://www.sapido.com.tw/ User Manual 1.0... - Page 160 1. Click on Edit > Preferences > double-click Advanced in the Category window. 2. Click on Proxies > select Direct connection to the Internet > click on OK button. 3. Click on Edit again and then click on Preferences. http://www.sapido.com.tw/ User Manual 1.0...
-
Page 161: Sapido Light N+ Broadband Router Setup
Q: Why can't I connect to the Web Configuration? A: you can remove the proxy server settings in your web browser. SAPIDO Light N+ Broadband Router Setup Q: Why does 11N Mini Router’s setup page shut down unexpectedly? A: If one of the pages appears incompletely in 11N Mini Router’s setup pages, please click on Logout item on the Main Menu before shutting it down. - Page 162 3.3.2 (Router Mode) or 4.3.1 (AP Mode). Q: How do I upgrade the firmware of 11N Mini Router? A: Periodically, a new Flash Code is available for SAPIDO Light N+ Broadband Router on your product supplier’s website. Ideally, you should update 11N Mini Router’s Flash Code using Firmware Upgrade on the System Management menu of SAPIDO Light N+ Broadband Router Settings.
-
Page 163: Wireless Lan
Finally, you might want to keep the system you're trying to configure in the same room as the router, at least during the initial configuration, in order to minimize potential interference from concrete walls or steel beams. http://www.sapido.com.tw/ User Manual 1.0... - Page 164 Any “noisy” devices should be shielded or relocated. RF Shielding: Your environment may tend to block transmission between the wireless stations. This will mean high access speed is only possible when close to the Access Point. http://www.sapido.com.tw/ User Manual 1.0...
-
Page 165: Support
A: The default WEP of WinXP is Authentication Open System - WEP, but the WEP of SAPIDO Light N+ Broadband Router is only for Shared Key - WEP, it caused both sides couldn’t communicate. Please select the WEP of WinXP from Authentication Open System to Pre-shared Key - WEP, and then the WEP wireless interface between WinXP and SAPIDO Light N+ Broadband Router would be communicated. -
Page 166: Others
Q: What can I do if there is already a DHCP server in LAN? A: If there are two DHCP servers existing on the same network, it may cause conflict and generate trouble. In this situation, we suggest to disable DHCP server in router and configure your PC manually. http://www.sapido.com.tw/ User Manual 1.0... -
Page 167: Chapter 9 Appendices
FireFox ver. 2.0.0.11 and the following related versions.3. Safari ver. 3.04 and the following related versions. Communications Regulation Information Should any consumers need to learn more information, services and supports, please contact the supplier of your product directly. http://www.sapido.com.tw/ User Manual 1.0...
Need help?
Do you have a question about the RB-1602 and is the answer not in the manual?
Questions and answers