
Related Manuals for NETGEAR XWN5001


Summary of Contents for NETGEAR XWN5001
- Page 1 Powerline 500 WiFi Access Point (XWN5001) User M anua l 350 East Plumeria Drive San Jose, CA 95134 October 2012 202-11003-01 v1.0...
-
Page 2: Revision History
Trademarks NETGEAR, the NETGEAR logo, and Connect with Innovation are trademarks and/or registered trademarks of NETGEAR, Inc. and/or its subsidiaries in the United States and/or other countries. Information is subject to change without notice. NETGEAR, Inc. All rights reserved. Revision History... -
Page 3: Table Of Contents
Wireless Settings ..........29 Access NETGEAR Web genie ........30 Advanced Wireless Settings. - Page 4 Powerline 500 WiFi Access Point (XWN5001) Appendix B Notification of Compliance Index...
-
Page 5: Chapter 1 Getting Started
Getting Started This chapter describes your Powerline 500 WiFi Access Point (XWN5001) and how your access point can fit into a home network. It also explains the security features and how to customize the encryption key for added security. This chapter includes: •... -
Page 6: Hardware Features
Powerline 500 WiFi Access Point (XWN5001) Hardware Features The package includes a Powerline 500 WiFi Access Point (XWN5001) and an Ethernet cable. Ethernet cable Powerline 500 WiFi Access Point Figure 1. Package contents Power Powerline Wireless Security button Factory Ethernet... -
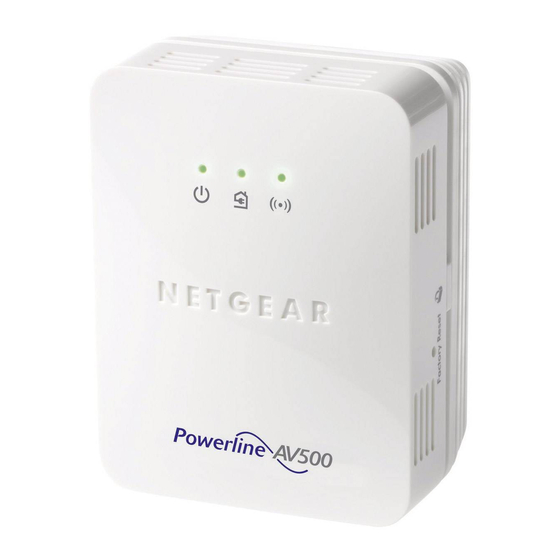
Page 7: Led And Feature Descriptions
• Amber. Power saving mode. The unit enters power saving mode if the Ethernet port is not linked for more than 10 minutes. • Off. There is no electrical power, or power has been turned off through the NETGEAR genie. -
Page 8: How The Powerline Av 500 Access Point Fits In Your Network
Ethernet Port Plug one end of the Ethernet cable that comes with the Powerline 500 WiFi Access Point (XWN5001) into this port and the other end either into your router, or into the computer or another peripheral device. Product Label The product label shows unique details specific to your device. - Page 9 Powerline 500 WiFi Access Point (XWN5001) The following illustration shows an existing Powerline network with one Powerline device in Room 1, a second Powerline device in Room 2, and a Powerline 500 WiFi Access Point (XWN5001) in Room 3: Room 1...
-
Page 10: Set Up The Powerline Network
You can set up a Powerline network that includes the access point or you can add the access point to an existing Powerline network. Set Up a New Powerline Network Different Powerline models can share the network. All NETGEAR Powerline AV products are compatible. First device To set up a new Powerline network: ... -
Page 11: Add The Access Point To An Existing Powerline Network
To add the access point to an existing Powerline network: If you used the Security buttons or the NETGEAR genie to secure your Powerline network, press the Reset button on each Powerline device to return it to its factory settings. -
Page 12: Set Up The Access Point Wireless Network
If your router does have WPS, use Method B. Method A: Use NETGEAR genie for Wireless Setup To use NETGEAR genie to manually configure the wireless settings of your XWN5001: Download and install NETGEAR genie on your computer. See Install NETGEAR genie on page 20. - Page 13 Powerline 500 WiFi Access Point (XWN5001) Click the Powerline icon on the Network Map screen. The Powerline Utility screen displays. On the Powerline Utility screen, right-click the XWN5001 icon. From the pop-up menu that displays, select Wireless configuration. Getting Started...
- Page 14 Powerline 500 WiFi Access Point (XWN5001) The following screen displays: Enter the following wireless settings: • Wireless Network Name (SSID) • Wireless Security Type • Passphrase If you want to clone your existing wireless network, enter the same wireless settings that your router or gateway uses.
-
Page 15: Method B: Use The Wps Button For Wireless Setup
To use the WPS button on your router or gateway to clone your existing wireless network: Press and hold the Security button on the XWN5001 (about 10 seconds) and release it. The Wireless LED starts to blink. Press the WPS button on the wireless router or gateway. -
Page 16: Join The Access Point Wireless Network
See Use the Security Button to Set the Encryption Key on page 17. • Use the NETGEAR genie to configure your Powerline network with an encryption key that you specify. See Install NETGEAR genie on page 20. Getting Started... -
Page 17: Use The Security Button To Set The Encryption Key
Powerline devices to their factory settings. To do this either press the Factory Reset button for 1 second, then release it, or use the NETGEAR genie factory defaults feature (see Reset a Device to Factory Settings page 27). - Page 18 Powerline 500 WiFi Access Point (XWN5001) Note: This process works for only one pair of Powerline devices at a time. If you have more than two Powerline devices, repeat this process for each additional Powerline device to be configured. The devices retain security settings even if they are unplugged.
-
Page 19: Chapter 2 Using Netgear Genie
This chapter explains how to install and use NETGEAR genie to manage your Powerline network. NETGEAR genie works with all Powerline products. You can use NETGEAR genie to access a local Powerline device that is connected to your computer with an Ethernet cable and also to access other Powerline devices on the same network. -
Page 20: Install Netgear Genie
Select NETGEAR genie from the downloads list. Click the Download button to download NETGEAR genie to your computer. Run the file that you downloaded, and follow the NETGEAR genie setup prompts to install NETGEAR genie. Click Finish to complete the setup. -
Page 21: Powerline Utility Screen
The Powerline Utility screen is where you view and manage your Powerline network. To navigate to the Powerline Utility screen: Launch NETGEAR genie. From the NETGEAR genie Home screen, click Network Map on the dashboard or select it from the list of menu items on the left. Using NETGEAR genie... -
Page 22: Security Icon
Powerline 500 WiFi Access Point (XWN5001) On the Network Map screen, click the Powerline icon to view all the devices in your Powerline network. The Powerline Utility screen displays. • Click the image of the device that you want to manage. -
Page 23: View The Link Rate Between Powerline Devices
Powerline 500 WiFi Access Point (XWN5001) View the Link Rate between Powerline Devices To view the link rate between your Powerline devices: On the Powerline Utility screen, click the device whose link rate you want to view. A pop-up screen displays. -
Page 24: Change The Name Of A Powerline Device
Powerline 500 WiFi Access Point (XWN5001) Change the Name of a Powerline Device Powerline devices are identified by their model number and name. NETGEAR genie detects any Powerline devices that are connected to the network and displays them on the Powerline Utility screen. -
Page 25: Turn Leds Off Or On
You use the Security screen in the NETGEAR genie Powerline Utility to set encryption keys. If you customize the encryption key and then forget what it is, you can return your Powerline devices to their factory default Powerline encryption key of HomePlugAV. - Page 26 Powerline 500 WiFi Access Point (XWN5001) To set the encryption key: On the Powerline Utility screen, right-click the Powerline device icon or click the Security icon. The Security screen displays. The top section of the Security screen shows information about each device that NETGEAR genie detects.
-
Page 27: Reset A Device To Factory Settings
Powerline 500 WiFi Access Point (XWN5001) Note: Before you can reset the encryption key for a remote device, you have to enter its password. The password is printed on the product label on the back of the device. Click the Apply Security to Selected Devices button. -
Page 28: Add A Device To The Powerline Network
Security Button to Set the Encryption Key on page 17. • You can use the NETGEAR genie Powerline Utility to add the new device to the network, as described in the following procedure. To add a Powerline device to the Powerline network using NETGEAR genie: ... -
Page 29: Wireless Settings
Powerline 500 WiFi Access Point (XWN5001) Wireless Settings You can use NETGEAR genie to view the current wireless settings, or to change them. To change the wireless settings for your XWN5001 access point: On the Powerline Utility screen, right-click the XWN5001 icon. -
Page 30: Access Netgear Web Genie
If you want your access point to use the same wireless settings as your router or gateway, scroll down and click Apply. Access NETGEAR Web genie From the NETGEAR genie Powerline Utility screen, you can manage basic settings on your Powerline devices. To configure more advanced settings on individual Powerline devices, use NETGEAR web genie. - Page 31 You can change the default password using the web genie. The NETGEAR web genie for the device displays in your browser window. You can use the web genie to reboot the device, configure advanced wireless settings, upgrade your device firmware, and more.
-
Page 32: Advanced Wireless Settings
You can use the Wireless Settings screen to change wireless settings including the wireless mode and channel. To change the advanced settings for the access point wireless network: Log in to the NETGEAR web genie for your XWN5001 access point. See Access NETGEAR Web genie on page 30. -
Page 33: Upgrade The Firmware
Powerline 500 WiFi Access Point (XWN5001) Upgrade the Firmware You can use NETGEAR web genie to upgrade the firmware on your access point. To check for new firmware and update your XWN5001 access point: Log in to the NETGEAR web genie for your XWN5001 access point. See... -
Page 34: Chapter 3 Troubleshooting
Troubleshooting This chapter provides information to help you diagnose and solve problems you might encounter. If you do not find the solution here, check the NETGEAR support site at http://support.netgear.com for product and contact information. This chapter includes: • Basic Functioning •... -
Page 35: Basic Functioning
If power is supplied and the LEDs stay off, someone might have used NETGEAR genie to turn off the LEDs. Use NETGEAR genie to see if the LEDs are turned off. If they are, then use the genie to turn them back on. -
Page 36: If You Do Not See All Your Devices With The Netgear Genie
Amber or red. Move the Powerline device to another electrical outlet with a faster connection. Wireless LED Is Off If the Wireless LED stays off, use NETGEAR web genie to turn on the wireless radio. See Advanced Wireless Settings on page 32. The Wireless LED is lit when the wireless radio is turned on. -
Page 37: If You Do Not See The Powerline Icon On Your Network Map
If You Do Not See the Powerline Icon on Your Network If you navigate to the Network Map on NETGEAR genie and do not see the Powerline icon, it could be that your computer’s antivirus software is blocking the Powerline communication protocol. - Page 38 Powerline 500 WiFi Access Point (XWN5001) The following screen displays: Click Add to add a firewall rule. The following screen displays: In the General tab, do the following: a. Type a name for the firewall rule in the Rule name field.
- Page 39 The rule appears in the firewall rule list. Make sure that the check box next to the rule is selected, and click OK. Restart the computer and launch NETGEAR genie. The Powerline icon should now display on the Network Map screen.
-
Page 40: Appendix A Supplemental Information
Supplemental Information This appendix provides technical specifications and safety information for the Powerline 500 WiFi Access Point (XWN5001). This appendix includes the following sections: • Technical Specifications • Safety Information... -
Page 41: Technical Specifications
Powerline 500 WiFi Access Point (XWN5001) Technical Specifications Feature Specification Data and routing protocols IEEE 802.3 (10BASE-T), IEEE 802.3u (100BASE-Tx) AC input 100–240V, 0.2A (max.) Power consumption Normal: 4W, Power saving mode: 3W Dimensions 112 x 74 x 45 mm (4.41 x 2.91 x 1.77 in.) Weight 0.245 kg (0.54 lb) -
Page 42: Safety Information
Powerline 500 WiFi Access Point (XWN5001) Safety Information Follow these safety guidelines to ensure your own personal safety and to help protect your system from potential damage. • AC input: 100–240V, 0.2A (max.) • Operating temperature: 0C–40 degrees C. •... - Page 43 Notification of Compliance N ETGE A R Powerl i n e P ro d uct s Safety Instructions and Precautions WARNING! Use the following safety guidelines to ensure your own personal safety and to help protect your product from potential damage. To reduce the risk of bodily injury, electrical shock, fire, and damage to the equipment, observe the following precautions.
-
Page 44: Regulatory Compliance Information
FCC Declaration Of Conformity We, NETGEAR, Inc., 350 East Plumeria Drive, San Jose, CA 95134, declare under our sole responsibility that the Powerline 500 Access Point (XWN5001) complies with Part 15 of FCC Rules. -
Page 45: Canadian Department Of Communications Radio Interference Regulations
Canadian Department of Communications Radio Interference Regulations This digital apparatus (Powerline 500 WiFi Access Point (XWN5001)) does not exceed the Class B limits for radio-noise emissions from digital apparatus as set out in the Radio Interference Regulations of the Canadian Department of Communications. - Page 46 Powerline 500 WiFi Access Point (XWN5001) GPL License Agreement GPL may be included in this product; to view the GPL license agreement, go to ftp://downloads.netgear.com/files/GPLnotice.pdf For GNU General Public License (GPL) related information, please visit http://support.netgear.com/app/answers/detail/a_id/2649. Notification of Compliance...
- Page 47 MAC addresses electromagnetic emissions product label encryption keys specification default and private mode, wireless setting model number Ethernet LED described modulation type troubleshooting Ethernet port name, changing for Powerline devices NETGEAR genie Factory Reset button NETGEAR web genie described...
- Page 48 Powerline 500 WiFi Access Point (XWN5001) network key, default networks technical specifications Powerline technical support wireless temperature, operating trademarks troubleshooting On/Off switch LEDs NETGEAR genie Powerline icon Symantec firewall package contents password device NETGEAR web genie upgrading firmware Pick A Plug feature...
Need help?
Do you have a question about the XWN5001 and is the answer not in the manual?
Questions and answers