Download Print this page
GE GLD5664V00SS Installation Instructions Manual

GE GLD5664V00SS Installation Instructions Manual

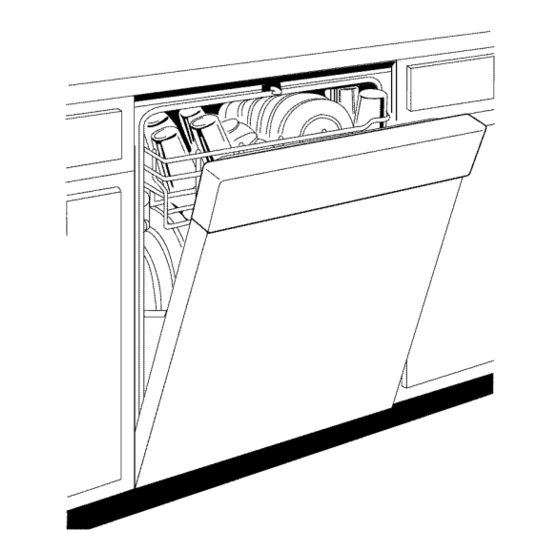
Built-in dishwasher

Advertisement

Quick Links

_ _
°
r¸_i _L_+° _._-._
_
#_'J_'_c__ _ _]I/ /II_]
Appliances
Installation Instructions
Built-In Dishwasher
If you have questions, call 800.GE.CARES{800.432.2737) or visit our Website at: GEAppliances.com.
In Canada, please call 1.800.561.3344 o r visit www.geappliances.ca
BEFORE YOU BEGIN
Read these instructions
completely
and
carefully.
I M PORTANT
- Observe all governing codes and
ordinances.
• Note to Installer
- Be sure to leave these instructions
for the
consumer's
and local inspector's
use.
• Note to Consumer
- Keep these instructions
with your
Owner's
Manual for future reference.
• Skill Level - Installation
of this dishwasher
requires
basic mechanical,
electrical
and plumbing
skills. Proper
installation
is the responsibility
of the installer.
Product
failure due to improper
installation
is not covered
under
the GE Appliance
Warranty.
See warranty
information.
• Completion
Time - i to 3 Hours. New installations
require
more time than replacement
installations.
I M PORTANT
- The dishwasher MUST be installed
to allow forfutureremoval from the enclosureif serviceis
required.
If you received a damaged dishwasher, you should immediately
contact your dealer or builder.
Optional Accessories
-
See the Owner's Manual for available
custom panel kits.
FOR YOUR SAFETY
Read and observe all CAUTIONS and WARNINGS shown
throughout
these instructions. While performing
installations described in this booklet, gloves, safety glasses
or goggles should be worn.
READ CAREFULLY.
KEEP THESE INSTRUCTIONS.
31-30283
05-11GE

Advertisement

loading

Summary of Contents for GE GLD5664V00SS

  • Page 1 #_'J_'_c__ _ _]I/ /II_] Appliances Installation Instructions Built-In Dishwasher If you have questions, call 800.GE.CARES{800.432.2737) or visit our Website at: GEAppliances.com. In Canada, please call 1.800.561.3344 o r visit www.geappliances.ca BEFORE YOU BEGIN I M PORTANT - The dishwasher MUST be installed...
  • Page 2 Installation Preparation PARTS SUPPLIED Side and Top Trim Pieces Ion some models) IN INSTALLATION PACKAGE: [] Two #8-18 x 5/8" Phillips special head screws, to HoseClamp Drain Hose secure dishwasher to underside of countertop Drain Hose Hanger [] Junction box cover and #10 hex-head screw Hose clamp Screw Kit Mounting...
  • Page 3 Installation Preparation PREPARE DISHWASHER ENCLOSURE AWARNING: Toreducethe risk of electric shock,fire, or injury to persons,the installer must ensurethat the dishwasheris completelyenclosedat the time of installation. ADVERTENCIA: ThisWall Area must be Free Poro reducirel riesgode descorgoel6ctrico, incendioo lesioneso of Pipesor personas,el instolodor debe osegurorsede que el Iovoplotosest6 wires s4-1/2"_+1/4"...
  • Page 4 Installation Preparation PREPARE ELECTRICAL WIRING Receptacle IkWARNING: Alternate Location FOR PERSONAL SAFETY: Remove house fuse or open circuit breaker beforebeginning installation.Do not usean extensioncord or adapter plug with this appliance. Ik ADVERTENCIA: Cabinet PARA SEGURIDAD P ERSONAL: Quiteel fusible o abra el interruptor de circuitos antes de comenzarla instalaci6n.No utilice un cable de extensi6no un enchufe adaptador con este artefacto.
  • Page 5 Installation Preparation PREPARE HOT WATER LINE • The line may enter from either side, rear or floor within the shaded area shown in Figure F. • The line may pass through the same hole as the electrical cable and drain hose. Or,cut an additional i-i/2" diameter hole to accommodate the water line.
  • Page 6 Dishwasher Installation STEP 3: REMOVE WOOD BASE, ACAUTION: INSTALL LEVELING LEGS Donot removewood baseuntil you to install the are ready dishwasher.Thedishwasherwill tip overwhen the door is opened IMPORTANT if base is removed. - Do not kick off wood base! Damage will occur. PRECAUCION: •...
  • Page 7 Position clamp so screw is on bottom side of hose. ordinances. Maximum power cord length is 6 feet. Power Cord Refer to Figure L. Kit WX09X70910, available for purchase from an authorized GE IMPORTANT Appliance Dealer, meets these requirements.
  • Page 8 Dishwasher Installation STEP 8: POSITION WATER LINE STEP 10: SLIDE DISHWASHER AND HOUSE WIRING THREE-FOURTHS OF THE WAY • Position water supply line and house wiring on the floor of the INTO CABINET opening to avoid interference with base of dishwasher and IN PORTANT components under dishwasher.
  • Page 9 Dishwasher Installation STEP 12: INSTALL MOUNTING BRACKETS STEP 13: PUSH DISHWASHER INTO FINAL POSITION For wood countertops you will need the top-mounting brackets and screws set aside in Step 1. For granite countertops you will • Check the tub insulation blanket, if equipped, to be sure it is need the side-mounting brackets and screws set aside in Step smoothly wrapped around the tub.
  • Page 10 Dishwasher Installation STEP 14: LEVEL DISHWASHER STEP 15: POSITION DISHWASHER, SECURE TO COUNTERTOP OR CABINET I M PORTANT - Dishwasher must be level f orproper In this step you will need the 2 Phillips special head screws dishrackoperation, wash performance and dooroperation. from the screw kit set aside in Step 1.
  • Page 11 Dishwasher Installation STEP 16: CONNECT WATER SUPPLY • Connect drain line to air gap, waste tee or disposer using the previously determined method. Secure hose supply Connect water line to 90 ° elbow. with a screw-type clamp. • Slide compression nut, then ferrule over end of water line.
  • Page 12 Dishwasher Installation STEP 18: CONNECT POWER SUPPLY STEP 19: PRETEST CHECKLIST Ifa power cord with plug is already installed proceed to Review this list after installing your dishwasher to avoid Step 19. charges for a service call that is not covered by your warranty.
  • Page 13 Dishwasher Installation STEP 20: DISHWASHER WET TEST STEP 21: REPLACE TOEKICK [] Turn on power supply or plug power cord into outlet, • Place toekick against the legs of the dishwasher. if equipped. Latch door. Push Rinse Only pad/button. Push Start/Reset pad/button one time. Dishwasher should start.
  • Page 14 Notes...
  • Page 15 Notes...
  • Page 16 SPECIFICATIONS SUBJECT TO CHANGE WITHOUT NOTICE GEAppliances & Lighting General Electric Company Louisville, Kentucky 40225 GEAppliances.com © 2011 General Electric Company...