Table of Contents
Advertisement
Available languages
Available languages
Advertisement
Chapters
Table of Contents

Subscribe to Our Youtube Channel
Related Manuals for Nexus Wind Data


Summary of Contents for Nexus Wind Data
- Page 1 Installation and Operation Manual...
- Page 2 If the instrument are to be used in a Nexus Network, there are some systems settings that are dependent on where the transducers are installed, i.e. at the instrument or at the Server.
-
Page 3: Table Of Contents
2.2 Installing cable ......................8 2.3 Connections in Nexus Network ................. 8 2.4 Connection of log transducer..................9 3 First start (only in a Nexus Network) ................10 3.1 Initialising the instrument..................10 3.2 Re-initialising the instrument .................. 10 4 Operation ........................11 4.1 About this manual .................... - Page 4 6.2.2 Fault - action ....................... 32 6.2.3 Error messages....................32 7 Specifications ......................... 33 7.1 Technical specifications ..................33 7.2 Nexus data bus introduction and user policy ............33 8 Optional Accessories...................... 35 9 Abbreviations ......................... 37 10 Warranty......................... 36...
-
Page 5: Part Specifications
PART SPECIFICATIONS Part specifications Nexus Wind Data is delivered with all parts for mounting. Check prior to installation. Wind Data instrument Qty. Description Reference Instrument, Nexus Wind Data Instrument front cover Drill template Installation and user manual Warranty card National distributors list Power cable, red and black, 3 m (9 ft) Extra wire protectors, 0,25 mm (1/100”) - Page 6 PART SPCIFICATIONS...
-
Page 7: Installation
2: INSTALLATION Installation You can install the Nexus Wind Data in three different ways: • The wind transducer is connected directly to the Nexus Wind Data instrument • By using the connection kit when both log and wind transducers are installed with a single Wind Data. -
Page 8: Installing The Instrument
Run the Nexus Network cable from the Server to the instrument. Cut the Nexus Network cable to length. Peel off about 35 mm (1,4") of the cable insulation. Remove about 6 mm (1/4") from the 3 isolated wires (the 4th wire is an earth / screen). -
Page 9: Installing Cable
3A Fuse Connections in Nexus Network Server If you already have a Nexus Network i.e. a Server, it is more practical to connect the transducer to the Server due to the single instrument cable installation. Note, set C71 OFF (see 5.5.1) Transducer The instrument is then connected to the Server’s Nexus Network terminal... -
Page 10: Connection Of Log Transducer
Connection of log transducer NEXUS, Star, D-20, If you have an other log instrument i.e. a Nexus log, a Star log, a D-20 2200 or 220 log, a 2200 log or a 220 log, you may connect the single log pulse wire from that instrument to the Wind Data instrument terminal 4. -
Page 11: First Start (Only In A Nexus Network)
Network ID number. At first power on after installation, you will be asked to press KEY [PrSKEY]. This will give the instrument a logical ID number on the Nexus Network. To initialise the instrument, press KEY on all installed digital instruments, one at the time. -
Page 12: Operation
Each time a function is mentioned in the text, it will be in brackets and in the same format, where possible, as displayed, e.g. [AWA]. This manual has been written to be: Compatible with Wind Data instrument from software version 1.0. -
Page 13: How To Use The 4 Push-Buttons
4: OPERATION How to use the 4 push-buttons APPARENT MAIN WIND ANGLE FUNCTION TRUE INFOTEXT WIND ANGLE SUB- TRIM FUNCTION FUNCTION MODE DOWN 3.2.1 MODE A press on MODE change the mode of the graphical display. It scrolls in a circular pattern, one step for every press. The MODE button is also used to move the cursor when in edit mode. -
Page 14: Clear
To select between the 4 light levels, press UP: [LOW], [MID], [MAX] and [OFF]. To lock the selected level, press KEY. The selected light level will be copied to all Nexus instruments connected to the system. When the lighting is on, it is not possible to reduce or turn... -
Page 15: Main Function
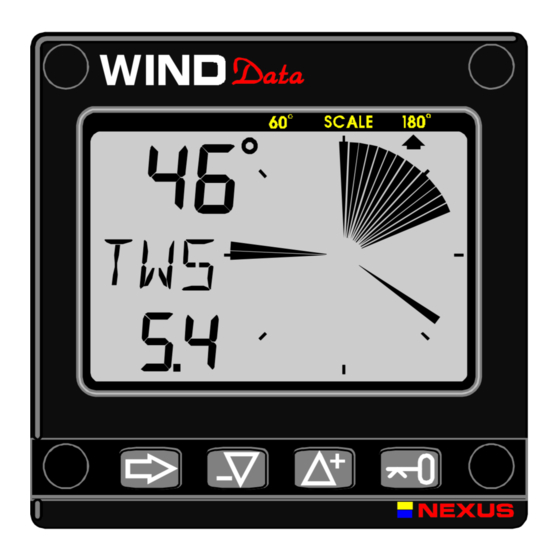
4: OPERATION Main function Top data is relative Wind angle, [AWA] (Apparent Wind Angle). As an alternative to [AWA] the following can be displayed: [AWS] (Apparent Wind Speed). [TWA] (True Wind Angle) if the log transducer is connected. [TWS] (True Wind Speed) if the log transducer is connected. To change between these functions, see C12, 5.1.2. -
Page 16: Sub-Functions
Wind. The water speed information from the log transducer is needed. The speed information can be taken from the log transducer or from Nexus Network. VMG = 0.0 knots when the true Wind angle is perpendicular to the boat. -
Page 17: Battery Voltage [Bat], Option
Some of the functions can only be used when the Wind Data is connected to Nexus Network. - Page 18 Nexus Server on the NMEA 0183 input. The Server will then transmit TBS on the Nexus Network. On the Wind Data display you will see both the digital value in % and the graphical value as a 2% variation for each segment.
-
Page 19: More Wind Data Functions Nexus Network
The Wind Data functions may be added or removed by the user. The Wind Data instrument can be used in a small Network together with the Multi, Log or analogue instrument, without a Server. In order to make the installation easy when using both log and Wind transducer in a small Network we recommend you to install with connection kit art.no. -
Page 20: Geographic Wind Direction (Twd)
4: OPERATION If you are using the race timer on the Multi or Log instrument you will have a graphical 60 second countdown timer ”popping up” on this instrument. In this example there is 45 second to start. 3.6.1 Geographic Wind direction (TWD) To get this function, set NAV = On C14 (See 5.1.4). - Page 21 Your ”boat” will be displayed on the right or left side of the road. The distance is also displayed and can be in either Nautical mile, Km or Miles.
-
Page 22: Hdc / Nxt, Course After Tack Or Jibe
HDC / NXT, Course after tack or jibe To get this function, set NAV = On C14 (See 5.1.4). This function also needs a Compass connected to the Nexus Server If the Compass sensor is missing, the HDC may be replaced by the COG (Course over ground) by setting the reference in COG. -
Page 23: Btw / Nxt, Bearing And Angle Deviation Relative Next Course
4: OPERATION 3.6.5 BTW / NXT, Bearing and angle deviation relative next course To get this function, set NAV = On C14 (See 5.1.4). This function is using both the Compass and the navigator information to calculate the angle deviation between the bearing and the course after tack. - Page 24 4: OPERATION 4: OPERATION DOWN Wind: When sailing downWind, the boat can always be sailing at the highest WCV (speed towards the mark). When [NXT] is [00 ] you should jibe because your drift is not important. The functions [BTW] and [NXT] is toggling, but can be locked or unlocked by use of the KEY.
-
Page 25: Calibration
5: CALBRATION Calibration To get the most out of your Nexus instrument, it is important to carefully calibrate the instrument. The calibration values are stored in a non volatile memory. To access calibration mode, press and hold KEY more than 2 seconds. -
Page 26: C13 Displaying Boat Speed, Trip Log And Temperature, Option
C13 Displaying boat speed, trip log and temperature, option When set to OFF, the functions will be removed from the display. The Wind Data instrument may be used as a Server in the Nexus Network, transmitting the log and temp to other Nexus instruments without having the information displayed in this instrument. -
Page 27: C23 Unit For Temperature
4.3.1 C31 True or magnetic course This function is only used when the instrument is connected in the Nexus Network. [MAG On] will display bearing, course and Wind direction as magnetic. The LCD indication is (MAG). Select [OFF] to display all as true. -
Page 28: C50 Wind Settings
5: CALBRATION C50 Wind Settings To return to normal mode, press KEY when the text [rET] is displayed. 4.4.1 C51 Network setting of true or apparent Wind angle Select true [TWA] or apparent Wind angle [AWA] as main function. The optional analogue Wind instrument will display the same selection. -
Page 29: C63 Speed Reference, Water Or Gps
4.4.6 C63 Speed reference, water or GPS This function is only used when the instrument is connected in the Nexus Network. When [BSP] is selected, the reference is water speed provided by the log transducer for calculation of true Wind speed and angle, VMG and NXT function together with the BTW. -
Page 30: C71 Wind-Master
5: CALBRATION To return to normal mode, press KEY when the text [rET] is displayed. In the configuration you will be able to tell the Nexus Network where you have installed the log and Wind transducer. This is important because you may optionally install those transducers at the Server too. -
Page 31: C74 Demo Mode
19763. 4.5.5 C74 Demo mode The Wind Data instrument has a built in demonstration mode. All values are simulated in this mode. It is convenient to learn the functions of the instrument by using this mode. -
Page 32: Maintenance And Fault Finding
Fault finding Before you contact your Nexus dealer, and to assist your dealer to give you a better service, please check the following points and make a list of: All connected instrument and transducers, including their software version numbers. -
Page 33: Fault - Action
No Network data received within a given time. ERROR 10 Range error caused by bad format, e.g. 430°. ERROR 11 Remote command that can not be performed. If other error messages than the above appears on the Wind Data instrument, contact your Nexus dealer. -
Page 34: Specifications
Nexus data bus introduction and user policy Introduction: The Nexus data bus is a Multi talker Multi receiver data bus specially designed for marine navigation applications. It utilises the RS485 standard with up to 32 senders and/or receivers to form a Local Area Network. - Page 35 PC to the Server or Nexus instruments and/or the Nexus GPS. A 9-pole D-sub connector connected to the RS232 port on the PC.
-
Page 36: Optional Accessories
(10 + 26 ft) cable 20721 Masttop Unit, 22 m ( 72 ft) cable 20860 Fluxgate Compass, 8 m (26 ft) cable 21000 GPS Antenna, Nexus/NMEA, fix, 10 m ( 33 ft) cable 21117 GPS Compass XL1000, portable 21170 GPS Navigator XL300, portable... - Page 37 Single bracket for Maxi repeater 69999 Double bracket for Maxi repeater 21248 Nexus FD interface. PC interface with 1 m (3.3 ft) cable. Includes a 3½”disc. with software for waypoint editing and a data bus manager and NMEA interface 19763...
-
Page 38: Abbreviations
9: ABREVIATIONS Abbreviations Boat Speed Bearing To Waypoint Celsius Fahrenheit KiloMetre KnoTS Miles per Hour Liquid Crystal Display RETurn Speed Over Ground TRiP Minus Plus... -
Page 39: Warranty
10: WARRANTY WARRANTY GENERAL All our products are designed and built to comply to the highest class industry standards. If the products are correctly installed, maintained and operated, as described in the installation and operation manual, they will provide long and reliable service. -
Page 40: Warranty Card
10: WARRANTY File id: WARRANTY CARD TO BE RETURNED TO YOUR NATIONAL DISTRIBUTOR OWNER: Name: Street : City/Zip Code : Country: Product name: Serial number: Date of purchase: _________________________Date installed ______________________________ Dealers stamp: Tick here if you do not wish to receive news about future products... - Page 41 INTRODUKTION Inledning Tack för att du valt Nexus Wind Data instrument. Vi är övertygade om att Du kommer att uppskatta all värdefull information som är tillgänglig på detta instrument vare sig Du är en kappseglare eller nöjer dig med familjesegling, och för att Du skall få största möjliga nytta av ditt nya vindinstrument är det därför viktigt att du noggrant följer...
- Page 42 Utgåva: Oktober 1997...
- Page 43 4.5.7 Triplog [TRP], tillval ................19 4.5.8 Vattentemperatur [TMP], tillval ..............19 4.5.9 Trimfunktion för kryssvinkel eller fart, tillval ...........19 4.6 Funktioner med Wind Data i Nexus nätverk..........20 4.6.1 Geografisk vindriktning [TWD] ...............21 4.6.2 WCV, Fart mot etappmål (märke) ............23 4.6.3 Avvikelse från kurslinje, XTE ..............23 4.6.4 HDC / NXT , Kurs och kurs att hålla efter slag........23...
- Page 44 5.3.2 Inställning av missvisning, C32............25 5.3.3 Inställning av kurs referens, C33 ............25 5.4 Inställning / kalibrering av vind, C50.............26 5.4.1 Nexus Inställning av sann eller relativ vindvinkel, C51 .....26 5.4.2 Val av enhet för vindhastighet, C52............26 5.4.3 Vindhastighets kalibrering, C53............26 5.4.4 Justering av visad vindvinkel, C54 .............26...
-
Page 45: Innehåll I Förpackningen
Monteringsskruvar för instrument Runda gummiproppar för att täcka Monteringsskruvarna Förpackning, siliconfett Anslutningskåpa 4-poliga skruvterminaler Endast i förpackning med Wind data instrument komplett med givare Vindgivare Nexus 25m mastkabel. Fästskruvar för vindgivare Vindgivarfäste Fyll i garantikortet När du har kontrollerat att alla ovanstående artiklar finns med i förpackningen, ber vi dig att fylla i garantikortet och skicka det till generalagenten. - Page 46 Svenska INNEHÅLL I FÖRPACKNINGEN...
-
Page 47: Installation
Innan Du börjar borra… Planera för placering av givare och instrument så att avsedd funktion uppfylls och att kabeldragning blir enkel. Om Du tänker använda Wind Data i ett Nexus nätverk med flera instrument bör Du nu bestämma om vindgivaren skall installeras i instrumentet eller i Nexus Server. -
Page 48: Installation Av Instrument
Svenska 2: INSTALLATION Installation av instrument Instrumentet är avsett för utanpåliggande montering och skall monteras framifrån på en jämn och plan yta. Använd alltid den medföljande borrmallen vid monteringen. Borra aldrig genom instrumentets monteringshål eftersom packningarna kan skadas och därmed göra instrumentet otätt. Garantin gäller ej för instrument med borrskadade monteringshål. -
Page 49: Kabeldragning
Röd Inkoppling i ett Nexus nätverk. Om du redan har ett Nexus nätverk, dvs. en Server, är det mer praktiskt att installera givaren till Servern. Instrumentet ansluts sedan var som helst i nätverket. OBS! Sätt C71 i OFF (se 5.5.1) Server 3A Säkring... -
Page 50: Installation Av Loggivare
Om du har ett annat logginstrument, en Star logg, 2200, 220, Power eller Direction, kan du ansluta endast en kabel från det instrumentet till skruv 4 på Wind Data instrumentet Om Du inte har något annat instrument kan en loggivare anslutas direkt till instrumentet. - Page 51 Svenska 2: INSTALLATION...
-
Page 52: Initialisering Av Instrumentet
Efter den första uppstarten efter installationen blir du ombedd att trycka på en knapp [PrESKEY] Detta kommer att ge instrumentet ett enhetsnummer på Nexus bussen. Detta kommer endast att ske om flera Nexus instrument är inkopplade på bussen. OBS! Om fler instrument är nyinkopplade på... -
Page 53: Funktioner
Alla funktioner som följs av texten tillval, är inte tillgängliga på ett fabriksinställt instrument. Se kalibreringskapitlet för att få tillgång till dessa funktioner. Denna manual är skriven för Wind data instrument version 1.00 OBS! Vi har lagt ner mycket möda på att få denna manual korrekt, fullständig och enkel att förstå. -
Page 54: Så Används De Fyra Knapparna
4: FUNKTIONER Svenska Så används de fyra knapparna SKENBAR HUVUD- VINDVINKEL FUNKTION SANN LEDTEXT VINDVINKEL UNDER- TRIM FUNKTION FUNKTION NYCKEL FUNKTION 4.2.1 FUNKTION Med FUNKTION väljs funktion på den analoga delen, skala 60° eller 180°, eller endast geografisk vindvinkel (tillval). FUNKTION används också... -
Page 55: Nollställning Av Ett Värde
Svenska 4: FUNKTIONER 4.2.5 Nollställning av ett värde & Genom att trycka på UPP och NER samtidigt nollställs ett värde 4.2.6 Kalibrering För att komma in i kalibreringsläge, håll NYCKEL nertryckt i två sekunder. För att komma ur kalibreringsläge, tryck NYCKEL när texten [RET] visas. -
Page 56: Huvudfunktioner
4: FUNKTIONER Svenska Huvudfunktioner Överst visas relativ vindvinkel, [AWA] (Apparent Wind Angle). Alternativt kan följande information visas: Relativ vindhastighet, [AWS] (Apparent Wind Speed). Sann vindvinkel, TWA] (True Wind Angle) om loggivare är ansluten Sann vindhastighet, [TWS] (True Wind Speed) om loggivare är ansluten. -
Page 57: Underfunktioner
Texten [VMG] (Velocity Made Good) och hastighet rakt mot (eller rakt från) vinden visas. Kräver loggivare eller att loggsignal byglas från t.ex.Nexus logginstrument. Information om båtfart kan även fås via Nexus nätverk. VMG = 0.0 knop när Du seglar med sann vindvinkel 90 grader tvärs båten och VMG =... -
Page 58: Batterispänning [Bat], Tillval
Båtfart [BSP], tillval Texten [BSP] och båtfart (vattenhastighet) visas. Text [BSP] visas växelvis med vald enhet, [KTS], [KMH] eller [MPH]. När loggivare ansluts till Wind Data instrumentet får Du tillgång till sann vindhastighet och vindvinkel, VMG, Båtfart, Trip samt vattentemperatur. - Page 59 [TBS] som beräknas med hjälp av ett program för PC där TBS fås ur ett polardiagram för just din båt. Information om ”Target Boat Speed” sänds från PC till NMEA 0183 ingången på Nexus Server, som i sin tur sänder ut TBS på Nexus nätverk. På Wind Data displayen kan Du se trim i % både digitalt och grafiskt.
-
Page 60: Funktioner Med Wind Data I Nexus Nätverk
Art.nr. 21453. Anslutning av både vind- och loggivare sker samlat vid t.ex.mastfoten. Därefter går endast en kabel fram till Wind Data med signaler och spänning. Till Wind Data kan Du nu enkelt ansluta t.ex.ett Multi Control instrument. När Nexus Wind Data skall användas i ett större Nexus nätverk med fler än 3 givare (log, wind, ekolod) rekommenderas att givare ansluts till... -
Page 61: Geografisk Vindriktning [Twd]
Svenska 4: FUNKTIONER 4.6.1 Geografisk vindriktning [TWD] Tillvalsfunktion, NAV = On i inställningar C10. Text [TWD] visas kortvarigt, därefter visas t.ex.[SSW], [NO], [WNW] etc. tillsammans med numerisk vindriktning i grader. Grafisk visning av TWD blir också tillgänglig. Tryck på FUNKTION tills dess att [TWD 360] visas tillsammans med geografisk vindriktnings ”pil”. -
Page 62: Hdc / Nxt , Kurs Och Kurs Att Hålla Efter Slag
4.6.4 HDC / NXT , Kurs och kurs att hålla efter slag Funktionen kräver att kompass anslutits till Nexus Server eller Kompass instrument. Tillval NAV on i inställningar C14 (se 5.1.4). Saknas kompass kan kompasskurs ersättas av COG (kurs över grund) genom att välja GPS referens i inställningar C33 (se 5.3.3). -
Page 63: Btw] / [Nxt] , Bäring Och Vinkelavvikelse Mot Märke
Svenska 4: FUNKTIONER 4.6.5 [BTW] / [NXT] , Bäring och vinkelavvikelse mot märke Funktionen kräver kompass och navigator samt tillval NAV i inställningar C14 (se 5.1.4). [BTW] visar bäring till märke. [NXT] visar negativ eller positiv slör/kryssvinkelskillnad efter gipp/slag baserat på kompasskurs eller COG, dvs. - Page 64 4: FUNKTIONER Svenska SLÖR: Vid slör kan båten alltid seglas med högsta fart mot märke VMG eftersom motsvarande slörbog efter gipp, dvs. när [NXT] visar 00 kommer att ske så att samma optimala skärningsvinkel kan hållas ända till märke utan större kurskorrigeringar. Funktionerna [BTW] och [NXT] växlar, men kan låsas/låsas upp med NYCKEL OBS! Denna funktion används endast på...
-
Page 65: Inställningar / Kalibrering
C20 - C24 = BSP, Logg-givar och temperatur kalibrering. C30 - C33 = HDC, Kompass inställning/deviation. C50 - C64 = WND, Vindgivarinställning/kalibrering. C70 - C74 = CON, Konfigurering av Nexus systemet. Därefter väljs respektive inställning/kalibrering inom huvudkalibreringsgruppen med NER och UPP . -
Page 66: Tillval Av Båtfart, Logg Samt Vattentemperatur, C13
(se C7, kap 5.5.2) 5.1.4 Tillval av NAV funktioner, C14 NAV funktioner är endast användbart med Wind Data i ett Nexus nätverk med kompassgivare och navigator. Inställning [NAV On] adderar funktionerna som visas under Nexus nätverk. Se 4.6 5.1.5... -
Page 67: Inställning Av Enhet För Vattentemperatur, C23
För att återgå till normaldrift, tryck NYCKEL när [rEt] visas. 5.3.1 Inställning av sann eller magnetisk kurs, C31 Gäller endast Nexus nätverk. Välj On för att visa magnetisk bäring, kurs och vindriktning (indikeras MAG). Välj OFF för att visa sann bäring, kurs samt vindriktning. Kan vara intressant om man har mycket stor missvisning på... -
Page 68: Inställning / Kalibrering Av Vind, C50
Inställning / kalibrering av vind, C50 För att återgå till normaldrift, tryck NYCKEL när [rEt] visas. 5.4.1 Nexus Inställning av sann eller relativ vindvinkel, C51 Välj mellan skenbar [AWA] eller sann [TWA] vindvinkel, denna inställning påverkar de analoga vindrepeatrarna samt de Multi instrument som har [WIA] i sin systemsetup C63 Inställning C51 är identisk med Multi Control inställning C51. -
Page 69: Hastighets Referens, Vatten- (Log) Eller Gps, C63
Wind Data instrumentet och Nexus Server kan sprida information om vind och fart. Ett Wind Data instrument som anslutits till Nexus nätverk kan ta information om både vind och fart från Nexus nätverk eller från givare som anslutits direkt till instrumentet. Informationen sänds då vidare till... -
Page 70: Vindmaster, C71
5: INSTÄLLNINGAR Svenska Obs !, om Du t.ex. konfigurerar för anslutning av loggivare i Wind Data instrumentet, men ändå skruvar in givaren i Nexus Server kommer varken fart, logg eller vattentemperatur att visas någonstans i Nexus systemet. 5.5.1 Vindmaster, C71 Inställning On innebär att instrumentet är vindgivarmaster i stället för... -
Page 71: Demo- Mode, C74
Svenska 5: INSTÄLLNINGAR Inkoppling av tryckknapp. Koppla in en slutande tryckknapp mellan terminal 3 och jord. Det är möjligt att koppla flera tryckknappar parallellt, t.ex en på styrbords sida och en på babord. Tryckknappens artikel nummer: 19763 5.5.4 Demo- mode, C74 Inställning av demo-mode (demonstrations läge) sker genom att sätta [DEM] till [On]. -
Page 72: Underhåll Och Felsökning
Kontrollera anslutningar och kablar någon gång om året. Felsökning Innan du kontaktar Nexus agent vill vi att du kontrollerar en del saker. Detta för att vi skall ha möjlighet att ge bra service. Vilka instrument som är kopplade till Nexus Nätverket, med dess versionsnummer Nexus Nätverksenhets nummer för alla instrument... -
Page 73: Fel - Åtgärd
0V och halva varvet 5V Vid ”hoppiga värden kontrollera dämpningen (SEA) (se C11, 5.1.1) 3 Felmeddelanden Följande felmeddelanden kan uppstå: ERROR 2 Inget Nexus Nätverk, kontrollera anslutningar ERROR 3 Långt uppehåll i dataöverföringen, kontrollera kablar och Id-nummer ERROR 10 ogiltigt Värde, t.ex. -
Page 74: Specifikationer
Nätverket. Det går även att lägga in Waypoints och rutter via PC:n. PC-interfacet är utrustat med en anslutning till Nexus Nätverk samt en 9-polig D-sub kontakt för anslutning till kommunikationsporten (RS-232) -
Page 75: Andra Delar I Nexus Serien
Svenska 8: TILLBEHÖR I NEXUS SERIEN Andra delar i Nexus serien Nedan finner du en förteckning över andra instrument och givare i Nexus serien. Art. Nr. Nexus, Kompletta Set: 20445-3 Multi Control instrument med Server 20445-1 Speed log, komplett med givare... - Page 76 Mastfäste för en Maxi repeater 69999 Mastfäste för två Maxi repeaters 21248 Nexus PC interface. FD med 1 m (3.3 ft) kabel. Innehåller en 3½”disc. Med mjukvara för waypoint editeringing och data bus hantering samt NMEA interface 19763 Extern tryckknapp för Taktik och MOB funktion 21154 Högfarts Paddelhjul, upp till 40 KTS...
- Page 77 Svenask 9: FÖRKORTNINGAR Förkortningar Förkortning Engelsk beskrivning Svensk översättning ADJust Justera APParent Skenbar Apparent Wind Angle Skenbar vindvinkel Apparent Wind Speed Skenbar vindhastighet BATtery Batteri Boat Speed Båtens fart Bearing To Waypoint Bäring till etappmål Celcius Celcius Calibrate 10 Kalibrering 10 Calibrate Kalibrering CONfiguration...
- Page 78 10: GARANTI Svenska GARANTI ALLMÄNT Alla produkter är utvecklade och tillverkade för att motsvara den yppersta bransch standarden. När produkten är korrekt installerad, handhavd och underhållen, i enlighet med beskrivningen i produktens manual, kommer den att bidra med många års tillförlitlig drift. Utöver produktens tekniska manual kan också...
- Page 79 Svenska 10: GARANTI Fil id: GARANTIKORT SKICKAS IN TILL GENERALAGENTEN ÄGARE: Namn: Adress : Postnummer : Land: Produktens namn: Serie nummer: Inköpsdatum: _________________________________Installationsdatum ___________________________ Återförsäljarens stämpel: Kryssa här om du inte är intresserad av information om nya produkter...
Need help?
Do you have a question about the Wind Data and is the answer not in the manual?
Questions and answers