Broan 331H Installation Manual
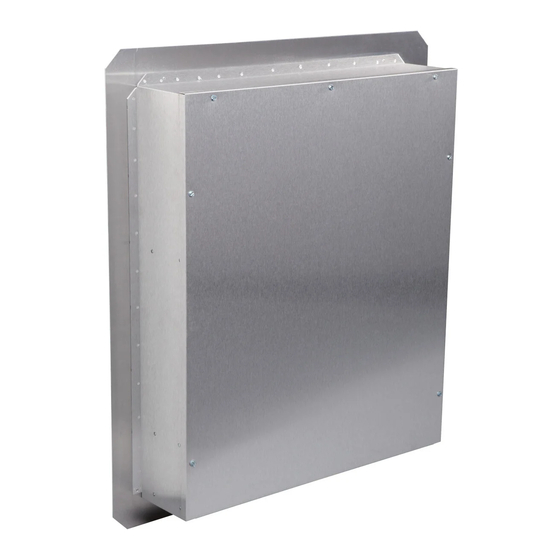
Exterior mounted blower
Hide thumbs
Also See for 331H:
- Installation instructions manual (49 pages) ,
- Instructions manual (13 pages) ,
- Specification sheet (1 page)
Table of Contents
Advertisement
Available languages
Available languages
Quick Links
BReAN
MODELS 331H & 332H
EXTERIOR MOUNTED BLOWER
FOR USE WiTH RANGEIVlASTER
HOODS
AND ECLIPSE
DOWNDRAFT
VENTILATORS
WARNING
CAUTION
TO REDUCE
THE RISK OF FIRE, ELECTRIC
SHOCK,
OR
INJURY TO PERSONS,
OBSERVE THE FOLLOWING:
1.
Use this unit only in the manner intended by the manufac-
turer. If you have questions, contact the manufacturer
at the
address or telephone number listed in the warranty.
2.
Before servicing or cleaning unit, switch power off at service
panel and lock the service disconnecting
means to prevent
power from being switched on accidentally. When the service
disconnecting
means cannot be locked, securely fasten a
prominent warning device, such as atag, to the service panel.
3.
Installation
work and electrical
wiring must be done by a
qualified person(s) in accordance
with all applicable codes
and standards,
including fire-rated
construction
codes and
standards.
4.
Sufficient air is needed for proper combustion
and exhaust-
ing of gases through
the flue (chimney)
of fuel burning
equipment to prevent backdrafting.
Follow the heating equip-
ment manufacturer's
guideline and safety standards such as
those published by the National Fire Protection Association
(NFPA), and the American Society for Heating, Refrigeration
and Air Conditioning
Engineers
(ASHRAE),
and the local
code authorities.
5.
When cutting or drilling into wall, or ceiling, do not damage
electrical wiring or other hidden utilities.
6.
Ducted fans must always be vented to the outdoors.
7. To reduce risk of fire, use only metal ductwork.
8. This unit must be grounded.
1.
For general ventilating
use only. Do not use to exhaust
hazardous or explosive material and vapors.
2.
To avoid motor bearing damage and noisy and/or unbalanced
impellers, keep drywall spray, construction dust, etc. off power
unit.
3.
Please read specification label on product for further informa-
tion and requirements.
4.
Electrical circuit, including speed control, (if used), must be
rated 6 AMPS minimum for Model 332H or 3 AMPS minimum
for Model 331H.
SPECiFiCATiONS
MODEL
VOLTS
AMPS
331H
120
2.4
332H
120
5.7
CFM
DUCT SIZE
600
10 " DIA.
900
10" DIA.
PLAN THE INSTALLATION
1.
Locate the blower so the length of the duct run and number of
elbows and transitions needed are kept to a minimum.
Please note = when using blower
with the
Broan Eclipse
Downdraft:
The downdraft
has a 31A'' x 10" discharge.
Transitions
are available
to connect
it to the 10" round
inlet on this exterior=mounted
blower.
2.
Where possible,
blower should be centered
between wall
studs or roof rafters.
3.
Avoid pipes, wires, or other ductwork that may be running
through the wall.
4.
Be sure that there is enough space for any transitions that may
be needed between the blower and the connecting ductwork.
5.
For best performance,
locate transitions nearest to ventilator
(i.e. downdraft).
NOTE: Horizontal discharge requires relocation of the duct open-
ing cover plate. See hood manual for instructions.
MODEL 331H or 332H
EXTERIOR
BLOWER
10" ROUND
DUCT
PLATE
IO"ROUNDELBOW
lO"ROUND
DUCT
MODEL
WALL HOOD
331H
CANOPY
or 332H
(island canopy
EXTERIOR
available)
BLOWER
DUCT
ROUGH-IN
PLATE
10"ROUND
DUCT
DUCT
WALL HOOD
OPENING
CANOPY
COVER
(island canopy
PLATE
available)
MODEL
331H
18"
or 332H
EXTERIOR
BLOWER
24" or 27"
PLATE
TYPICAL ROOFMOUNTEDINSTALLATION
(Verticaldischarge)
TYPICALWALL MOUNTEDINSTALLATION
(Verticaldischarge- elbow to horizontal)
TYPICALWALL MOUNTEDINSTALLATION
(Horizontaldischarge)
INSTALLER:
Leave This Manual With The Homeowner
HOMEOWNER:
Use And Care Information
On Page 3
Advertisement
Table of Contents

Related Manuals for Broan 331H


Summary of Contents for Broan 331H
- Page 1 BReAN MODELS 331H & 332H EXTERIOR MOUNTED BLOWER FOR USE WiTH RANGEIVlASTER HOODS AND ECLIPSE DOWNDRAFT VENTILATORS WARNING CAUTION TO REDUCE THE RISK OF FIRE, ELECTRIC SHOCK, For general ventilating use only. Do not use to exhaust INJURY TO PERSONS, OBSERVE THE FOLLOWING: hazardous or explosive material and vapors.
-
Page 2: Prepare The Installation Location
PREPARE THE INSTALLATION PREPARE THE INSTALLATION LOCATION LOCATION Locate the blower on the rear slope of the roof. 1. Choose a position on the outside wall. Make sure Place it in a location to minimize duct run. The that no wall studs, pipes or wires run through location should be free of obstacles... - Page 3 iNSTALL THE BLOWER INSTALL THE BLOWER 1. Remove roofing nails from the upper 2/3 of the 1. Place a large bead of caulk on the back side of the shingles around the cutout area and carefully lift the housing along the outer edge. shingles to allow the back flashing sheet...
-
Page 4: Service Parts
* Standard Hardware - May be purchased locally. sedes all prior warranties. Always order replacement parts by Part No., not Key No. To qualify for warranty service, you must (a) notify Broan-NuTone at the address or telephone number below, (b) give the model... -
Page 5: Specifications
BReAN MODi LES 331H & 332H VENTILATEURA MONTAGEEXTERIEUR POUR UTIUSATION AVEC LES HOTTES RANGEMASTER ET LES VENTILATEURS ENCASTRI_S ECLIPSE AVERTISSEMENT ATTENTION OBSERVEZ LES DIRECTIVES CI-DESSOUS DE IVIANIERE A RE- Cetappareil nedoitservirqu'fitlaventilation g_n@ale. Nevousen DUIRE LES RISQUES D'INCENDIE, DE CHOC I_LECTRIQUE OU DE... - Page 6 PREPAREZ L'ENDROIT POUR PREPAREZ L'ENDROIT POUR L'INSTALLATION L'INSTALLATION Positionnez le ventilateur sur la pente arriere du toit. Placez- 1. Choisissez une position sur lemur exterieur. Assurez qu'il n'y le dans un endroit qui minimisera la Iongueur du conduit de a pas de colombage, tuyaux ou ills dans I'endroit qui sera ouvert.
-
Page 7: Installation Du Ventilateur
POSE DU VENTILATEUR INSTALLATION DU VENTILATEUR 1. Retirez les premiers deux tiers des clous & toiture Appliquez une large bande de produit & calfeutrer & I'arri_re bardeaux se trouvant autour de la surface de decoupe puis du boftier, le long du rebord exterieur. soulevez delicatement les bardeaux afin de glisser le solin en dessous. - Page 8 COMMERCIALISATION ET DE CONVENANCE DANS UN BUT REPERE N ° PIECE DESCRiPTiON PARTICULER. 97011795 Bofte & air Pendant cette p_riode d'un an, Broan, & son choix, r_parera remplacera, gratuitement, tout produit ou piece qui s'av_re 98008507 Clapet d_fectueux sous utilisation et service normaux.
-
Page 9: Especificaciones
Consulte las instrucciones en el manual de la campana. CONDUCTO REDONDO VENTILADOR EXTERIOR CODO REDONDO (25.4 CM) MODELO 331H o 332H 10"(25.4CM) CONDUCTO CONDUCTO REDONDO REDONDO (25.4 CM) 10" (25.4 CM) PLAFON PLACADE DE LA CUBIERTA DE LA PLAFON... - Page 10 PREPARE EL LUGAR DE LA PREPARE EL LUGAR DE LA INSTALAClON INSTALAClON Ubique el ventilador en la pendiente posterior del techo. Col6quelo Seleccione un lugar en la pared exterior. AsegQrese de que no en un Area en la cual minimice la Iongitud del tramo de conductos.
-
Page 11: Uso Y Cuidado
INSTALE EL VENTILADOR INSTALE EL VENTILADOR 1. Quite los davos del techo de las 2/3 partes de las tejas superiores que se encuentran alrededor del Area de corte Coloque un reborde grande de material de calafateo en el lado levante las tejas con cuidado para permitir que la hoja cubrejuntas posterior de la cubierta,... -
Page 12: Piezas De Repuesto
PIEZAS DE REPUESTO MODELOS 331H Y 332H GARANTIA BROAN LIMITADA POR UN ANO Broan garantiza al consumidor comprador original de sus productos que dichos productos carecer&n de defectos en materiales o en mano de obra por un periodo de un aSo a partir de la fecha original de compra.
Need help?
Do you have a question about the 331H and is the answer not in the manual?
Questions and answers