Table of Contents
Advertisement
Advertisement
Table of Contents
Troubleshooting

Related Manuals for HP 2311gt


Summary of Contents for HP 2311gt
- Page 1 HP 2311gt 3D LCD Monitor User Guide...
- Page 2 U.S. marks. Bluetooth is a trademark owned by its proprietor and used by Hewlett-Packard Company under license. The only warranties for HP products and services are set forth in the express warranty statements accompanying such products and services. Nothing herein should be construed as constituting an additional warranty.
-
Page 3: About This Guide
About This Guide This guide provides information on safety and maintenance, setting up the LCD monitor, installing drivers, using the on-screen display menu, troubleshooting and technical specifications. WARNING! Text set off in this manner indicates that failure to follow directions could result in bodily harm or loss of life. - Page 4 About This Guide ENWW...
-
Page 5: Table Of Contents
Table of contents 1 Product Features ............................1 HP 2311gt 3D LCD Monitor ........................1 2 Safety and Maintenance Guidelines ......................3 Important Safety Information ........................ 3 Safety Precautions ..........................3 Maintenance Guidelines ........................4 Cleaning the Monitor ......................4 Shipping the Monitor ...................... - Page 6 Preparing to Call Technical Support ....................33 Locating the Rating Label ........................33 Appendix B Technical Specifications ......................34 HP 2311gt 3D LCD Monitor ........................ 34 Preset Video Modes ........................... 35 Entering User Modes .......................... 35 LCD Monitor Quality and Pixel Policy ....................36 Appendix C Agency Regulatory Notices .......................
- Page 7 ENERGY STAR® Qualification ..................40 Disposal of Waste Equipment by Users in Private Household in the European Union ..40 Chemical Substances ......................41 HP Recycling Program ...................... 41 Restriction of Hazardous Substances (RoHS) ..............42 Turkey EEE Regulation ..................... 42 Ukraine Restriction of Hazardous Substances ..............
- Page 8 viii ENWW...
-
Page 9: Product Features
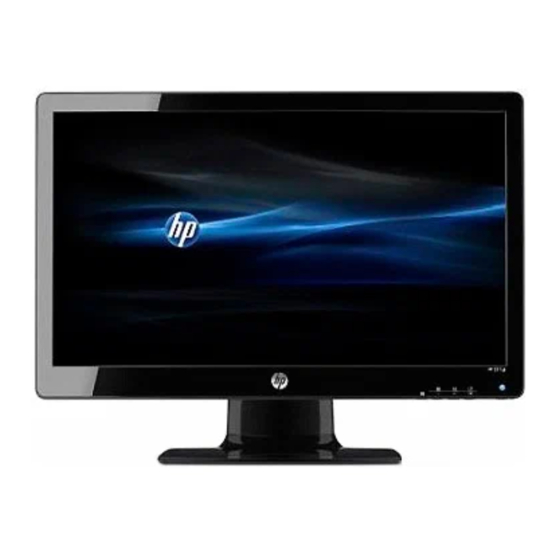
Product Features HP 2311gt 3D LCD Monitor Figure 1-1 HP 2311gt 3D LCD Monitor The HP LCD (liquid crystal display) monitors have an active matrix, twisted nematic (TN) screen with an LED backlight and the following features: ● Large diagonal display ●... - Page 10 ● Dynamic contrast ratio (DCR) to provide deeper blacks and brighter whites for brilliant shading effects while gaming or watching movies ● Plug and Play capability, if supported by your computer system ● On-screen display (OSD) adjustments for ease of setup and screen optimization (choose English, Simplified Chinese, Traditional Chinese, French, German, Italian, Spanish, Dutch, Japanese, or Brazilian Portuguese) ●...
-
Page 11: Safety And Maintenance Guidelines
Damage Replacement Policy so you can replace the equipment, if surge protection fails. Use the appropriate and correctly sized furniture designed to support your HP LCD monitor. WARNING! LCD monitors that are inappropriately situated on dressers, bookcases, shelves, desks, speakers, chests, or carts might fall over and cause personal injury. -
Page 12: Maintenance Guidelines
Do not open the monitor cabinet or attempt to service this product yourself. Adjust only those controls that are covered in the operating instructions. If the monitor is not operating properly or has been dropped or damaged, contact an authorized HP dealer, reseller, or service provider. ●... -
Page 13: Shipping The Monitor
Shipping the Monitor Keep the original packing box in a storage area. You might need it later if you move or ship the monitor. To prepare the monitor for shipping: Disconnect the power and video cables from the monitor. Press the button on the front of the pedestal (1) and lift the monitor panel from the base (2). Figure 2-1 Removing the Monitor Panel Set the panel on a soft, protected surface. -
Page 14: Setting Up The Monitor
Setting Up the Monitor Unpacking the Monitor Unpack the monitor and store the packing box. Turn off the computer and other attached devices. Prepare a flat area to assemble the monitor. You may need a flat, soft, protected area for placing the monitor screen-down while preparing it for installation. -
Page 15: Connecting Monitor Cables
Slide the hinge bracket on the monitor into the opening on top of the pedestal. The panel will click into place when fully inserted. Figure 3-2 Inserting the Monitor Panel Connecting Monitor Cables CAUTION: Before connecting cables to the monitor, ensure that the computer and monitor are powered off. -
Page 16: Getting Hdmi Sound
Figure 3-3 Connecting the HDMI Cable Getting HDMI Sound If you use HDMI to connect to a monitor model without speakers, you must activate HDMI sound by adjusting the setting in Microsoft Windows. If HDMI is not activated, you can not hear any sound. To activate HDMI sound on your computer: Right-click on the volume icon in the Windows system tray. -
Page 17: Connecting The Vga Video Cable (Not Provided)
Connecting the VGA Video Cable (not provided) Connect one end of the VGA video cable to the back of the monitor and the other end to the VGA video connector on the computer. The VGA cable is not included with the monitor. Figure 3-4 Connecting the VGA Cable (cable not provided) ENWW... -
Page 18: Connecting The Dvi-D Video Cable (Not Provided)
Connecting the DVI-D Video Cable (not provided) Connect one end of the DVI-D video cable to the back of the monitor and the other end to the DVI-D video connector on the computer. You can use this cable only if your computer has a DVI compliant graphics card that is either integrated or installed. - Page 19 Connect the round end of the power supply cord to the monitor, and then connect one end of the power cord to the power supply and the other end to a grounded electrical outlet. WARNING! To prevent injury from electrical shock, you should do one of the following if a properly grounded electrical outlet is not available: (1) You should use an electrical outlet adapter that provides proper grounding.
-
Page 20: Installing The Cable Management Clip
Installing the Cable Management Clip Install the cable management clip over the input cable and power cord to gather them together behind the monitor. Figure 3-7 Installing the Cable management Clip High-Bandwidth Digital Content Protection (HDCP) Your monitor supports HDCP and can receive high-definition content when using either the HDMI or DVI input. -
Page 21: Turning On The Monitor
Image retention is a condition that might occur on all LCD screens. Monitors with a "burned-in image" are not covered under HP warranty. * A prolonged period of time is 12 consecutive hours of non-use. -
Page 22: Adjusting The Tilt
Adjusting The Tilt For optimal viewing, adjust the screen tilt to your own preference, as follows: CAUTION: To avoid breakage or other damage, avoid applying pressure to the LCD screen while changing the tilt. Face the front of the monitor and hold the base so that you do not topple the monitor while changing the tilt. -
Page 23: Connecting External Speakers And Audio Cable (Not Provided)
Connecting External Speakers and Audio Cable (not provided) Use the following procedure to connect external speakers to a computer. Turn the computer on. Connect the audio cable to the audio-speaker connector on the computer, and then connect the USB power cable to a USB connector on the computer. NOTE: Use the volume controls on the computer to adjust the speaker volume. -
Page 24: Operating The Monitor
CD, in case of an installation error. Refer to the "Driver Software Readme" file on the CD for instructions (in English only). Downloading updated drivers from the Internet To download the latest version of drivers and software files from the HP Support site: Refer to: www.hp.com/support. Select your country/region. -
Page 25: Using The On-Screen Display (Osd)
Quick View Opens the OSD Quick View menu where you can select a viewing mode which compliments or optimizes the content you are viewing. Minus Navigates down through the OSD menu and decreases adjustment levels. Source Chooses the video input source from the computer. Plus Navigates up through the OSD menu and increases adjustment levels. - Page 26 The following table lists the on-screen display (OSD) menu selections and their functional descriptions. After changing an OSD menu item, and if the menu screen has these options, you might choose to: ● Cancel — to return to the previous menu level. ●...
- Page 27 Icon Main Menu Options Sub-menu Options Description Clock Minimizes any vertical bars or strips visible on the screen background. Adjusting the Clock also changes the horizontal screen image (VGA input only). Clock Phase Adjusts the focus of the display. This adjustment allows you to remove horizontal noise, and clear or sharpen the image of characters (VGA input...
- Page 28 Icon Main Menu Options Sub-menu Options Description Power Saver Enables the power saving feature (see Power-Saver Feature on page 22). Select: ● ● The factory default is On. Power-On Recall Restores power to the monitor following an unexpected removal of power. Select: ●...
- Page 29 Provides the recommended resolution mode and refresh rate for the monitor. Serial Number Reports the serial number of the monitor. The serial number is needed if contacting HP technical support. FW Version Reports the firmware version of the monitor. Backlight Hours Reports the total hours of backlight operation.
-
Page 30: Identifying Monitor Conditions
Icon Main Menu Options Sub-menu Options Description Auto-Switch Source Turns the automatic video signal input to On or Off on the system. The factory default is On. Exit Exits the OSD menu screen. Identifying Monitor Conditions Special messages appear on the monitor screen for the following monitor conditions: ●... - Page 31 The monitor also supports a power-saver mode that is controlled by the computer. When the monitor is in the reduced-power state, the monitor screen is blank, the backlight is off, the Power light is amber, and the monitor uses minimum power. When the monitor is "awakened," a brief warm-up period occurs before the monitor returns to normal operating mode.
-
Page 32: Using 3D Technology
Using 3D Technology The following items are provided for your 3D experience: ● 3D Passive FPR Glasses ● 3D monitor ● CyberLink PowerDVD Premium 3D and CyberLink PowerDVD Premium BD 3D (for Blu-ray) ● TriDef® 3D Ignition Game Player NOTE: Select computer models may include 3D content on a CD or DVD so you can immediately begin enjoying 3D. -
Page 33: 3D Safety Information
Carefully read all of the following safety precautions before using the 3D glasses and 3D monitor. WARNING! If you cannot see 3D content after you set up your 3D system, HP recommends that you discontinue use. Consult a physician if you suspect a physical problem seeing stereoscopic 3D. -
Page 34: Using The 3D Passive Fpr Glasses
The CyberLink PowerDVD software also supports 2D and converts 2D files, DVD, and Blu-ray to 3D. For information on using CyberLink PowerDVD, refer to the software Help. Ensure that your HP 2311gt 3D monitor is connected to your PC as the primary monitor during CyberLink PowerDVD software installation and power on both components. -
Page 35: Using Tridef 3D Ignition Game Player
3D games are not included with the monitor and must be purchased separately. Ensure that your HP 2311gt 3D monitor is connected to your PC as the primary monitor during TriDef® 3D Ignition Game Player software installation and power on both components. -
Page 36: Caring For The 3D Glasses
● Network card ● DirectX 9.0c The minimum system requirements for the TriDef® 3D Ignition Game Player are: NOTE: Minimum PC system requirements may vary depending on the game you want to play. Refer to the games's user guide for system requirements. ●... -
Page 37: Handling The Glasses
Handling the Glasses The 3D glasses are durable but sensitive to physical pressure, and need to be handled with care. The 3D glasses should be held by the frame in order to avoid getting fingerprints on the lenses. When you are not using the 3D glasses, store them in the protective pouch. -
Page 38: Appendix A Troubleshooting
Make sure that the graphics card supports the optimal resolution. the optimal resolution. Make sure that the latest supported driver is installed for the graphics card. For HP and Compaq systems, you can download the latest graphics driver for your system from: www.hp.com/support. - Page 39 Make sure that the monitor drivers are installed. Refer to Installing Drivers on page 16 more information. Monitor drivers are also available at: www.hp.com/support. Picture bounces, flickers, or Move electrical devices that might cause electrical interference as far away from the monitor wave pattern is present in as possible.
-
Page 40: Frequently Asked 3D Troubleshooting Questions
Frequently Asked 3D Troubleshooting Questions Why am I unable to see 3D content? If you are watching in 3D mode and cannot see 3D content, HP recommends that you not use the 3D glasses. Refer to the information below and 3D Safety Information on page 25. -
Page 41: Getting Support From Hp.com
Getting Support from hp.com Before you contact customer service, refer to HP Technical Support at: www.hp.com/support. Select your country/region, and then follow the links to the support page for your monitor. Preparing to Call Technical Support If you cannot solve a problem by using the troubleshooting tips in this section, you might have to call technical support. -
Page 42: Appendix B Technical Specifications
Technical Specifications All specifications represent the typical specifications provided by HP component manufacturers; performance might vary either higher or lower. HP 2311gt 3D LCD Monitor Table B-1 2311gt Specifications Specifications Display Type: TN LCD active matrix Viewable Image Size: 58.42 cm (23.0 in) diagonal... -
Page 43: Preset Video Modes
Preset Video Modes The monitor automatically recognizes many preset video input modes that will appear properly sized and centered on the screen. Table B-2 Factory Preset Video Input Modes Preset Resolution Horizontal Frequency (kHz) Vertical Frequency (Hz) 640 x 480 31.469 59.94 720 x 400... -
Page 44: Lcd Monitor Quality And Pixel Policy
For more information about your LCD monitor and pixel policy, refer to the HP Web site at: www.hp.com/support. To find pixel policy information on the HP Web site, type in "HP Pixel Policy" in the search box and press Enter. -
Page 45: Appendix C Agency Regulatory Notices
This device must accept any interference received, including interference that may cause undesired operation. For questions regarding the product, contact: Hewlett Packard Company P. O. Box 692000, Mail Stop 530113 Houston, Texas 77269-2000 Or, call 1-800-HP-INVENT (1-800 474-6836) ENWW Federal Communications Commission Notice... -
Page 46: Canadian Notice
Compliance with these directives implies conformity to applicable harmonized European standards (European Norms) that are listed in the EU Declaration of Conformity issued by HP for this product or product family and available (in English only) either within the product documentation or at the following Web site: http://www.hp.eu/certificates... -
Page 47: German Ergonomics Notice
0.75 mm² or 18 AWG, and the length of the cord must be between 6 feet (1.8 m) and 12 feet (3.6 m). If you have questions about the type of power cord to use, contact an authorized HP service provider. -
Page 48: Product Environmental Notices
Product Environmental Notices ENERGY STAR® Qualification HP Displays marked with the ENERGY STAR® certification mark meet the requirements of the U.S. Environmental Protection Agency (EPA) ENERGY STAR program. The EPA ENERGY STAR® certification mark does not imply endorsement by the EPA. As an ENERGY STAR Partner, Hewlett Packard Company has determined that this product meets the ENERGY STAR®... -
Page 49: Chemical Substances
Chemical Substances HP is committed to providing our customers with information about the chemical substances in our products as needed to comply with legal requirements such as REACH (Regulation EC No 1907/2006 of the European Parliament and Council). A chemical information report for this product can be found at http://www.hp.com/go/reach. -
Page 50: Restriction Of Hazardous Substances (Rohs)
Material Content Declarations for certain categories of electronic products offered for sale after July 1, 2006. To view the JIS C 0950 material declaration for this product, visit www.hp.com/go/jisc0950. Turkey EEE Regulation In Conformity with the EEE Regulation EEE Yönetmeliğine Uygundur...
Need help?
Do you have a question about the 2311gt and is the answer not in the manual?
Questions and answers