Table of Contents
Advertisement
Quick Links
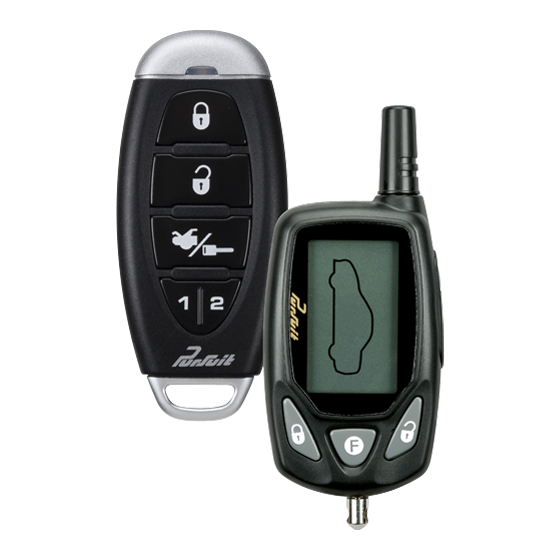
5 Button Remote Start Security System With
Plug-In Shock Sensor & Starter Disable
IMPORTANT ! In order to provide you with the highest level of security to your
vehicle, this system is equipped with selectable manual override circuitry. It is
possible that you will need to override your security system if the transmitter
becomes lost, or inoperative due to battery failure. Reading the sections on
"Manually Overriding Your System" is necessary to fully understand the
procedure required to enable your vehicle in such situations. In addition, the
chart on page 23 of this manual has a section for the particular features and
functions installed in your vehicle as well as the override method selected.
Although the default mode is "Valet Switch" operation, the system can be
configured for "Custom Code" operation for enhanced security. Confirm the
override mode selected on page 23 of this manual, and familiarize
yourself with the section on its operation.
FEATURES :
1 Two Way 5 Button Remote Control And 1 One Way 5 Button Remote Control
Six Channel Code Learning Programmable Receiver
External Superheterodyne Transceiver Antenna w/PushButton Switch & LED
Single Or Two User Programmable W/Separate Control Outputs
Single Button Lock/Unlock or Separate Button Lock/Unlock or Both
Remote Keyless Entry With Optional Access Guard (must have power door
locks)
Selectable Manual Override Mode
New Enhanced Panic Feature (Any button other than unlock stops siren, no
change to the units state)
Smart Disarm (If triggered, elect to shut off siren, or disarm entire unit )
Adjustable Shock Sensor Via The Transmitter (Pre-Detect Off, Pre & Full Detect
Off, City Mode)
Safe Start Output Controlled From Channel 3 (Option Channel 3 For Trunk, Or
For Remote Start)
24 Hour Time Start Mode
Cold Temperature Start Mode
2 or 4 Hour Automatic Start Mode
Parking Meter Count Down Timer On LCD Remote
Additional Count Down Timer Mode
Remote Panic In All Modes (Press & Hold Lock /Unlock Button For 3 Seconds
To Engage)
Improved Custom Code Override, User Selectable and Programmable
Model PRO9801C
Owner's Manual
Page 1
128-8794
1 of 24
Advertisement
Table of Contents

Related Manuals for Audiovox Pursuit PRO9801C


Summary of Contents for Audiovox Pursuit PRO9801C
- Page 1 Model PRO9801C Owner’s Manual 5 Button Remote Start Security System With Plug-In Shock Sensor & Starter Disable IMPORTANT ! In order to provide you with the highest level of security to your vehicle, this system is equipped with selectable manual override circuitry. It is possible that you will need to override your security system if the transmitter becomes lost, or inoperative due to battery failure.
- Page 2 Protected Push Button LED Valet/Override Switch In Windshield Receiver 7-Function LED-Arm / Disarm / Zone 1 / Zone 2 / Zone 3 / Valet / Arming Intrusion Alert With Memory Instant Siren Activation When Used Starter Disable Output ...
-
Page 3: Arming The System - Active
known as a code grabber, which will receive and store the signal from your keychain transmitter and re-transmit at a later time to disarm your system. Your Keeloq Code Hopping transmitters will change their signal every time the button is pressed, so when a thief grabs then re-transmits your signal, the alarm system will not respond. -
Page 4: Protection While The System Is Armed
The dash mounted LED begins to flash slowly. Parking Lights flash one time. Siren will not sound. If the siren "chirped" three times, sometime after arming, the exclusive delayed dome light learn circuit has been programmed and the system detected a open entry point after the learned delay expired. - Page 5 Any mild impact to the vehicle’s glass will cause the alarm to sound a short series of warning tones. Any strong impact to the vehicle’s glass will cause the alarm to trigger for the full 30 second alarm cycle. NOTE: If the optional interior illumination circuit was installed, the interior light will flash as well for the full 30 second alarm cycle.
-
Page 6: While The System Is Sounding
Parking Lights flash two times. If the parking lights flashed three times, then the alarm was triggered in your absence. Before turning the key on, examine the LED to identify which zone was triggered. Siren will not sound. If the siren sounds 4 chirps, then the alarm was triggered in your absence. -
Page 7: Manually Overriding Your System
3. To return to normal operation, press and release the Push-Button switch any time the ignition is on. NOTE: Always remember to return the vehicle to the valet off position. This will ensure that the vehicle remains protected at all times. MANUALLY OVERRIDING YOUR SYSTEM: Using The Receiver's Push-Button Override Switch Your Security System can be disarmed without the use of the keychain transmitter. -
Page 8: Eliminating The Normal Arm/Disarm Chirps
2. Turn the ignition switch to the on position. 3. Within 10 seconds, press and release the Receivers Push-button switch, 3 times. 4. Within 10 seconds turn the ignition switch off, on, off, on, off, on. (The siren or horn will beep and the lights will flash one time.) 5. -
Page 9: Remote Panic Operation
NOTE: Your system must be programmed by the installation center to enable this feature. REMOTE PANIC OPERATION The Lock or Unlock button on your keychain transmitter also functions as a panic switch for use in emergency situations. To use remote panic: 1. -
Page 10: Remote Starting The Vehicle
To change or adjust the shock sensor, press and release the ARM button of your keychain transmitter. 1. Within 2 seconds of arming, press and release the ARM button 1 time to defeat the pre-detect stage of the shock sensor. (The lights will flash and the siren will chirp once.) 2. - Page 11 lights will flash or turn on depending on the programming set up by your installation center. When you arrive at your vehicle, disarm the alarm system by pressing and releasing the arm/disarm button of your keychain transmitter. Enter the vehicle and turn the ignition key to the on position.
- Page 12 The parking lights will flash and the siren will chirp 4 times indicating the timed start mode is activated. CANCELING THE AUTOMATIC START UP TIMER To cancel the automatic start up timer do one of the following: 1. Start the vehicle manually with the use of the ignition key and depress the brake pedal.
-
Page 13: Turbo Timer Mode
ADDITIONAL REMOTE FUNCTION (CHANNEL 6 ) Channel 6 is an alternate output that can be controlled by the unlock button of the transmitter, or by and independent button or combination of buttons. For your vehicle this output is: Controlled By: Trunk/Key Button Option Button Lock + Unlock Buttons Lock + Trunk/Key Buttons ... -
Page 14: Telematic Upgrade
2. Set the parking, (hand), brake. 3. Be certain your foot is off the brake pedal. 4. Press the receiver's program/Push-Button switch 2 times within 5 seconds. The parking lights will flash two times indicating the mode was successfully entered. If your parking lights flashed four times, this indicates the turbo mode was on and is now turned off. - Page 15 NOTE: The engine can be started in many modes armed, disarmed, valet, etc... The screen shown is Locked/Armed and running. When the Panic Mode has been activated and the system is armed, the vehicle's lights will flash, the siren and lock icon will be displayed on the LCD screen and the siren will beep.
- Page 16 ADDITIONAL ICONS THAT MAY BE DISPLAYED ARE: If the arm/disarm chirp tones have been turned off at the vehicle, when you arm, or disarm, the display will indicate this as shown and there will be no arm/disarm chirps at the transmitter.
- Page 17 ADDITIONAL REMOTE FEATURES: The two way remote control unit allows you to access status information from the vehicle, check temperature, light the display, toggle the transmitter from beep tones to vibrate mode, initiate daily start timer, and temperature start. Selection of these and other features are shown below: NOTE: The Transmitter must be within operating range of the...
- Page 18 Note this feature must be activated at the vehicle at the prescribed time. Once activated at the vehicle, you can toggle the feature on by simultaneously pressing the Lock + Option buttons of the transmitter. The 24 hour icon will appear and the transmitter will emit a tone confirming the feature is active.
- Page 19 Battery Indicator: Your transmitter has a battery indicator that is shown in the upper right corner of the screen as shown left. This icon indicates a new battery shown with 3 bars. As the battery deterio- rates, the bars will disappear. 1 bar indicates the battery should be replaced.
- Page 20 Temperature Start Mode. This icon will appear when the temp start mode is activated. The vehicle will start one time automatically when the temperature reaches 0*. Caution Be certain vehicle is outside before activating this mode. To toggle this feature on or off, from the Locked/Armed mode, press the Option and Lock buttons simultaneously.
- Page 21 Page 21 128-8794 21 of 24...
- Page 22 THIS PAGE LEFT BLANK INTENTIONALLY Page 22 128-8794 22 of 24...
- Page 23 PRO9801C SYSTEM FUNCTIONS AT A GLANCE DASH LED INDICATORS RAPID FLASHING PASSIVE ARMING/ACTIVE REARMING SLOW FLASHING ARMED DISARMED ON SOLID VALET MODE 3 FLASH...PAUSE INTRUSION ZONE 3 2 FLASH...PAUSE INTRUSION ZONE 2 1 FLASH...PAUSE INTRUSION ZONE 1 SIREN CHIRP INDICATORS...
- Page 24 © 2010 Audiovox Electronics Corp., 150 Marcus Blvd., Hauppauge, NY 11788 128-8794 Page 24 128-8794 24 of 24...
Need help?
Do you have a question about the Pursuit PRO9801C and is the answer not in the manual?
Questions and answers