Table of Contents

Related Manuals for Primera LX810e


Summary of Contents for Primera LX810e
- Page 1 161110-510943-(04) User’s Manual An online version of this manual can be found at http://primera.eu/europe/manuals.html *after registering your product. See © 2010 All rights reserved www.primerawarranty.com for terms and conditions.
- Page 2 Notices: T he information in this document is subject to change without notice. NO WARRANTY OF ANY KIND IS MADE WITH REGARD TO THIS MATERIAL, INCLUDING, BUT NOT LIMITED TO, THE IMPLIED WARRANTIES OF MERCHANTABILITY AND FITNESS FOR A PARTICULAR PURPOSE. No liability is assumed for errors contained herein or for incidental or consequential damages in connection with the furnishing, performance, or use of this material.
-
Page 3: Table Of Contents
Table of Contents Section 1: Getting Started ................1 A. Choosing a Good Location ..............1 B. Unpacking and Inspection..............2 C. Identifying the Parts ................3 D. Minimum PC Specifications..............4 E. Minimum MAC Specifications ............4 Applying Power ..................5 G. Installing the Driver and Software...........5 Section 2: Supplies and Driver Settings............8 A. -
Page 5: Section 1: Getting Started
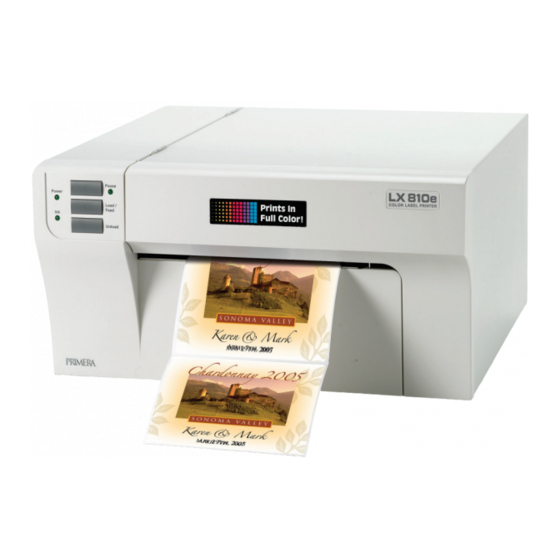
...for choosing an LX810e Color Label Printer. This printer is the perfect way for you to create customized, full color labels quickly, easily, and with a touch of class. The LX810e Printer will print razor-sharp text and barcodes, vibrant colors, and even stunning photo-realistic photographs directly onto rolls of labels and card stocks. -
Page 6: Unpacking And Inspection
B. UNPACKING AND INSPECTION While unpacking your printer, inspect the carton to ensure that no damage has occurred during shipping. Make sure that all supplied accessories are included with your unit. The following items should be included: • Printer • Power Adapter •... -
Page 7: Identifying The Parts
This illustration shows the front of the printer with its control buttons and LED indicator lights. The Pause Button pauses the printer AFTER the printing of the current label has finished to allow for loading of label stock and ink cartridges. The Pause LED is lit when the printer is paused. -
Page 8: Minimum Pc Specifications
This illustration shows the input ports and power switch found on the rear panel of the printer. For optimal printing speed you must have a PC with the following minimum specifications: • Pentium IV Processor • 512 MB of RAM •... -
Page 9: Applying Power
1. Locate the power adapter supplied with your printer. 2. Place one end of the adapter cord into the power port on the rear panel of the printer. 3. Plug the power cord of the adapter into an available wall outlet or surge protecting power strip. - Page 10 b. Plug in USB Cable After a few moments Windows will detect the printer and attempt to install the printer driver. You will be prompted with a dialog box like the one shown here: Click “Continue Anyway”. ii. Once installed the "Color Label Printer" icon will appear in the printers folder.
- Page 11 Insert the Installation CD into your computer. In a few moments the Color Label Printer Icon should appear on your desktop. 2. Double click on the Color Label Printer Icon. 3. To run the installation, click on the ColorLabelSeries.pkg file. 4.
-
Page 12: Section 2: Supplies And Driver Settings
Primera carries a large variety of paper label stock that has been converted and ready for use with your printer. - Page 13 Other paper label stock may also work properly as long as it is in specification. Use the following table to identify if a certain stock is within specification: Max Roll Core Minimum Maximum Minimum Maximum Outside Inside Label Label Label Label Diameter Diameter Width...
- Page 14 The following steps will guide you through loading label stock in your printer: Make sure power is connected and printer is on. Open the Top Cover. Lower the Roll Guide and pull it outward to make room for your label stock. Pull the Movable Throat Guide outward to make room for the label stock.
- Page 15 Place the leading edge of label stock under the Label Stock "label stock" symbols on the Throat Guides. The label stock should be placed far enough into the throat of the printer to correctly position the Movable Throat Guide but not yet into the printer itself. The label stock should be biased against the Fixed Throat Guide.
- Page 16 it over the identifying mark. The Sensor Position Adjust tab has a guide in inches and milimeters that will help you identify where to set the tab to align the sensor over any identifying mark. To do this, simply measure from the cen- ter of the hole or mark to the edge of the label stock.
-
Page 17: Installing Ink Cartridges
Your printer has a built-in ink tracking system. This system is designed to warn you if your ink cartridges are low on ink. This ensures your labels will print properly and that the printer can create large batches of labels unattended and worry-free. - Page 18 11. Click OK on your screen to indicate the new cartridge is now installed. Once you click OK you will be prompted to align the cartridge. The printer will automatically align the cartridge for you as follows: a. For Alignment you will need to have installed label stock that is equal to or larger than 4"...
-
Page 19: Printer Driver Settings
The printer will print the alignment test and scan it into memory. Once the alignment is complete you will see a confirmation dialogue box on your monitor. Click OK. You have successfully installed the ink cartridges. Once the printer driver has been successfully installed, you will need to set the driver up with the appropriate print options. - Page 20 Click Print from within any printing application. The following screen will appear: Click the Copies and Pages drop down arrow. Choose Label Printer Settings. Supplies and Driver Settings...
- Page 21 This option is set to Custom as a default. Even though you can click Properties and key in the dimensions of your label, this is best done from your labeling software. It is recommended that the Label Size setting is left to "Custom". There are two settings for orientation, Portrait and Landscape.
- Page 22 Best for Photos mode is best used for photographic images where accurate color reproduction is very essential. Images printed in this mode will look lighter than those printed in Photo mode. Skin tones especially will look more natural in this mode. This option controls the amount of ink used when printing an image.
- Page 23 sheet of paper (no wider than 8.25 inches or 209mm) into the print area then click OK to continue. The printer will print an alignment pattern then scan that pattern into memory automat- ically. Once it has finished you will see a dialog box stating that alignment values have been saved.
- Page 24 b. If not, press the Unload button found on the front of the printer simultaneously to reverse the stock out of the print feed mechanism. Load a sheet of paper, not to exceed 8.25 inches or 209 millimeters in width, into the feed mechanism by pulling the Throat Guide all the...
- Page 25 Sensor Type refers to the method the printer will use to center the print image on your label material. If you are using standard die-cut labels or Through-hole label material where a hole is punched through each label for alignment purposes use the Through-hole/Die-Cut setting.
-
Page 26: Section 3: Using The Printer
Section 3: Using the Printer Your printer ships with a basic version of Niceware's NiceLabel software. This easy-to-use software is designed to allow you to create full color labels with text and barcodes quickly and simply. The following is a tutorial to guide you through creating and printing a sample label. - Page 27 a. Set the dimensions of your label and unit of measure and click Next. b. Select your printer. This should be the Color Label Printer. Click Finish. Using the Printer...
- Page 28 3. Now you will see your label in the Document Window. You can start to design your label using Tools from the Tool Box. First, we will use the Text Tool. Click the Text Tool Icon in your Toolbox, then move the text cursor over the Document Window and click in the location where you want to enter text.
-
Page 29: B. Creating Barcodes In Nicelabel
Now, insert a barcode. a. Click the Barcode Tool Icon from the Toolbox. You will now have a Barcode Cursor that can be positioned anywhere within the Document Window. Position your cursor in the general area where you wish your barcode to print and click to start entering your barcode information. - Page 30 Click Define to change the type of Barcode or to make changes to the options associated with your particular type of barcode. You will also want to set the Symbol Height and X Expansion Factor d. Click the Human Readable tab to change the font that prints under your barcode Using the Printer...
- Page 31 Click OK, then click Finish and your Barcode will be placed on your label with "Edit Handles" to allow you to move and resize your barcode. Now insert a graphic. Click on the Graphics Tool Icon in the toolbox. You will now see a Graphics Cursor. Drag the cursor to the general area where you wish to place the graphic and click to get an Open dialog box.
- Page 32 Click Open and the graphic will be imported with edit handles so you can easily move and resize your graphic. b. There are other tools at your disposal to align the object or add shapes. On the right side of the screen you will see alignment tools so you can align the objects on your label in relation to each other.
-
Page 33: Creating Barcodes In Nicelabel
You are now ready to print your label. Click File then Print from the main menu. Choose your number of copies and click OK. Congratulations! You have successfully created and printed your first label. The rest of this section will explain in more detail how to use barcode labels. - Page 34 ii. Click Define to change the type of Barcode. iii. This contains four tabs, General, Check Digit, Human Readable and Details. iv. The General Tab (shown on page 27) allows you to choose the appropriate barcode type from the Available barcodes: menu. You can choose one- or two-dimensional barcodes.
- Page 35 Barcode Dimensions Field Symbol Height Field X Expansion factor Base element width (mils) Check Digit Tab Using the Printer...
- Page 36 Human Readable Tab Details Tab Include Quiet Zones Descender Bars Mirror Horizontally Mirror Vertically Intercharacter Gap Include EAN white space Using the Printer...
-
Page 37: Printing On A Mac From Adobe Illustrator
1. Create your document using the File - New command. Set your Width and Height to correspond with the label stock installed in the Printer. 2. Once your document is created and ready to print go to File - Print. The following screen will appear. Before doing anything else, click the Printer button to change the print quality settings for this print. - Page 38 3. The printer settings screen defaults to Copies and Pages. Click the drop down arrow to change the screen to Label Printer Settings. 4. Change your printer settings to the desired quality. Using the Printer...
- Page 39 5. Click Print to return to the print preview screen. Now click Page Setup to change the label size set in the printer driver. 6. The paper/label size defaults to 4x6 or whatever was last used. Using the Printer...
- Page 40 7. Click on the drop down arrow to select a predefined label size or create a custom size by clicking Manage Custom Sizes. For this example there is no 5.5 x 4 label predefined so the following step will explain how to create a custom size.
- Page 41 9. If you have created a custom size you will need to choose it again here by clicking the drop down arrow and choosing the custom size. Click OK. 10. You are now ready to print your label. Make sure the number of copies is set.
-
Page 42: Creating Barcodes On A Mac
You can integrate barcode printing into any application that can print to the printer by using Mac Barcode Maker. Mac Barcode Maker can be purchased from their website at www.barcodeformac.com This application was tested using Adobe Illustrator. Follow the instructions that are included with the application to use it with your program. -
Page 43: Section 4: Troubleshooting And Maintenance
Section 4: Troubleshooting and Maintenance A. CLEANING THE PRINTER It may be necessary to clean the ink cartridge nozzles if the your labels are printing with horizontal banding or if you suspect an ink cartridge nozzle has become slightly dried out or clogged. Refer to the cleaning procedure explained within the Clean/ Purge description of Section 2-D to clean the cartridge nozzles. -
Page 44: Technical Support
If you have difficulty operating your Color Label Printer, the procedures in this manual should, in most cases, solve the problem. If you still have difficulty, contact Primera's Technical Support Department. You can reach tech support by phone, fax, email or mail at the following:... -
Page 45: Section 5: Label Specifications
Section 5 : Label Specifications Label Sensing Methods Label Width Media Width Gap Between Labels Method 1: Label Gap Sensing Distance from edge of Media Method 2: Thru-Hole Sensing Width of Opening Label Height Distance from edge of Media to edge of Label Method 3: Reflective/Black Mark Sensing (Black Mark must be printed... - Page 46 Reflective/Black 0.1" (2.54mm) Mark Width* Max Outer Diameter (OD) 6.0"(152.4mm) Inner Core Diameter (ID) 3.0" (76.2mm) 3.0" (76.2mm) Stock Thickness .006” (152 micron) Distance from edge of Printer driver assumes 2 mm gap. media to edge of label However, this is adjustable via the left margin offset.
-
Page 47: Section 6: Technical Specifications
Section 6 : Technical Specifications Print Method: Inkjet Print Resolutions: 4800 x 1200 dpi, 1200 x 1200 dpi, 600 x 600 dpi Approximately 2" (51mm) per second Print Speeds: for black Approximately 1.5" (38mm) per second for color + black Approximately 10"... - Page 48 Label Design NiceLabel™ ME Primera Edition included. Software: Can also be used with most other popular Windows-based label design software programs 12VDC, 3.0A Electrical Rating: Power Requirements: 100-240VAC, 50/60 Hz, 60 watts Certifications: UL, UL-C, CE, FCC Class B 29 lbs. (13.2 Kg)
-
Page 49: Section 7: Auxiliary Port Specifications
Section 7: Auxiliary Port Specifications The 6-pin minicircular auxiliary interface is used for connect- ing the printer with auxiliary equipment such as a Auto Cutter. Pin assignments are as follows: Uses 5v logic @ 5mA - All signals are active low. Pin Number Signal Description Cut signal - Output - Cut now. -
Page 50: Index
Index Alignment Tool................28 Applying Power ................5 Auxiliary Port..................45 Available Barcode Types in NiceLabel........31 Barcode Wizard ................25, 29 Cartridge Alignment ..............18 Check Digit Tab................31 Clean/Purge Ink Cartridges ............19 Details Tab..................32 Dye-Based Monochrome Black.............8 Dye-Based Ink ..................8 General Tab ..................30 Gloss/Semi-Gloss Label Stock ............8 Human Readable Tab..............26, 32 Importing Graphics ...............27 Ink Low LED..................3... - Page 51 Print Quality ...................17 Printer Driver Settings..............15 Printing ..................33, 38 Roll Arm ..................10 Roll Guide ..................10 Sensor Position Adjustment ............11 Sensor Type ..................21 Rewinder Mode................21 Tear Off Offset................21 TOF Offset..................21 Troubleshooting ................39 Unload Button ..................3 Using NiceLabel................22 Index...
- Page 52 Printed in the United States of America P/N 510943...
Need help?
Do you have a question about the LX810e and is the answer not in the manual?
Questions and answers