Advertisement
Model No. 831.21652.0
Serial No.
Serial
Number
Decal
• Assembly
• Operation
• Maintenance
• Part List and Drawing
CAUTION
Read all precautions and instruc-
tions in this manual before using
this equipment. Keep this manual
for future reference.
BIKE EXERCISER
User's Manual
Sears, Roebuck and Co., Hoffman Estates, IL 60179
Advertisement
Table of Contents

Related Manuals for Pro-Form XP 110 R


Summary of Contents for Pro-Form XP 110 R
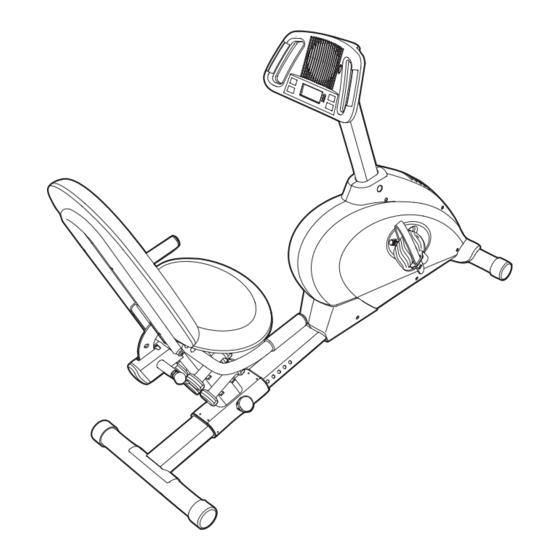
- Page 1 Model No. 831.21652.0 Serial No. BIKE EXERCISER User’s Manual Serial Number Decal • Assembly • Operation • Maintenance • Part List and Drawing CAUTION Read all precautions and instruc- tions in this manual before using this equipment. Keep this manual for future reference.
-
Page 2: Table Of Contents
TABLE OF CONTENTS IMPORTANT PRECAUTIONS ..............2 BEFORE YOU BEGIN . -
Page 3: Before You Begin
The contacting us. The model number is 831.21652.0. The XP 110 R exercise cycle offers a selection of features serial number can be found on a decal attached to the designed to let you enjoy this healthful exercise in the exercise cycle (see the front cover of this manual). -
Page 4: Assembly
ASSEMBLY Assembly requires two persons. Place all parts of the exercise cycle in a cleared area and remove the packing materials. Do not dispose of the packing materials until assembly is completed. Assembly requires the included tools and your own adjustable wrench and Phillips screwdriver Use the part drawings below to identify the small parts used in assembly. - Page 5 To make assembly easier, read the information on page 4 before you begin assembling the exercise cycle. Identify the Front Stabilizer (9), which is shorter than the Rear Stabilizer (not shown). While another person lifts the front of the Frame (1), attach the Front Stabilizer to the Frame with two M8 x 75mm Button Screws (44), two M8 Split Washers (66), and two M8 x 19mm Washers (65).
- Page 6 4. Orient the Seat Carriage (3) as shown. Slide the Seat Carriage onto the Seat Rail (2), and then tighten the Seat Carriage Knob (31) into the Seat Carriage and an adjustment hole in the Seat Rail. Make sure the Seat Carriage Knob is engaged in one of the adjustment holes.
- Page 7 7. Attach a Dumbbell Cradle (33) to the side of the Seat Carriage (3) with two M4 x 10mm Screws (54). Repeat this step for the other three Dumbbell Cradles (33). 8. Apply a generous amount of the included grease to the Pivot Axle (40).
- Page 8 9. Attach the Seat (14) to the Seat Carriage (3) with four M6 x 20mm Button Screws (52). Note: The Button Screws may be preattached to the underside of the Seat. 10. Attach the Backrest (15) to the Backrest Bracket (13) with four M6 x 38mm Button Screws (46).
- Page 9 11. Have another person hold the Upright (4) near the front of the Frame (1). Locate the wire tie (see the inset drawing) in the Upright. Tie the lower end of the Avoid pinching the wire tie to the Wire Harness (28). Next, pull the upper Wire Harness (28) end of the wire tie upward out of the top of the during this step...
- Page 10 14. Identify the Left Pedal (26), which is marked with an “L.” Using an adjustable wrench, firmly tighten the Left Pedal counterclockwise into the left arm of the Crank (18). Tighten the Right Pedal (not shown) clockwise into the right arm of the Crank. Important: Tighten both Pedals as firmly as possible.
-
Page 11: How To Operate The Exercise Cycle
HOW TO OPERATE THE EXERCISE CYCLE HOW TO ADJUST THE SEAT HOW TO ADJUST THE BACKREST For effective exer- The backrest can be adjusted to any of three positions: cise, the seat the inclined (upright) position, the semi-inclined posi- Seat should be in the tion, or the flat position. - Page 12 FEATURES OF THE CONSOLE exercises during your workout. Choose an upper body, lower body, or whole body cross training program for The advanced console offers an array of features an effective workout. Note: The strength exercises designed to make your workouts more effective and require the use of the included dumbbells and an enjoyable.
- Page 13 The center of the HOW TO USE THE MANUAL MODE display—When you select the manual mode, the center of Press any button or begin pedaling to turn on the display will show a the console. track that represents 1/4 mile. As you exercise, indicators will appear in A moment after you turn on the console, the dis- succession around the track until the entire track play will light.
- Page 14 Measure your heart rate if desired. Turn on the fan if desired. If there are sheets To turn on the fan at Thumb Tab of clear plastic on Metal Contacts high speed, press the the metal contacts Fan button. To turn on on the handgrip the fan at low speed, pulse sensor,...
- Page 15 As you exercise, you will be prompted to keep HOW TO USE A TRAINER PROGRAM your pedaling pace near the target pace setting for the current segment. When the words PEDAL Press any button or begin pedaling to turn on FASTER appear in the display, increase your the console.
- Page 16 As you exercise, you will be prompted to keep HOW TO USE A CROSS TRAINING PROGRAM your pedaling pace near the target pace setting for the current segment. When the words PEDAL FASTER appear in the display, increase your Press any button or begin pedaling to turn on pace.
- Page 17 Perform the first strength exercise when Continue the cross training program. prompted. When you have performed the recommended When the first strength exercise segment begins, number of repetitions, the words START PEDAL- the name of the first strength exercise will appear ING will appear in the display.
- Page 18 Important: The target pace settings are intend- HOW TO USE A CALORIE GOAL PROGRAM ed only to provide motivation. Your actual pace may be slower than the target pace set- tings. Make sure to exercise at a pace that is Press any button or begin pedaling to turn on comfortable for you.
-
Page 19: Maintenance And Troubleshooting
MAINTENANCE AND TROUBLESHOOTING Inspect and properly tighten all parts of the exercise With the left side shield removed, locate the Reed cycle regularly. Replace any worn parts immediately. Switch (24). Turn the Crank (18) until the Magnet (19) is aligned with the Reed Switch. Next, loosen, but do To clean the exercise cycle, use a damp cloth and a not remove, the indicated Reed Switch Screw (49). -
Page 20: Cycling Exercise Guidelines
CYCLING EXERCISE GUIDELINES The following guidelines will help you to plan your During the first few minutes of exercise, your body exercise program. Remember that proper nutrition uses easily accessible carbohydrate calories for ener- and adequate rest are essential for successful results. gy. -
Page 21: Strength Exercise Guidelines
STRENGTH EXERCISE GUIDELINES through a variety of strength exercises. Consult a rep- WARNING: utable book to find additional strength exercises. When Before beginning any you use a cross training program, you will be prompt- exercise program, consult your physician. ed to perform a specific number of repetitions. When This is especially important for persons over you are not using a cross training program, begin with the age of 35 or persons with pre-existing... -
Page 22: Part List
PART LIST—Model No. 831.21652.0 R0607A Key No. Qty. Description Key No. Qty. Description Frame Foam Grip Seat Rail Handlebar Endcap Seat Carriage Seat Carriage Bushing Upright Pivot Axle Upright Endcap M8 x 18mm Washer Console M8 x 15mm Screw Left Side Shield M8 x 75mm Carriage Bolt Right Side Shield M8 x 75mm Button Screw... -
Page 23: Exploded Drawing
EXPLODED DRAWING—Model No. 831.21652.0 R0607A 66 65... -
Page 24: 90 Day Full Warranty
Get it fixed, at your home or ours! Your Home For repair—in your home—of all major brand appliances, lawn and garden equipment, or heating and cooling systems, no matter who made it, no matter who sold it! For the replacement parts, accessories, and user’s manuals that you need to do-it-yourself. For Sears professional installation of home appliances and items like garage door openers and water heaters.
Need help?
Do you have a question about the XP 110 R and is the answer not in the manual?
Questions and answers
is this a recumbent bike?
Yes, the Pro-Form XP 110 R is a recumbent bike.
This answer is automatically generated
how do you move the unit from one room to another