Table of Contents
Advertisement
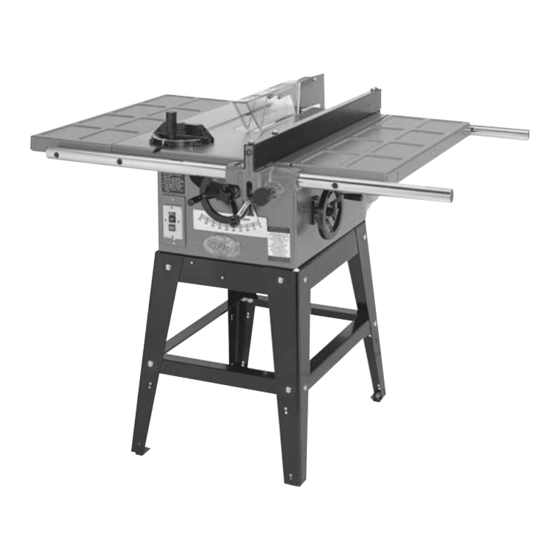
10" TABLE SAW
MODEL G1022SM, G1022Z, G1022ZF, G1022ZFX, G1022PRO
INSTRUCTION MANUAL
G1022SM
G1022Z
G1022ZF
&
G1022PRO
G1022ZFX
COPYRIGHT © MARCH, 2002 BY GRIZZLY INDUSTRIAL, INC.
WARNING: NO PORTION OF THIS MANUAL MAY BE REPRODUCED IN ANY SHAPE
OR FORM WITHOUT THE WRITTEN APPROVAL OF GRIZZLY INDUSTRIAL, INC.
PRINTED IN TAIWAN.
Advertisement
Table of Contents

Related Manuals for Grizzly G1022PRO


Summary of Contents for Grizzly G1022PRO
-
Page 1: Instruction Manual
INSTRUCTION MANUAL G1022SM G1022Z G1022ZF & G1022PRO G1022ZFX COPYRIGHT © MARCH, 2002 BY GRIZZLY INDUSTRIAL, INC. WARNING: NO PORTION OF THIS MANUAL MAY BE REPRODUCED IN ANY SHAPE OR FORM WITHOUT THE WRITTEN APPROVAL OF GRIZZLY INDUSTRIAL, INC. PRINTED IN TAIWAN. - Page 2 WARNING Some dust created by power sanding, sawing, grind- ing, drilling, and other construction activities contains chemicals known to the State of California to cause cancer, birth defects or other reproductive harm. Some examples of these chemicals are: • Lead from lead-based paints. •...
-
Page 3: Table Of Contents
SAFETY SAFETY RULES FOR ALL TOOLS...2-3 ADDITIONAL SAFETY INSTRUCTIONS FOR TABLE SAWS ...4-7 CIRCUIT REQUIREMENTS 110V OPERATION ...8 220V OPERATION ...9 GROUNDING ...10 EXTENSION CORDS ...10 GENERAL INFORMATION COMMENTARY ...11-12 UNPACKING ...13 PIECE INVENTORY ...13 HARDWARE BAG CONTENTS ...14 HARDWARE RECOGNITION CHART ...15 CLEAN UP ...16 SITE CONSIDERATIONS ...16 ASSEMBLY... -
Page 4: Safety
SECTION 1: SAFETY For Your Own Safety Read Instruction Manual Before Operating This Equipment The purpose of safety symbols is to attract your attention to possible hazardous conditions. This manual uses a series of symbols and signal words which are intended to convey the level of importance of the safety messages. - Page 5 Safety Instructions For Power Tools 9. USE PROPER EXTENSION CORD. Make sure your extension cord is in good condi- tion. Conductor size should be in accor- dance with the chart below. The amperage rating should be listed on the motor or tool nameplate.
-
Page 6: Additional Safety Instructions For Table Saws
If you do not have a complete understanding of how kickback occurs, or how to prevent it, DO NOT operate this table saw. NEVER reach behind or over the blade with either hand for any reason. -
Page 7: Safety Accessories
We also carry a wide selection of table inserts shown in Figure 2 in the Grizzly catalog. Be sure to hold the insert firmly in place with a piece of wood when creating slots. Never hold the table insert... - Page 8 Push Paddles Push paddles provide added leverage and sup- port when ripping or crosscutting wide work- pieces as shown in Figure 3. We offer a number of push paddles in the Grizzly catalog. Push Paddles Figure 3. Push Paddles. Featherboards...
- Page 9 It is important that you read and become familiar with them before assembling, adjusting or operating this machine. Your safety is VERY important to us at Grizzly! Arbor: Metal shaft extending from the drive mechanism, to which the cutting blade is attached.
-
Page 10: Circuit Requirements 110V Operation
SECTION 2: CIRCUIT REQUIREMENTS 110V Operation The Model G1022SM, Z and ZF motors are prewired to operate at 110V. See Figure 5 for a typical 110V installation. G1022SM and G1022Z: Under normal 110V use, the Models G1022SM and Z motors draw approximately 16 amps. We recommend a 20 amp circuit breaker or a 20 amp slow-blow fuse. -
Page 11: 220V Operation
220V Operation G1022ZFX and G1022PRO: The motors supplied with the Models G1022ZFX and G1022PRO are prewired to operate at 220V. The Models G1022ZFX and G1022PRO are not supplied with a plug; therefore, a suitable 220V plug must be wired in. When operating at 220V, we recommend using a NEMA-style 6-15 plug and outlet as shown in Figure 6A. -
Page 12: Grounding
Grounding In the event of an electrical short, grounding pro- vides electric current a path of least resistance to reduce the risk of electrical shock. This tool is equipped with an electric cord having an equip- ment-grounding conductor which must be proper- ly connected to a grounding plug. -
Page 13: Commentary
When used according to the guide- lines set forth in this manual, you can expect years of trouble-free, enjoyable operation and proof of Grizzly’s commitment to customer satis- faction. The Model G1022 Series comes in 5 different ver- sions. The differences are listed on the chart at the beginning of this manual. - Page 14 The specifications, drawings, and photographs illustrated in this manual represent the Model G1022 Series as supplied when the manual was prepared. However, owing to Grizzly’s policy of continuous improvement, changes may be made at any time with no obligation on the part of Grizzly.
-
Page 15: Unpacking
1. Stand Components 2. Extension Wings (2) 3. V-Belt 4. Motor with Pulley 5. Motor Bracket 6. Motor Mount Plate 7. Table Saw Unit 8. Handwheels (2) 9. Arbor Wrench 10. Dado Insert 11. Standard Insert 12. Miter Gauge pieces. -
Page 16: Hardware Bag Contents
Hardware Contents Guide Rail & Extension Wing Hardware Bag Qty Description Special Rail Bolt (SM & Z) Fence Rail Spacer (SM & Z) Flat Washer M10 (SM & Z) Hex Nut M10-1.5 (SM & Z) Fence Rail Plug (SM & Z) Flat Washer M10 x M4 Thick Hex Bolt M10-1.5 x 25 Hand Wheel Knob... -
Page 17: Hardware Recognition Chart
Hardware Recognition Chart Use this chart to match up hardware pieces during the assembly process! Thumb ⁄ Screw ⁄ ⁄ Screw ⁄ ⁄ Setscrew ⁄ Washer 10mm 12mm 16mm G1022 Series Contractor Saws Lock Countersunk Phillips Phillips Head Head Screw Screw Carriage Bolt... -
Page 18: Clean Up
Remove this protective coating with a solvent cleaner or citrus-based degreaser such as Grizzly’s G7895 Degreaser. Avoid chlorine-based solvents as they may damage painted surfaces should they come in contact. Always follow the usage instructions on the product you choose for clean up. -
Page 19: Assembly
SECTION 4: ASSEMBLY Beginning Assembly Disconnect power to the machine when perform- ing any maintenance, assembly ments. Failure to do this may result in serious personal injury. Keep loose rolled up and out of the way of machinery and keep hair pulled back. Wear safety glasses dur- ing the entire assembly process. -
Page 20: Stand
Make certain the side of the stand with the “Z Series” label, if applicable, is on the front side of the machine (the side with the Grizzly label and angle scale). Secure with M8-1.25 x 19 hex bolts, 8MM flat washers and M8-1.25 hex nuts, with the dust port sandwiched between as shown in Figure 11. -
Page 21: Handwheels
Handwheels To mount the handwheels: Position a handwheel over the arbor raising shaft on the front of the saw. Be sure it fits completely over the shaft. The slots in the handwheel hole will engage with the roll pin on the shaft as shown in Figure 12. Position the other handwheel similarly on the blade tilting shaft located at the side of the saw. - Page 22 Set the motor on end and slip the pulley guard bracket between the base of the motor and the motor plate. Tighten one of the four mounting bolts. Leave the other three loose as shown in Figure 15. Figure 15. Installing pulley guard. Locate the motor mount bracket.
-
Page 23: Motor
Simply connect the quick disconnect on the cord between the switch and motor. G1022ZF, G1022ZFX and G1022PRO: The ON/OFF switch on the ZF, ZFX and PRO models mounts directly below the front fence rail. -
Page 24: Extension Wings
The Model G1022SM and Z are supplied with round rails, the Model G1022ZF and ZFX are supplied with flat angular bar sections and the Model G1022PRO is supplied with square tube rails. This accommodates the standard fence for the SM and Z models, the Shop Fox the ZF and ZFX models and the Shop Fox Classic fence for the PRO model. -
Page 25: Fence
Figure 22. Attaching fence rails. Fence G1022SM and G1022Z Thread the plastic knob onto the lock handle. Set the lock handle in the up position and slide the fence over the front and rear rails as shown in Figure 23. Lock Handle Figure 23. -
Page 26: Blade Guard
Blade Guard Screw the threaded end of the support shaft into the hole in the back of the rear trunnion. The check nut on the shaft will be used to tighten the shaft in place as shown in Figure 25. Leave it loose for now. Figure 25. -
Page 27: Blade Guard
Figure 28. Checking alignment of blade guard. 7. If the blade guard/splitter is to the right of the blade as shown in Figure 29. simply add washers between the splitter and front mounting bracket, and adjust the rear splitter support as shown in Figure 29. Figure 29. -
Page 28: Table Insert
Table Insert Disconnect power to the machine when perform- ing any maintenance, assembly ments. Failure to do this may result in serious personal injury. The table insert provides access to the blade and arbor when removed. When in place, the insert provides support for materials being cut. -
Page 29: Adjustments
SECTION 5: ADJUSTMENTS Disconnect power to the machine when perform- ing any maintenance, assembly ments. Failure to do this may result in serious personal injury. Keep rolled up and out of the way of machinery and keep hair pulled back. Wear during the entire adjust- ment process. - Page 30 Loosen the rear lock adjustment, the slotted screw on the front of the fence shown in Figure 33, until the rear locking lever ceases to engage the rear rail with the fence in the locked position. Rear Lock Adjustment Figure 33. Rear lock adjustment screw. Loosen the adjustment bolts at the top of the fence shown in Figure 34.
-
Page 31: G1022Z Fence
Once the fence is adjusted, check the mea- surement pointer shown in Figure 36 and adjust if necessary. Measurement Pointer Figure 36. Adjust measurement pointer. G1022Z Fence (The Model G1022ZF, ZFX and PRO use a Shop ® fence. Please refer to the instruction manu- al included with the Shop Fox ®... - Page 32 Front Adjustment Screws Locking Lever Figure 38. Adjustment bolts for fence parallelism. Loosen the locking lever (Figure 38) until it is approximately two-thirds engaged. Make note of its position and lift it up all the way. Tighten the rear adjustment screw until the rear clamp is approximately Move the lock handle back to its two-thirds position.
-
Page 33: Blade Parallelism
Blade Parallelism Your table saw will give the best results if the miter slot is parallel to the blade. If they are not exactly parallel, your cuts and finished work will be lower in quality. To check and adjust blade... -
Page 34: Blade Parallelism
Now check to see if the blade remains paral- lel to the miter slot when tilted to 45°. Tilt the blade to 45° and repeat Steps 1-5. If the blade is still parallel to the miter slot, con- tinue with the next section. Otherwise, con- tinue with the next step. -
Page 35: 90˚ Positive Stops
45° and 90° Stops The Model G1022 Series is equipped with posi- tive stops at 45° and 90°. When properly adjust- ed, they provide precise and dependable guides for bevel adjustment. To set these stops: Unplug the machine! Raise the saw blade to its maximum height by turning the front handwheel clockwise. -
Page 36: Worm Gear
Worm Gear The degree of resistance at the blade height handwheel can be adjusted to compensate for wear or for personal preference. To adjust: Loosen the lock nut (A) shown in Figure 48. This will allow the eccentric sleeve that sur- rounds the worm gear to turn. -
Page 37: Operations
Face the table saw and stand to the left of the blade path. With one finger on the START button and one finger on the STOP button, turn the saw on. -
Page 38: Blade Selection
Blade Selection Choosing the correct blade for the job is essential for the safe and efficient use of your table saw. Ignoring this important step could result in dam- age to the saw and serious injury to the operator. -
Page 39: Crosscutting
This section on blade selection is by no means comprehensive. Always follow the saw blade manufacturer's recommendations to assure safe and efficient operation of your table saw. G1022 Series Contractor Saws Figure 54. Various saw tooth cutting profiles. Crosscutting Crosscutting means cutting across the grain of the wood. -
Page 40: Ripping
Page 62, or you can purchase the G3445 or G1411 push stick from the Grizzly catalog. Use them to hold the workpiece against the table and fence, and push the -38- workpiece fully past the blade. -
Page 41: Dado Operations
Dado Operations In addition to its ability to rip and crosscut lumber, the table saw is also an invaluable tool for creat- ing a variety of dadoes. These non-through cuts can be created with a regular saw blade or with a specially-designed dado blades shown in Figure Figure 57. -
Page 42: Rabbet Operations
-40- Rabbet Operations In addition to its ability to create a variety of dadoes, this table saw can be used to cut L- shaped rabbets. These cuts can be created with a regular saw blade or with specially-designed stacking or wobbling dado blades (Figure 57). - Page 43 Always use push sticks, featherboards, push paddles and other safety accessories whenever possible to increase safety and control during operations which require that the blade guard and splitter must be removed from the saw. ALWAYS replace the blade guard after dadoing is complete. Ensure that the saw is switched off and dis- connected from its power source.
-
Page 44: Maintenance General
Model G1022 Series require no further lubrication during their lifetime. When they do wear out, replacements can be obtained through the Grizzly Parts Department. Lubricate the areas indicated below every 12 months. Blade angling trunnions. These should be lubricated with 6 or 7 drops of light machine oil. -
Page 45: Wiring Diagrams
G1022SM AND Z WIRING DIAGRAM G1022 Series Contractor Saws -43-... -
Page 46: Wiring Diagrams
G1022ZF, ZFX AND PRO WIRING DIAGRAM -44- G1022 Series Contractor Saws... -
Page 47: Closure
SECTION 8: CLOSURE The following pages contain general machine data, parts diagrams/lists, a troubleshooting guide and Warranty/Return information for your Model G1022 Series. If you need parts or help in assembling your machine, or if you need operational information, we encourage you to call our Service Department. Our trained service technicians will be glad to help you. -
Page 48: G1022Sm Machine Data
Customer Service #: (570) 546-9663 • To Order Call: (800) 523-4777 • Fax #: (800) 438-5901 GRIZZLY MODEL G1022SM 10'' TABLE SAW Design Type ...Floor Model Overall Dimensions: Table Height ...37" Table Size ...27 Size With Extension Wings ...27 With Wings and Fence Rails ...48" W x 44" D Miter Gauge T-Slot ... -
Page 49: G1022Sm Part Breakdowns And Part List
G1022SM... - Page 50 G1022SM...
- Page 51 G1022SM...
- Page 52 G1022SM PARTS LIST PART # DESCRIPTION P1022001 TABLE INSERT DADO INSERT P1022001-A PSS04M SETSCREW M6-1.0 x 12 P1022Z003A STAND LEG P1022003-1 FOOT PB32M HEX BOLT M10-1.5 x 25 PN02M HEX NUT M10-1.5 P1022004 TABLE P1022SM005 SHEET METAL WING PW04M FLAT WASHER 10MM PB01M HEX BOLT M10-1.5 x 30 P1022008...
- Page 53 G1022SM PARTS LIST PART # DESCRIPTION PRP02M ROLL PIN 3 x 16 PN05M HEX NUT M16-1.5 P1022090 FRONT TRUNNION 100 PRP06M ROLL PIN 5 X 24 101 PSS04M SET SCR M6 - 1.0 x 12 102 P1022102 WAVY WASHER 103 PW03M FLAT WASHER 6MM 104 PB08M HEX BOLT M6-1.0 x 20...
-
Page 54: G1022Z Machine Data
Customer Service #: (570) 546-9663 • To Order Call: (800) 523-4777 • Fax #: (800) 438-5901 GRIZZLY MODEL G1022Z TABLE SAW Design Type ...Floor Model Overall Dimensions: Table Height ...37" Table Size ...27 Table Size With Extension Wings ...27 Table With Wings and Fence Rails ...48" W x 44" D Miter Gauge T-Slot ... -
Page 55: G1022Z Part Breakdowns And Part List
G1022Z... - Page 56 G1022Z...
- Page 57 G1022Z...
- Page 58 G1022Z PARTS LIST PART # DESCRIPTION P1022001 TABLE INSERT DADO INSERT P1022001-A PSS04M SETSCREW M6-1.0 x 12 P1022Z003A STAND LEG FOOT P1022003-1 HEX BOLT M10-1.5 x 25 PB32M 3-3 PN02M HEX NUT M10-1.5 P1022004 TABLE G1193 EXTENSION WING PW04M FLAT WASHER 10MM PB01M HEX BOLT M10-1.5 x 30 P1022Z008...
- Page 59 G1022Z PARTS LIST PART # DESCRIPTION PRP06M ROLL PIN 5 X 24 PSS04M SET SCR M6 - 1.0 x 12 P1022102 WAVY WASHER PW03M FLAT WASHER 6MM PB08M HEX BOLT M6-1.0 x 20 PB10M HEX BOLT M6-1.0 x 25 PN01M HEX NUT M6-1.0 P1022107 SET PLATE...
-
Page 60: G1022Zf/Zfx/Pro Machine Data
Customer Service #: (570) 546-9663 • To Order Call: (800) 523-4777 • Fax #: (800) 438-5901 GRIZZLY MODEL G1022ZF/ZFX/PRO TABLE SAW Design Type ...Floor Model Overall Dimensions: Table Height ...37" Table Size ...27 Table Size With Extension Wings ...27 Overall Dimensions – With Wings and Fence Rails ...50" D x 52 Miter Gauge T-Slot ... -
Page 61: G1022Zf/Zfx/Pro Part Breakdowns And Part List
G1022ZF/ZFX/PRO... - Page 62 G1022ZF/ZFX/PRO...
- Page 63 G1022ZF/ZFX/PRO...
- Page 64 G1022ZF/ZFX/PRO PARTS LIST PART # DESCRIPTION P1022ZF001 TABLE INSERT P1022001-A DADO INSERT PSS04M SETSCREW M6-1.0 x 12 P1022Z003A STAND LEG 3-1 P1022003-1 FOOT 3-2 PB32M HEX BOLT M10-1.5 x 25 3-3 PN02M HEX NUT M10-1.5 P1022ZF004 TABLE G1193 EXTENSION WING PW04M FLAT WASHER 10MM PB01M...
- Page 65 "-20 x 2" ⁄ "-20 PART # DESCRIPTION P1022Z252 SPRING WARNING LABEL P1022SM325 ELECTRICITY LABEL P1022SM326 SAFETY GLASSES LABEL P1022SM327 P1022ZF328 MACHINE ID LABEL G1022ZF P1022ZFX328 MACHINE ID LABEL G1022ZFX MACHINE ID LABEL G1022PRO P1022PRO328 BLADE GUARD LABEL P1022SM329 -63-...
-
Page 66: Troubleshooting Guide
TROUBLESHOOTING GUIDE SYMPTOM Motor will not start. Low voltage. Open circuit in motor or loose con- nections. Motor will not start; fuses or Short circuit in line cord or plug. circuit breakers blow. Short circuit in motor or loose con- nections. -
Page 67: Push Stick
G1022 Series Contractor Saws -65-... -
Page 68: Warranty Card
Do you think your purchase represents good value? ___Yes Would you recommend Grizzly Industrial to a friend? ___Yes Would you allow us to use your name as a reference for Grizzly customers in your area? Note: We never use names more than three times. ___Yes Comments:_________________________________________________... -
Page 69: Warranty
WARRANTY AND RETURNS Grizzly Industrial, Inc. warrants every product it sells for a period of 1 year to the original purchaser from the date of purchase. This warranty does not apply to defects due directly or indirectly to misuse, abuse, negligence, accidents, repairs or alterations or lack of maintenance. - Page 70 FOLD ALONG DOTTED LINE FOLD ALONG DOTTED LINE Send a Grizzly Catalog to a friend: Name_______________________________ Street_______________________________ City______________State______Zip______ GRIZZLY INDUSTRIAL, INC. P.O. BOX 2069 BELLINGHAM, WA 98227-2069 TAPE ALONG EDGES--PLEASE DO NOT STAPLE...
Need help?
Do you have a question about the G1022PRO and is the answer not in the manual?
Questions and answers