Table of Contents
Advertisement
Quick Links
LaCinema Mini HD Bridge
User Manual
Table of Contents
1. Introduction................................................................................................................. 7
1.1. Minimum System Requirements ........................................................................................................ 8
1.2. Supported Formats ......................................................................................................................... 9
1.3. Box Content ................................................................................................................................. 10
1.4. Languages ................................................................................................................................... 10
1.5. Views of the LaCinema Mini HD Bridge .......................................................................................... 11
1.5.1. Front View ........................................................................................................................ 11
1.5.2. Rear View ......................................................................................................................... 11
1.5.3. Internal ............................................................................................................................ 11
1.6. Cables and Connectors ................................................................................................................ 12
1.6.1. A/V (Audio/Video) Cables ................................................................................................. 12
1.6.2. USB Cable ....................................................................................................................... 12
1.7. Power Management ...................................................................................................................... 13
2. Using the Remote Control ......................................................................................... 14
2.1. Battery Installation ........................................................................................................................ 14
2.2. Remote Control Key Index ............................................................................................................. 15
2.2.1. Important Button Details .................................................................................................... 16
3. Setting Up: Hard Drive Installation and Transferring Files ......................................... 17
3.1. Connect Storage (External Hard Drive or Internal Hard Disk) ............................................................ 18
3.1.1. Option A: Connect External Hard Drive .............................................................................. 18
3.1.2. Option B: Install Internal Hard Disk .................................................................................... 19
3.2. Unmounting Your Drive ................................................................................................................ 22
4. Setting Up: Connecting to TV and Network ............................................................... 23
4.1. STEP 1: Connect HDMI or Composite Cables ................................................................................. 23
4.1.1. HDMI (High-Definition) Connection .................................................................................... 24
4.1.2. Composite Video & Stereo Audio Cable ............................................................................. 24
4.1.3. Optical Audio (S/PDIF) Connection .................................................................................... 25
4.2. STEP 2: Connect the Ethernet Cable .............................................................................................. 26
4.3. STEP 3: Connect the Power Supply ................................................................................................ 27
4.4. STEP 4: Complete the Installation Wizard ....................................................................................... 28
5. Playing Multimedia Files............................................................................................ 30
5.1. Movie Space ................................................................................................................................ 31
5.1.1. Movie Space Options ........................................................................................................ 32
5.2. Photos Space ............................................................................................................................... 34
5.2.1. Photo Space Options ........................................................................................................ 35
5.3. Music Space ................................................................................................................................ 36
5.3.1. Music Space Options ........................................................................................................ 38
5.4. Network Space ............................................................................................................................. 40
5.4.1. Media Servers ................................................................................................................... 40
5.4.2. Shared folders .................................................................................................................. 40
6. Playing Files From a Networked Media Server .......................................................... 41
6.1. Network-Attached Storage (NAS) ................................................................................................... 41
6.2. From Windows or Mac Computers ................................................................................................. 42
6.2.1. Packet Video TwonkyVision ................................................................................................ 42
6.2.2. Windows Media Player (WMP) ........................................................................................... 43
6.2.3. Shared folders on your Computer ....................................................................................... 44
Table of Contents
page 1
Advertisement
Table of Contents

Subscribe to Our Youtube Channel
Related Manuals for LaCie LaCinema Mini HD Bridge


Summary of Contents for LaCie LaCinema Mini HD Bridge
-
Page 1: Table Of Contents
1.1. Minimum System Requirements ......................8 1.2. Supported Formats ......................... 9 1.3. Box Content ..........................10 1.4. Languages ........................... 10 1.5. Views of the LaCinema Mini HD Bridge ..................11 1.5.1. Front View ........................11 1.5.2. Rear View ......................... 11 1.5.3. Internal ..........................11 1.6. - Page 2 7.1.1. STEP 1: Verify Physical Connection ..................48 7.1.2. STEP 2: LaCie Network Assistant: Install ................48 7.1.3. STEP 3: LaCie Network Assistant: Manage Files ..............49 7.1.4. Alternative Network Connection Methods ................51 7.2. Play Files on Networked Media Players ................... 52 7.2.1.
- Page 3 10.1. Television/Stereo Connection ...................... 76 10.2. USB Connection (Mac Users) ....................... 77 10.3. USB Connection (Windows Users) ....................79 10.4. USB Hard Drive Connection ......................81 11. Contacting Customer Support ................... 82 11.1. LaCie Technical Support Contacts ....................83 12. Warranty Information ....................84...
- Page 4 EN61000-4-3: 2006 + A1: 2007 ED. 3.0 Modifications to this product not authorized EN61000-4-4: 2004 ED. 2.0 by LaCie could void the FCC & Industry Canada regulations and negate your au- EN61000-4-5: 2005 ED. 2.0 thority to operate the product.
-
Page 5: General Use Precautions
(even above. through a window). Inversely, placing your LaCinema Mini HD Bridge in an environment that is too cold or humid may damage the unit. ■ Always unplug the LaCinema Mini HD... - Page 6 Allow 5 cm of clear- 5 cm 5 cm ance for airflow on all sides of the LaCinema Mini HD Bridge to prevent overheating. See Fig. ■ Do not stack the LaCinema Mini HD Bridge on or below another audio/video appliance such as a TV, VCR or DVD player.
-
Page 7: Introduction
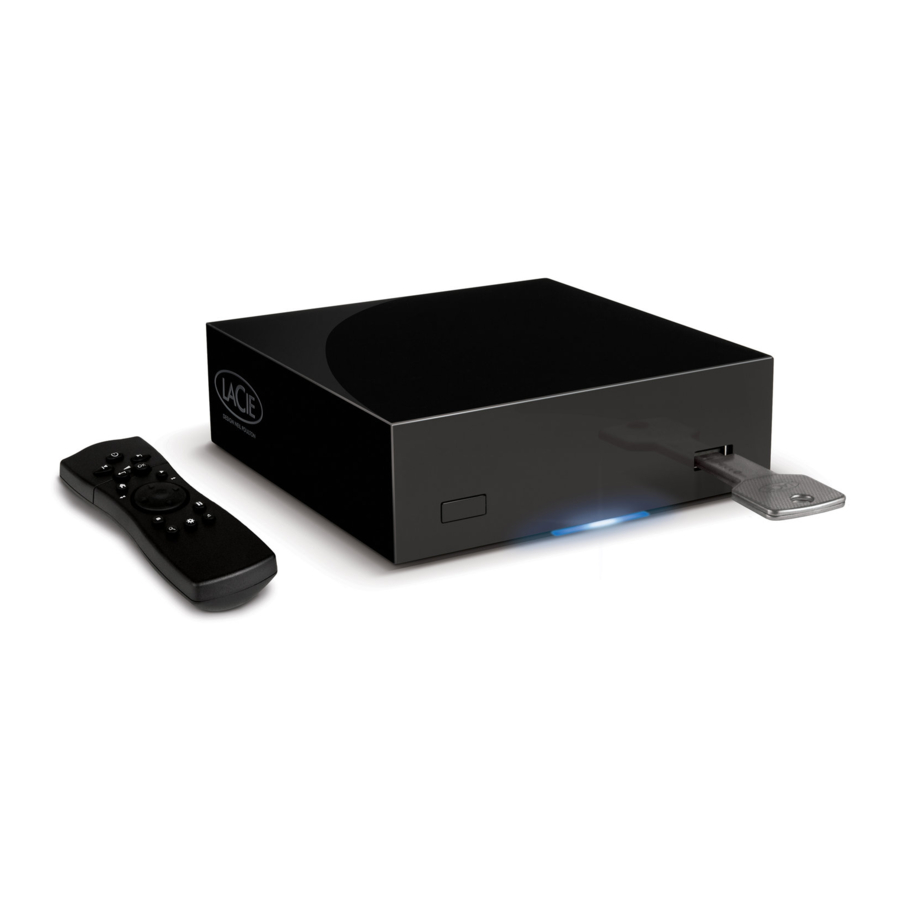
1. Introduction Congratulations on the purchase of your new LaCinema Mini HD Bridge! The LaCinema Mini HD Bridge plugs directly into a wide array of audio/visual equipment for instant playback of stored home movies, music or photos. And with high-quality video and quality audio, there’s no compromise on performance. -
Page 8: Minimum System Requirements
LaCinema Mini HD Bridge Introduction User Manual page 8 1.1. Minimum System Requirements ■ Latest version of Windows XP, Windows Vista, Windows 7 / Mac OS X 10.5 or 10.6 ■ Computer with available USB port ■ Router with available Ethernet port... -
Page 9: Supported Formats
They contain data Audio File Types (Containers) that has been compressed using a codec. For a file to play properly on your LaCinema Mini HD Bridge, both its codec and container ■ MP3 ■ AAC** ■... -
Page 10: Box Content
• Polish • Portuguese • Russian • Spanish • Swedish Please check the LaCie website for a complete list of supported lan- guages. Genie Backup Assistant PV TwonkyMedia Server 5.0 for Windows XP , Vista for Windows XP , Vista Mac OS 10.3.9 or higher... -
Page 11: Views Of The Lacinema Mini Hd Bridge
LaCinema Mini HD Bridge to a network via WiFi in order to trans fer and play multimedia files. CAUTION: Do not stack another electronic device on or below the LaCinema Mini HD Bridge or place it in an enclosed area to avoid performance and overheating issues (Fig. 06). -
Page 12: Cables And Connectors
Fig. 07 audio/video method for connecting the LaCinema Mini HD Bridge to HDTVs. Optical Audio (S/PDIF) (not included) – This connection allows Maximum Connection you to connect your LaCinema Mini HD Bridge to a digital am- Resolution plifier. High HDMI 1080p Definition 1.6.2. -
Page 13: Power Management
(not applicable for USB-to-computer connection). Power modes By default, the LaCinema Mini HD Bridge is set to Instant ON mode, which means that when you press the power button on the remote control (Fig. -
Page 14: Using The Remote Control
IMPORTANT INFO: If you will not be using the remote control for an extended period of time, LaCie recommends that you remove the batteries. When replacing batteries, please do not dispose of the used batteries with your normal household waste. Dispose of them by handing them over to a designed collection point for the recycling of waste electrical and electronic equipment. -
Page 15: Remote Control Key Index
Using the Remote Control User Manual page 15 2.2. Remote Control Key Index The LaCinema Mini HD Bridge’s remote control allows you to control the LaCinema Mini HD Bridge while its connected to your TV or home theatre center. Button Infrared emitter Stand-by... -
Page 16: Important Button Details
LaCinema Mini HD Bridge Using the Remote Control User Manual page 16 2.2.1. Important Button Details This button allows you to confirm a selection. Return: Press this button to return to the previous menu. Settings button: This button is used to display the available set- tings or actions in the different media spaces. -
Page 17: Setting Up: Hard Drive Installation And Transferring Files
17 3. Setting Up: Hard Drive Installation and Transferring Files In order to play files on your TV using the LaCinema Mini HD Bridge, you must connect some kind of storage to the casing. You can install an internal hard disk (see 3.1.2. -
Page 18: Connect Storage (External Hard Drive Or Internal Hard Disk)
Drive This chapter explains how to load files onto your external hard drive, then how to connect the drive to your LaCinema Mini HD Bridge. If you don’t need to transfer files to the hard drive, skip to step #5. -
Page 19: Option B: Install Internal Hard Disk
LaCie cannot guarantee that all drives will be compatible with the LaCinema Mini HD Bridge. The LaCinema Mini HD Bridge is compatible with three disk formats: HFS+ (non-journaled), NTFS, and FAT32. Refer to section 8. - Page 20 LaCinema Mini HD Bridge Setting Up: Transferring Files User Manual page 20 5. Secure the disk drive in the casing by inserting the two included screws into the slots as indicated (Fig. 21). 6. Replace the top of the casing by first aligning the ports on the bottom plate with the cutouts on the top shell and then gently press down until you hear a “click”...
- Page 21 CAUTION: Only use the AC adapter supplied with your specific LaCie device. Do not use a power supply from another LaCie device or an- other manufacturer. Using any other power cable or power supply may cause damage to the device and void your warranty. Always remove the AC adapter before transporting your LaCie drive.
-
Page 22: Unmounting Your Drive
3.2. Unmounting Your Drive In order to avoid file corruption on your external hard drive or inter- nal hard disk installed in the LaCinema Mini HD Bridge, you should unmount its volume before unplugging the USB cable. Windows XP Users... -
Page 23: Setting Up: Connecting To Tv And Network
Cable) Definition In each of the above connection methods, it is possible to connect the LaCinema Mini HD Bridge to home theater systems by plug- TECHNICAL NOTE: The connectors on the rear of your TV may ging the S/PDIF cable (not included) to your digital amplifier via the not appear exactly as shown in the following pages. -
Page 24: Hdmi (High-Definition) Connection
24 4.1.1. HDMI (High-Definition) Connection 1. Connect the HDMI cable to your television’s HDMI port and to the corresponding port on the LaCinema Mini HD Bridge (Fig. 30). 2. Move on to the next step, 4.2. STEP 2: Connect the Ethernet Cable. -
Page 25: Optical Audio (S/Pdif) Connection
Optical Audio (S/PDIF) Connection In each of the above connection methods, it is possible to connect the LaCinema Mini HD Bridge to home theater systems by plugging the S/PDIF cable (not included) into your digital amplifier via the LaCinema Mini HD Bridge’s digital optical audio connector. -
Page 26: Step 2: Connect The Ethernet Cable
4.4. STEP 4: Complete the Installa- tion Wizard. 1. Connect the Ethernet cable to the Ethernet port on the back of the LaCinema Mini HD Bridge (Fig. 35). 2. Connect the other end of the Ethernet cable into an available Ethernet LAN (local area network) port on your router or hub (refer to your router or hub’s documentation if necessary). -
Page 27: Step 3: Connect The Power Supply
LaCinema Mini HD Bridge Setting Up: Connecting to TV User Manual page 27 4.3. STEP 3: Connect the Power Supply IMPORTANT INFO: If your power supply cable is already con- nected, turn on your TV and then skip to 4.4. STEP 4: Complete the Installation Wizard. -
Page 28: Step 4: Complete The Installation Wizard
4.4. STEP 4: Complete the Installation Wizard The first time you turn on the LaCinema Mini HD Bridge, a wizard appears to help you configure your settings. The wizard appears only the first time you turn on the LaCinema Mini HD Bridge unless you have reset the product. - Page 29 Connect Now. c. You can configure multiple wireless networks from this page. To set one network as preferred, and therefore the server that the LaCinema Mini HD Bridge will connect to automatically, select the network and select the Favorites button (Fig.
-
Page 30: Playing Multimedia Files
LaCinema Mini HD Bridge Playing Multimedia Files User Manual page 30 5. Playing Multimedia Files This chapter explains how to use the interface and to play files lo- cated either on the internal hard disk, an attached USB hard drive, or network source. -
Page 31: Movie Space
(Fig. 47). The Movie Space will display all of the supported video files that are accessible to the LaCinema Mini HD Bridge. Only files recognized as video files will be displayed. Music and Photo files will not be displayed. All Movies: Displays all available videos, sorted alphabetically ■... -
Page 32: Movie Space Options
LaCinema Mini HD Bridge Playing Multimedia Files User Manual page 32 5.1.1. Movie Space Options While a movie is playing, you can adjust several playback pa- rameters. Press the Setup button to display or exit the on-screen menu, and use the... - Page 33 LaCinema Mini HD Bridge Playing Multimedia Files User Manual page 33 Change play mode: By pressing the Setup button you can adjust the play mode as follows: a. Normal (Fig. b. Repeat one: The currently playing file will repeat continuously (Fig.
-
Page 34: Photos Space
(Fig. 55). The Photo Space will display all of the supported video files that are accessible to the LaCinema Mini HD Bridge. Only files recognized as photo files will be displayed. Music and video files will not be displayed. All Photos: Displays all available photos, sorted alphabetically ■... -
Page 35: Photo Space Options
LaCinema Mini HD Bridge Playing Multimedia Files User Manual page 35 5.2.1. Photo Space Options While a photo is being displayed, you can adjust several playback pa rameters. Press the Setup button to display or exit the on- screen menu, and use the... -
Page 36: Music Space
(Fig. 59). The Music Space will display all of the supported video files that are accessible to the LaCinema Mini HD Bridge. Only files recognized as audio files will be displayed. Photo and video files will not be displayed. All Music: Displays all available music files, sorted alphabetically ■... - Page 37 LaCinema Mini HD Bridge Playing Multimedia Files User Manual page 37 Now playing: If a music file is playing, this icon will be present ■ (Fig. 60). Clicking the button will take you to the Now Play- ing window. Click the button to stop music playback.
-
Page 38: Music Space Options
LaCinema Mini HD Bridge Playing Multimedia Files User Manual page 38 5.3.1. Music Space Options During playback, you can adjust several pa rameters (Fig. 62). Press Setup button to display or exit the on-screen menu and con- figure the following settings. Once you’ve selected the option you want, click the button. - Page 39 LaCinema Mini HD Bridge Playing Multimedia Files User Manual page 39 Random: Files in the current folder or playlist will play in random order (Fig. 66). Random repeat all: Files in the current folder or playlist will play in random order and in succession repeatedly (Fig.
-
Page 40: Network Space
LaCinema Mini HD Bridge Playing Multimedia Files User Manual page 40 5.4. Network Space Navigate to the Network Space using the Left Right but- tons. Then use the Down buttons to browse within the Network Space (Fig. 68). From this menu, you can access files located on media servers and computer shared folders located on your home network. -
Page 41: Playing Files From A Networked Media Server
6.1. Network-Attached Storage (NAS) If you have a NAS running a media server, it is possible to stream this content to the LaCinema Mini HD Bridge. In order to view your NAS content on LaCinema Mini HD Bridge, first make sure that both devices are connected to the network (Fig. -
Page 42: From Windows Or Mac Computers
Bridge via your Ethernet or wireless network. Once the software has Network Router been installed and configured, files located on the host computer will appear in the various Spaces on the LaCinema Mini HD Bridge (see Fig. 71). Choose from two different software:... -
Page 43: Windows Media Player (Wmp)
Network Router Install Windows Media Player (WMP) 11 to allow you to stream con- tent to the LaCinema Mini HD Bridge via your Ethernet or wireless network. Follow these steps to configure the connection: 1. Make sure that the software is installed on your computer. WMP... -
Page 44: Shared Folders On Your Computer
Shared folders on your Computer After you modify some settings in your operating system, you can make files located in certain folders on your computer available for playback on your LaCinema Mini HD Bridge in Network > Shared Folders (Fig. - Page 45 81, 4). If you are prompted for an administrator password or confirmation, type the password or provide confirmation. The files contained in the folders you select will now be available to the LaCinema Mini HD Bridge in Network > Shared Folders. Fig. 80...
- Page 46 Share files and folders using SMB. The files contained in the folders you select will now be available to Fig. 82 the LaCinema Mini HD Bridge in Network > Shared Folders. Mac OS X 10.4.x 1. Open your System Preferences and select...
-
Page 47: Sharing Files Throughout Your Home Network
It is convenient to use the network connection to transfer, move, or delete files located on the external hard drive connected to the LaCinema Mini HD Bridge or internal hard disk once it has been connected to the TV. Follow these steps to manage files using your networked computer: 7.1.1. -
Page 48: Step 1: Verify Physical Connection
User Manual page 48 7.1.1. STEP 1: Verify Physical Connection 1. First, make sure the LaCinema Mini HD Bridge has been con- nected to the TV and network as described in section (4. Setting Up: Connecting to TV and Network). -
Page 49: Step 3: Lacie Network Assistant: Manage Files
Assistant icon will appear in the system tray (Fig. 85) and Network Assistant will automatically detect your LaCinema Mini HD Bridge. Fig. 85 b. From the system tray, click the LaCie Network Assistant icon then MiniHD > LaCie (Fig. 87) or Connect Manually. - Page 50 IMPORTANT INFO: If you want to delete files from the external hard drive connected to the LaCinema Mini HD Bridge, you must empty the Trash or Recycle Bin after moving the files there. Other- wise, the files will still have a reference and occupy hard drive space.
-
Page 51: Alternative Network Connection Methods
51 7.1.4. Alternative Network Connection Methods If your LaCinema Mini HD Bridge is connected to your home net- work, it is possible to access its volume without using the LaCie Network Assistant. Windows Users To access the volume in Windows, look in My Network Places, and select Microsoft Windows Workgroup. -
Page 52: Play Files On Networked Media Players
7.2. Play Files on Networked Media Players The LaCinema Mini HD Bridge is both a network media player and server. Note that this functionality is only available if you have in- stalled an internal hard disk. It can play content located on a local... -
Page 53: Upnp Usage Example: Xbox
Bridge (see 3.1. Connect Storage (External Hard Drive or Inter- nal Hard Disk)). 2. If not already done, connect the LaCinema Mini HD Bridge to your TV and network (see 4. Setting Up: Connecting to TV and Network). 3. Using the remote control, navigate to Settings >... -
Page 54: Reformatting The Lacinema Mini Hd Bridge
Reformatting the LaCinema Mini HD Bridge User Manual page 54 8. Reformatting the LaCinema Mini HD Bridge Windows File System Formats Please read the following information on file system formats for Win- dows and Mac operating systems to determine if you need to refor-... -
Page 55: Windows Xp Users
LaCinema Mini HD Bridge Reformatting the LaCinema Mini HD Bridge User Manual page 55 8.1. Windows XP Users The steps listed below will help you format and partition your disk drive using Windows XP. For more information on choosing the op- timal file format, refer to 8. - Page 56 LaCinema Mini HD Bridge Reformatting the LaCinema Mini HD Bridge User Manual page 56 9. Specify the partition size. Please note that FAT32 partitions must be 32GB (32000MB) or smaller. By default, the partition oc- cupies the entire volume (Fig.
- Page 57 LaCinema Mini HD Bridge Reformatting the LaCinema Mini HD Bridge User Manual page 57 12. A window appears listing your choices. If all seems well, click Finish to begin the format process (Fig. 101). To make a change, select Back.
-
Page 58: Windows Vista & Windows 7 Users
Reformatting the LaCinema Mini HD Bridge User Manual page 58 8.2. Windows Vista & Windows 7 Users The following steps explain how to format your LaCie hard disk using Windows Vista or Windows 7. 1. Right-click Computer and choose Manage. From the Manage... - Page 59 Windows Vista SP1 and Windows 7, the exFAT file system can work on Windows XP SP2 with a special driver. Since Mac OS support is unstable, sharing your LaCie drive between Windows and Apple Fig. 106 operating systems using this file format is discouraged.
- Page 60 LaCinema Mini HD Bridge Reformatting the LaCinema Mini HD Bridge User Manual page 60 7. The last window is a summary of the format options you have just selected. If all looks to be correct, click Finish for the format to begin (Fig.
-
Page 61: Mac Os X Users
LaCinema Mini HD Bridge Reformatting the LaCinema Mini HD Bridge User Manual page 61 8.3. Mac OS X Users CAUTION: Following these steps will erase everything from the hard drive. If you have information that you want to protect or con- tinue to use, back up this information before performing these steps. -
Page 62: Settings Menu
LaCinema Mini HD Bridge Settings Menu User Manual page 62 9. Settings Menu The LaCinema Mini HD Bridge Setup Space will help you to prop- erly configure and customize your device. Access it at any time by clicking the Setup button. -
Page 63: Display Resolution
LaCinema Mini HD Bridge Settings Menu User Manual page 63 9.1.2. Display Resolution Choose a display resolution to match your television (default is Auto). 9.1.3. Aspect Ratio Depending on your television’s setup, choose either (Fig. 115) (note that Widescreen is the default setting): ■... -
Page 64: Ntsc/Pal
LaCinema Mini HD Bridge Settings Menu User Manual page 64 9.1.5. NTSC/PAL Depending on your television’s configuration, choose either PAL or NTSC (Fig. 117) (note that is the default setting). Alternatively, you can change this setting by pressing and holding the Setup button until the standard changes. -
Page 65: Subtitle Font Size
LaCinema Mini HD Bridge Settings Menu User Manual page 65 9.2.2. Subtitle Font Size Choose from a range of 24pt to 40pt (Fig. 120): Fig. 120... -
Page 66: Settings: Music
LaCinema Mini HD Bridge Settings Menu User Manual page 66 9.3. Settings: Music 9.3.1. Music Sequence Choose from the following (Fig. 121): Repeat one: The currently playing file will repeat continuously. ■ Repeat all: All files in the current folder will play in succession ■... -
Page 67: Settings: Photo
LaCinema Mini HD Bridge Settings Menu User Manual page 67 9.4. Settings: Photo 9.4.1. Slideshow This parameter allows you to change the way pictures are played back (default is Normal) (Fig. 124): ■ Normal ■ Shuffle ■ Repeat All ■ Repeat All and Shuffle 9.4.2. -
Page 68: Transition Effect
LaCinema Mini HD Bridge Settings Menu User Manual page 68 9.4.3. Transition Effect This parameter allows you to modify the transition effects between photos (default is Normal) (Fig. 126): ■ Normal ■ Fade ■ Random 9.4.4. Interval Time This settings allows you to set the amount of time a photo is dis-... -
Page 69: Settings: System
LaCinema Mini HD Bridge Settings Menu User Manual page 69 9.5. Settings: System 9.5.1. Language Choose your language. 9.5.2. Content Aggregation This setting activates or deactivates the file database, which allows you to browse files within each media type according to certain pa- rameters (file type, date, recent, etc.). -
Page 70: Additional Encoding Support
LaCinema Mini HD Bridge Settings Menu User Manual page 70 9.5.5. Additional Encoding Support Change this setting if you encounter incorrect text characters in file names in the drive operating system (default is Western Europe) (Fig. 131). 9.5.6. System Reset... -
Page 71: About
Update using USB Key If the drive does not have internet access, you can download an update file from the LaCie website, copy it to a USB flash drive, and connect the drive to the front port of the LaCinema Mini HD Bridge. -
Page 72: Settings: Network
Settings Menu User Manual page 72 9.6. Settings: Network 9.6.1. Network Setup: Wired / Wireless This page will display your LaCinema Mini HD Bridge’s network val- ues, such as IP address (Fig. 137). To modify these values, click the Configure button. -
Page 73: Device Name
9.6.3. Media Server Use this page to turn on or off the Media servers (default is OFF). For details on configuring your LaCinema Mini HD Bridge as a UPnP multimedia server, see section 7.2. Play Files on Networked Media Players. -
Page 74: Auto Login
LaCinema Mini HD Bridge’s operating system. Press to confirm (Fig. 143). Fig. 142 9.7. Settings: Shutdown This menu will allow you to shut down the LaCinema Mini HD Bridge or restart it in the case you encounter a playback issue (Fig. 144). 9.7.1. Shutdown... -
Page 75: Troubleshooting
75 10. Troubleshooting If your LaCinema Mini HD Bridge is not working correctly, please re- fer to the following checklist to determine the source of the problem. If you have gone through all of the points on the checklist and your LaCinema Mini HD Bridge still does not work properly, please check the FAQs that are regularly published on our website –... -
Page 76: Television/Stereo Connection
HDMI cable (included). There is no sound Have the Audio Settings been When using the A/V cable to connect the LaCinema Mini HD Bridge to a when connecting the adjusted? TV, go into the Settings... -
Page 77: Usb Connection (Mac Users)
Answer The drive is not Does an icon for the drive appear There should be an icon for the LaCie drive on the desktop (unless you’ve recognized by the on the desktop? set the Finder preference not to show External disks on the desktop). If the computer. - Page 78 LaCinema Mini HD Bridge Troubleshooting User Manual page 78 Problem Question Answer The drive is not run- Is the drive connected to a Hi- Check to see that the Hi-Speed USB 2.0 drivers for both your host bus ning noticeably faster Speed USB 2.0 port on your...
-
Page 79: Usb Connection (Windows Users)
Go into My Computer and look for an icon and drive letter assigned to the LaCie drive. If the drive does not appear, follow the rest of the Troubleshooting tips to isolate the problem. - Page 80 LaCinema Mini HD Bridge Troubleshooting User Manual page 80 Problem Question Answer The drive is not run- Is the drive connected to a stan- If your drive is connected to a standard USB port, this is normal. A Hi- ning noticeably faster dard USB port on your computer? Speed USB 2.0 device can only operate at Hi-Speed USB 2.0 performance...
-
Page 81: Usb Hard Drive Connection
3.1.1. Option A: Connect External Hard Drive to see if your hard drive isn’t ible file system? drive’s file system is compatible with the LaCinema Mini HD Bridge. Note recognized by the that drives formatted in HFS+ (Mac OS extended) Journaled are incom- LaCinema Mini HD patible. -
Page 82: Contacting Customer Support
If you have asked yourself all of the pertinent questions in the troubleshooting checklist, and you still can’t get your LaCie drive to work properly, contact us at www.lacie.com. Before contacting us, make sure that you are in front of your computer and that you have... -
Page 83: Lacie Technical Support Contacts
LaCinema Mini HD Bridge Contacting Customer Support User Manual page 83 11.1. LaCie Technical Support Contacts LaCie Asia LaCie Australia http://www.lacie.com/cn/contact/ http://www.lacie.com/au/contact/ LaCie Belgium LaCie Brazil http://www.lacie.com/us/contact/ http://www.lacie.com/be/contact/ (Dutch) http://www.lacie.com/befr/contact/ (French) LaCie Canada LaCie Denmark http://www.lacie.com/dk/contact/ http://www.lacie.com/ca/contact/ (English) http://www.lacie.com/cafr/contact/ (French) -
Page 84: Warranty Information
LaCie, may provide their own warranties nal box and shipped with postage prepaid. to the end user purchaser, but LaCie, in so far as permitted by law, provides their products “as is”. Software distributed by LaCie with or...
Need help?
Do you have a question about the LaCinema Mini HD Bridge and is the answer not in the manual?
Questions and answers