LaCie d2 network 2 User Manual
Hide thumbs
Also See for d2 network 2:
- User manual (71 pages) ,
- Quick install manual (44 pages) ,
- Datasheet (4 pages)
Table of Contents
Advertisement
Advertisement
Table of Contents
Troubleshooting

Related Manuals for LaCie d2 network 2


Summary of Contents for LaCie d2 network 2
- Page 1 D2, 2BIG, AND 5BIG NETWORK 2 USER MANUAL CLICK HERE TO ACCESS UP-TO-DATE ONLINE VERSION of this document for the most recent content as well as for features such as expandable illustrations, easier navigation, and search capability. d2, 2big, and 5big Network 2 User Manual...
-
Page 2: Box Content
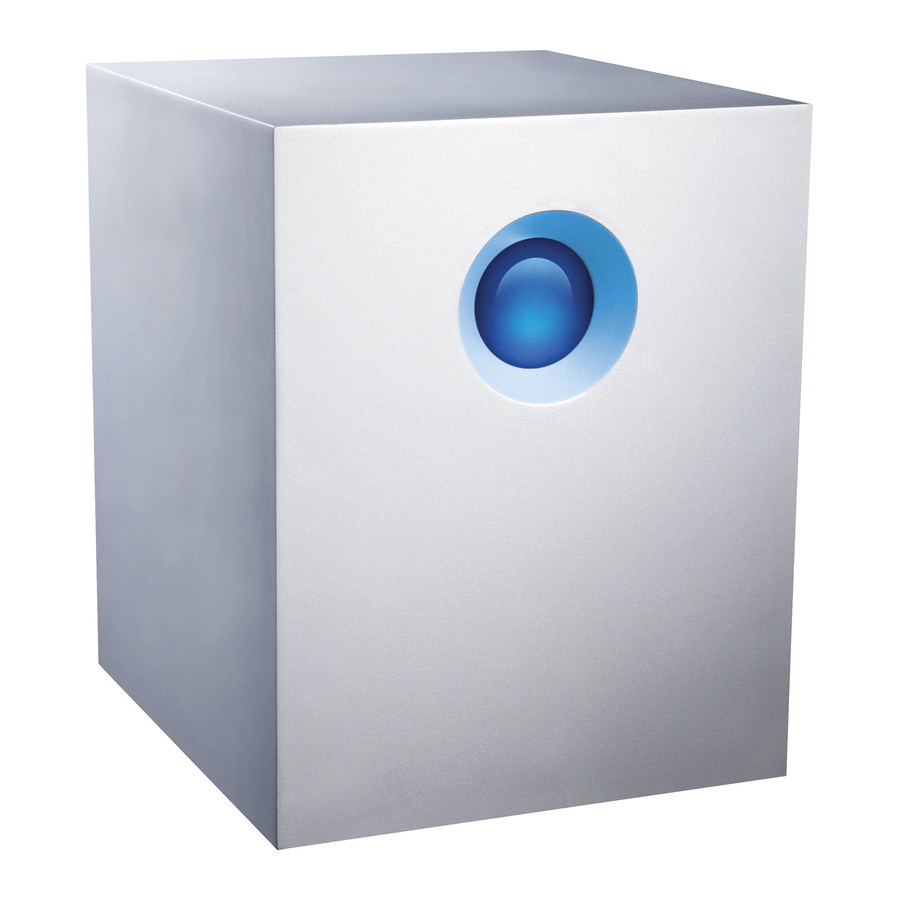
2.2 (upgrade here) 5big Network 2 Congratulations on your purchase of a LaCie d2, 2big, or 5big Network 2. Designed to satisfy the data sharing and backup needs of small offices, your LaCie NAS (network-attached storage device) represents the new generation of shared storage with security. -
Page 3: Minimum System Requirements
Web browsers: Internet Explorer™ 7.0 / 8.0 Firefox™ 3.0, Safari™ 3.0, or Chrome 2.0 or higher Important info: Your LaCie product's performance can be affected by such external forces as network activity, hardware, distance, and setup. For optimal performance, use a Gigabit Ethernet router and a Gigabit Ethernet board in your host computer. -
Page 4: Rear View
Rear View d2 Network 2 ON/OFF Gigabit Ethernet USB 2.0 Expansion Power Connector eSATA Expansion USB 2.0 Direct Connection Kensington Lock Slot d2, 2big, and 5big Network 2 User Manual... - Page 5 2big Network 2 Left drive status LED ON/OFF Gigabit Ethernet eSATA Expansion USB 2.0 Expansion Right drive status LED Drive tray handle Drive lock USB 2.0 Direct Connection Power Connector d2, 2big, and 5big Network 2 User Manual...
-
Page 6: Power Button Functions
Activate deep sleep mode: If Deep Sleep Mode is enabled in Dashboard - Eco Management, click the blue button. Wake from sleep mode: Press the blue button. To wake the drive from Deep Sleep Mode, press the blue button or use the Wake on LAN function in the LaCie Network Assistant (see Wake on... -
Page 7: Led Behavior
LED BEHAVIOR The front and rear LEDs indicate drive status and activity (only the 2big and 5big have rear drive LEDs). This section describes the behavior of the LED indicators. Technical note: Even if you have turned off the front LED using the Dashboard, events triggering a red light will always cause the front LED to turn on. - Page 8 2big/5big Front LED Rear LED Color State Color Activity LED for working disk(s) (until they are fully initialized) Occurs as the device is booting; will cease once the drives are fully initialized Blinking blue Activity LED for working disk(s) Backup in progress Blinking blue/red RAID synchronizing;...
-
Page 9: Hard Disk Heat Management
Note: This chapter refers to the d2 and 2big Network 2 only. HEAT DISSIPATION DESIGN This LaCie product's metal body is ideal for naturally dissipating internal drive heat. Its unique design actually draws heat away from the internal drive toward the external casing. The large surface area of the heat sink casing absorbs internal heat and dissipates it, keeping the drive safe and prolonging its life and reliability. - Page 10 d2, 2big, and 5big Network 2 User Manual...
-
Page 11: Adding Disks To An Empty Enclosure
Only 3.5” SATA II drives may be used in the NAS enclosure. LaCie recommends selecting drives that are equal in storage capacity. For example, if the first drive has a 1TB disk, fill all the slots with 1TB drives. -
Page 12: Remove The Empty Disk Tray
3. REMOVE THE EMPTY DISK TRAY 5big Network 2 Use the included drive lock tool to unlock the drive tray. Turn the lock until it is vertical. d2, 2big, and 5big Network 2 User Manual... - Page 13 Place your index finger into the space behind the handle. Please use caution when drawing out the drive tray handle. d2, 2big, and 5big Network 2 User Manual...
-
Page 14: Secure The Disk
LaCie NAS Disk Tray Hard drive Disk Tray screws. Use only the screws that are provided with your LaCie NAS. Phillips head screwdriver. Please confirm that the head of the screwdriver is the proper size for the Disk Tray d2, 2big, and 5big Network 2 User Manual... - Page 15 screws. Caution: To avoid potential problems caused by electrostatic discharge (ESD), it is recommended that you do not touch the hard drive’s printed circuit board. As a further precaution against ESD, please use an anti-static wristband or an anti-static mat to ground yourself when handling the hard drive. To secure the disk in the drive tray: Place the empty drive tray onto the flat work area with the handle on the bottom left.
-
Page 16: Power On And Initialize The Lacie Nas
For example, the second disk should be inserted into Disk Slot 2, the third disk into Disk Slot 3, etc. Use the drive lock tool to lock the drive(s) in place. 5. POWER ON AND INITIALIZE THE LACIE NAS d2, 2big, and 5big Network 2 User Manual... - Page 17 Caution: Only use the AC adapter supplied with your specific LaCie device. Do not use a power supply from another LaCie device or another manufacturer. Using any other power cable or power supply may cause damage to the device and void your warranty. Always remove the AC adapter before transporting your LaCie device.
-
Page 18: Format The Disk(S)
Turn solid blue when initialization is finished Flash red and blue. The red and blue lights indicate the system is loading. The LaCie NAS is ready to format the disk(s) once the front LED turns solid blue again. 6. FORMAT THE DISK(S) Steps 1 through 3 should take approximately seven minutes. - Page 19 The NAS will reboot to complete the initialization. The front LED will blink red and blue. The system is ready once the front LED turns solid blue. Go to Connect to the Network. d2, 2big, and 5big Network 2 User Manual...
-
Page 20: Connect To The Network
CONNECT TO THE NETWORK This chapter explains how to connect your LaCie NAS to a network. For details on connecting your NAS directly to a computer via USB (2big/d2 only), see Connect to a Computer via USB. A - CONNECT THE ETHERNET CABLE Connect the Ethernet cable to the Ethernet port on the back of the product. -
Page 21: B - Connect The Power Supply
Turn on the drive by pressing the power button on the back of the drive. The front LED will turn on and then begin blinking. Caution: Only use the AC adapter supplied with your specific LaCie device. Do not use a power supply from another LaCie device or another manufacturer. Using any other power cable or power supply may cause damage to the device and void your warranty. -
Page 22: C - Install Lacie Network Assistant
C - INSTALL LACIE NETWORK ASSISTANT Lacie Network Assistant detects all LaCie network-attached storage devices on your network and gives you easy ways to connect to or configure them. Note: If you've installed LaCie Network Assistant before purchasing this LaCie product, make sure that you've downloaded and installed the latest version from the LaCie website. -
Page 23: Access And Transfer Files
USB access). On the other hand, when it is connected to a computer via USB, only USBShare will be accessible. 5big Default Shares Your LaCie 5big Network 2 has three shares (similar to folders) by default: Share, Public, and iSCSIShare (iSCSIShare will be created automatically when you allocate space for the iSCSI share; see Dashboard - Drive Information for details). -
Page 24: Access Shares
Right-click on the icon in the system tray. Mac Users: Select LaCie Network Assistant in your Applications folder. A Network Assistant icon will appear in the menu bar and LaCie Network Assistant will automatically detect your LaCie product on the network. - Page 25 The share will open in a Finder window (Mac) or an Explorer window (Windows). If you are prompted for a username/password, enter your username and password (by default): Username = admin Password = admin If you have changed the username/password from the default admin/admin (see Administration (Dashboard) d2, 2big, and 5big Network 2 User Manual...
- Page 26 ), enter your new credentials. Transfer files normally between your computer and the share. Mac users: If the share does not open in a Finder window, simply navigate in the Finder to Network > [machine name] > [share name]. Option 2 Mac Users In your Finder, navigate to Go >...
- Page 27 Right-click the icon in the system tray (Windows) or click the icon in the menu bar (Mac) and select Configuration Window. Select your LaCie NAS' machine name from the list of devices in the left-hand column, then click the Volumes tab.
- Page 28 Double-click the share you wish to access. The share will open in a Finder window (Mac) or an Explorer window (Windows). Transfer files normally from your computer to the share. Technical note: Mac users: If the share does not open in a Finder window, simply navigate in the Finder to Network >...
-
Page 29: Dashboard - Accessing
Click on the LaCie Network Assistant icon in the system tray (Windows users) or menu bar (Mac users) and select [machine name] > Web Access (Windows users) or [machine name] (Mac users). The login page will open in a new browser window or tab. If your browser is not open, LaCie Network Assistant will open it for you. - Page 30 Click Log in. d2, 2big, and 5big Network 2 User Manual...
-
Page 31: Access Dashboard Using A Browser
Access Dashboard Using a Browser Open your Internet browser (Firefox, Internet Explorer, Safari, etc.) and type your NAS' IP address or machine name in the browser's URL (web address) field. For example: http://[IP-address] or http://[machine name] (Windows) or http://[machine name].local (Mac) The first time you access the Dashboard, fill in the information in the Setup Wizard. - Page 32 The email will arrive in the user's email inbox. In the email, click the Click here link. In the Reinitialize your password screen, type your login, new password, then reconfirm the new password, then click Send. d2, 2big, and 5big Network 2 User Manual...
-
Page 33: Dashboard - Welcome
DASHBOARD - WELCOME The welcome page contains links to helpful documents from the LaCie website, the ability to change details for the currently logged in user, and a list of the different pages that make up the Dashboard. Important info: Note that if you log in to the Dashboard with administrative credentials, you will have full access to the Dashboard's features. -
Page 34: Logged In User Information
Click Change my email address: (if you haven't input one already) or click the actual email address (if you have). Giving an email address allows you to receive notifications from your LaCie NAS or to recover your password if you forget it. Note that an SMTP server also needs to be defined on the Dashboard or you won't be able to modify the email address. -
Page 35: File Browser
Log Out To log out of the Dashboard, click the log out button. File Browser Dashboard - File Browser. DASHBOARD - NAVIGATION The Dashboard is made up of a central area surrounded by widgets, or small boxes that represent the different pages that make up the Dashboard. -
Page 36: Dashboard - Users
DASHBOARD - USERS This page allows you to manage user accounts. See below for details. New User To create a new user, click the Add User button, then fill out the required fields. Important info: The password is case-sensitive. In text fields, you may enter from 4 to 20 characters using letters, numbers, symbols, hypen, and underscore. -
Page 37: Existing User
Existing User User data is organized in a table. Click the text in the Login column to change the user name. Click the text in the Password column to change the user's password. Click the text in the Email column to change the user's email address. An X in the Administrator column indicates the user has administrative privileges. - Page 38 A window will appear listing all the users on the domain. Type a few characters in the text field to filter results. Hold down the Command key (Mac users) or Ctrl key (Windows users) to select multiple users. Click the IMPORT button. The imported users will appear in the table.
- Page 39 because the circle in the Domain column will be green. d2, 2big, and 5big Network 2 User Manual...
-
Page 40: Delete A User
Delete a User To delete a user, click the gray X on the far right of the user's row. Confirm in the dialogue window. d2, 2big, and 5big Network 2 User Manual... -
Page 41: Dashboard - Shares
DASHBOARD - SHARES Shares—network folders—comprise the storage capacity of your LaCie NAS. Out of the box, it has two shares, Share and Public, and USBShare (d2/2big only) or iSCSIShare (5big only) is created automatically when storage is allocated to it using the Dashboard. The Shares page in the Dashboard allows the administrator to assign quotas and access rights to users and groups, and to toggle share-level service activation. -
Page 42: Existing Share
Existing Share Share data is organized in a table. Click the text in the Name column to change the share name. Click the text in the Description column to change the share's description (optional). Click the text in the Quota column to change the share's maximum size. A number in the Usage column indicates the amount of storage space occupied by the share. -
Page 43: Delete A Share
Group Access, then click the Edit button. In the left-hand column of the resulting window, the users or groups without access to the share are listed. Select the group or user to be granted access, then click the right arrow either to the Read + write access cell or to the Read only access cell. -
Page 44: Dashboard - Download
DASHBOARD - DOWNLOAD The LaCie NAS Dashboard features a torrent server that will allow you to download torrent files. For more information on torrents, see: http://en.wikipedia.org/wiki/BitTorrent_protocol Click the Start Download Machine button. To start a download, click the Add Download button. -
Page 45: Download Page Settings
Technical note: Because the torrent client service uses bandwidth and system resources, multiple simultaneous downloads can impact your LaCie NAS' performance. Additionally, even after a download has completed, it may continue to use system resources if it is uploading, as long as the torrent is active. -
Page 46: Dashboard - General Settings
LaCie NAS and treated exactly as if they were created in the Dashboard. You can use the Users page to assign domain users access to the LaCie NAS' shares. d2, 2big, and 5big Network 2 User Manual... -
Page 47: Services Tab
To connect to a share, select the Domain box, then fill in the Fully Qualified Domain Name, Administrator login, and Administrator password. For more complex network configurations, click the Advanced Criteria arrow and fill in the Server name and Server IP. Once connected, you should see the domain's associated users in the Dashboard's Users page (these users will be identified by the word Domain in place of password). - Page 48 Multimedia services allow you to stream media files from your NAS to Multimedia UPnP-enabled players (such as cell phones, computers, and game consoles). Advanced Accessibility Features for details. Time Machine™ Allows Time Machine to back up a Mac onto your LaCie NAS' share. d2, 2big, and 5big Network 2 User Manual...
-
Page 49: Dashboard - Drive Information
DASHBOARD - DRIVE INFORMATION 5big Network 2 d2, 2big, and 5big Network 2 User Manual... - Page 50 2big Network 2 d2 Network 2 This page shows you information about disk usage and will allow you to reformat your disk(s). When you click the top FORMAT button, ALL data on the disk(s) (including on USBShare or iSCSIShare) will be...
- Page 51 erased and the disk(s) will be formatted. Data on any USB or eSATA hard drive connected to the expansion ports will not be affected. To reformat: Click the FORMAT button. In the blue window that opens, confirm by clicking the FORMAT button. d2, 2big, and 5big Network 2 User Manual...
- Page 52 Connect to a Computer via USB details on connecting your LaCie NAS to a computer via USB. To change the storage allocated to USBShare, click the capacity in the USBShare row, then drag the slider (maximum is 500GB). Once you click on the slider, you can use the left or right keys on your keyboard to fine tune.
-
Page 53: Dashboard - Support
DASHBOARD - SUPPORT Configuration Version: Your LaCie NAS' operating system version will be listed here. This information is important when you're updating the OS or if you need to speak with LaCie technical support. System Log: Click the Download button to save the system log to your computer. The log may be useful to LaCie tech support in troubleshooting any issues. -
Page 54: Email Notification Triggers
Auto-Update If you wish, your LaCie NAS will automatically check if an operating system update is available from the update server, and will install it for you. See Update Product Operating System for details. -
Page 55: Dashboard - Groups
DASHBOARD - GROUPS Assigning users to groups gives you powerful tools to manage large numbers of users and their privileges. They allow administrators to change access rights to entire groups rather than individually. From this page, administrators can: create, modify, delete, and add users to groups. Important info: In text fields, you may enter 1 to 20 characters using letters, numbers, hypen, and underscore. -
Page 56: New Group
New Group To create a new group, click the ADD GROUP button, then fill out the required fields. Existing Group Group data is organized in a table. Click the text in the Group Name column to change the group name. Click the text in the Description column to change the group's description (optional). -
Page 57: Importing Groups From Active Directory
Importing Groups from Active Directory If you have successfully connected to an Active Directory domain (see Dashboard - General Settings), you will see a button on the Dashboard - Groups page labelled IMPORT FROM DOMAIN. Click the button. A window will appear listing all the groups on the domain. Type a few characters in the text field to filter results. -
Page 58: Dashboard - Backup
DASHBOARD - BACKUP Your LaCie NAS features a robust backup and restore system. It allows you to back up files: To and from another NAS on your local network or through the Internet To and from your NAS and an external hard drive Between shares on your NAS The Backup &... - Page 59 Next, choose Local backup, then click NEXT. In the next screen, choose one or multiple sources (ie, what will be backed up) in the left-hand column. Then choose a destination (ie, where the files will be backed up) in the right-hand column. To create a new folder, navigate to where you wish it to be created, then click the CREATE FOLDER button.
- Page 60 Select a backup type, then click NEXT. Full means the entire contents of the source folder will be saved each time the backup job runs. This method offers high security but may not be the most efficient use of storage capacity. Full (optimized) means that, after the initial full backup, only modified (or missing or new) files are d2, 2big, and 5big Network 2 User Manual...
- Page 61 modified in subsequent backups. Select a backup mode, then click NEXT. Manual means that the backup job will only run when you execute it. Scheduled means that the backup job will run according to a schedule you set. Automatic is available only when the backup target is an external hard drive. This choice will cause the backup job to run automatically when the drive is connected to the NAS.
- Page 62 In the next screen, type a name for the backup job, then click Next. The next screen will display the details for the job you've just created. Click FINISH. d2, 2big, and 5big Network 2 User Manual...
-
Page 63: Remote Backup
You may have to open ports on your router of both networks in order to accomplish this. Refer to your router's documentation for details. The target NAS must be rsync compatible. A LaCie NAS must have the most up-to-date operating system and netbackup server enabled; see Enable Netbackup Server. - Page 64 In the next screen, choose a share or folder on your NAS you wish to back up, then click NEXT. In the next screen, choose whether the destination NAS is a LaCie NAS or non-LaCie rsync-compatible NAS. Then click NEXT.
- Page 65 In the next screen, the Dashboard will scan the local network for LaCie NAS. In the next screen, the local LaCie NAS will be listed. If a NAS is listed but grayed out, this NAS either has an outdated operating system or does not have netbackup server enabled.
- Page 66 Select a NAS, then type in the password you created when activating netbackup on the target NAS. Or, type in the public IP address of a remote LaCie NAS, then type in the password you created when activating netbackup on the target NAS.
- Page 67 In the next screen, the Dashboard will test the connection. If the connection succeeds, you will see the Select a Backup mode screen, which is explained in the local backup section of this user manual. If you choose non-LaCie NAS: Type the rsync server name or IP, login, and password, then select the rsync target. Click NEXT.
- Page 68 The NAS will test the connection. If successful, you will see the advanced parameters screen. Otherwise, retry with modified settings. In the Advanced parameters screen, choose optional features such as encryption or compression, then click NEXT. In the next screen, the Dashboard will test the connection. If the connection succeeds, you will see the Select a Backup mode screen, which is explained in the local backup section of this user manual.
- Page 69 The rest of the wizard follows the same process as for local backup. Restore Note: Remote NAS backups aren't available for file restoring by the Backup & Restore Wizard. To restore a file, access it on the target NAS using a file service (AFP or SMB). Click the CREATE JOB button.
- Page 70 Select a restore type, either from an existing backup job, or from a backup folder. Click NEXT. If you chose to restore from an existing backup job, information about that job will be listed in the next screen for your confirmation. Click NEXT. If you chose to restore from a backup folder, the next screen will allow you to select the source from which d2, 2big, and 5big Network 2 User Manual...
- Page 71 you want to restore the data. Valid backups will have a red folder icon. Choose the backup directory, then click NEXT. Information about that backup source will be listed in the next screen for your confirmation. Click NEXT. In the next screen, choose a restore point. A restore point corresponds to a version of the directory for each time it was backup up.
- Page 72 You can also choose to clear the target folder before the job starts. All data will be erased in the target folder. In the next screen, name the restore job, then click NEXT. In the next screen, click FINISH. d2, 2big, and 5big Network 2 User Manual...
-
Page 73: Enable Netbackup Server
Your NAS can be used by another NAS, whether it's on the same network or is remote, as a target for backup. This function must be activated before it will function. A non-LaCie NAS must be rsync compatible. To activate the service: From Dashboard >... -
Page 74: Disable Netbackup Server
Disable Netbackup Server From Dashboard > Backup, click the Netbackup Server tab. Click the DISABLE button. Choose an option: Keep the data. All backup data on the share Netbackup will remain available. Delete share “Netbackup”. All data stored on the share Netbackup will be erased. Modifying Existing Backup Jobs Jobs you have created will be listed in the table on the Backup page. - Page 75 If you disable a scheduled job, it will not run until it is enabled. d2, 2big, and 5big Network 2 User Manual...
-
Page 76: Dashboard - External Ports
Your LaCie NAS features a printer server. To activate it, click the Activate the printer server check box. Then power on the printer and connect it to the NAS via a USB expansion port on the rear of your LaCie NAS. Once connected, the printer will be listed on the Dashboard - External Ports page, and the printer will become available throughout your network. -
Page 77: External Drives
External Drives Connect an external hard drive to the LaCie NAS via either USB or eSATA, and it will be listed on this page. Once connected, it will behave similarly to the local shares on your LaCie NAS. It will be listed on the Dashboard - Shares page and can be accessed using your operating system's file system (Explorer Window for Windows users, and Finder for Mac users). -
Page 78: Dashboard - Network
Choose between Configure using DHCP and Configure manually. If your network is DHCP-enabled, as are most consumer networks, the LaCie NAS will automatically be assigned an IP address and other values. As a result, most users will see that the table has been filled in with values. If you select Configure Manually, you will be able to modify the table values to conform to your non-DHCP-managed network. -
Page 79: Advanced Tab
Advanced Tab Proxy Configuration Your LaCie NAS can be configured to connect to a proxy server. First activate the feature by clicking the Enable proxy box, then fill in the proxy server address, port, and optional authentication information and click APPLY. -
Page 80: Bonding Tab (5Big Only)
Bonding Tab (5big Only) This section displays features made available to the 5big Network 2 when it is connected to the network via two Ethernet cables. In the first two boxes, information about LAN1 and LAN2 are displayed. In the third box, labelled Bonding, you can select how the 5big will use the dual LAN connection. Choose from: No bonding (LAN1 only) Load balancing: Load balancing distributes traffic over both LAN connections to optimize data transfers. -
Page 81: Dashboard - Eco Management
Scheduled power on/off: Set the drive to activate/deactivate deep sleep mode at a certain time to save energy. UPS Management: Your LaCie NAS supports UPS (uninterrupted power supply) management. If you connect a supported UPS device to the NAS' USB port, in the Dashboard you will see modifiable parameters. In the left-hand column, a bullet will indicate power supply status. - Page 82 On the right, under the heading Battery threshold level (%), you can choose a minimum percentage of battery power at which the LaCie NAS will automatically enter stand-by mode. Below, in the case that battery power is completely drain and the drive is automatically shut down, you can elect to have the drive restarted once power has been restored.
-
Page 83: Dashboard - Raid Management
DASHBOARD - RAID MANAGEMENT Manage RAID. DASHBOARD - FILE BROWSER The Dashboard features an interactive file browser that allows you to manage and transfer files via HTTP. Access the File Browser by clicking its icon in the upper right-hand corner of the Dashboard. The File Browser allows you to transfer, copy, and delete files, as well as view photos in thumbnails and even stream multimedia content such as mp3 or view photos. - Page 84 You can view photos full-sized as well as stream certain types of music and text files. Select the file, then: Photo: Click the View button in the toolbar. Music: Click the play button in the Details panel. TXT files: Click the Edit button in the toolbar. d2, 2big, and 5big Network 2 User Manual...
-
Page 85: Advanced Accessibility Features
NAS with a strong password BEFORE setting up remote access. Since LaCie MyNAS lets you access your NAS with a simple URL, malicious users could guess the URL and access your NAS' files unless each user is protected by a strong password. - Page 86 Next, type a name for your NAS in the Name field. Next, click Apply. If your NAS is able to connect to the internet, the Dashboard will query the mynas.lacie.com server to see if the name you chose is available. If so, you will receive a message confirming the connection.
- Page 87 If your name is already chosen, type a new one and click Apply until you find an available name. Failed Connection If you receive an error that your NAS is unable to connect to the internet, you may need to configure port d2, 2big, and 5big Network 2 User Manual...
- Page 88 forwarding, or if you are using a proxy, the proxy configuration could be preventing the remote connection. If the issue is related to your router, you will need to access its administration page in order to forward a port (by default, 8080), which will create a path from your NAS to the internet. Refer to your router's documentation for details.
-
Page 89: Using Remote Access
Browser. CREATING SHORTCUTS TO SHARES Once you successfully set up your LaCie NAS, you can create shortcuts so you can quickly access stored files. You can do this by using your operating system or LaCie Network Assistant. Create Shortcut Using LaCie Network Assistant LaCie Network Assistant (LNA) can be configured to automatically mount shares on your computer, which allows you quick access to the files they store. -
Page 90: Create Shortcut Using Operating System
If you see the message “can't list volumes,” it may be because you are using an outdated version of LNA. Download the most recent version from the LaCie website. PC users: The share will mount in My Computer/Computer automatically when the computer detects it on the network. - Page 91 Browse to and select the share you wish to auto mount. Windows will offer the option to mount the share each time you log on to the computer. Repeat steps 1-3 for other shares. Mac Users Open a new Finder window. On the left of the window, navigate to Shared > [machine name] > [share]. If prompted, type in your username and password and click Connect.
- Page 92 When you log on to the Mac OS, the share(s) will automatically mount on your desktop (as long as you haven't configured your Finder not to display connected servers on your desktop). d2, 2big, and 5big Network 2 User Manual...
-
Page 93: Accessing Shares Via Ftp
To connect to your NAS via FTP locally on the LAN, enter in your browser's or FTP client's address field: ftp://[IP-address] Example: ftp://192.168.10.149 Technical note: Find your NAS' IP address in the LaCie Network Assistant Configuration Window. ftp://[username:password]@[ip or machine name]/ Example: ftp://ringo:4xtp23@lacie-5big/ To login, enter your Dashboard username and password. -
Page 94: Wake On Lan (Wol)
WAKE ON LAN (WOL) You can use LaCie Network Assistant (LNA) to wake your LaCie NAS from Deep Sleep. First time you use WOL: You’ll need your drive’s MAC address. Click the LNA icon in your system tray (Windows) or menu bar (Mac) and select Configuration Window…. -
Page 95: Media Servers
Click Wake Up. MEDIA SERVERS You can configure your LaCie NAS to share files (read-only) with UPnP/DLNA devices connected to the same network. Follow these steps: Make sure your LaCie NAS is connected to your home network as described in Connect to the Network. - Page 96 d2, 2big, and 5big Network 2 User Manual...
-
Page 97: Media Servers - Itunes
Media Servers - iTunes Your LaCie NAS can act as an iTunes Music server, streaming audio files to a computer on the network running iTunes. Once configured, a playlist bearing your NAS' machine name will appear in the Shared category within iTunes, and audio files stored on the NAS will be listed in this playlist. - Page 98 In the dialogue window, click Add, select your NAS' machine name under the Network section, and click Include Folder. WMP will begin indexing the media files. Once completed, they will appear in the WMP library. d2, 2big, and 5big Network 2 User Manual...
-
Page 99: Using Backup Software
USING BACKUP SOFTWARE Your LaCie NAS is fully compatible with Time Machine®, Windows Backup and Restore®, and Genie Timeline®. A share on your NAS can be set as a backup target for these software. Just make sure that the user whose computer will be backed up onto the share has access to the share. -
Page 100: Connect To A Computer Via Usb
Note: This chapter refers to the d2 and 2big Network 2 only. This chapter explains how to connect your LaCie d2 or 2big Network 2 to a computer via USB. For details on connecting your NAS to a network, see Connect to the Network. -
Page 101: Disconnect The Usb Connection
USB, FireWire, eSATA, and Thunderbolt external devices feature “plug & play” connectivity, which means that your drive can be connected and disconnected while the computer is running. To prevent failures, however, it is important to follow these steps when disconnecting your LaCie hard disk. Windows XP Users From the System Tray (located in the lower right-hand side of your screen), click the Eject icon (a small green arrow over a hardware image). -
Page 102: Windows Vista & Windows 7 Users
Windows Vista & Windows 7 Users From the System Tray (located in the lower right-hand side of your screen) click on the plug icon (note the white check mark inside a green circle). A message will appear, detailing the devices that may be safely unmounted. Select Eject for the device you wish to unmount. -
Page 103: Configure Iscsi
CONFIGURE ISCSI Note: This feature is available only with the 5big Network 2. You can configure a 5big Network 2 share as an iSCSI target client, which allows you to mount a network share as a local share. You can then format this share in a non-network file system such as NTFS, HFS+, or FAT32. The way this works is you can allocate a portion of the 5big Network 2's storage to iSCSIShare. - Page 104 Next, you need to install and configure an iSCSI client initiator from Microsoft (Windows users) or other third party vendor. Refer to the vendor's documentation for details. The Dashboard offers several advanced parameters. Click the configuration icon and select Advanced Settings.
-
Page 105: Manage Raid
MANAGE RAID Note: This chapter refers to the 2big and 5big Network 2 only. Your 2big or 5big Network 2 feature a robust RAID management system that will allow you to choose and manage the RAID mode most optimized for your data. MODIFY RAID MODE Navigate to the Dashboard - RAID Management page. - Page 106 Automatic RAID (5big Only) In automatic mode, the RAID mode will be chosen automatically to ensure constant protection with maximum capacity. At least two disks must be installed in your 5big for this option to work. This way, you can increase the number of disks in your NAS, or rotate in new, higher-capacity disks, without ever losing your data.
- Page 107 If you select a RAID mode under the heading Without data loss, converting the new mode will not erase files stored on your LaCie NAS. If you select a RAID mode under the heading With data loss, converting to the new mode will erase files on the shares (but Dashboard configuration will not be affected).
- Page 108 The Dashboard will become unavailable while the RAID mode is changed. d2, 2big, and 5big Network 2 User Manual...
-
Page 109: Rebuilding Times
Rebuilding Times Rebuilding a protected RAID array takes many hours, depending on the capacity of the disks and your NAS' available resources (concurrent tasks such as backups or torrent downloads will slow rebuilding). Changing to an unprotected RAID mode (ie RAID0) takes less than a minute. Note that data is accessible during rebuilding. ABOUT RAID MODES Refer to the table below for an overview of the different RAID modes, and see the descriptions for details. - Page 110 RAID0 (2big and 5big): RAID 0 (also called Spanning mode in some LaCie devices), is the fastest RAID mode. In a RAID 0 array, the available capacities of each disk are added together so that one logical volume mounts on the computer.
- Page 111 RAID5+Spare (5big only): RAID 5+Spare is a RAID 5 array in which one disk is used as spare to rebuild the system as soon as a disk fails. At least four disks are required. If one physical disk fails, the data remains available because it is read from the parity blocks.
-
Page 112: Replacing Disk
REPLACING DISK Disk Removal If your array is protected, ie in a RAID1 or RAID5/6 (5big only) mode, you can remove a disk without damaging the array and losing data, a process also referred to as “hot-swapping”. However, if you remove a disk from an unprotected (ie RAID0) array, you may lose data. -
Page 113: Disk Insertion
Grasp the drive tray handle and carefully extract the drive. Disk Insertion Important info: In the event that an individual hard disk fails in your LaCie NAS, please contact your LaCie reseller or LaCie Customer Support. Please replace a defective hard drive only with a new drive provided by LaCie. - Page 114 resistance, press the drive tray handle firmly until you feel the drive snap into place and the drive tray handle is flush with the back of the NAS. Use the drawer key to lock the drive. Navigate in the Dashboard to the RAID Management page. In the drive map, the new disk will be represented by a lighter blue color than the already-claimed disks and will be labelled New (see screenshot below).
- Page 115 Choose a RAID level, then click NEXT. Note that you can choose to add the new disk as a spare. If you leave a disk as a spare and one of the disks in the array fails, the array will automatically be rebuilt using the spare.
- Page 116 Then in the next screen, click the FINISH button once again, then confirm by clicking YES. The Dashboard will become unavailable while the RAID mode is changed. The new disk will be added as a part of a RAID array and will begin to rebuild. If the new disk is a spare, no rebuilding will occur. d2, 2big, and 5big Network 2 User Manual...
-
Page 117: Update Product Operating System
Dashboard to the Support page. This chapter explains how to update your LaCie NAS' operating system and how to reset it to factory conditions. LaCie may improve your LaCie NAS' software or add new features over time. See below for updating information. -
Page 118: Update Using Lacie Network Assistant
Disconnect all connections to shares on the NAS you want to update Make sure you are using the latest version of LaCie Network Assistant (minimum 1.4.2). If you download a newer version, make sure to uninstall previous versions. Download the latest software update for your product from here. - Page 119 Select your product from the list on the left and click on the *Update your NAS… button. Enter your admin username and password. Browse to and load the update package (.capsule file) you downloaded from the LaCie website. Click on Continue… to begin update. Mac users may have to type in their administrator’s password.
- Page 120 (Windows) and select Configuration Window. Click the Network tab, where the system version will be listed. If the update has failed despite the network precautions listed in the box above, connect the drive directly to your computer using the Ethernet cable, then try again. d2, 2big, and 5big Network 2 User Manual...
-
Page 121: Reset To Factory Conditions
Dashboard - Drive Information. For the 5big Network 2, there are two methods for resetting your LaCie NAS to factory conditions. Both will erase the default Dashboard data such as users, groups, machine name, etc. However, the first method, Reset Without Data Loss, will not delete files stored to the NAS, and the second, Reset With Data Loss, will. -
Page 122: Reset With Data Loss
DHCP. In certain cases, you may wish to reinitialize your LaCie 5big Network 2. For example, it is going to be repurposed by moving it from one branch office to another. Since the new branch office employs a different team, you decide to reset the 5big to its out-of-box state. - Page 123 Power on and initialize the LaCie NAS The following steps should take approximately three minutes. Turn the device On via the power button on the back of the enclosure. The front LED will: Blink Turn solid blue d2, 2big, and 5big Network 2 User Manual...
-
Page 124: Insert And Format The Disk(S)
Flash red and blue. The red and blue lights indicate the system is loading. The LaCie NAS is ready for disk installation once the front LED turns solid blue again. Insert and format the disk(s) Steps 4 through 6 should take approximately seven minutes. -
Page 125: Getting Help
GETTING HELP If you are having problems with your LaCie product, consult the table below for a list of available resources. Order Source Description Location Concise steps to Quick follow for getting your Either a printed leaflet or accessory box and included in the... -
Page 126: Troubleshooting Topics
Q: Is the blue light on the front of the device flickering for an inordinate period of time? A: If the blue light is flickering or will not turn on, the power supply may be defective. Please contact your LaCie reseller or LaCie Customer Support. -
Page 127: Troubleshooting Expansion Device Connection
I can't copy a file from a connected external hard drive to a share on my LaCie NAS. Q: Is the drive formatted in MS-DOS (FAT32) and the file size is larger than 2GB? A: Due to a limitation inherent in MS-DOS, files larger than 2GB cannot be transferred to a share on the LaCie NAS. -
Page 128: Troubleshooting The Usb Connection (D2/2Big Only)
Q: Did you get an "Error –50" message while copying to drive when connected via USB? A: When you connect the d2 Network 2 to a computer via USB, the USB share of the drive that mounts on the computer is formatted in MS-DOS (FAT32). Under this format, file names with certain characters cannot be copied. -
Page 129: Troubleshooting The Active Directory Connection
A hard disk is making clicking noises. Q: Is the sound "soft clicking" or "hard clicking"? A: Soft clicking can be the normal sound of the drive working. If the drive is functional, this is normal. Drives do not typically give an indication of any problems prior to failure, so it does not mean it is about to fail if the drive is making a clicking sound and still functioning. - Page 130 The most precise way to set the product's time is to use the NTP Server feature in the Dashboard - General Settings widget. It can also be set manually from this page. Make sure that the DNS server address provided to the product is a domain DNS, NOT an internet DNS (as may be provided by an internet provider).
- Page 131 LaCie product. From this computer, attempt to ping the DNS server. Dashboard: Domain Configuration window settings: Enter the domain's Full Qualified Domain Name (FQDN). For example: directory-example.domain.com (Active Directory Users and Computers Tool on Primary Domain Controller) Admin login: Use the AD's administrator username.
- Page 132 All the above points must be verified, including the next section about configuring the AD to ensure correct Domain joining. Any incorrect configuration can cause the connection to fail. d2, 2big, and 5big Network 2 User Manual...
- Page 133 Ask the AD administrator to verify if Kerberos Server & Time Server are registered in the domain DNS, in order to allow the LaCie product to connect. Kerberos Server & Time Server need to be accessible to the LaCie product, as these servers are involved in the joining process.
-
Page 134: Health And Safety Precautions
LaCie be held liable for the recovery or restoration of this data. To help prevent the loss of your data, LaCie highly recommends that you keep TWO copies of your data; one copy on your external hard disk, for instance, and a second copy either on your internal hard disk, another external hard disk or some other form of removable storage media. -
Page 135: General Use Precautions
II). Do not expose the LaCie device to temperatures outside the range of 5º C to 30º C (41º F to 86º F); or to operational humidity beyond 10-80%, non-condensing, or non-operating humidity beyond 10-90%, non-condensing. -
Page 136: Warranty Information
LaCie (“LaCie”) warrants, to the original purchaser, that this equipment shall be free of defects in materials and workmanship for a period of one (1), two (2), three (3), or five (5) years, depending on the model, from LaCie's date of original shipment when the equipment is used normally and is properly serviced when needed. If you discover a defect covered by the warranty set forth above, your sole and exclusive remedy will be for LaCie, in its sole discretion to (i) repair or replace the product at no charge to you;... - Page 137 Any loss, corruption or destruction of data while using a LaCie drive is the sole responsibility of the user, and under no circumstances will LaCie be held liable for the recovery or restoration of this data. To help prevent the loss of your data, LaCie highly recommends that you keep TWO copies of your data;...
-
Page 138: Service Doa
Within the 15 calendar days of purchase, should you experience an issue with your new LaCie product, we ask you to return the product to the place where it was originally bought. You will be required to give a proof of purchase. -
Page 139: Legal Info
LEGAL INFO COPYRIGHTS Copyright © 2013 LaCie. All rights reserved. No part of this publication may be reproduced, stored in a retrieval system, or transmitted in any form or by any means, electronic, mechanical, photocopying, recording or otherwise, without the prior written consent of LaCie. -
Page 140: Licences And Free Software
LICENCES AND FREE SOFTWARE Your LaCie product ships with copyrighted software that are licensed under the GPL, AFL, Apache, Apple, BSD, GNU LGPL, MIT, OpenLDAP, OpenSSL, PHP, Python, and Creative Common. It also includes free software, the source code for which can be downloaded from the LaCie website: www.lacie.com/support/... -
Page 141: Japan Compliance Statement
Install the equipment according to the manual. MANUFACTURER'S DECLARATION FOR CE CERTIFICATION We, LaCie, solemnly declare that this product conforms to the following European standards: Electromagnetic Compatibility Directive (2004/108/EC); Low-Voltage Directive: 2006/95/EC d2, 2big, and 5big Network 2 User Manual...
Need help?
Do you have a question about the d2 network 2 and is the answer not in the manual?
Questions and answers