Table of Contents
Advertisement
Advertisement
Table of Contents

Related Manuals for Alienware X51 R2


Summary of Contents for Alienware X51 R2
- Page 1 Alienware X51 R2 Owner’s Manual Regulatory model: D05S Regulatory type: D05S002...
- Page 2 © 2013 Dell Inc. All rights reserved. Reproduction of these materials in any manner whatsoever without the written permission of Dell Inc. is strictly forbidden. ® Trademarks used in this text: Dell™ and the DELL logo are trademarks of Dell Inc.; Alienware is a ® ®...
-
Page 3: Table Of Contents
......Contacting Alienware ..... . . - Page 4 Contents...
-
Page 5: About Your Computer
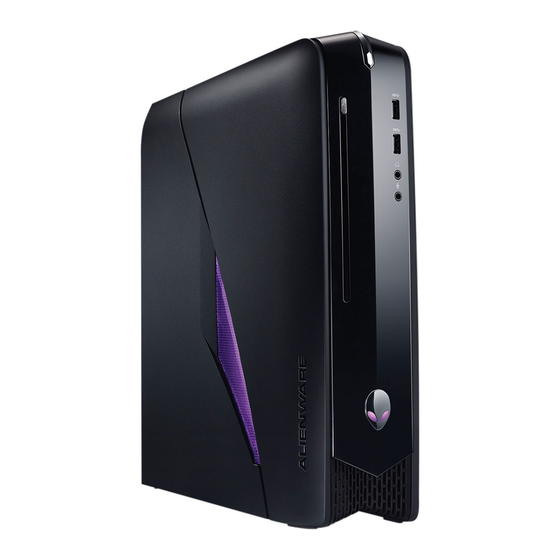
USB 3.0 ports (2) NOTE: Your Alienware X51 R2 computer supports dual orientation. You can place your computer vertically or horizontally. The rotatable AlienHead allows you to change the direction of the AlienHead depending on the orientation of your computer. -
Page 6: Back View
Back View optical S/PDIF port USB 3.0 ports (2) USB 2.0 ports (2) rear L/R surround port side L/R surround port microphone port hard-drive activity light label tab power adapter port 10 HDMI port discrete graphics card line-out port line-in port center/subwoofer LFE port security-cable slot USB 3.0 ports (2) -
Page 7: Before You Begin
Before You Begin Turn Off Your Computer and Connected Devices CAUTION: To avoid losing data, save and close all open files and exit all open programs before you turn off your computer. Save and close all open files and exit all open programs. Access the Settings charm in the Charms sidebar. -
Page 8: Safety Instructions
Safety Instructions Use the following safety guidelines to help protect your computer from potential damage and to help ensure your personal safety. WARNING: Before you begin, read the safety information that shipped with your computer. For more safety best practices information, see the Regulatory Compliance Homepage at dell.com/regulatory_compliance. -
Page 9: Working Inside Your Computer
Only a certified service technician is authorized to remove the computer cover and access any of the components inside the computer. For information on removing and replacing the internal component of your computer, contact Alienware. See "Contacting Alienware" on page 18. Working Inside Your Computer... -
Page 10: System Setup
Entering System Setup Turn on (or restart) your computer. During POST, when the Alienware logo is displayed, watch for the F2 prompt to appear and then press <F2> immediately. NOTE: The F2 prompt indicates that the keyboard has initialized. This prompt can appear very quickly, so you must watch for it, and then press <F2>. -
Page 11: System Setup Options
Setup Item — This field appears on the Help Screen — This field appears on the left side of the system setup window. right side of the system setup window and The field is a scrollable list containing contains information about each option features that define the configuration of listed in the Setup Item. - Page 12 ME Information Displays the version of the Management Engine (ME) ME Firmware Firmware. Version Memory Information Displays the total computer memory. Total Memory Displays the amount of memory available on the computer. Memory Available Memory Technology Displays the type of memory technology used. Displays the memory speed.
- Page 13 Advanced — Integrated Devices Allows you to enable or disable the integrated USB USB Controller controller. Allows you to enable or disable the integrated audio HD Audio controller. Allows you to enable or disable the onboard LAN controller. Onboard LAN Controller Allows you to select which of the Integrated/Discrete Primary Display...
- Page 14 Set Boot Priority Allows you to select Legacy or UEFI boot mode. Boot Mode NOTE: Legacy boot mode if selected, enables booting to devices that support Legacy BIOS. UEFI boot mode if selected, enables UEFI drivers. CAUTION: Changing boot modes require that your boot storage device be partitioned to match the boot mode compatibility.
-
Page 15: Boot Sequence
Boot Sequence This feature allows you to change the boot sequence for devices. Boot Options • Floppy — The computer attempts to boot from the floppy disk drive. If no operating system is on the drive, the computer generates an error message. •... -
Page 16: Changing Boot Sequence For Future Boots
Changing Boot Sequence for Future Boots Enter system setup. See "Entering System Setup" on page 10. Scroll using the mouse or use the arrow keys to highlight the Boot menu option and press <Enter> to access the menu. NOTE: Write down your current boot sequence in case you want to restore it. Navigate to Set Boot Priority to change the devices assigned to the following: –... -
Page 17: Flashing The Bios
Flashing the BIOS The BIOS may require flashing when an update is available or when replacing the system board. To flash the BIOS: Turn on the computer. Go to dell.com/support/downloads. Under the category Support for Home Users, click Drivers & Downloads Home. Locate the Service Tag of your computer. -
Page 18: Contacting Alienware
Select the appropriate service or support link based on your need. Choose the method of contacting Dell that is convenient for you. If you are in the United States, call 1-800-ALIENWARE for help on your Alienware computer. Websites For the latest information, FAQs, and solutions to most common issues, see dell.com/Alienware.
Need help?
Do you have a question about the X51 R2 and is the answer not in the manual?
Questions and answers