Advertisement
Quick Links
Advertisement

Related Manuals for Alienware Aurora R6 D23M


Summary of Contents for Alienware Aurora R6 D23M
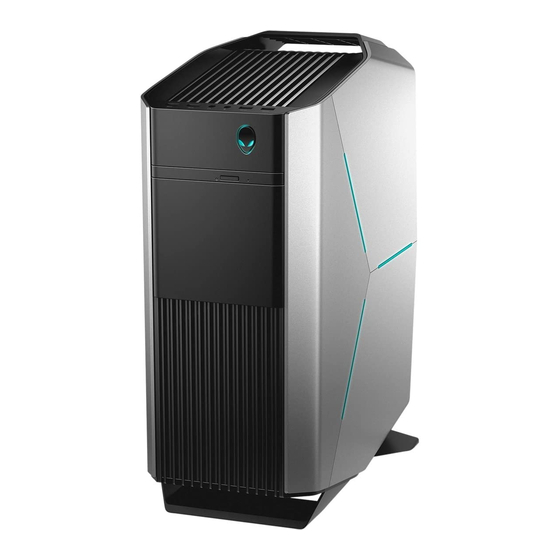
- Page 1 Aurora R6 Liquid Cooling Module Regulatory Model: D23M Regulatory Type: D23M001...
- Page 2 Notes, cautions, and warnings NOTE: A NOTE indicates important information that helps you make better use of your product. CAUTION: A CAUTION indicates either potential damage to hardware or loss of data and tells you how to avoid the problem. WARNING: A WARNING indicates a potential for property damage, personal injury, or death.
-
Page 3: Table Of Contents
Contents 1 Before working inside your computer....................4 Before you begin ................................ 4 Safety instructions...............................4 Recommended tools..............................4 2 Installing liquid cooling module......................6 3 After working inside your computer....................16 4 Getting help and contacting Alienware..................17... -
Page 4: Before Working Inside Your Computer
Before working inside your computer NOTE: The images in this document may differ from your computer depending on the configuration you ordered. Before you begin 1. Save and close all open files and exit all open applications. 2. Shut down your computer. Windows 10: Click or tap Start >... - Page 5 • Plastic scribe...
-
Page 6: Installing Liquid Cooling Module
Installing liquid cooling module NOTE: Ensure that you remove the security cable and security screw from the security-cable slot—if applicable. 1. Pull the side-panel release latch. 2. Release the left-side cover away from the chassis and then lift it from the computer. 1. - Page 7 3. power-supply unit cage release cage latches (2) 5. Lift the power-supply unit cage while pressing and holding the graphics-card bracket. 1. power-supply unit cage 2. graphics-card bracket 3. chassis 6. Rotate the power-supply unit cage away from the chassis. 1.
- Page 8 8. In a nonadjacent sequence, loosen the captive screws that secure the processor fan and heat-sink assembly to the system board. 9. Lift the processor fan and heat-sink assembly off the system board. 1. processor-fan cable 2. captive screws (4) 3.
- Page 9 1. chassis 2. screw 3. top-chassis fan 4. top-chassis fan cable 13. Rotate the power-supply unit cage towards the chassis until the unit snaps into place. 14. Stand the computer right side up. 15. Carefully pry around the edges of the right-side cover from the chassis. 1.
- Page 10 1. right-side cover 2. lighting cable 18. Remove the screws that secure the top cover to the chassis. 19. Disconnect the lighting cable from the top cover. 20. Slide the lighting cable through the slot on the chassis. 1. lighting cable 2.
- Page 11 1. top cover 2. slot 3. lighting cable 4. chassis 23. Lay the computer on the right side. 24. Slide the radiator and fan assembly into the radiator and fan cage. 25. Align the screw holes on the radiator and fan assembly with the screw holes on the radiator and fan cage. 26.
- Page 12 1. radiator fan 2. radiator-fan cable 3. processor-cooling assembly cable 4. system board 5. processor-cooling assembly 6. captive screws (4) 30. Align the screw holes on the VR heatsink with the screw holes on the system board. 31. Tighten the captive screws that secure the VR heatsink to the system board. 1.
- Page 13 33. Replace the screws that secure the radiator and fan assembly to the radiator and fan cage. 1. screws (4) 2. radiator and fan cage 34. Slide the lighting cable through the slot on the chassis. 35. Align the tabs on the top cover with the slots on the chassis and snap the top cover into place. 1.
- Page 14 1. lighting cable 2. chassis 3. screws (2) 4. top cover 38. Connect the lighting cable to the right-side cover. a. chassis b. lighting cable c. right-side cover d. tabs e. slots 39. Align the tabs on the right-side cover with the slots on the chassis and snap the right-side cover to lock it in place.
- Page 15 a. chassis b. slots c. right-side cover 40. Align the tabs on the left-side cover with the slots on the chassis. 41. Snap the left-side cover to lock it in place. 1. chassis 2. slots 3. tabs 4. left-side cover...
-
Page 16: After Working Inside Your Computer
After working inside your computer CAUTION: Leaving stray or loose screws inside your computer may severely damage your computer. 1. Replace all screws and ensure that no stray screws remain inside your computer. 2. Connect any external devices, peripherals, or cables you removed before working on your computer. 3. -
Page 17: Getting Help And Contacting Alienware
Getting help and contacting Alienware Self-help resources You can get information and help on Alienware products and services using these online self-help resources: Table 1. Self-help resources Information about Alienware products and services www.alienware.com Troubleshooting information, user manuals, setup instructions, www.alienware.com/gamingservices...
Need help?
Do you have a question about the Aurora R6 D23M and is the answer not in the manual?
Questions and answers