Table of Contents

Related Manuals for PROEL PLML575E


Summary of Contents for PROEL PLML575E
- Page 1 MANUALE UTENTE – USER’S MANUAL DREAMLIGHT 575 ECLIPSE WASH PLML575E PROEL S.p.A. (World Headquarters – Factory) Via alla Ruenia 37/43 64027 Sant’Omero (TE) – Italy Tel. +39 0861 81241 Fax. +39 0861 887862 e-mail: info@proelgroup.com www.proelgroup.com...
-
Page 2: Table Of Contents
CLEANING AND MAINTENANCE CAUTION: Disconnect from mains before starting maintenance operation! It is absolutely essential that the fixture is kept clean and that dust, dirt and smoke-fluid residues must not build up on or within the fixture. Otherwise, the fixture‘s light-output will INDICE: be significantly reduced. -
Page 3: Attenzione
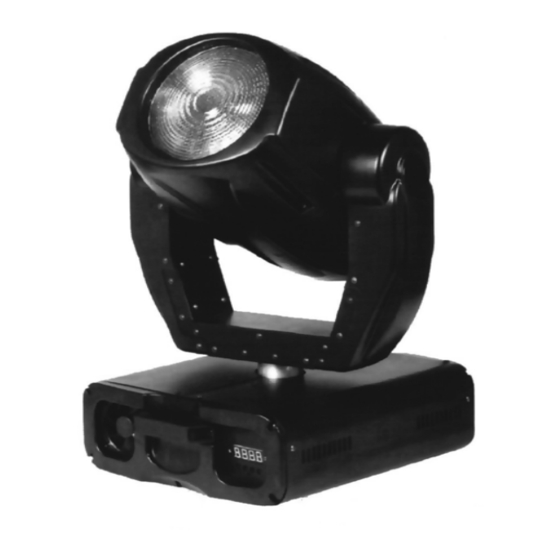
Shipping weight: 38 kg INTRODUZIONE Grazie per aver scelto il testamobile PLML575E. Vi renderete presto conto di aver acquistato un apparecchio potente e versatile. Togliere dall’imballo il testamobile PLML575E. Prima di accenderlo per la prima volta, sinceratevi che non vi siano danni provocati dal trasporto. - Page 4 Dimmer Smooth dimmer from 0 - 100 % Motor 13 high quality stepping-motors controlled by microprocessors Electronics 1 - testa del proiettore Digital serial input DMX-512 2 - bracci 3 - base 16 control-channels (full 16 bit protocol): 4 - maniglia Channel 1: Horizontal movement 8 bit Channel 2: Fine Horizontal mirror-movement 16 bit Channel 3: Vertical movement 8 bit...
-
Page 5: Norme Di Sicurezza
TECHNICAL SPECIFICATIONS NORME DI SICUREZZA Power supply 230V / 50Hz ATTENZIONE: prestare particolare attenzione alle operazioni da effettuare. Con l’alta (117V / 60Hz USA) tensione potreste subire pericolosi shock elettrici toccando i cavi. Power consumption 800W DMX channels 14 / 16 (16 bit) Questo apparecchio ha lasciato i nostri stabilimenti in condizioni assolutamente perfette. -
Page 6: Condizioni Operative
Tenere lontano dalla portata dei bambini o di persone non esperte. - Color-wheel error This message will appear after the reset of the fixture if the magnetic-indexing circuit CONDIZIONI OPERATIVE malfunctions (sensor failed or magnet missing) or the stepping-motor is defective (or its driver circuit on the main PCB). -
Page 7: Installazione
(the lamp is too hot). The message will appear on the display if the lamp doesn't ignite within 28 seconds. The PLML575E will store this information and Durante il normale funzionamento, la lampada raggiunge temperature superiori a 600 °C. -
Page 8: Regolazione Della Lampada
Function Display Default value Display intensity Display reverse TURN Feedback function Lamp OFF via DMX viti X, Y, Z Ventilation fan AUTO - Adjusting the default positions Non accendere l’apparecchio finché l’alloggiamento della lampada non sia chiuso. By this function you can calibrate and adjust the different wheels to their standard / right Prima di riaccendere la nuova lampada resettare il contaore con la funzione “LAti”, nel positions. -
Page 9: Montaggio
- Low / High speed of the fan operating The fan keeps the adjusted low speed until the temperature exceeds max. inside temp. of the fixture, then the PLML575E automatically switches from low to high fan-speed. - Low speed / switch off the lamp operating The fan keeps the adjusted low speed until the temperature exceeds max. - Page 10 Il proiettore deve essere installato al di fuori della portata delle persone. head to the required position and press “ENTER” to confirm or “MODE” to cancel and return to the menu. Se la posizione del proiettore dovesse essere più bassa rispetto al soffitto o a travi alte, Note: If feedback was switched “OFF”, the pan/tilt position is changed by external force bisognerà...
-
Page 11: Connessione Ad Una Centralina Dmx / Connessione Fra Apparecchi
CONNESSIONE CON UNA CENTRALINA DMX / CONNESSIONE FRA APPARECCHI - Display-adjusting This function allows you to adjust the display settings: I cavi DMX non devono venire a contatto con altri cavi, in tal caso infatti gli apparecchi potrebbero non funzionare correttamente o non funzionare affatto. Usare solo cavi stereo schermati con spina e presa tipo XLR 3 poli, per la connessione alla centralina DMX o per il collegamento tra apparecchi. -
Page 12: Connessione Alla Rete Di Alimentazione
ATTENZIONE: Per installazioni in cui il cavo di segnale - Lamp On automatically deve percorrere lunghe distanze o dove vi sono disturbi elettrici, per esempio in This menu allows you to turn the lamp on after switching the fixture on and switch on/off discoteca, è... - Page 13 - Reset Function Press “ENTER” key to run reset. This option enables the PLML575E to index all effects CANALE 4: movimento verticale fine 16 bit and return to their standard positions. CANALE 5: Velocità di pan/tilt - Special functions Velocità...
- Page 14 255 Velocità minima - Power On time CANALE 12: Macro By this option you can read the total number of hours that the PLML575E has been powered on. Press “ENTER” or “MODE” to return to the main menu. 128-135 Macro 16...
-
Page 15: Funzioni Del Controllo Canali - Protocollo 8 Bit
CANALE 14: Zoom The PLML575E is cooled by three axial fans - one each in the projector head and one in Zoom 28° the base. The speed of the fan (and of course the noise) can be continuously reduced if 255 Zoom 7°... -
Page 16: Controlli
5 minutes period has expired. The message "HEAt" will appear on the control board Il PLML575E permette di accendere spegnere il la lampada attraverso il pannello di display at the back side of the PLML575E. If the ignition of the lamp is seven times controllo sul lato anteriore o attraverso la vostra centralina. -
Page 17: Pannello Di Controllo
A relay inside of the PLML575E allows you to switch on and off the lamp via the Control effettuare un reset ed inoltre utilizzare speciali funzioni per il controllo manuale o il Board on the top side or via your controller. - Page 18 Le funzioni di ciascuna di tali voci sono descritte nelle sezioni successive; la sequenza CHANNEL 12 - Colour-macros - CMY and colour-wheel sul menù è indicata di seguito: 128-135 Macro 16 8-15 Macro 1 136-143 Macro 17 16-23 Macro 2 144-151 Macro 18 24-31 Macro 3...
- Page 19 – Tempo di accensione apparecchio Speed (0 max ÷249 min) 0÷249 Questa funzione permette di leggere il numero totale di ore che il PLML575E è stato 250÷252 Max speed + black-out colour changes acceso. Premere “ENTER” oppure “MODE” per ritornare al menu principale.
- Page 20 CONNECTION WITH THE MAINS – Controllo manuale degli effetti Connect the device to the mains with the enclosed power supply cable. Questa funzione permette il controllo manuale delle funzioni dei canali dell’apparecchio. The occupation of the connection-cables is as follows: Usare i tasti “UP”...
- Page 21 The DMX wires must not come into contact with each other, otherwise the fixtures will IMPORTANTE: l’opzione “OFF” serve solo per un utilizzo di emergenza nel caso in cui il not work at all, or will not work properly. sensore sia difettoso. Se il sensore luminoso è spento non appariranno sul display i messaggi di errore “LAEr”, SnEr,”.
- Page 22 – Accensione display If the projector shall be lowered from the ceiling or high joists, professional trussing systems have to be used. The projector must never be fixed swinging freely in the room. Questa funzione permette di decidere se tenere il display sempre acceso oppure se farlo spegnere 2 minuti dopo che è...
- Page 23 BEAMPATH - Controllo continuo della velocità delle ventole senza DMX Questo modo è simile a “rEG”, ma il livello iniziale della velocità delle ventole non può essere controllato attraverso il DMX. – Massima velocità delle ventole Le ventole di raffreddamento lavorano alla massima velocità (massimo raffreddamento) RIGGING –...
- Page 24 Funzione Display Valore di default Do not operate this device with opened cover. Inversione del Pan Before striking the lamp, reset the "LAti" counter in the main menu of the Control Board, by pressing the "UP" and "DOWN" buttons in one time and then confirming with the Inversione del Tilt Enter-button.
-
Page 25: Messaggi Di Errore
If this device will be operated in any way different to the one described in this manual, voci poi premere “ENTER” e usare i tasti “UP” e “DOWN” per regolare il giusto valore the product may suffer damages and the guarantee becomes void. Furthermore, any fra 0 e 255. - Page 26 temperatura dell’ambiente è 40° C o più), oppure potrebbe esserci una rottura OPERATING DETERMINATIONS nell’accenditore o nel ballast. È necessario controllare la temperatura ambient e, sostituire la lampada o contattare il This device is a moving-head wash for creating decorative effects. This product is only ostro fornitore se il difetto non dipende dalla lampada.
-
Page 27: Caratteristiche Tecniche
SAFETY INSTRUCTIONS - Errore tilt CAUTION: be careful with your operations. With a dangerous voltage you can suffer a Questo messaggio appare dopo il reset se il tilt non è nella corretta posizione oppure dangerous electric shock when touching the wires. non funzionano correttamente il sensore magnetico o il motore passo passo This device has left our premises in absolutely perfect condition. - Page 28 Strobo Effetto strobo con velocità regolabile fra 1 – 10 flash al secondo Zoom Controllabile a distanza tramite il DMX Zoom motorizzato regolabile fra 7° e 28° Dimmer 1 - projector head Dimmer da 0 – 100% 2 - yoke 3 - base 4 - handle Motori...
- Page 29 Dimensione e peso INTRODUCTION Lunghezza di base: 467 mm Larghezza delle braccia: 449 mm Thank you for having chosen a PLML575E. You acquired a versatile, powerful and Altezza (con la testa orizzontale): 580 mm intelligent lighting-effect. Peso netto: 33 Kg...
-
Page 30: Pulizia E Manutenzione
PULIZIA E MANUTENZIONE ATTENZIONE: disconnettere l’alimentazione prima di effettuare operazioni di pulizia e manutenzione. Si raccomanda una pulizia frequente dell’apparecchio, utilizzare un panno umido e senza sfilacciamenti, non usare mai alcol o solventi. TABLE OF CONTENTS ATTENZIONE: le lenti devono essere sostituite se visibilmente danneggiate o se la loro CAUTION…...…………………………………………………………………...
Need help?
Do you have a question about the PLML575E and is the answer not in the manual?
Questions and answers