Allied Telesis AR750S Installation And Safety Manual
Ar700 series
Hide thumbs
Also See for AR750S:
- Manual (10 pages) ,
- Release note (99 pages) ,
- Hardware reference manual (62 pages)
Table of Contents
Advertisement
Quick Links
Advertisement
Table of Contents

Related Manuals for Allied Telesis AR750S


Summary of Contents for Allied Telesis AR750S
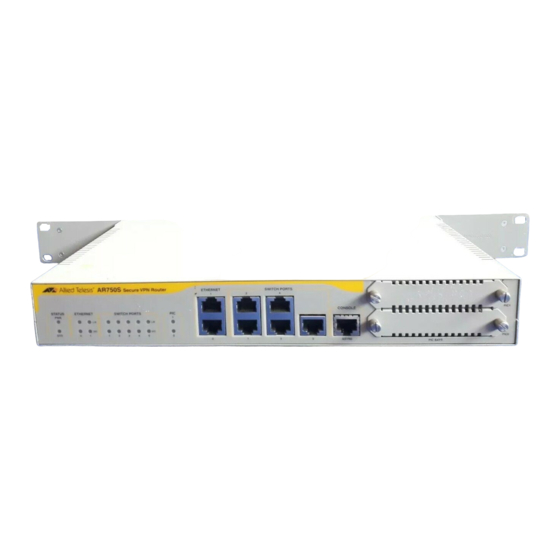
- Page 1 AR700 Series Router Installation and Safety Guide AR750S AR770S...
- Page 2 AR700 Series Router Installation and Safety Guide AR750S AR770S...
- Page 3 AR700 Series Router Installation and Safety Guide Document Number 613-000051 Rev E. © 2004-2011 Allied Telesis Inc. All rights reserved. No part of this publication may be reproduced without prior written permission from Allied Telesis Inc. Allied Telesis Inc. reserves the right to change specifications and other information in this document without prior written notice.
-
Page 4: Table Of Contents
Configuring with the CLI ..................13 Default configuration ....................15 Connecting Data Cables to the Router ..............16 LEDs on the AR750S ....................17 LEDs on the AR770S ..................... 18 Documentation and Tools CD-ROM ................. 19 Emission Compliance Statements ................20 Safety .......................... -
Page 5: Models Covered By This Guide
■ AR770S ■ Documentation updates can be found at www.alliedtelesis.com/support/documentation/ Package Contents AR750S package contents These items are included with the AR750S router: One AR750S router ■ One AC power cord ■ One power cord retaining clip ■ One serial cable for connecting the router to a terminal or PC ■... -
Page 6: Installing The Router
You can install the router on a level surface such as a desktop or bench, in a standard 19-inch rack using the rack mount kit included with your router, or on a firm wall using a wall mount kit (AR750S only). When you install the router, choose a site that: allows adequate airflow around the router and its vents. -
Page 7: Before Installing
Read the safety information “Safety” on page ■ Gather the tools and equipment you will need. ■ To install an AR750S or AR770S in a rack (Installing the router in a rack) you will need: • the rack mount bracket kit included with your router •... -
Page 8: Installing The Router In A Rack
Ensure the rack has sufficient space for the router and its associated cables. The router is 1U high. 2. Unscrew the feet. 3. Connect the handles to the brackets (AR750S only). Screw the handles to the wider side of each bracket, using the supplied screws (see the figure below). -
Page 9: Installing The Router On A Wall
AR700 Series Router Installing the router on a wall 1. Screw the brackets to the AR750S router. Screw a wall mount bracket to the outer screw holes on each side of the router using the shorter screws supplied (see figure below). -
Page 10: Installing Sfps
Installation and Safety Guide Installing SFPs Warning Do not look into the optical ports of SFP cables or transceivers. Invisible laser radiation may be emitted from disconnected fibres or connectors. If you purchased optional SFPs for the AR770S, install them in the Ethernet SFP slots (leftmost). -
Page 11: Configuring The Router
15). Configuring with the GUI This section describes how to access the AR750S GUI via a switch port in VLAN1, when the PC and the router are in the same subnet, in order to configure the router. The router’s switch ports all belong to VLAN1 by default. - Page 12 The PC can be connected directly, or through your LAN. To connect the PC directly to the router, use a straight-through Ethernet cable to connect an Ethernet card on the PC to any one of the router’s switch ports. AR750S Router AR750S Secure VPN Router ETHERNET...
- Page 13 AR700 Series Router 3. Browse to the GUI. If you access the Internet through a proxy server, set your browser to bypass the proxy for 192.168.1.1. Point your web browser at 192.168.1.1. 4. Log in and set the password. At the log in prompt, enter the log in name and password. Passwords are case sensitive.
-
Page 14: Configuring With The Cli
Using the terminal cable supplied, connect a VT100-compatible terminal, or the COM port of a PC running a terminal emulation program such as Windows Hyper Terminal, to the Console RS-232 (ASYN0) port on the router’s front panel. AR700 Series Router AR750S Secure VPN Router ETHERNET SWITCH PORTS PIC1... - Page 15 AR700 Series Router 2. Log in and set the password. The login prompt appears on the terminal or PC. If the login prompt does not appear, press [Enter] two or three times. When the router boots for the first time it automatically creates an account with manager privileges.
-
Page 16: Default Configuration
Default configuration The default configuration file boot.cfg loads automatically when the router starts up. This file is stored in the router’s flash memory. Figure 1: Default configuration file for the AR750S and AR770S routers # IP Configuration ena ip add ip int=vlan1 ip=192.168.1.1... -
Page 17: Connecting Data Cables To The Router
AR700 Series Router Connecting Data Cables to the Router Connecting the router to your network: 1. Connecting to the LAN. If you have not already done so, use Ethernet patch cables to connect the devices on your private network (LAN) to the router’s switch ports. By default, all switch ports are members of VLAN1. -
Page 18: Leds On The Ar750S
Installation and Safety Guide LEDs on the AR750S State Function Status Green The router is receiving power and the power switch is ON. Status Normal operation. Amber Lit briefly during router start up, or the router is malfunctioning. Flashing The router fan has failed. -
Page 19: Leds On The Ar770S
AR700 Series Router LEDs on the AR770S State Function Status PWR Green The router is receiving power and is switched ON. Status SYS Normal operation. Amber Lit briefly during router start up, or when the router system is malfunctioning. Flashing The router fan has failed. -
Page 20: Documentation And Tools Cd-Rom
Installation and Safety Guide State Function PIC 0..1 Green A port interface card (PIC) is correctly installed and has been detected by the router. Documentation and Tools CD-ROM The Documentation and Tools CD-ROM bundled with each router contains the complete Document Set for your router. The CD-ROM also includes tools for managing your router. -
Page 21: Emission Compliance Statements
AR700 Series Router Emission Compliance Statements STANDARDS: The AR700 Series routers meet the following standards: Category Approval Agency and Requirement Safety UL60950-1 CAN/CSA-C22.2 No. 60950-1-03 EN60950-1 EN60825-1 (for AR770S only) AS/NZS 60950.1 Electromagnetic Compliance FCC CFR47 Part 15 Class A EN55022 Class A VCCI Class A AS/NZS CISPR22 Class A... - Page 22 CAUTION: Air vents must not be blocked and must have free access to the room ambient air for cooling. OPERATING TEMPERATURE: AR750S and AR770S routers are designed for a maximum ambient temperature of 50 degrees C. ELECTRICAL - AC MAINS CIRCUIT OVERLOADING When installing product, consideration must be given to the accumulative nameplate ratings when connecting the equipment to the AC supply wiring.
-
Page 23: Sicherheit
VORSICHT Die Entlüftungsöffnungen dürfen nicht versperrt sein und müssen zum Kühlen freien Zugang zur Raumluft haben. BETRIEBSTEMPERATUR: AR750S, AR770S: Dieses Produkt wurde für den Betrieb in einer Umgebungstemperatur von nicht mehr als 50° C entworfen. NETZSICHERUNG Bei der Installation muß der auf dem Typenschild angezeigte Nennwert des Gerätes für den Anschluß... -
Page 24: Sikkerhed
UDSTYR TIL STIKKONTAKT, stikkontakten bør installeres nær ved udstyret og skal være lettilgængelig. ADVARSEL: Ventilationsåbninger må ikke blokeres og skal have fri adgang til den omgivende luft i rummet for afkøling. BETJENINGSTEMPERATUR: AR750S, AR770S: Dette apparat er konstrueret til en omgivende temperatur på maksimum 50 grader C. -
Page 25: Veiligheid
AR700 Series Router ELEKTRISK-OVERBELASTNING AF SPÆNDINGSKREDSLØBET Ved installation af produktet, bør der tages hensyn til den kumulative kapacitet der angives på navneskiltet, når udstyret forbindes med vekselstrømsledningen. ADVARSEL: MEKANISK OPSTILLING-Udstyret skal opstilles i stativet, på en sådan måde, at der ikke opstår fare p.g.a. ujævn opstilling. Lithium batteri - Bør kun udskiftes af uddannet og kvalificeret tekniker. -
Page 26: Sécurité
Installation and Safety Guide OPGELET: De ventilatiegaten mogen niet worden gesperd en moeten de omgevingslucht ongehinderd toelaten voor afkoeling. BEDRIJFSTEMPERATUUR: AR750S, AR770S: De omgevingstemperatuur voor dit produkt mag niet meer bedragen dan 50 graden Celsius. ELEKTRISCH: OVERBELASTING VAN WISSELSTROOM HOOFDCIRCUIT... - Page 27 être placée près de l’équipement et facilement accessible”. ATTENTION: Ne pas bloquer les fentes d’aération, ceci empêcherait l’air ambiant de circuler librement pour le refroidissement. TEMPÉRATURE DE FONCTIONNEMENT: AR750S, AR770S: Ce matériel est capable de tolérer une température ambiante maximum de ou 50 degrés Celsius.
-
Page 28: Turvallisuus
HUOMAUTUS: Ilmavaihtoreikiä ei pidä tukkia ja niillä täytyy olla vapaa yhteys ympäröivään huoneilmaan, jotta ilmanvaihto tapahtuisi. KÄYTTÖLÄMPÖTILA: AR750S, AR770S: Tämä tuote on suunniteltu ympäröivän ilman maksimilämpötilalle 50°C. SÄHKÖ-VAIHTORVIRTASÄHKÖPIIRIN YLIKUORMITUS Tuotetta asennettaessa on otettava huomioon osien nimikilvissä osoitettu teho silloin kun osat liitetetään vaihtovirtaverkkoon. -
Page 29: Norme Di Sicurezza
ATTENZIONE: le prese d’aria non vanno ostruite e devono consentire il libero ricircolo dell’aria ambiente per il raffreddamento. TEMPERATURA DI FUNZIONAMENTO: AR750S, AR770S: Questo prodotto è concepito per una temperatura ambientale massima di 50 gradi centigradi. -
Page 30: Sikkerhet
FORSIKTIG: Lufteventilene må ikke blokkeres, og må ha fri tilgang til luft med romtemperatur for avkjøling. DRIFTSTEMPERATUR: AR750S, AR770S: Dette produktet er konstruert for bruk i maksimum romtemperatur på 50 grader celsius. ELETRISK OVERBELASTNING PÅ AC HOVEDKRETSLØP Når produktet installeres, må... -
Page 31: Segurança
AR700 Series Router FORSIKTIG: MEKANISK LASTNING Installering av utstyret på hyllen må utføres på en slik måte at ingen farlige situasjoner oppstår som en følge av ujevn lastning. Litiumbatteri — Må kun byttes ut av en faglig kvalifisert tekniker. FORSIKTIG: Eksplosjonsfare hvis batteriet feilinnsettes.Batteriet må bare erstattes med samme type eller en tilsvarende type som er anbefalt av fabrikanten. -
Page 32: Seguridad
Installation and Safety Guide TEMPERATURA DE FUNCIONAMENTO: AR750S, AR770S: Este produto foi projetado para uma temperatura ambiente máxima de 50 graus centígrados. ELÉTRICO - SOBRECARGA DA REDE DE CORRENTE ALTERNADA (AC) Antes de instalar o produto, verifique o efeito cumulativo da conexão de diversos aparelhos àrede de corrente alternada através das etiquetas que... - Page 33 TEMPERATURA REQUERIDA PARA LA OPERACIÓN: AR750S, AR770S: Este producto está diseñado para una temperatura ambiental máxima de 50 grados C. ELECTRICO - SOBRECARGA DEL CIRCUITO PRIMARIO DE CORRIENTE ALTERNA Al instalarse el producto deberán considerarse las potencias nominales...
-
Page 34: Säkerhet
VARNING: Luftventilerna får ej blockeras och måste ha fri tillgång till omgivande rumsluft för avsvalning. DRIFTSTEMPERATUR: AR750S, AR770S: Denna produkt är konstruerad för rumstemperatur ej överstigande 50 grader Celsius. ELEKTRISKT - ÖVERBELASTNING AV VÄXELSTRÖMSNÄTET: När produkten installeras bör den sammanlagda effekten på namnplåten beaktas när apparaten ansluts till växelströmsnätet. -
Page 35: Connection To Mains Voltage Supply
AR700 Series Router Connection to mains voltage supply This product is supplied with a power cord that incorporates a moulded plug and has been approved for use. It must only be used with the power cord supplied. For continued protection against the risk of fire and shock hazard, replace fuses only with the same type and rating. -
Page 36: Connection To Isdn Network
Installation and Safety Guide Connection to ISDN network Ports for the connection of other apparatus The following interfaces normally operate at SELV (Safe Extra Low Voltage) levels: Asynchronous (console) ports ■ Ethernet ports ■ G703 ports ■ Synchronous ports ■ Note SELV is a secondary circuit whose voltages do not exceed a safe value under normal operating conditions and under single fault conditions. -
Page 37: Us Federal Communications Commission (Fcc)
Ordering Codes Translation Review and is registered for IOC S and EZ-ISDN 1. RJ49C USOC Jack Type Should you experience trouble with this telephone equipment, please contact: ALLIED TELESIS INTERNATIONAL 19800 NORTH CREEK PARKWAY #200 BOTHELL WASHINGTON 98011 TEL: 425 487 8880... -
Page 38: Canadian Department Of Communications
Installation and Safety Guide Canadian Department of Communications The Industry Canada label identifies certified equipment. This certification means that the equipment meets telecommunications network protective, operational and safety requirements as prescribed in the appropriate Terminal Equipment Technical Requirements document(s). The Department does not guarantee the equipment will operate to the user’s satisfaction.
Need help?
Do you have a question about the AR750S and is the answer not in the manual?
Questions and answers