Navman M-Nav 800 User Manual
Messaging and navigation device
Hide thumbs
Also See for M-Nav 800:
- Installation training & troubleshooting (50 pages) ,
- Installation training & troubleshooting (38 pages)

Related Manuals for Navman M-Nav 800


Summary of Contents for Navman M-Nav 800
-
Page 1: User Manual
M-Nav 800 User Manual G P S T R A C K I N G A N D F L E E T M A N AG E M E N T S O L U T I O N S... - Page 3 Copyright © Copyright 2012 Navman Wireless Holdings LP. Navman Wireless is a registered trademark of Navman Wireless Holdings LP. All rights reserved. All other trademarks and registrations are the property of their respective owners.
-
Page 4: Table Of Contents
Install the M-Nav 800 in a Vehicle ........ -
Page 5: Introduction
• set a location as the start point, a via point, or the destination, • have the M-Nav 800 calculate the route then guide you along it with clear visual and verbal instructions, • check for places and points of interest such as fuel stops, nearby or along your route, •... -
Page 6: Glossary Of Terms
This manual represents the M-Nav 800 at the time of printing. Navman Wireless reserves the right to make changes to specifi cations without notice. -
Page 7: The M-Nav 800
2 The M-Nav 800 Box Contents The M-Nav 800 is supplied with a suction mount designed for installation on a vehicle windshield. Check that you have ALL of the items pictured below before you start the installation. Contact your supplier if anything is missing. -
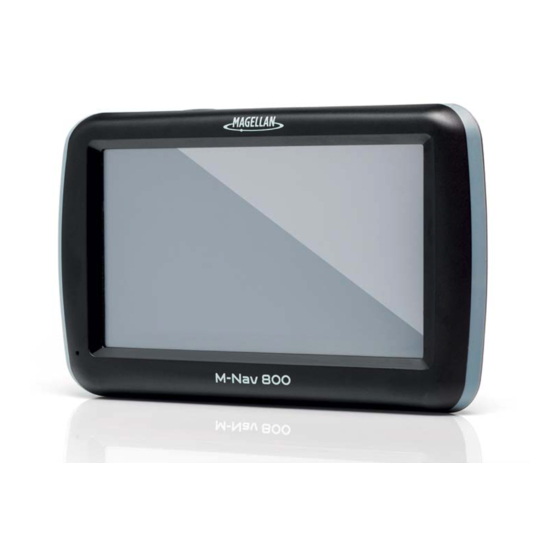
Page 8: M-Nav 800 Parts
Micro-SD card Used for updates and log fi les ON/OFF switch Short press to turn the M-Nav 800 on. Press and hold to turn the M-Nav 800 off Mini-USB port External connection port. (Not used while unit is in the cradle) -
Page 9: M-Nav 800 Specifi Cations
M-Nav 800 | User Manual M-Nav 800 Specifi cations Component Description Display 5” Transmissive, WQVGA resolution 340 NITS minimum, including effects of integrated touch panel Touch Panel 4-wire resistive, commercial grade Processor Type ARM11 architecture, >= 533M Operating System WinCE 6.0r2... -
Page 10: Install The M-Nav 800 In A Vehicle
To add the M-Nav to the docking cradle: 1. Tilt the top of the M-Nav 800 towards you and position so it sits on the cradle ledge and the 2 bottom cradle clips line up with the 2 lugs on the cradle 2. -
Page 11: Get Started
Note: The following sequence of screens will appear the FIRST time you use your M-Nav 800, OR whenever the internal battery in the M-Nav 800 has gone fl at (this can happen if you have not used your M-Nav 800 for several days). Otherwise, your M-Nav 800 will re-display the last screen that you used. -
Page 12: Driver Logon & Status
Vehicle Inspection Note: The ‘’Vehicle Inspection’ option may not be available in your market. Contact your supplier for more information. If these screens are displayed you cannot use the M-Nav 800 until you enter these details. If the ‘Vehicle Inspection’ screen appears, you must inspect your vehicle, and then touch Accept. -
Page 13: Switch Between Messages And Navigation
M-Nav 800 | User Manual When the ‘Main Menu’ is displayed your M-Nav 800 is ready to use. Touch an icon to select an option. Switch Between Messages and Navigation You must return to the Main Menu to switch between Messages and Navigation. -
Page 14: Check The Gps Status
Your M-Nav 800 has an internal GPS (Global Positioning System) antenna so you can always receive a GPS signal, fi nd your current location and use the M-Nav 800 for navigation. For best operation, ensure your M-Nav 800 is positioned where it has a good view of the sky. -
Page 15: Check The Qube Tracking Device Status
If you had to enter your Driver Pin and select a work status (as described in Section 4.2) before you could use the M-Nav 800, you must use Log Off when you have fi nished work. Note: These screens will be displayed only if your fl eet administrator has set up the Driver Log On and Driver Status functions in the OnlineAVL2 application. -
Page 16: Shut Down
A 30 second countdown will be displayed. Once this is fi nished, the screen will go blank. Touch: • OK to confi rm you want to turn the M-Nav 800 off before the countdown fi nishes • Cancel if you want to continue using the M-Nav 800 (e.g. -
Page 17: Messages
M-Nav 800 | User Manual 5 Messages IMPORTANT: The M-Nav 800 must be in the docking cradle and connected to the Qube tracking device in order for you to send and receive messages, and otherwise communicate with your fl eet administrator. -
Page 18: New Messages
M-Nav 800 | User Manual Form message that is also a Route-To message. If you cannot see the whole Form message, touch the up or down arrows. Touch: • Reply (see section 5.5). Notes: • If the Form message does not require a reply, the Reply button is not displayed. - Page 19 M-Nav 800 | User Manual The ‘Received Messages’ screen lists all your received messages. The most recent is at top of the list. Notes: • If the message was received today, the time it was received will be displayed, otherwise the received date will be displayed.
-
Page 20: Reply With A Canned Template Or Reply Form
M-Nav 800 | User Manual Reply with a Canned Template or Reply Form Note: This section assumes that the message you want to reply to is already displayed. Any previous replies to that message are also displayed in sequence (up to a maximum of 30 replies). -
Page 21: Use A Reply Form
(e.g. 45). Note: The M-Nav 800 can hold a maximum of 100 canned messages. Use a Reply Form Note: This section assumes that the reply Form is already displayed. - Page 22 If a numeric keyboard is displayed, use the onscreen buttons to enter a number. If your M-Nav 800 is set to use the 12 hour clock, and you are updating a time and want to change from AM to PM: •...
-
Page 23: View A Reply Or A Sent Message
fl eet administrator. The following icons show the type of sent message and its status: Message read and reply sent. The M-Nav 800 will display a maximum of 30 replies to any stored message. Form message read and reply sent. -
Page 24: Create A New Message Or Free Text Reply
M-Nav 800 | User Manual Create a New Message or Free Text Reply If you want to create a new message, display the ‘Received Messages’ screen (see Section 5.3), then touch New. If you want to create your own reply to an information or Route-To message that is already displayed, touch Reply. -
Page 25: Go To A Message Location
Route-To message.) Touch Go to exit from Messages and navigate to the location in the message. The M-Nav 800 calculates the new route starting from your current location. Touch Go to start navigation. Note: You can preview the journey by touching the map button (bottom right). -
Page 26: Delete A Message
M-Nav 800 | User Manual 5.10 Delete a Message Note: This section assumes that the message you want to delete is already displayed. Touch Delete. The ‘Confi rm Message Delete’ popup box is displayed. Touch: • Yes to delete the message. The updated Message List is displayed. -
Page 27: Bluetooth Phone Connection
6 Bluetooth Phone Connection You can pair a compatible Bluetooth-enabled mobile phone with your M-Nav 800. This will enable you to use the Phone option to make and receive mobile phone calls using the M-Nav 800 as the hands-free device. -
Page 28: Ems (Engine Monitoring System)
M-Nav 800 | User Manual 7 EMS (Engine Monitoring System) EMS allows you to display specifi c engine information. Alerts for speed, RPM, temperature, fuel and oil pressure will be displayed if these exceed limits preset by your fl eet administrator. You can: •... -
Page 29: Set Up Ems Options
M-Nav 800 | User Manual Set up EMS Options Notes: • This feature has to be enabled by your fl eet administrator • If enabled, these options may be set up by your fl eet administrator and you may not be able to change them Go to the ‘Main Menu’... -
Page 30: Change The Ems Dashboard Screen
M-Nav 800 | User Manual Change the EMS Dashboard Screen Note: These options may be set up by your fl eet administrator and you may not be able to change them. Touch Settings. The ‘EMS Settings’ menu is displayed. Touch Dashboard Layout. The ‘EMS Dashboard Layout’... -
Page 31: Working Time
M-Nav 800 | User Manual 8 Working Time The M-Nav 800 allows you to record when you are starting a new task, taking a break, or fi nishing work. The list of tasks will be set up by your fl eet administrator. -
Page 32: Set Your Preferences
M-Nav 800 | User Manual 9 Set Your Preferences You can set many options on your M-Nav 800. Refer to the Magellan Navigation Manual for information on the options not described in this section. Set Date / Time Formats To set the date format, display the ‘Main Menu’. -
Page 33: Set Geographic / Custom Time Zone
M-Nav 800 | User Manual Set Time Zone You can set the time zone for your location or allow the zone to be set automatically. To set the time zone, display the ‘Main Menu’. Touch Nav. to display the Navigation main menu. -
Page 34: Set Language
M-Nav 800 | User Manual Set Language The M-Nav 800 can operate in a variety of languages. The language can also be set from the Navigation main ‘Menu’. When the language is changed using ‘Settings’ in the ‘Main Menu’ (as described below), the Navigation system language option will also change provided the language is supported in that system. -
Page 35: Set The Choose Language At Startup Option
Set the Choose Language at Startup Option You can choose whether or not to show the ‘Language’ selection menu (described in section 9.3) whenever you switch on the M-Nav 800. To change the current ‘Choose Language at Startup’ setting, display the ‘Main Menu’. -
Page 36: Set Button Sound
M-Nav 800 | User Manual Set Button Sound The sound the M-Nav 800 makes when a button is touched can be turned on or off. To set the button sound, display the ‘Main Menu’. Touch Settings to display the ‘Settings’ menu. -
Page 37: Run Qube Diagnostics
M-Nav 800 | User Manual Run Qube Diagnostics You may be asked to run diagnostics on the Qube tracking device to help with troubleshooting. To run Qube Diagnostics, display the ‘Main Menu’. Touch Settings to display the ‘Settings’ menu. Touch System. -
Page 38: Restore Factory Default Settings
M-Nav 800 | User Manual Restore Factory Default Settings In the unlikely case of any problems with your M-Nav 800 that you cannot otherwise resolve, you can restore the factory default settings. WARNING: This option will remove all of your customized settings and stored information except your map selection. -
Page 39: Contact Information
M-Nav 800 | User Manual Contact Information Navman Wireless welcomes your feedback. Navman Wireless UK Navman Wireless USA Innovation Centre 2, Navman Wireless North America Keele University Science Park 2701 Patriot Boulevard, Suite 150 Keele, Newcastle Under Lyme Glenview, IL 60026... - Page 40 MAN000020 Lat 42° 6’ 16.98” N Lon 87° 49’ 29.27” W...