Table of Contents
Advertisement
Advertisement
Table of Contents

Related Manuals for Navman Cruise Series


Summary of Contents for Navman Cruise Series
- Page 1 User Manual CRUISE Series EZY Series MOVE Series...
-
Page 2: Table Of Contents
Precautions ..................4 Declaration of conformity ..............6 Getting to know your Navman ..............7 Mounting your Navman in a vehicle ............9 Enabling traffic (TMC) reception ............11 Turning your Navman ON and OFF ............12 Resetting your Navman ..............12 Connecting your device to the computer ........... - Page 3 Traffic event notification ............47 How do I use the Bluetooth function? ............48 How do I pair my Navman with a Bluetooth device? ......48 How do I add contacts to my Navman? ..........48 How do I make a hands-free call? ............49 Making a call using the keypad ..........
- Page 4 Map ..................60 Subscriptions ................61 Custom POIs ................62 Locking your device ................ 63 Backing up and restoring your Navman ..........64 Smart Recovery ................64 Recovering keys on your device ............64 Configuring NavDesk II ..............64 Reference ..................... 66 About GPS and signal reception ............
-
Page 5: Important Safety Information
• Consult your country’s and/or state’s laws regarding operation of a vehicle with any accessories or modifications. • It is your sole responsibility to place, secure and use your Navman in a manner that will not cause accidents, personal injury or property damage. Always observe safe driving practices. - Page 6 Navman to connect your Navman unit. • Do not modify and temper with your Navman unit. • Your Navman uses a Lithium-ion battery. It is important to follow the guidelines set out regarding this type of Battery. Electronic devices using a lithium – ion battery such as Mobile phones, GPSs and cameras are designed to operate at a temperature range of approximately 0°C to 50°C.
-
Page 7: Declaration Of Conformity
You can also visit www.navman.com.au / www.navman.co.nz to view our latest trade-in offers. Declaration of conformity Note: For regulatory identification purposes, this product is assigned a model name of NAVMAN CRUISE550MT/CRUISE650MMT/EZY455MT/EZY460MT/MOVE100/MOVE120M. Marking labels located on the exterior of your Navman indicate the regulations that your model complies with. -
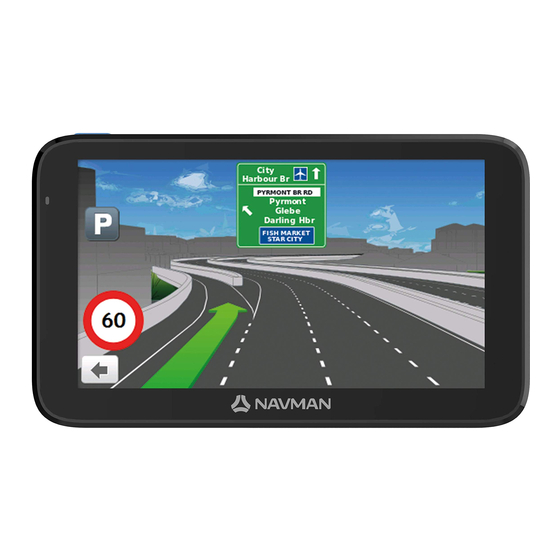
Page 8: Getting To Know Your Navman
❼ ❻ ❽ ❾ Name Description Touch screen Displays the output of your Navman. Tap the screen with your fingertip to select menu commands or enter information. Power button Turns your Navman on and off. Power indicator • Glows in when powered. - Page 9 Tap on the touch screen to make selections and enter information. Microphone Receives sound and voice. Touch screen Displays the output of your Navman. Tap the screen with your fingertip to select menu commands or enter information. Power indicator • Glows in when powered. ...
-
Page 10: Mounting Your Navman In A Vehicle
Mounting your Navman in a vehicle Use the provided device holder and mount to secure your Navman in your vehicle. It is recommended to mount the device near the centre of the bottom edge of the windscreen (Position A in the illustration). If Position A is not practicable, mount the device in the bottom-right corner of the windscreen (Position B in the illustration). - Page 11 EZY series MOVE series...
-
Page 12: Enabling Traffic (Tmc) Reception
• There is no need to fully discharge the Navman unit. • When storing the product for a long period of time, be sure to connect your Navman at least once every two weeks. Over discharge of the Navman Unit can affect the performance. -
Page 13: Turning Your Navman On And Off
Note: The first time you use your Navman, it may take several minutes to establish a GPS connection. When you have a GPS fix, you can start to use your Navman to plan your trip. • To put your Navman in a suspended state, briefly press the power button. -
Page 14: Connecting Your Device To The Computer
USB drive from the system. This prevents data loss on the device. CAUTION: When your Navman is turned on and connected to a computer, it is recognised as an external mass-storage device. Do NOT delete any files that are pre-installed on your Navman. -
Page 15: Inserting A Memory Card
Note: A memory card is only required if installing additional maps and subscriptions that can no longer fit on the internal memory. The device can operate normally without one. Note: Navman does not guarantee the product’s compatibilities with MicroSD cards from all manufacturers. -
Page 16: Navigating On The Screen
Navigating on the screen To operate your Navman, touch the screen with your fingertip. You can perform the following actions: • Tap Touch the screen once with your fingertip to open items or select on-screen buttons or options. • Drag Hold your fingertip on the screen and drag up/down/left/right or across the screen. -
Page 17: Main Menu
Navman model. The Main Menu is your starting point for searching for a destination. The Main Menu also allows you to customise your Navman, view saved locations as My Place/Home, and search for POIs nearby, and so on. -
Page 18: Navigating Through The Menu Screens
Record GPS co-ordinates of a location or a journey. Select your navigation mode: Car, Large Vehicle* or Professional Truck*. *Available as an optional purchase for CRUISE Series only. Get help with just a phone call when your car breaks down on the road. -
Page 20: Using The Keyboard Screen
Using the Keyboard screen The Keyboard screen will display when you are required to enter text, such as when searching for a street name. The Keyboard screen can display with various layouts depending on the information you need to enter, including alphabets, numbers, alternate characters and combinations of these. -
Page 21: How Do I Go From A-B
How do I use the FIND wizard? Your Navman is equipped with maps that provide street-level details for door-to-door navigation, including POIs such as accommodation, parking areas, petrol stations, railway stations and airports. The FIND wizard allows you to search the location easily. -
Page 22: How Do I Plan My First Trip
Note: Menu displays may vary, depending on your Navman model. Using your Navman to plan your first trip is easy. There are several ways to select your destination. The following steps will show you how to plan your route by searching the address. -
Page 23: How Do I Preview The Destination On Map
How do I preview the destination on map? After searching an address (or a POI), you can preview the destination on map to explore the area near the location. 1. On the Destination screen, tap the button to display the destination preview map. 2. -
Page 24: Changing The Navigation Mode
Recent places menu or Home to set the departure point if you want the demonstrated route to start elsewhere. 3. Select a destination point through the Going to screen. 4. When done, tap 5. Select a route type and tap , and the route demonstration will start automatically. - Page 25 If you want to… Then… limit the route planning while shipping tap Hazmat (Hazardous Materials) and then hazardous materials in the Professional Truck select the correct option from the list. mode, enable/disable the speed limit alerts, tap Speed limit display / Speed limit alerts to turn it on or off.
-
Page 26: How Do I View My Route
How do I select the route type? Note: This feature is not available on all models. Depending on your Navman model, the Select Route Type screen may be displayed when you tap from the Destination screen. All of the four route types (Fastest, Economical, Easiest, and Shortest) will be calculated. -
Page 27: How Do I Change The Route Configuration
For more information on changing the route configuration, see the following sections. Note: Map options screen display and the order of the items may vary, depending on your region, maps installed or Navman model. CRUISE series EZY/MOVE series... -
Page 28: How Do I View My Route Statistics
How do I view my route statistics? 1. From the Map options screen, tap 2. Tap the tabs in the title bar to view the additional information in the different screens. 3. Your Navman provides the information on your: • time to destination • time travelled •... -
Page 29: How Do I Zoom In/Out The Map
How do I view the traffic status on my route? Note: Traffic information is not available on all models and is only available in selected countries. Depending on your Navman model, you can view the traffic status by: • EZY series: tapping from the Map options screen. -
Page 30: My Drive
Over time, your Navman learns your preference for road types and driving speeds, turns and more. Your Navman will save the information and provide a more personalised route and accurate time of arrival the next time you plan a trip. -
Page 31: How Do I Create A Trip With Multiple Stops
Note: Trip Planner is not available on all models and is only available in selected countries. Depending on your Navman model, you may be able to set multiple stops or waypoints for your trip. Your route will be calculated to go via each of these points in the specified order. -
Page 32: How Do I Edit The Waypoints In The Trip
How do I edit the waypoints in the trip? 1. On the Main Menu, tap 2. Tap the trip to edit. 3. Tap the desired waypoint in the trip. 4. Complete the following: If you want to… Then… delete a waypoint, tap Delete, then select OK. -
Page 33: How Do I Capture A Location Or A Journey
Note: The capture functionality is not available on all models. Your Navman may have a capture feature which allows you to record GPS co-ordinates of a location and capture a journey, and save them so you can navigate back at a later time. -
Page 34: How Do I Navigate To A Location I Have Captured
2. Tap the captured destination you want to travel to ( 3. Tap . Your Navman will calculate a route from your current location. How do I navigate to the saved car location? Note: This feature may not be available for all models. -
Page 35: My Places
2. Tap the Sort by button to change the sorting order of the items: : by time : by name : by type 3. Tap the favourite destination you want to travel to. 4. Tap . Your Navman will calculate a route from your current location. -
Page 36: How Do I Navigate To Home
3. Tap . Your Navman will calculate a route from your current location. Depending on your Navman model, once your home has been set on your Navman, tap on the Main Menu and you will be directed to Home. How do I navigate to a recent place? To make navigating to a location easier, your Navman will automatically save all your start locations and destinations in a list of recent places. - Page 37 If you want to… Then… delete the location,...
-
Page 38: How Do I Search For A Poi
POIs are grouped by category, such as petrol stations, parks, beaches and museums. Your Navman may provide several ways to search for the nearby POIs. Depending on your Navman model, you can search for the nearest POIs by using: •... -
Page 39: How Do I Find The Pois Using Explore
Note: Explore is not available on all models and is only available in selected countries. Depending on your Navman model, you may search for the POIs using the Explore map. The Explore map allows you to explore the local area to find POIs or navigate to an address. -
Page 40: How Do I Find A Poi Using The Poi Cluster
How do I find a POI using the POI cluster? Tapping on the selected POI will bring up the screen with the POI destination details. Complete the following: If you want to… Then… calculate the route and start navigating, save the location as a favourite, explore the map, place a phone call to the POI,... -
Page 41: How Do I Find The Nearest Pois Using The Poi Category Buttons
2. Complete the following: If you want to… Then… display all POI icons, tap Show all. display no POI icons, tap Hide all. Note: Hiding POIs will stop you from finding them when using explore mode/cluster search. select a specific POI icon for display, tap the required POI category to show ( ) or hide (... -
Page 42: How Do I Search For A Poi By Type
If you want to… Then… calculate the route and start navigating, save the location as a favourite, explore the map, place a phone call to the POI, Note: This feature is not available on all models and is only shown when the phone number of the POI is available. -
Page 43: How Do I Search For A Poi By Smart Find Keyword
If you want to… Then… search for emergency services, 5. Tap the desired item from the list. 6. Complete the following: If you want to… Then… calculate the route and start navigating, save the location as a favourite, explore the map, place a phone call to the POI, Note: This feature is not available on all models and is only shown when the phone number of the POI is... -
Page 44: How Do I Receive Current Traffic Information Via Tmc
How will I know when a traffic event occurs? When travelling through an area in which you can receive traffic updates, your Navman will decode these events and display them. An icon will display at the event location on the Map screen, and an audible warning is given if an event is on your route. -
Page 45: How Do I View A List Of All Events On My Route
Traffic Options windows. How do I view a list of all events on my route? Your Navman creates a list of events as they are received on the All traffic events screen. On the Traffic screen, tap ... -
Page 46: How Do I Know If A Detour Is Recommended
Item Description Tap to return to the previous screen. Event icon and Displays details of the event, including: description • Name of road and direction in which the event is taking place. • Location of where the event begins and ends. •... -
Page 47: Detour Recommended
If a detour is recommended, one of the following messages will display: Message Description Finding detour… Your Navman is calculating a new route. During calculation, the % complete will display. Recalculating route… Note: Exiting this screen before the new route is calculated will cancel the operation. -
Page 48: Accept Recommended Detours Automatically
more green bars, the stronger the signal. 2. To change your preferred radio station, select your preferred radio station from the list. You can select Automatic to receive the traffic signal automatically. Accept recommended detours automatically When the Accept recommended detours is selected, your route will be re-planned automatically when the detour is recommended by the traffic event. -
Page 49: How Do I Use The Bluetooth Function
4. From your phone, scan for nearby Bluetooth devices. 5. From the device list, select your Navman. 6. To pair with your phone with your Navman, enter "1234" on the mobile phone when prompted. Note: To pair another Bluetooth mobile phone with your Navman, first disconnect the current Bluetooth connection on the mobile phone, and then repeat the above procedure to set up a new connection. -
Page 50: How Do I Make A Hands-Free Call
Note: International calls require a country code to be included in the phone number. On your Navman, the country code is separated from the rest of the number sequence by a + sign. If you are making an international call, tap and hold 0 until the + sign displays. -
Page 51: How Do I Respond To A Phone Call
How do I view my call history? From the Phone screen, tap The Call History screen lists the calls made during the time your Navman is connected to a mobile phone. Numbers are arranged by time with the most recent time at the top. Your Navman can store up to 30 history entries (limited to 10 entries for incoming, outgoing and missed calls each). - Page 52 select All, Outgoing Call, Incoming Call or Missed Call. • To delete an entry from the history, tap the entry and tap • To place a call, tap the entry and tap • To delete all entries in the history, tap from the Call History screen.
-
Page 53: Customising The System Settings
Customising the system settings Note: Depending on your Navman model, certain features and setting options may not be available. There are various customisation options available to enhance your navigation experience. 1. On the Main Menu, tap 2. Select the option you want to customise. - Page 54 Note: You can simply tap on the brightness bar and the screen brightness will be set immediately at the position you tapped. Note: Your Navman can heat up when the brightness scale is set high, therefore, use lower brightness whenever acceptable.
- Page 55 Route options If you want to… Then… change the navigating mode, tap Mode to select Car, Large vehicle or Professional Truck. Note: This feature is not available on all models. Not all options are available on all models. set route type options for your route, tap Route type to select your route type preference from the list: •...
- Page 56 If you want to… Then… set the avoidance manually, tap Custom Avoidance. • Tap Add Avoid Road and then follow the on- screen instructions to select the avoid road from the map view screen. • Tap Add Avoid Area and then follow the on- screen instructions to select the avoid area from the map view screen.
- Page 57 Note: The available settings of the Voice option can be customised by adding/deleting the voice file through NavDesk II when your Navman is connected to the computer. For more information, see the "My NAVMAN" section in “What is NavDesk II™?”...
- Page 58 Bluetooth Note: This feature is not available on all models. The Bluetooth option allows you to pair a Bluetooth mobile phone with your Navman. For the compatibility list, visit: www.navman.com.au (Australia) or www.navman.co.nz (New Zealand). For more information, see the "How do I use the Bluetooth function?" section.
- Page 59 Start.Tap OK. Your Navman will restart. When your Navman is in Shop demo mode, you will see the navigation demonstration of the pre-defined route without having to set a destination.
-
Page 60: What Is Navdesk Ii
• Internet connection for activation How do I install NavDesk II onto my computer? For Windows systems: 1. Close all programs on your computer. 2. Download the NavDesk II application installer for your Navman from www.navman.com.au (Australian residents) or www.navman.co.nz (New Zealand residents). -
Page 61: Backup Of Your Navman's Data
Your Navman comes with one or more pre-activated maps. Map files take up space on your Navman’s internal memory. If you do not use a map file, you can remove it to free up space. You can later reinstall it to your Navman if required. -
Page 62: Subscriptions
5. In the Upwards column, select the desired region map and click Install to install it. Note: If no map data is found on your Navman, click Contents and then Load. Then browse for the desired downloaded/purchased map (*.iso), if available, on your computer. -
Page 63: Custom Pois
Custom POIs You can import your own POI files. These are called custom POIs. Unlike preinstalled POIs, custom POIs can be removed from your Navman and can have audio alerts associated with them. To install custom POIs from your own POI file: 1. -
Page 64: Locking Your Device
9. Click Add to my NAVMAN to add the POI to your Navman. Note: Each file corresponds to a POI category; for example, Hotels.csv will be listed on your Navman as the Hotels category. To edit a custom POI category: 1. -
Page 65: Backing Up And Restoring Your Navman
It is recommended to perform a backup when your device is connected to NavDesk II for the first time so as to make sure that the data on your Navman is synchronised to the server. 1. Open NavDesk II, and then click My NAVMAN. - Page 66 select your preferred language. 3. To change the unit of measurement, click Options , click Metric unit or Imperial unit.
-
Page 67: Reference
LCD panels may be used to help protect the screen from minor scratches. • Never clean your Navman when it is turned on. Use a soft, lint-free cloth to wipe the screen and the exterior of your Navman. -
Page 68: Troubleshooting
• Do not use paper towels to clean the screen. • Never attempt to disassemble, repair or make any modifications to your Navman. Disassembly, modification or any attempt at repair could cause damage to your Navman and even bodily injury or property damage and will void any warranty. - Page 69 Problem Solution My unit keeps displaying Power your unit through a USB cable If it is still displaying battery battery low. connected to a computer for 8 hours. low after following this Ensure the device is turned on and is process, contact our technical displaying the USB connection screen.
-
Page 70: For More Information
Navman is not responsible for any damages of any type. In some countries the data information regarding safety or speed cameras may conflict with local law and/or regulations. -
Page 71: Poi Categories
POI categories Icon Description Icon Description Airport Amusement park Art centre ATM/Cash dispenser Bank Bar/Pub Beach Breakdown service/Car repair facility Bowling centre Business facility or company Business office Bus station Camping ground Car dealer/Automobile dealer Casino Cemetery Church Cinema City hall City, town or village Coffee shop College/University... -
Page 72: Branded Pois
Veterinarian Winery Note: The POI categories and the order may differ, depending on your region, maps installed or Navman model. Branded POIs Branded POIs are available on some maps. These include well known restaurants, accommodation providers, tourist attractions, Petrol stations, etc. The icon will usually display the company logo. - Page 73 My Places categories Icon Description Home Saved locations Captured journey Traffic and other TMC events Each TMC Event is sorted in to one of nine categories. When an Event is received, one of the following icons will display: Event Avoided Message Type Event Description Event...
- Page 74 Revision: R01 (10/2019) Trademarks All brand and product names are trademarks or registered trademarks of their respective companies. Disclaimer Specifications and documents are subject to change without notice. Notes Not all models are available in all regions. Depending upon the specific model purchased, the colour and look of your device and accessories may not exactly match the graphics shown in this document.
Need help?
Do you have a question about the Cruise Series and is the answer not in the manual?
Questions and answers