Alto X23 User Manual
2-way stereo/3-way mono active crossover
Hide thumbs
Also See for X23:
- User manual (12 pages) ,
- Service manual (25 pages) ,
- Service manual (25 pages)

Related Manuals for Alto X23


Summary of Contents for Alto X23
- Page 1 User's Manual 2-WAY STEREO/3-WAY MONO ACTIVE CROSSOVER www.altoproaudio.com Version 2.0 Dec. 2002 English...
- Page 2 the recommended fuse type as indicated in this SAFETY RELATED SYMBOLS manual. Do not short-circuit the fuse holder. Before replacing the fuse, make sure that the product is CAUTION OFF and disconnected from the AC outlet. RISK OF ELECTRIC SHOCK DO NOT OPEN Protective Ground This symbol, wherever used, alerts you to the pre-...
- Page 3 PREFACE Dear Customer: Thanks for choosing LTO Active Crossover and thanks for choosing the one of results of LTO AUDIO TEAM job and researches. For our LTO AUDIO TEAM, music and sound are more than a job...are first of all passion and et us say...our obsession! We have been designing professional audio products for a long time in cooperation with some of the major brands in the world in the audio field.
-
Page 4: Table Of Contents
4. INSTALLATION & CONNECTION .....................7 4.1 Mains Connection 4.2 Audio Connection 4.3 Rack Mounting 5. APPLICATION .............................8 5.1 X23 2-Way Stereo 5.2 X23 3-Way Mono 6. TECHNICAL SPECIFICATIONS ......................10 7. WARRANTY ............................11... -
Page 5: Introduction
LTO products by purchasing our X23 Active Crossover. It is the most effective support to us. The X23 Active Crossover is an ideal crossover and used universally in most small and large PA systems, recording studio monitors, DJ setups, commercial installations and live concerts. It is not only adaptable in mounting to different sound systems, but also it has many developed features. -
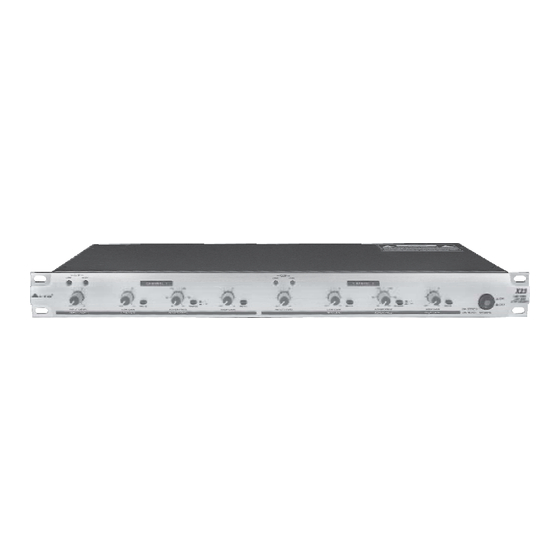
Page 6: The Rear Panel
HIGH OUT 1 / (NOT USED) LOW OUT1 / (LOW OUT) INPUT 1 / (INPUT) ( 3WAY- MONO) CHANNEL 2 CHANNEL 1 X23 2-way stereo / 3-way mono active crossover 2-WAY STEREO MODE 3-WAY MONO MODE Fuse Holder AC Inlet Ch1 Line Input (Linked XLR-F&jack) Line Input (Linked XLR-F&jack) - Page 7 Fuse holder & voltage selector Your unit may have the AC voltage selector ( 115V/60Hz or 230V/50Hz) built into the Fuse Holder. To change, pull fuse-holder out and rotate 180 , then push in again. Caution: The fuse protecting the AC supplies circuits of this unit. The fuse can only be changed by a qualified technician, in the event of a fault or changing the supply voltage.
-
Page 8: Installation & Connection
XLR Type Unbalanced XLR Type alanced b. In Line Connection For these applications, the X23 Active Crossover provides XLR connectors to easily interface with most profe- ssional audio devices. Follow the configuration examples below for your particular connection. Balanced Ring... -
Page 9: Rack Mounting
4.Output the High frequencies signal to the power amplifier. 5.Set LOW-HIGH Crossover Range of channel1 and channel2 to 10. 6.Power up the X23 first, then the power amplifier to run the system. While powered off, please ensure the power amplifier is turned off first, then the X23. -
Page 10: X23 3-Way Mono
4.Output the Mid frequencies signal to the power amplifier. 5.Output the High frequencies signal to the power amplifier. 6.Power up the X23 first, then the power amplifier to run the system. While powered off, please ensure the power amplifier is turned off first, then the X23. -
Page 11: Technical Specifications
6. TECHNICAL SPECIFICATIONS Electrical LOW-MID Frequency Range Range 1 80Hz - 1KHz MID-HIGH Frequency Range Range 10 800Hz - 10KHz AV=0dB, fc=800Hz HUM & Noise LOW Section (Output@0dB) -106dBu HIGH Section(Output @0dB) -97dBu S/N Ratio 118dB Controls Input Level continuously variable Output Level low, high continuously variable rear panel switch... -
Page 12: Warranty
7. WARRANTY 1. WARRANTY REGISTRATION CARD To obtain Warranty Service, the buyer should first fill out and return the enclosed Warranty Registration Card within 10 days of the Purchase Date. All the information presented in this Warranty Registration Card gives the manufacturer a better understanding of the sales status, so as to purport a more effective and efficient after-sales warranty service. - Page 13 Tel: 886-4-22313737 email: info@altomobile.com Fax: 886-4-22346757 All rights reserved to ALTO Mobile. Due to continued development in response to customer feedback, product features, specifications and/or internal/external design may be changed without prior notice. No photocopying, translation or reproduction of any part of this user manual is allowed without prior written permission.Copyright...
Need help?
Do you have a question about the X23 and is the answer not in the manual?
Questions and answers