Table of Contents
Advertisement
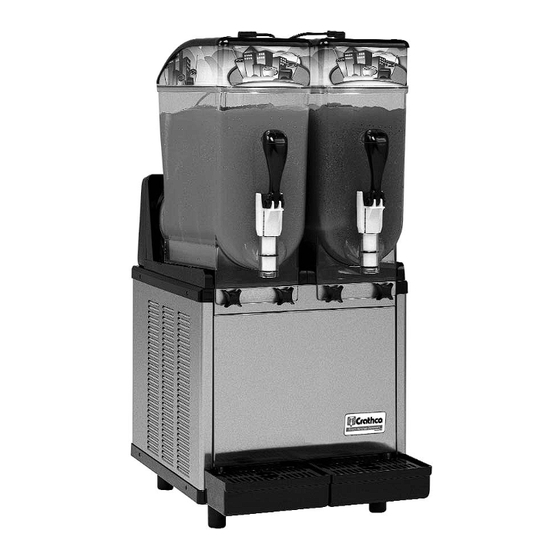
Crathco
Operation and Instruction Manual
T
O
ABLE
F
Introduction and Warnings......................................2
Installation............................................................2-3
Connection To Power Supply..................................3
Preparing Product ..................................................4
Operating Panel ......................................................4
Touchpad Model ..................................................4-6
Rocker Switch Model ..............................................7
Dispensing Product ................................................8
Adjustments ............................................................8
Cleaning & Sanitizing ........................................9-11
Maintenance ....................................................11-13
Maintenance Checklist ......................................14-15
Accessories ..........................................................16
Troubleshooting ..............................................17-18
Exploded View ................................................19-26
Crathco Granita G&MG Series Parts List ............27
Gear Motor Exploded View ..................................28
Refrigeration Diagrams....................................29-30
Electrical Diagrams..........................................31-33
Prior authorization must be obtained from
Grindmaster Corporation for all warranty claims.
© Grindmaster Corporation, 2000
PRINTED IN THE USA
Visual Granita Machine
®
G & MG Series Models
C
ONTENTS
for
Models G23-2B, G235-2B, G236-2B,
MG23-2B, MG235-2B & MG236-2B
(800) 695-4500 (USA & Canada only)
www.grindmaster.com • info@grindmaster.com
Grindmaster Corporation
4003 Collins Lane
Louisville, KY 40245 USA
Phone: (502) 425-4776
Fax: (502) 425-4664
0608 Form# CC-399-05
Part# 90381
Advertisement
Table of Contents
Troubleshooting

Subscribe to Our Youtube Channel
Related Manuals for Grindmaster Crathco G235-2B


Summary of Contents for Grindmaster Crathco G235-2B
-
Page 1: Table Of Contents
Crathco Granita G&MG Series Parts List ...27 Gear Motor Exploded View ...28 Refrigeration Diagrams...29-30 Electrical Diagrams...31-33 Prior authorization must be obtained from Grindmaster Corporation for all warranty claims. © Grindmaster Corporation, 2000 PRINTED IN THE USA Visual Granita Machine G & MG Series Models Models G23-2B, G235-2B, G236-2B, MG23-2B, MG235-2B &... -
Page 2: Introduction And Warnings
Introduction and Warnings This instruction manual is an important part of this Granita machine and must be kept for future reference. Carefully read the warnings contained in this instruction manual before installing and operating this Granita machine. Instructions For Machine Transport NOTE: Refrigeration equipment must remain upright to avoid damage to the compressor In order to prevent the oil contained in the compressor from flowing into the cooling circuit, it is necessary to always ship, carry, store and handle this Granita machine in... -
Page 3: Installation
Installation (cont.) 4.) Installing the Top Lid Merchandiser (requires Phillips head screwdriver) • Unplug the cord to the lid and remove the lid from the machine. • On top of the cover, remove the 4 hole plugs over the front (2) screws, middle (near rocker switch) and back screws then remove these 4 screws with a Phillips head screwdriver. -
Page 4: Preparing Product
Press To Select Function AUTO TIMER Programming G Series Electronic Touchpad Models Models G23-2B, G235-2B & G236-2B Electronic Touchpad: Main Power Switch: 1.) Turns unit ON. 2.) Selects 12/24 time or FÞ/CÞ temperature display when turned ON while simultaneously depressing the auger button. - Page 5 Model G23-2B Electronic Touchpad (cont.): Auger ON/OFF Button: 1.) Turns auger ON and OFF when main power switch is ON. 2.) Must be ON to permit defrost time to be reset. 3.) Must be ON to activate the “Mode/Press To Select Function” button to select manual “OFF”, “FREEZE” or “COOLING”...
-
Page 6: Errors - G Series Electronic Touchpad Model
Setting Defrost Timer (Night Setting) (cont.): 5.) Then press the “Auto Timer” clock button to set the minutes to complete time setting that you want it to turn to refrigeration mode, (defrost mode). Then press the “Press To Select Function” button to save the setting. 6.) Proceed to setting the time you want the machine to turn to freezing mode by following steps 4 and above. -
Page 7: Operating Panel Description-Mg Series Traditional Rocker Switch Model
G SERIES MODELS - ERROR MESSAGES (CONT.) “SYSTEM OVER TEMPERATURE” ALARM • A system over temperature alarm will activate as a safety when the unit has overheated to protect the compressor. • The system automatically goes to “OFF” status where the compressor’s operations is stopped, while augers will keep working to avoid forming ice blocks. -
Page 8: Dispensing Product
Dispensing Product To dispense the product, position the cup under the dispensing valve (C) and lower the dispensing lever (B) (see fig. O). Attention: If the machine is turned off at night, with the bowls filled, or just partially filled, a layer of solid ice may form on the surface due to the natural separation of the unmixed (non-moving) product. -
Page 9: Cleaning And Sanitizing Procedures
Cleaning and Sanitizing Procedures Warning Disconnect the unit from its power supply prior to cleaning or sanitizing the unit. Failure to do so may result in electric shock. Daily Cleaning For the machine to function properly, it is important that the cleaning procedures be carried out daily, according to the following instructions: 1.) Turn off the... - Page 10 Cleaning and Sanitizing Procedures (con’t) 10.) Reassemble the mixing unit back together, according to the following procedures (see fig. Y): • Moisten the bowl seal (P) with water and slip it into place at the back of cylin- der with ribs angled toward back of freezer. •...
-
Page 11: Cleaning & Sanitizing
Cleaning and Sanitizing Procedures (con’t) 16.) Plug the unit back into appropriate power supply. 17.) After the cleaning and reassembly of the mixing parts and bowl as per above instructions, fill the bowl with a mix of water and an approved cleaning solution (example kay5), according to the measures specified. 18.) Start the mixing part of the machine for about 10 minutes to sanitize all parts. - Page 12 Maintenance (con’t) Cleaning the Condenser (Monthly) This cleaning should be done monthly or more often if necessary. In order to guarantee an efficient refrigerating system, it is essential that the condenser be properly cleaned at regular intervals, according to the following procedures: •...
-
Page 13: O-Ring Maintenance
Maintenance (con’t) Seal Maintenance Bell Shaped Seal • Replace every 1 to 6 months depending on conditions of use and level of maintenance and lubrication. This part should be lubricated during re-assembly after every cleaning. Spindle Bushing Seal • Replace every 6 to 12 months depending on conditions of use and level of maintenance. Replacement of spindle bushing should ONLY be done by a qualified service technician. -
Page 14: Crathco Granita Preventive
Failure to complete PM’s every 6 months is considered abuse of the machine, and therefore voids the warranty. Proof of PM must be documented with Grindmaster Corporation to maintain warranty coverage. To docu- ment your PM, complete this form with signatures, place used/worn parts that were replaced during the PM inside envelope, and mail to Grindmaster Corporation. - Page 15 PM, complete this form with signatures, place used/worn parts that were replaced during the PM inside enve- lope, and mail to Grindmaster Corporation. Parts returned should include 2 spindle bushing evaporator seals, 2 rub- ber bell shaped shaft seals, valve o-rings and shafts (if applicable).
-
Page 16: Accessories
Autofills minimize manual labor to mix and refill the unit, as well as maintain the product bowl at an attractive level. BIB Product (Figure RR) Contact your local Grindmaster Corporation representative or Grindmaster Corporation customer service at (800) 695-4500 for more information on any of the above accessories. Page 16... -
Page 17: Troubleshooting Guide
Troubleshooting Guide The following procedures must be performed by a qualified service technician. Problem The machine does not cool, or cools only partially, but the compressors are running The machine does not cool or cools only partially, but one or more of the compressors are not running The machine over-freezes, making the auger movement slow or... -
Page 18: Troubleshooting
Friday, 8 am - 6 pm EST) or an authorized service center in your area. Please have the model and serial numbers ready so that accurate information may be given. Prior authorization must be obtained from Grindmaster Corporation’s Technical Services Department for all warranty claims. -
Page 19: Exploded View
Exploded View MG23-2B (115/60) (for units up to serial number 8195) G & MG Series Granita Machine Page 19... - Page 20 Exploded View G23-2B (115/60) (for units up to serial number 8195) Page 20 G & MG Series Granita Machine...
- Page 21 Exploded View G23-2B (115/60) (serial number 8195 and higher) G & MG Series Granita Machine Page 21...
- Page 22 Exploded View MG23-2B (115/60) (serial number 8195 and higher) Page 22 G & MG Series Granita Machine...
- Page 23 Exploded View G235-2B (220/50) G & MG Series Granita Machine Page 23...
- Page 24 Exploded View MG235-2B (220/50) Page 24 G & MG Series Granita Machine...
- Page 25 Exploded View G236-2B (220/60) G & MG Series Granita Machine Page 25...
- Page 26 Exploded View MG236-2B (220/60) Page 26 G & MG Series Granita Machine...
-
Page 27: Crathco Granita G&Mg Series Parts List
Crathco Granita G & MG Series Parts List ITEM PART DESCRIPTION 90000 Supporting Foot 90002 Washer 90003 90004 Bushing for Cord 90006 Screw 90007 General Switch 90008 Function Switch (MG Series) 90015 Lid Light Switch 90391 Lid Merchandiser, city scene 90021 Bottom of Lid 90022... -
Page 28: Gear Motor Exploded View
Page 28 GEAR MOTOR EXPLODED VIEW Item # Description ROTOR WITH TWO BEARINGS 90174 ARMATURE DRIVE GEAR WITH BEARING IDLER GEAR WITH BEARING OUTPUT SHAFT AND GEAR OUTPUT SHAFT BEARING HOUSING GASKET OUTPUT SHAFT SEAL G & MG Series Granita Machine Part No. -
Page 29: Refrigeration Diagrams
REFRIGERATION DIAGRAM MODEL G SERIES (115V/220V) REFRIGERATION DIAGRAM MODEL MG SERIES (115V) G & MG Series Granita Machine Item Description COMPRESSOR LEFT DRIER LEFT CAPILLARY TUBE LEFT EVAPORATOR LEFT ACCUMULATOR LEFT COMPRESSOR RIGHT DRIVER RIGHT CAPILLARY TUBE RIGHT EVAPORATOR RIGHT ACCUMULATOR RIGHT C &... -
Page 30: Refrigeration Diagrams
REFRIGERATION DIAGRAM MODEL MG SERIES (220V) Page 30 Item Description COMPRESSOR LEFT DRIER LEFT CAPILLARY TUBE LEFT EVAPORATOR LEFT ACCUMULATOR LEFT COMPRESSOR RIGHT DRIVER RIGHT CAPILLARY TUBE RIGHT EVAPORATOR RIGHT ACCUMULATOR RIGHT C & CFM CONDENSER AND CONDENSER FAN MOTOR G &... -
Page 31: Electrical Diagrams
ELECTRICAL DIAGRAM MODEL - MG SERIES (115) G & MG Series Granita Machine Page 31... - Page 32 ELECTRICAL DIAGRAM MODEL - MG SERIES (220V) Item Description LEFT BOWL RIGHT BOWL POWER SWITCH DEFROST TIMER MASL MIXING AUGER SWITCH LEFT FREEZING SWITCH LEFT REFRIGERATING SWITCH LEFT MASR MIXING AUGER SWITCH RIGHT FREEZING SWITCH RIGHT REFRIGERATING SWITCH RIGHT GEAR MOTOR LEFT GMFL GEAR MOTOR FAN LEFT THERMOSTAT LEFT...
-
Page 33: Electrical Diagrams
ELECTRICAL DIAGRAM MODEL - G SERIES (115V/220V) G & MG Series Granita Machine Page 33... - Page 36 Grindmaster® Coffee Grinders and Brewers • Espressimo® Espresso Machines • Crathco® Hot Beverage Dispensers Crathco® Cold and Frozen Beverage Dispensers • American Metal Ware® Coffee and Tea Systems Tel (502) 425-4776 • Fax (502) 425-4664 • 1-800-695-4500 P.O. Box 35020 • Louisville, KY 40232 • USA...
Need help?
Do you have a question about the Crathco G235-2B and is the answer not in the manual?
Questions and answers