Table of Contents
Advertisement
Quick Links
Advertisement
Table of Contents

Summary of Contents for Summit SM903BSA1
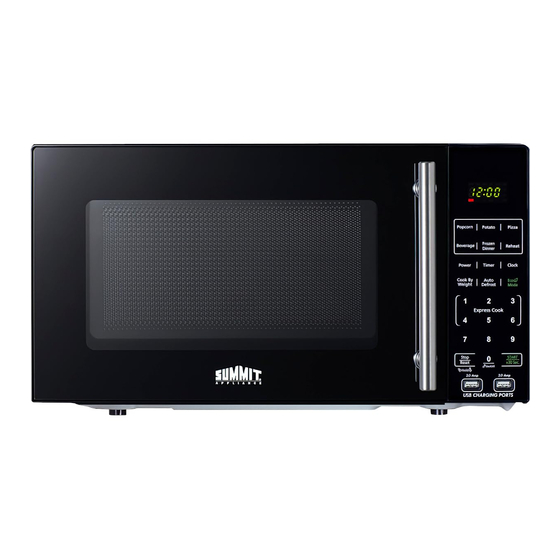
- Page 1 Microwave Oven Instructions Model: SM903BSA1 PLEASE READ THESE INSTRUCTIONS CAREFULLY BEFORE INSTALLING AND OPERATING THE OVEN. Felix Storch, Inc. An ISO 9001:2015 registered company 770 Garrison Ave Bronx, New York 10474 www.summitappliance.com...
-
Page 2: Table Of Contents
CONTENT SPECIFICATIONS ....................... 1 PRECAUTIONS TO AVOID POSSIBLE EXPOSURE TO EXCESSIVE MICROWAVE ENERGY ..................... 2 IMPORTANT SAFETY INSTRUCTIONS ..............2 GROUNDING INSTRUCTIONS ................. 5 INSTALLATION GUIDE ..................... 6 COOKING UTENSILS GUIDE ................... 6 PART NAMES ......................7 CONTROL PANEL ...................... 8 OPERATING INSTRUCTIONS .................. -
Page 3: Precautions To Avoid Possible Exposure To Excessive Microwave Energy
PRECAUTIONS TO AVOID POSSIBLE EXPOSURE TO EXCESSIVE MICROWAVE ENERGY 1. Do not attempt to operate this oven with the door open since that can result in harmful exposure to microwave energy. It is important not to disengage or tamper with the safety interlocks. 2. - Page 4 for industrial or laboratory use. 8. As with any appliance, close supervision is necessary when used by children. 9. To reduce the risk of fire in the oven cavity: a) Do not overcook food. Carefully attend appliance when paper, plastic, or other combustible materials are placed inside the oven to facilitate cooking.
- Page 5 16. This appliance should be serviced only by qualified service personnel. Contact the nearest authorized service facility for examination, repair, or adjustment. 17. When cleaning surfaces of door and oven that comes together on closing the door, use only mild, nonabrasive soaps, or detergents applied with a sponge or soft cloth.
-
Page 6: Grounding Instructions
GROUNDING INSTRUCTIONS This appliance must be grounded. In the event of an electrical short circuit, grounding reduces the risk of electric shock by providing an escape wire for the electric current. This appliance is equipped with a cord having a grounding wire with a grounding plug. -
Page 7: Installation Guide
INSTALLATION GUIDE 1. Make sure that all the packing materials are removed from the inside of the door. 2. This microwave oven must be placed on a flat. 3. For correct operation, the oven must have sufficient air flow. Allow 20cm of space above the oven, 10cm at back and 5cm at both sides. -
Page 8: Part Names
1 inch (2.54cm) between aluminum foil and cavity. Ceramic, porcelain, and stoneware— Use these if they are labeled "Microwave Safe". If they are not labeled, test them to make sure they can be used safely. Plastic — Use only if labeled "Microwave Safe". Other plastics can melt. NOT RECOMMENDED Glass jars and bottles —... -
Page 9: Control Panel
CONTROL PANEL DISPLAY Time, power, and indicators are displayed. AUTO COOK MENUS Instant settings to cook popular foods. NUMBER BUTTONS (0-9) Use to set time, food weight or servings. But use number buttons from 1 to 6 to set express cooking programs. -
Page 10: Operating Instructions
OPERATING INSTRUCTIONS When the oven is plugged in, a beep will sound and the display will show "ENTER", "CLOCK" and "TIME". You can press the number buttons to set the clock time, then press CLOCK button to confirm. If you do not want to set the clock time, press RESET button directly to enter next operation. -
Page 11: Speed Defrost
Press the POWER button repeatedly to select power level: Press POWER Power (Display) Press POWER Power (Display) Once 100% (100) 7 times 40% (40) Twice 90% (90) 8 times 30% (30) 3 times 80% (80) 9 times 20% (20) 4 times 70% (70) 10 times 10% (10) -
Page 12: Cook By Weight
.22 to .27 .79 to .84 .28 to .34 .85 to .90 .35 to .40 .91 to .97 .41 to .46 above .97 go to next even .47 to .53 OOK BY WEIGHT Press the COOK BY WEIGHT button once. Use the number button (1~3) to set a food code. -
Page 13: Child Lock
B. Two-stage microwave cooking programs: Some recipes require different stages of cooking at different temperatures. Input the first microwave cooking program. Do not press the START/STOP button. Press the COOK button once. Input the second stage microwave cooking program. Press the START/STOP button to start. HILD LOCK The safety lock prevents unsupervised operation by children. -
Page 14: Auto Cook Menus
AUTO COOK MENUS For the following food or cooking mode, it is not necessary to program the cooking power and time. It is sufficient to indicate the type of food that you wish to cook as well as the weight or servings of the food. For small portions, simply press the applicable button and start. -
Page 15: Cleaning And Care
CLEANING AND CARE 1. Turn off the oven and unplug the power cord from the wall when cleaning. 2. Keep the inside of the oven clean. When food splatters or spilled liquids stick to oven walls, wipe with a damp cloth. Mild detergents may be used if the oven gets very dirty. -
Page 16: Limited Warranty
LIMITED WARRANTY 90- DAY LIMITED WARRANTY Within the 48 contiguous United States, for 90 days from the date of purchase, when this appliance is operated and maintained according to instructions attached to or furnished with the product, warrantor will pay for factory-specified parts and repair labor to correct defects in materials or workmanship.


Need help?
Do you have a question about the SM903BSA1 and is the answer not in the manual?
Questions and answers