Table of Contents
Advertisement
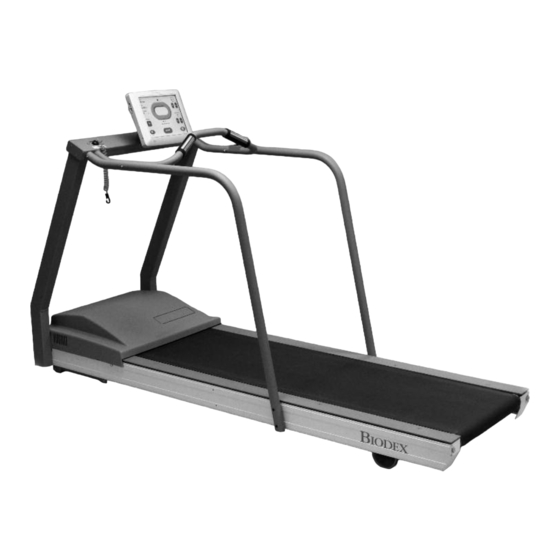
RTM 600 REHABILITATION TREADMILL
APPLICATION/OPERATION MANUAL
950-420
950-421
950-422
950-423
950-426
950-427
B
IODEX
Biodex Medical Systems, Inc.
20 Ramsay Road, Shirley, New Y ork, 11967-4704, Tel: 800-224-6339 (Int'l 631-924-9000), Fax: 631-924-9338, Email: info@biodex.com, www.biodex.com
FN: 11-086 3/11
Advertisement
Table of Contents

Subscribe to Our Youtube Channel
Related Manuals for biodex rtm 600


Summary of Contents for biodex rtm 600
- Page 1 RTM 600 REHABILITATION TREADMILL APPLICATION/OPERATION MANUAL 950-420 950-421 950-422 950-423 950-426 950-427 IODEX Biodex Medical Systems, Inc. 20 Ramsay Road, Shirley, New Y ork, 11967-4704, Tel: 800-224-6339 (Int’l 631-924-9000), Fax: 631-924-9338, Email: info@biodex.com, www.biodex.com FN: 11-086 3/11...
- Page 2 RTM 600 This manual covers installation and operation procedures for the following products: 950-420 Treadmill, RTM600, 115 VAC 950-421 Treadmill, RTM600, 230 VAC 950-422 Treadmill, RTM600, 115 VAC, with Extended Handrails 950-423 Treadmill, RTM600, 230 VAC, with Extended Handrails 950-426...
-
Page 3: Table Of Contents
• Manual Mode Exercise Track/Numeric Display Parameters ..........5-2 profIle operatIon ........................6-1 • Choosing a Pre-Defined Exercise Profile ..................6-1 • Designing a Custom Exercise Profile ..................6-3 rtM 600 utIlItIes ........................7-1 • Configuration ..........................7-1 • System Maintenance ........................7-3 • Speed and Elevation Calibration ....................7-3 MaIntenance ..........................8-1... -
Page 4: Introduction
1. INTRODUCTION The RTM 600 is the only treadmill to offer a true zero starting speed, 1/10 mph speed increments over a range of 0-10 mph, plus powered incline and decline in both forward and reverse direc- tions. Extremely versatile, it’s perfect for exercise with acute post-operative, neuro, pediatric, car- diopulmonary, respiratory, seniors and orthopedic/sports medicine patients in need of strength- ening and aerobic conditioning. -
Page 5: Safety Considerations For General Use
Always inform the patient immediately prior to increasing or decreasing speed or eleva- tion. 8. If reversing belt direction, bring the RTM 600 to a complete stop and inform patient that the belt will begin moving in the opposite direction. -
Page 6: Setup
(See Figure 3.1.) A Safety Lanyard is provided. The RTM 600 will not operate unless the lanyard is attached. Attach the Safety Lanyard at the left corner of the top cross bar supporting the Display panel. The round end of the Safety Lanyard attaches to the unit via a Velcro®... -
Page 7: Handrail Installation (Optional)
(See Figures 3.2 – 3.4.) Figure 3.2. Figure 3.3. Figure 3.4. The Biodex RTM 600 comes with a sturdy support bar installed (Figure 3.2). Optional Extended (Figure 3.3) and Geriatric/Pediatric handrails (Figure 3.4) are also available. SET-UP — 3-2 —... - Page 8 CONTENTS The Biodex RTM 600 comes with a sturdy support bar, but optional Extended and Geriatric/Pediatric handrails are also available. Both optional handrails are installed as follows: NOTE: Do not fully tighten any screws until all the screws and hardware have been positioned and par- tially secured.
-
Page 9: Quick Start Operation
Figure 4.1. The Quick Start feature allows the user to begin the exercise session with minimal input. QuIck start operatIon (See Figure 4.1.) Although the RTM 600 offers advanced programming capability, it also features a "Quick Start" function that allows the user to immediately begin exercise on the system with 1/4-mile scaled track views. -
Page 10: Quick Start Track/Numeric Display Parameters
CONTENTS QuIck start track / nuMerIc dIsplay paraMeters Users can choose from a Quick Start Exercise Track or Numeric display during Quick Start exer- cise sessions. The following parameters are displayed for both choices. NOTE: To toggle between displayed parameters (i.e., to change measurement units for calories, pace or dis- tance) touch the yellow dot next to each parameter heading. -
Page 11: Manual Operation
5. MANUAL OPERATION Figure 5.1. The RTM 600 Setup Options screen allows entry of patient-specific information and parameters. Manual operatIon (See Figure 5.1.) Manual Operation is easy with the Biodex 600 RTM. Like the Quick Start function, Manual Start allows the user to begin exercising quickly. Rather than use default settings, however, this mode of operation prompts the clinician to enter the patient’s body weight, select the treadbelt direction,... -
Page 12: Manual Mode Exercise Track/Numeric Display Parameters
CONTENTS When all parameters are entered/selected, press <Start> on the display to activate the tread- belt and begin the exercise session. The treadbelt will ramp up to .1 mph. Use the < > and <M> arrows on the Exercise Track or Numeric Display to adjust the speed setting to the desired value. - Page 13 CONTENTS Figure 5.2. The Exercise Track display. Figure 5.3. The Numeric display. — 5-3 — MANUAL OPERATION...
-
Page 14: Profile Operation
The treadmill will also automatically rise or lower to the required elevation. The RTM 600 will automatically beep to signal the end of each profile segment and then pro- ceed to match the required speed and elevation for the next segment. If necessary, the < >... - Page 15 CONTENTS Figure 6.1. The Select Profile screen allows the user to choose from five pre-defined profiles. Figure 6.2. At the Profile Setup Options screen, users can enter values for time, body weight and maximum elevation. PROFILE OPERATION — 6-2 —...
-
Page 16: Designing A Custom Exercise Profile
(See Figure 6.4.) To design a custom exercise profile: At the RTM 600 Opening Menu touch <Profile>. The Select Profile Menu should now be dis- played Touch option six, <Custom>. The Custom Profiles screen should now be displayed. - Page 17 CONTENTS Figure 6.4. At the Editing Profile screen, clinicians enter values for speed, elevation and time for each of up to ten stages for any profile. PROFILE OPERATION — 6-4 —...
-
Page 18: Rtm 600 Utilities
Utilities Menu. The Utilities Menu allows users to access the Configuration and System Maintenance (not shown) screens. The Utilities Menu also displays technical information about the RTM 600, firmware ver- sion, and cumulative hours of use. To access the Utilities Menu, touch <Utilities> on the Main. The Utilities Menu should now be dis- played. - Page 19 Set Date/Time: Touch <Set Date/Time> to change the system time or date. Touch to highlight the value to change, then use the < >or < > icons to increase or decrease the value as desired. Touch <OK> to return continue and return to the Configuration screen. RTM 600 UTILITIES — 7-2 —...
- Page 20 "warm up" prior to making any adjustments for belt creep. • Incline Range: The RTM 600 comes with a choice of 0 to 15 or –3 to 12 degrees of incline. Touch the displayed value to show both options and then touch the desired setting to select.
-
Page 22: Maintenance
8. MAINTENANCE Your Biodex RTM 600 should provide trouble-free operation as long as the following maintenance procedures are performed. To verify hours of operation, simply touch <Utilities> button (see Figure 8.1). At the bottom of screen, hours of use will be indicated (see Figure 8.2). Be sure to adhere to the hours of usage guidelines in Figure 8.3. -
Page 23: Daily Maintenance
Quarterly MaIntenance lubricate treadbelt and slider deck The Biodex Lubricant Kit is designed to reduce friction between the treadbelt and the slider deck. It is required for all institutional treadmills. Proper and timely application of the lubricant will prevent premature failures due to excessive wear and load. Items affected by inadequate lubrica- tion are the treadbelt, slider deck, motor, and motor controller. -
Page 24: Annually Or Every 1,000 Hours
Using the large syringe provided, squirt one-half tube of the lubricant underneath the center of the treadbelt. Walk 10 steps on the RTM 600 at a speed of 1.0 mph. This will moisten an 8” track underneath the center of the entire treadbelt. - Page 25 CAUTION: Before testing treadbelt tension as described below, turn the RTM 600 OFF and unplug the system. Moving parts on the RTM 600 can cause serious injury. Do not attempt to determine treadbelt tension while the belt is moving.
- Page 26 If belt hesitates during heel strikes, additional tightening is required. To check over tight- ening, set RTM 600 to .5 mph and, while holding rail, resist until belt stops. If drive roller continues to rotate with the belt stopped, further adjustment is not necessary. If drive roller stops when belt is stopped, belt is too tight.
-
Page 28: Troubleshooting
NOTE: The above faults indicate an issue with your treadmill. For fault 64-Safety Lanyard Removed, verify lanyard is still attached in its proper location. For all other faults, please contact Biodex Support Services department and provide the fault code. You will be instructed on how to proceed. -
Page 30: Electromagnetic Compatability
EN 60601-1-2 when used with the Gait Trainer III Treadmill. cable description part no. cable length USB Printer Cable Biodex # C12086 15ft Table 1.2 Gait Trainer III Treadmill cable — 10-1 — ELECTROMAGNETIC COMPATIBILITY... - Page 31 CONTENTS declaration of conformity emissions Manufacturer’s declaration electromagnetic emissions The Gait Trainer III Treadmill is intended for use in the electromagnetic environment specified below. The customer or the user of the Gait Trainer III Treadmill should assure that it is used in such an environment emission test compliance...
- Page 32 CONTENTS Continued from previous page Immunity test Iec 60601-1-2 Iec 60601-1-2 electromagnetic test level compliance level environment – guidance Voltage dips, short < 5% UT (> 95% of dip < 5% UT (> 95% of dip Mains power quality should interruptions and in UT for 1/2 cycle) in UT) for 1/2 cycle...
- Page 33 CONTENTS NOTE 1: UT is the a.c. mains voltage prior to application of the test level. NOTE 2: At 80 MHz and 800 MHz, the higher frequency range applies. NOTE 3: These guidelines may not apply in all situations. Electromagnetic propagation is affected by absorp- tion and reflec¬tions from structures, objects and people Field strength from mixed transmitters, such as base stations for radio telephones and land mobile radios, amateur radio, AM or FM broadcast and TV broadcast cannot be predicted theoretically with...
-
Page 34: Specifications
11. SPECIFICATIONS dimensions: 86" l x 27" w (218 x 69 cm) running area: 64" l x 20" w (160 x 51 cm) Motor: 2 HP with 4Q-Pulse Width Modulation Control speed range: forward: 0-10 mph (0-16.9 km/h) reverse: 0-3 mph (0-4.8 km/h) in .1 mph (.16 km/h) increments elevation: 0-15% Grade or -3 to 12% Grade (Optional for RTM600 Only) heart rate Monitoring: Polar Telemetry (Chest Strap) and contact hand grips (RTM600 Only) -
Page 35: References And Bibliography
BARBEAU, H, et al. WALKING AFTER SPINAL CORD INJURY: EVALUATION, TREATMENT, AND FUNCTIONAL RECOVERY Arch Phys Med Rehabili (80) 225-235, February 1999 Biodex #91-132 BEHRMAN, AL, et al. LOCOMOTOR TRAINING AFTER HUMAN SPINAL CORD INJURY: A SERIES OF CASE STUDIES Physical Therapy / Vol. 80 (7):688-700 / July 2000 Biodex #91-174 BOND, JM, et al. - Page 36 DEFICT AND CHANGE IN GAIT VELOCITY DURING REHABILITATION AFTER STROKE Arch Phys Med Rehabil, Vol. 77:1074-1082 / Oct 1996 Biodex #91-142 PREDICTION OF GAIT VELOCITY IN AMBULATORY STROKE PATIENTS DURING REHA- BILITATION Arch Phys Med Rehabil, Vol. 80:415-420 / April 1999 Biodex #92-215 HESSE, S, et al.
- Page 37 STRATEGIES FOR IMPROVING MOTOR CONTROL Rehabilitation of the Head-Injured Adult – Chpt. 22: 313-334 Biodex #91-135 USING THE BIODEX UNWEIGHING SYSTEM, BALANCE SYSTEM AND GAIT TRAINER IN AN INTEGRATED REHABILITATION PROGRAM Abstract, May 2001 Biodex #92-217 NIAM, S, et al.
- Page 38 SCHINDL, MR, et al. TREADMILL TRAINING WITH PARTIAL BODY WEIGHT SUPPORT IN NONAMBULATORY PATIENTS WITH CEREBRAL PALSY Arch Phys Med Rehabil, Vol 81:301-306, March 2000 Biodex #91-181 SEKIYA, N, et al. OPTIMAL WALKING INT ERMS OF VARIABILITY IN STEP LENGTH...
- Page 39 CONTENTS Phys Ther 70(9): 549-558, discussion 558-560 / Sept 1990 Biodex #91-160 WHITTLE, MW GAIT ANALYSIS – AN INTRODUCTION (SECOND EDITION) ISBN 0 7506 2222 9 Butterworth-Heineann / Linacre House / Jordan Hill, Oxford OX2 8DP div. of Reed Educational & Professional Ppublishing Ltd.
-
Page 40: Assembly Drawings And Schematics
13. ASSEMBLY DRAWINGS AND SCHEMATICS — 13-1 — ASSEMBLY DRAWINGS AND SCHEMATICS... - Page 41 CONTENTS ASSEMBLY DRAWINGS AND SCHEMATICS — 13-2 —...
- Page 42 CONTENTS — 13-3 — ASSEMBLY DRAWINGS AND SCHEMATICS...
- Page 43 CONTENTS ASSEMBLY DRAWINGS AND SCHEMATICS — 13-4 —...
- Page 44 CONTENTS — 13-5 — ASSEMBLY DRAWINGS AND SCHEMATICS...
- Page 45 Certified Quality Management System IODEX Biodex Medical Systems, Inc. 20 Ramsay Road, Shirley, New Y ork, 11967-4704, Tel: 800-224-6339 (Int’l 631-924-9000), Fax: 631-924-9338, Email: info@biodex.com, www.biodex.com...
Need help?
Do you have a question about the rtm 600 and is the answer not in the manual?
Questions and answers