
Related Manuals for Avision HF-1303S


Summary of Contents for Avision HF-1303S
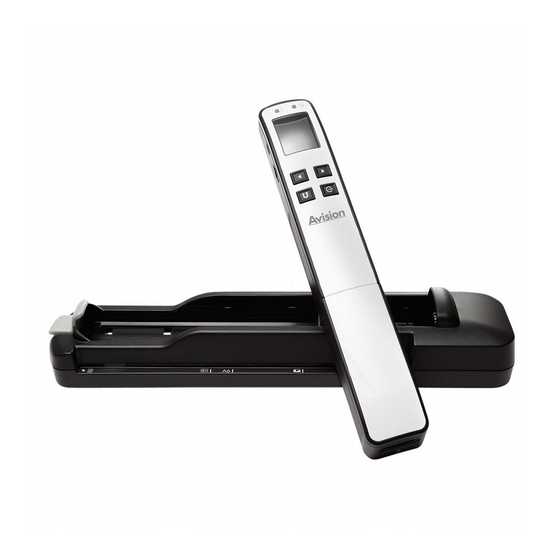
- Page 1 Hand-Held Scanner User’s Manual Regulatory model: HF-1303S Avision Inc. manual-en-250-0793-E-miwandwifi-v200...
- Page 2 Warranty The information contained in this document is subject to change without notice. Avision makes no warranty of any kind with regard to this material, including, but not limited to, the implied warranties of fitness for a particular purpose. Avision shall not be liable for errors contained herein or for incidental or consequential damages in connection with the furnishing, performance, or use of this material.
- Page 3 User’s Manual FCC Statement: This equipment has been tested and found to comply with the limits for a Class B digital device, pursuant to Part 15 of the FCC Rules. These limits are designed to provide reasonable protection against harmful interference in a residential installation. This equipment generates, uses and can radiate radio frequency energy and, if not installed and used in accordance with the instructions, may cause harmful interference to radio communications.
- Page 4 R&TTE Directive 1999/5/EC CE compliance of this product is valid if powered with the correct CE-marked AC adapter provided by Avision. This product satisfies the Class B limits of EN55022, EN55024, safety requirements of EN 60950 and ROHS requirements of EN50581.
- Page 5 User’s Manual Warning and Precautions of the lithium-ion battery Warning: Danger warning to prevent the possibility of the battery from leaking, heating, explosion, please observe the following precautions: • Don’t immerse the battery in water and seawater. Please put it in cool and dry environment if no using.
- Page 6 Caution: • Risk of explosion if battery is replaced by an incorrect type. Dispose the battery according to local regulations. • Never place batteries or devices on or in heating devices, such as microwave ovens, stoves, or radiators. Batteries may explode when overheated or its performance will be degenerate and its service life will be decreased.
-
Page 7: Table Of Contents
User’s Manual Table of Contents Overview................1-1 Introduction ..................1-1 Package Contents................1-1 Top View..................1-3 Front View..................1-4 Rear View ..................1-4 Bottom View..................1-5 Front View with Feeder Dock..............1-6 Scanner Indicator Light ..............1-7 Installation ................ 2-1 Precautions ..................2-1 Remove Scanner from the Feeder Dock ..........2-1 Install the Batteries ................2-2 Charge the Batteries.................2-3 2.4.1... - Page 8 Access the scanned images through Wi-Fi ......4-1 Access the scanned image through Wi-Fi..........4-1 Use options under image thumbnails ..........4-3 Reset login settings................4-4 Exit the Wi-Fi Mode ................4-5 Maintenance ..............5-1 Calibrate the Scanner ............... 5-1 Clean the Scanner and Feeder Dock ...........
-
Page 9: Overview
User’s Manual Overview Introduction Congratulations on your purchase of the portable handheld scanner. With this scanner, you can scan and store your photos or documents directly to a micro SD card without any computer. Simply turn on the scanner, press the Power/Scan button to start and slide the scanner on the surface of your document and press the Power/Scan button again to stop. - Page 10 Additional package items for MiWand 2 Wi-Fi PRO: Feeder Dock Power Adapter Note: 1. Only use the power adapter WA-10H05 by APD/ADS-5FN-06 05005GPCU by HONR/Li-ion Battery NP45 made by APACK/CA NP45 made by City Bright included in the product. Using other power adapters may damage the machine and void the warranty. 2.
-
Page 11: Top View
User’s Manual Top View Item Name Description Wi-Fi indicator Indicates the Wi-Fi status. light Indicates the operating/warning status of the System indicator scanner. light LCD display Displays preview pictures and settings menus. Enters Menu screen from [Scan Ready] screen. Up arrow Navigate “backward”... -
Page 12: Front View
Front View Item Name Description Micro USB Used to plug the micro end of the USB cable to port connect to PC. Memory Used to insert a memory card. card slot Rear View Item Name Description Wi-Fi switch Turn on and off the Wi-Fi connection. Used to reset the Wi-Fi login information to Reset factory default setting. -
Page 13: Bottom View
User’s Manual Bottom View Name Description The rollers are sensors and should only be rolled in Sensor one direction. Do NOT roll back and forth while rollers scanning, except during calibration. While rolling scanner over a document, the optical Glass sensor in the glass reads and scans the image. -
Page 14: Front View With Feeder Dock
Front View with Feeder Dock Item Name Description Guide slide Slide the guide to fit your document size. Used to insert original into the feed slot to begin Feed slot scanning. Used to disengage the wand scanner from the Latch feeder dock. -
Page 15: Scanner Indicator Light
User’s Manual Scanner Indicator Light Wi-Fi Indicator Light System Indicator Light Wi-Fi Indicator Light Status Indication Device is not connected to scanner via Wi-Fi. Blinking blue every Wi-Fi ready to connect to your device. 3 seconds Blinking blue 1 Browsing or downloading photos. second/Fast System Indicator Light Status... -
Page 16: Installation
User’s Manual Installation 2.1 Precautions Keep the product out of direct sunlight. Direct exposure to the sun or excessive heat may cause damage to the unit. Do not install the product in a humid or dusty place. Place the product securely on an even, flat surface. Tilted or uneven surfaces may cause mechanical or paper-feeding problems. -
Page 17: Install The Batteries
2.3 Install the Batteries Push and remove the battery cover on the scanner. Load the battery into the battery container. Make sure the battery is loaded with the correct polarity. Note the copper strips on the battery should be touching the copper strips on the device inside the battery container. -
Page 18: Charge The Batteries
User’s Manual 2.4 Charge the Batteries There are two methods to charge the batteries, a. Through the USB cable to the computer. b. Through the USB power adapter to the electric outlet. (Available for MiWand 2 Wi-Fi PRO only!) 2.4.1 Via the USB cable Turn off the scanner. -
Page 19: Via The Power Adapter
2.4.2 Via the power adapter Turn off the scanner. Insert the scanner in the feeder dock. Insert the small end of the power adapter to the feeder dock and the other end to a power outlet. Important: Do not turn on the scanner power when charging the battery. For first-time use, please charge the battery for at least 2 hours. -
Page 20: Install A Microsd Card
User’s Manual 2.5 Install a microSD Card The scanner’s built-in storage disk has approximately 128MB of space that can be used to store scanned images. You can install a microSD card to the SD slot of the scanner to expand your storage. Gently press in until the SD card is latched. micro SD card Note: The scanner only accepts micro SD card in FAT16 or FAT32 format. -
Page 21: Operation
User’s Manual Operation 3.1 Suitable and Unsuitable Original Types Suitable for Wand Scanning The scanner used as a wand scanner without the feeder dock is designed to obtain the best scanning results with photo and document up to 8.5” x 14” (216 x 356 mm) size. Suitable for Feeder Dock The scanner used with the feeder dock is designed to obtain the best scanning results with the following types of originals:... -
Page 22: Choose Your Desired Scan Settings
3.3 Choose Your Desired Scan Settings On the [Scan Ready] screen, press to enter the Menu mode. A list of menu options is displayed. The options include Resolution, Color Mode, Save Format, LCD Off, and so Press to focus on your desired option such as Save Format, and then press to select it. -
Page 23: Start Sheet-Fed Scanning With Feeder Dock
User’s Manual 3.5 Start Sheet-Fed Scanning with Feeder Dock By attaching the feeder dock into the scanner, the whole unit allows you to start auto scan as soon as your document is inserted to the feed slot. When the scan is finished, the image is saved in the memory card. - Page 24 Operation: Make sure the Wi-Fi connection is turned off. Press to turn on the scanner. Refer to the section [Customize Your Scan Settings] to select your desired scan settings. Insert a page FACE UP and align it to the left edge of the feeding slot. The scan is automatically started when your document is fed into the feeding slot.
-
Page 25: Preview Scanned Images On The Lcd Screen
User’s Manual 3.6 Preview Scanned Images on the LCD Screen You can quickly and easily preview your JPEG images on the LCD screen immediately after a scan, or at any other time. You can also view all images individually or as a slideshow. 3.6.1 Set Preview Mode By default, the Preview mode is on allowing you to view the scanned images for 2 seconds immediately after scanning (available for JPEG file format only). -
Page 26: View Or Download The Scanned Images (Windows)
View Scanned JPEG images Individually With the screen displayed, press to enter the Display mode. The slideshow automatically begins and displays the images in the alphanumeric order they are stored on the SD card. Press to view previous or next image. Press to exit the Display mode and return to the Scan Ready screen. -
Page 27: Computer System Requirements For Usb Connection
User’s Manual Each scanned image is given a file name with the prefix IMG_ followed by a 4-digit sequential number in the order the images are stored. For example, IMG_0001.jpg, IMG_0002.jpg, IMG_0001.pdf, IMG_0002.pdf, etc. JPG files are stored in a sub folder titled DCIM\100PHOTO. The folder stores 9999 photo files, and then automatically creates another sub folder titled 101PHOTO, and so on to 199PHOTO. -
Page 28: View Or Download Images With Ipad
3.8 View or Download Images with iPad Plug the iPad Camera Connector(not included)to iPad dock connector. Plug the micro USB connector of the supplied USB cable to the Micro USB port of your scanner and plug the USB connector of the supplied USB cable to iPad Camera Connector. The scanned images in the micro SD card of your scanner will be displayed in iPad in 3 seconds. -
Page 29: Customize Your Scan Settings
User’s Manual 3.10 Customize Your Scan Settings You can customize scanner settings through the Menu screen to fit different document types. 3.10.1 Resolution The scan resolution is measured in dpi (dots per inch). The higher the resolution, the more details the scanned image will be displayed. However, a higher resolution may require more disk space stored in the SD card. -
Page 30: Save Format
3.10.3 Save Format The scanner offers two types of file formats for your scanned image. JPEG (default, fits for photos) and PDF (fits for text document). Follow these steps to select your desired file format: With the screen displayed, press to enter the Menu mode. -
Page 31: Power Saving
User’s Manual 3.10.5 Power Saving To conserve power, the scanner automatically shuts off after left idle for a specified time (90 seconds, 3 minutes, or 5 minutes). Follow these steps to change the time setting: With the screen displayed, press to enter the Menu mode. -
Page 32: Anti-Mirror (Wand Scans Only)
3.10.6 Anti-mirror (wand scans only) When the [Anti-mirror] feature is turned on (default), the scanner allows you to scan an original either from top-to-bottom or from bottom-to-top. In either way, you can obtain a correct scanned image. (The scanner automatically detects your scanning direction and if you scan your original from bottom-to-top, the scanned image will be automatically flipped and rotated upside-down.) When [Anti-mirror] is turned off, if you scan your original from bottom-to-top, your scanned image will be upside-down and mirrored (the right side and left... -
Page 33: Card Format
User’s Manual 3.10.7 Card Format Warning !: If you reformat your memory card, all existing files on the card will be deleted. To format your SD card: With the screen displayed, press to enter the Menu mode. Press to scroll to Card Format, and then press to select it. -
Page 34: Auto-Crop (Sheet-Fed Scan Only)
3.10.8 Auto-crop (sheet-fed scan only) When using the feeder dock, the whole unit has a built-in cropping function to capture an image according to the actual size of your original as illustrated below. *This feature is available when using sheet-fed scan with the feeder dock. Original/Auto-crop on (default) Auto-crop off Depending on the shape and size of your original, you may want to perform additional... -
Page 35: Language
User’s Manual 3.10.10 Language The scanner offers multi-lingual text for LCD screen. Choice includes English, German, French, Dutch, Italian, Spanish, Chinese Traditional, Chinese Simplified, Japanese, Korean, and so on. However, the availability of the languages varies based on your area. Follow these steps to choose your desired language: With the screen displayed, press... -
Page 36: About
3.10.12 About The About option lists the current Firmware and Calibration versions. You may need this information if you contact our Customer Support. Follow these steps to view the About information: With the screen displayed, press to enter the Menu mode. Press to scroll to About, and then press to select it. -
Page 37: Access The Scanned Images Through Wi-Fi
Wi-Fi settings to select the scanner’s network ID “Avision-XXXX” [last four digits of Access Point’s MAC address]”. PC users: Go to the Wi-Fi Network icon and select the network ID (Avision-XXXX). No password is required; wait for the connected status confirmation. - Page 38 Make sure you are connected to only one IP interface (either Wi-Fi or Ethernet port). The Client IP would be 10.10.100.x range. iPhone & iPad users: Go to Settings→Wi-Fi → select the network ID (Avision- XXXX). No password is required; wait for the check mark to confirm the connected status.
-
Page 39: Use Options Under Image Thumbnails
Tablets & Phones: The files are automatically downloaded to your Photo Gallery into a folder titled Download. iPhone/iPad Devices: Open Safari Browser, the Avision PhotoView page will be displayed. Select the photo(s) to open. A new browser will appear with selected photo. -
Page 40: Reset Login Settings
Android Devices: 1. Open a Browser, the Avision PhotoView page will be displayed. 2. Select the photo(s) or document(s). 3. Select the download icon ( 4. Document(s) or image(s) selected will begin downloading. 5. Document(s) or image(s) can be found in your gallery. -
Page 41: Exit The Wi-Fi Mode
User’s Manual 4.4 Exit the Wi-Fi Mode To exit Wi-Fi mode, simply slide the Wi-Fi button to the off position or shut off the scanner. When Wi-Fi mode is on, the scanner does not time-out and automatically turns off like it does normally. -
Page 42: Maintenance
User’s Manual Maintenance 5.1 Calibrate the Scanner Calibrate only if the scanned image looks fuzzy, the color looks abnormal (e.g., darker than normal), after more than 8,000 scanned, or the scanner has been stored without use for a long time. The calibration process resets the Contact Image Sensor to resume its color and sharpness precision. -
Page 43: Clean The Scanner And Feeder Dock
During calibration, move the scanner only in the white area. Warning: Do not interrupt the calibration sequence or try to shut off the device while it is calibrating. If you stop the calibration before it has completed, a calibration error may occur. - Page 44 User’s Manual Clean the feeder dock: Remove the scanner from the feeder dock. Wipe the rollers with the included cleaning cloth. Wipe the feeder dock with a dry and clean lint-free cloth. Rollers Note: Adding some isopropyl alcohol (95%) on the cleaning cloth is more efficient when cleaning the rollers.
-
Page 45: Troubleshooting
User’s Manual Troubleshooting Error Messages If there is error during scanning, the LED light will be flashing in red color and error message will be displayed. Refer to the following table to clear the error conditions. Error Message Root Cause/Code Purpose How to restore 1. -
Page 46: Frequently Asked Questions And Answers
Frequently asked questions and answers Q: Why does not my scanner turn on? A: 1. The scanner may not be engaged with the feeder dock correctly. 2. The batteries may not enough power or may not be inserted correctly. Q: Why doesn’t my scanner scan? A:... - Page 47 User’s Manual Q: How can I tell if the scanner is scanning at 300 dpi, 600 dpi or 1200 dpi? A: The scan indicator light indicates the selected resolution: Green= 300 dpi, Orange=600 dpi, Orange flashing=1200 dpi (1200 dpi is only available for the wand scanner –...
- Page 48 Wi-Fi network when you are finished with your scanner connection. Q: My browser can’t access the Avision PhotoView window and the Avision PhotoView slideshow window? A: It is probably the proxy settings has been enabled in your device’s browser or the URL address of your default page contains “https”.
-
Page 49: Technical Service
Windows Explorer. Technical Service Before contact Avision, please prepare the following information: Scanner serial & revision number (located on the bottom of the scanner); Hardware configuration (e.g., your host CPU type, RAM size, free disk space, display card, interface card);... - Page 50 China Area Avision(Suzhou) Co., Ltd. No.9, Suhong West Road, Suzhou Industrial Park, Jiangsu Province, PRC 215021 TEL:+86-512-62565888 Toll Free:+86-400-185-8566 FAX:+86-512-62560115 E-MAIL:shop@avision.com.cn Web Site:http://www.avision.com Europe Area Avision Europe GmbH Bischofstr. 101 D-47809 Krefeld Germany TEL: +49-2151-56981-40 FAX: +49-2151-56981-42 E-MAIL: info@avision-europe.com Web Site: http://www.avision.de...
-
Page 51: Specifications
User’s Manual Specifications Specifications are subject to change without notice. Item Description Regulatory model number HF-1303S Image Technology Contact Image Sensor (CIS) Scanner Display 1.8” TFT LCD Memory Built-in 128MB NAND Flash Max. Document Size 8.5” x 14” (216 x 356 mm) - Page 52 Standard IEEE 802.11 b/g/n standards compliant Wireless LAN 1T1R Mode Frequency Range 2.400 ~ 2.4835GHz ( subject to local regulations) 802.11n: 20MHz/40MHz Number of USA, Canada (FCC):11 channels (2.412GHz~2.462GHz) Selectable 802.1 Europe (CE): 13 channels (2.412GHz~2.472GHz) Channels 1b/g: Japan (TELEC): 14 channels (2.412GHz~2.4835GHz) 802.11n: up to 150Mbps Data Rate 802.11b: 1, 2, 5,5, 11Mbps...
Need help?
Do you have a question about the HF-1303S and is the answer not in the manual?
Questions and answers