Multitech MultiModem MTCBA-G-U-F4 User Manual
Usb wireless modem
Hide thumbs
Also See for MultiModem MTCBA-G-U-F4:
- Quick start manual (8 pages) ,
- User manual (51 pages)
Table of Contents
Advertisement
Quick Links
Download this manual
See also:
User Manual
Advertisement
Table of Contents

Related Manuals for Multitech MultiModem MTCBA-G-U-F4


Summary of Contents for Multitech MultiModem MTCBA-G-U-F4
- Page 1 ® MultiModem GPRS USB Wireless Modem MTCBA-G-U-F4 User Guide...
- Page 2 Copyright and Technical Support MultiModem® GPRS USB Wireless Modem User Guide Model MTCBA-G-U-F4 S000444D, Revision D Copyright This publication may not be reproduced, in whole or in part, without prior expressed written permission from Multi-Tech Systems, Inc. All rights reserved.
-
Page 3: Table Of Contents
Contents Contents Chapter 1 – Product Description and Specifications ..............5 Product Description ..........................5 Features ..............................5 Safety ................................ 6 General Safety .............................. 6 RF Interference Issues..........................6 Vehicle Safety ............................... 6 Maintaining the Modem ..........................7 Package Contents ........................... 7 SIM Chip ................................ - Page 4 Contents Band Options Overview ..........................27 Changing the GPRS Band ........................27 Determining the Phone Number for the Wireless Modem ..............27 Examples of Useful AT Commands ..................... 28 Verifying Signal Strength ........................... 28 Checking Network Registration and Roaming Status ................28 Checking the Modem’s Identity ........................
-
Page 5: Chapter 1 - Product Description And Specifications
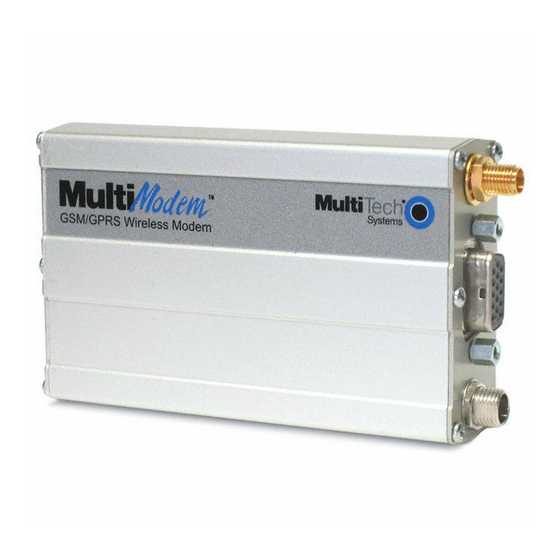
Chapter 1 – Product Description and Specifications Product Description The Multi-Tech MultiModem GPRS is an external data/fax/voice wireless modem with a USB interface. It supports mobile originated short message service (SMS) and mobile-terminated SMS. Designed for global use, it offers standards-based quad-band GSM/GPRS Class 10 performance. This ready-to-deploy, standalone modem allows developers to add wireless communication to products with a minimum of development time and expense. -
Page 6: Safety
Chapter 1 – Product Description and Specifications Safety General Safety The modem is designed for and intended to be used in fixed and mobile applications. “Fixed” means that the device is physically secured at one location and is not able to be easily moved to another location. -
Page 7: Maintaining The Modem
Chapter 1 – Product Description and Specifications Maintaining the Modem Treat your wireless MultiModem with care. The suggestions below will help you enjoy this product for many years. ● Do not expose the wireless MultiModem to any extreme environment where the temperature is above 50ºC or humidity is above 90% noncondensing. -
Page 8: General Specifications
Chapter 1 – Product Description and Specifications General Specifications General Specifications Mechanical Dimensions & Weight 4.3" L x 2.4" W x 0.94" H; 4.2 oz. (11 cm x 6.1 cm x 2.4 cm; 119 g) Connectors & Fasteners Antenna Connection type: SMA jack Interface Connector: USB Type B Phone Handset: Modular handset jack SIM receptacle: Standard 3V SIM receptacle... -
Page 9: Rf Specifications
Chapter 1 – Product Description and Specifications RF Specifications GSM 850 EGSM 900 GSM 1800 GSM 1900 Frequency RX 869 to 894 MHz 925 to 960 MHz 1805 to 1800 MHz 1930 to 1990 MHz Frequency TX 824 to 849 MHz 880 to 915 MHz 1710 to 1785 MHz 1850 to 1910 MHz... -
Page 10: Led Interface
Chapter 1 – Product Description and Specifications LED Interface Transmit Data. Lit when modem is transmitting data. Receive Data. Lit when modem is receiving data. Carrier Detect. Lit when data connection has been established. Line Status. Continuous “on” state indicates that the wireless modem is not registered on the network. Flashing state indicates registration on network. -
Page 11: Chapter 2 - Activation And Installation
However, before you can begin to use the modem, you must set up a cellular data account with your cellular network provider. Refer to Multi-Tech’s Cellular Activation website http://www.multitech.com/activation.go for information on activating your cellular modem. Phone Numbers for the Wireless Modem Every wireless modem has a unique phone number. -
Page 12: Connecting Phone Handset (Optional)
Chapter 2 – Activation and Installation Connecting Phone Handset (Optional) If you intend to use a phone handset, connect it to the MultiModem now. Attaching the Modem to a Flat Surface (Optional) To mount the wireless MultiModem: Obtain mounting screws (two are needed) that are appropriate for the surface on which you will mount the MultiModem. -
Page 13: Installing Modem Drivers
You must install the wireless MultiModem USB driver in your computer’s program directory. You can download the Windows USB drivers from the website: www.multitech.com/setup/product.go A complete set of drivers for each operating system is organized into Vista and XP with either 32-bit or 64-bit processor. - Page 14 Chapter 2 – Activation and Installation Click Locate and install driver software (recommended). A Windows installation wizard guides you through the process of installing the driver. On the next Wizard screen, click I don’t have the disc. Show me other options. Select Browse my computer for driver software (advanced).
- Page 15 Chapter 2 – Activation and Installation At the Browse for driver software on your computer wizard screen, click Browse. Browse to the Drivers folder on your computer where you stored the driver you downloaded. Then select one of the following: If installing on a 32-bit operating system, select the location of the Vista32 driver.
- Page 16 Chapter 2 – Activation and Installation Click Next. Windows can’t verify the publisher of this driver software dialog box opens. Select Install this driver software anyway. Multi-Tech Systems, Inc. MultiModem GPRS USB Wireless Modem User Guide...
- Page 17 Chapter 2 – Activation and Installation The Installing driver software… wizard screen appears. A window appears telling you that the software has been successfully installed. Click Close. Multi-Tech Systems, Inc. MultiModem GPRS USB Wireless Modem User Guide...
-
Page 18: Installing The Modem Driver
Chapter 2 – Activation and Installation Installing the Modem Driver To install the modem driver: The Found New Hardware – MultiTech GSM Modem window appears. Click I don’t have the disc. Show me other options. Click Next. Click Browse my computer for driver software (advanced). - Page 19 Chapter 2 – Activation and Installation Select Install this driver software anyway. The Installing driver software progress window appears. The software for this device has been successfully installed window appears. Windows has finished installing the driver software for this device: Multi-Tech Systems USB GSM_GPRS wireless Modem Click Close.
-
Page 20: Installing The Drivers In Windows Server 2008, Xp, 2003
Chapter 2 – Activation and Installation Installing the Drivers in Windows Server 2008, XP, 2003 This section describes how to install drivers for the operating systems Windows Server 2008, XP and 2003. You need to install both a USB driver and a modem driver. Installing the USB driver To install the USB driver: Connect the USB cable between the MultiModem and the PC. - Page 21 Chapter 2 – Activation and Installation The wizard screen Please choose your search and installation options opens. Ensure that only checkbox that is selected is Include this location in the search. Browse to the Drivers folder on your computer where you stored the driver you downloaded. Then select one of the following: If installing on a 32-bit operating system, select the location of the Vista32 driver.
- Page 22 Chapter 2 – Activation and Installation Please wait while the wizard searches for the GSM Modem. This window only appears briefly. Please select the best match for your hardware for the list below. Click Next. A Windows Logo Testing window appears. Multi-Tech Systems, Inc.
- Page 23 Chapter 2 – Activation and Installation At the Completing the Found New Hardware Wizard – GSM Device window. Click Finish. Installation of the USB driver is now complete. Installing the Modem Driver If the Welcome to the Found New Hardware Wizard window asking – Can Windows connect to Windows update to search for software? appears again.
- Page 24 Chapter 2 – Activation and Installation The Found New Hardware Wizard window appears for the MultiTech GSM Modem. Select the Install from a list or specific location (Advanced) radio button. Then click Next. The Please choose your search and installation options window appears.
- Page 25 Chapter 2 – Activation and Installation Browse to the Drivers folder on your computer where you stored the driver you downloaded. Then select one of the following: If installing on a 32-bit operating system, select the location of the Vista32 driver. ●...
- Page 26 Chapter 2 – Activation and Installation The final Windows Logo Testing window may appear depending on operating system settings. This window pertains to the creation of a modem entity in the operating system that accommodates the wireless USB MultiModem. Click Continue Anyway. The Completing the Found New Hardware Wizard window appears. Click Finish.
-
Page 27: Chapter 3 - Using Your Wireless Modem
Chapter 3 – Using Your Wireless Modem Changing the GPRS Band All MultiModem GPRS-F4 wireless modems support quad band (850/1900/900/1800 MHz). In reality, they operate like dual, dual-band modems. In other words, they can be configured for 850/1900 or 900/1800 MHz. They do not automatically seek the local area frequency. Band Options Overview The GPRS-F4 wireless modems can be ordered with a default band of 850/1900 MHz or 900/1800 MHz. -
Page 28: Examples Of Useful At Commands
Chapter 3 – Using Your Wireless Modem Examples of Useful AT Commands Using HyperTerminal In order to verify signal strength and roaming status, you must use a terminal application such as HyperTerminal. To open this program in Windows XP, go to Start > All Programs > Accessories > Communications >... -
Page 29: Establishing A Voice Call
Chapter 3 – Using Your Wireless Modem Establishing a Voice Call To establish a voice call: Enter PIN code, if your wireless provider requires one. a. Type AT+CPIN=1234 b. Responses include: OK (PIN Code accepted) +CME ERROR : 16 (Incorrect PIN Code) +CME ERROR : 3 (PIN already entered [with +CMEE : 1 mode]) Initiate a voice call. -
Page 30: Establishing A Circuit-Switched Data (Csd) Connection
Chapter 3 – Using Your Wireless Modem Establishing a Circuit-Switched Data (CSD) Connection A Circuit-Switched Data Connection (CDC) makes the wireless modem work similar to a regular analog modem. You must have CSD service in order to make a CSD call. Note: Your cellular provider charges airtime usage for these connections. -
Page 31: Using Short Message Services (Sms)
Chapter 3 – Using Your Wireless Modem Using Short Message Services (SMS) Sending a Short Message to a Specified Number Type AT+CMGS="8585551212" <press Enter> Then type your message: Please call me soon. <press ctrl Z> The modem may respond with +CMGS:<mr> OK Writing a Message to Memory You can store a message to send it at a later date. -
Page 32: Sms Examples
Chapter 3 – Using Your Wireless Modem 3 Delete all READ, SENT, and UNSENT messages. 4 Delete ALL messages. If you want to delete one message at a time, do not enter a value for n. The modem will respond OK. Note: The x represents an index location. - Page 33 Chapter 3 – Using Your Wireless Modem TEST1 at+cmgd=1 (delete message that is stored in location 1) Receive Example 2: Receive SMS message in text mode by directly routing the received message to the TE through the serial port using Phase 2: at+cmgf=1 (set to text mode) at+csms=0 (set to Phase 2) +CSMS: 1,1,1...
-
Page 34: Setting Up Internet Access
Chapter 3 – Using Your Wireless Modem Setting up Internet Access You can setup Internet access in Windows Dial-Up Networking (DUN) of the computer that the wireless modem is serving. Setup procedures vary according to the type of wireless service provider used. To access Dial-Up Networking on your PC, from the Start button, select Settings >... -
Page 35: Setting The Access Point Name (Apn)
Chapter 3 – Using Your Wireless Modem Setting the Access Point Name (APN) So that your GPRS wireless modem can connect to your provider’s network, you must tell the modem the Access Point Name (APN) to which it will connect. The APN is a server name that your account is setup on with your provider. -
Page 36: Creating Your Dial-Up Connection In Windows Vista, Xp, 2003, And 2000
Chapter 3 – Using Your Wireless Modem Creating Your Dial-Up Connection in Windows Vista, XP, 2003, and 2000 From the Start button, select Control Panel. In the Control Panel, double-click Network Connections. The Network Connections window opens. In the Network Tasks group, select Create a new connection. The New Connection Wizard opens. -
Page 37: Chapter 4 - Troubleshooting And Frequently Asked Questions
Chapter 4 – Troubleshooting and Frequently Asked Questions Troubleshooting Examples Before calling the Multi-Tech Technical Support, check the following connections: ● The right antenna is connected to the modem ● The serial cable connection is correct ● The power is connected correctly and the power lights on the modem are on ●... -
Page 38: Situation B: The Modem Always Returns «No Carrier» When Trying To Originate A Call
Chapter 4 – Troubleshooting and Frequently Asked Questions Situation B: The modem always returns «No carrier» when trying to originate a call Solutions for “no carrier” message If the modem Then ask … Action returns … no carrier Is the selected bearer type Type AT+CEER to view the extended error code (see (esp. -
Page 39: Frequently Asked Questions
Chapter 4 - Troubleshooting and Frequently Asked Questions Frequently Asked Questions Which providers can I use? ● Two major providers are T-Mobile and AT&T. Does this modem support High-Speed Circuit-Switched Data (HSCSD)? ● No, our GSM/GPRS modems do not support HSCSD. ●... - Page 40 AT&T = “0000” T-Mobile = “500” Here is an example of how to send an SMS message to an email account: AT+CMGS=”0000” > email@multitech.com My message goes here. <ctrl +Z> Multi-Tech Systems, Inc. MultiModem GPRS USB Wireless Modem User Guide...
-
Page 41: Appendix A - Environmental Information
Appendix A - Environmental Information Waste Electrical and Electronic Equipment (WEEE) The WEEE directive places an obligation on EU-based manufacturers, distributors, retailers and importers to take-back electronics products at the end of their useful life. A sister Directive, ROHS (Restriction of Hazardous Substances) complements the WEEE Directive by banning the presence of specific hazardous substances in the products at the design phase. -
Page 42: Restriction Of The Use Of Hazardous Substances (Rohs)
Appendix A - Environmental Information Substances of Very High Concern (SVHC): Per the candidate list of Substances of Very high Concern (SVHC) published October 28, 2008 we have reviewed these substances and certify the Multi-Tech Systems, Inc. products are compliant per the EU “REACH”... -
Page 43: China Rohs
Appendix A - Environmental Information China ROHS 依照中国标准的有毒有害物质信息 根据中华人民共和国信息产业部 (MII) 制定的电子信息产品 (EIP) 标准-中华人民共和国《电子信息产品污染控制管理办法》(第 39 号),也称作中国 RoHS,下表列出了 Multi-Tech Systems Inc. 产品中可能含有的有毒物质 (TS) 或有害物质 (HS) 的名称及含量水平方面的信息。 有害/有毒物质/元素 汞 铅 镉 六价铬 多溴联苯 多溴二苯醚 成分名称 (Hg) (CR6+) (PBDE) (PB) (CD) (PBB) 印刷电路板 电阻器 电容器...
Need help?
Do you have a question about the MultiModem MTCBA-G-U-F4 and is the answer not in the manual?
Questions and answers