Table of Contents
Advertisement
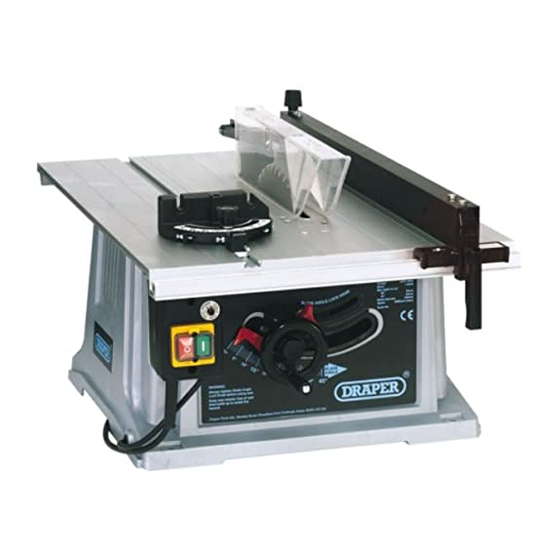
10" TABLE SAW
STOCK No.65839
PART No.BTS251
• INSTRUCTIONS •
IMPORTANT: PLEASE READ THESE INSTRUCTIONS CAREFULLY TO ENSURE THE
SAFE AND EFFECTIVE USE OF THIS TOOL.
04/2002
GENERAL INFORMATION
This manual has been compiled by Draper Tools and is an integrated part of the power tool equipment, which
should be kept with the machine.
This manual describes the purpose for which this tool has been designed and contains all the necessary
information to ensure its correct and safe use.We recommend that this manual is read before any operation of
the machine, before performing any kind of adjustment to the machine, and prior to any maintenance tasks. By
following all the general safety instructions contained in this manual, it will ensure both machine and operator
safety, together with longer life of the tool itself.
All photographs and drawings in this manual are supplied by Draper Tools to help illustrate the operation of the
machine.
Whilst every effort has been made to ensure accuracy of information contained in this manual, the Draper Tool
policy of continuous improvement determines the right to make modifications without prior warning.
Advertisement
Table of Contents

Related Manuals for Draper TABLE SAW


Summary of Contents for Draper TABLE SAW
-
Page 1: General Information
04/2002 GENERAL INFORMATION This manual has been compiled by Draper Tools and is an integrated part of the power tool equipment, which should be kept with the machine. This manual describes the purpose for which this tool has been designed and contains all the necessary information to ensure its correct and safe use.We recommend that this manual is read before any operation of... -
Page 2: Table Of Contents
Specification/Guarantee ................2 Power Supply ....................3 General Safety Instructions ................4 Additional Safety Instructions ............... 5 Getting to Know Your Table Saw ..............6 Assembly ....................7-8 Operation & Use ..................9-10 DECLARATION OF CONFORMITY Draper Tools Ltd. Hursley Road, Chandler’s Ford, Eastleigh, Hampshire. -
Page 3: Specification/Guarantee
This guarantee applies in lieu of any other guarantee expressed or implied and variations of its terms are not authorised. Your Draper guarantee is not effective unless you can produce upon request a dated receipt or invoice to verify your proof of purchase within the 12 month period. -
Page 4: Power Supply
(i.e. red). Fuse covers are available from your Draper Tools stockist. If the fitted plug is not suitable, it should be cut off and destroyed. *The end of the cable should now be suitably prepared and the correct type of plug fitted. -
Page 5: General Safety Instructions
IMPORTANT Draper Tools Limited recommends that this machine should not be modified or used for any application other than that for which it was designed. If you are unsure of its relative applications do not hesitate to contact us in writing and we will advise you. -
Page 6: Additional Safety Instructions
ADDITIONAL TABLE SAW SAFETY RULES WARNING 12. KICKBACKS - THEIR CAUSE. For your own safety, do not operate your saw until it is Kickbacks can cause serious injury. A kickback completely assembled and installed according to the occurs when a part of the workpiece binds instructions..and until you have read and understood... -
Page 7: Getting To Know Your Table Saw
GETTING TO KNOW YOUR TABLE SAW Fig.1 - FRONT VIEW ✗✌ ✖✌ ✕✌ ✚✌ ✕✕✌ ✙✌ ✕✔✌ BACK VIEW ✘✌ ✢✌ ✜✌ ✛✌ ✕✖✌ Fig.1. 1. Work Table 7. Dust Extraction Port 2. Blade 8. Rip Fence 3. Blade Guard 9. -
Page 8: Assembly
When set securely, tighten the bolts. This setting must be checked regularly. This table saw must be securely fastened to the proper stand (Draper Stock No.65840) or to another appropriate supporting surface. If choosing the Draper stand, refer to the... - Page 9 The mitre gauge is a guide. The gauge slides along the two grooves ✱✌ in the table. It should be checked against the blade using an engineers square (Draper Stock No.34065) to ensure greater accuracy. Loosen locking knob ✲✌ and using the ✲✌...
-
Page 10: Operation & Use
OPERATION & USE NOTE: Fig.7. ✶✌ ENSURE THE POWER IS SWITCHED OFF AND THE MACHINE UNPLUGGED. BLADE ADJUSTMENT (FIGS. 7, 8 & 9): HEIGHT: To move the blade up or down, turn handle ✵✌ clockwise or anticlockwise depending on requirements. The locking knob ✶✌ does not require loosening for this procedure (Fig.7). -
Page 11: Stock No
DUST EXTRACTION (FIG.12): Dust extraction is required when using this machine to reduce the amount of airborne dust particles. Connect the port to a suitable vacuum cleaner (Draper Stock No.64674). NOTE: When making any cuts, wear safety goggles, ear defenders and a dust mask. -
Page 12: Cutting Operations
CUTTING OPERATIONS There are two basic types of cuts: ripping and cross cutting. In general, cutting with the grain is ripping and cutting across the grain is cross cutting. However, with man-made materials this distinction is somewhat different to make. Therefore, cutting a piece of wood to different width is ripping and cutting across the short dimension is cross cutting. - Page 13 CUTTING OPERATIONS RIPPING (Fig.17): Fig.17. Secure the rip fence to the table (see Fig.4, page 8). Remove the mitre gauge. Raise the blade so it is 53mm high. Hold the work piece flat on the table and against the fence. Keep the work piece about 25mm from the blade.
- Page 14 ADJUSTING THE BLADE PARALLELISM Fig.23. (Fig.23): ✬✌ This can be quite a confined adjustment. If difficulty is encountered, have a qualified Draper ✮✌ repair agent carry out the work. Loosen ✬✌, ✭✌, ✮✌, ✯✌ and ✰✌ screws and ✭✌ nuts. Adjust the blade and remeasure once all the fixings have been secured.
-
Page 15: Optional Accessories
OPTIONAL ACCESSORIES PART NO.: ABTS1 STOCK NO.: 65840 DESCRIPTION: TABLE SAW STAND FOR BTS251 PART NO.: ABTS2 STOCK NO.: 65841 DESCRIPTION: EXTENSION WING (1) FOR BTS251 BLADES: Key. Diameter Stock. Part No. of Bore Reducing Type Finish Teeth Bushes Supplied 250mm (10") -
Page 16: Trouble Shooting
TROUBLE SHOOTING Trouble Probable Cause Remedy Saw will not start. 1. Saw not plugged in. 1. Plug in saw. 2. Fuse blown or circuit breaker 2. Replace fuse or reset circuit breaker. tripped. 3. Cable damaged. 3. Have cable replaced. Does not make accurate 1. - Page 17 NOTES - 16 -...
- Page 18 NOTES - 17 -...
- Page 19 NOTES - 18 -...
- Page 20 ©Published by Draper Tools Ltd. No part of this publication may be reproduced, stored in a retrieval system or transmitted in any form or by any means, electronic, mechanical photocopying, recording or otherwise without prior permission in writing from Draper Tools Ltd.
Need help?
Do you have a question about the TABLE SAW and is the answer not in the manual?
Questions and answers