Avocent AMX Series Installer/User Manual
Amx series
Hide thumbs
Also See for AMX Series:
- Brochure (10 pages) ,
- Installer/user manual (108 pages) ,
- Installer/user manual (236 pages)
Table of Contents
Advertisement
Advertisement
Table of Contents

Related Manuals for Avocent AMX Series


Summary of Contents for Avocent AMX Series
- Page 1 AMX™ Series Installer/User Guide...
- Page 2 INSTRUCTIONS This symbol is intended to alert the user to the presence of important operating and maintenance (servicing) instructions in the literature accompanying the appliance. DANGEROUS VOLTAGE This symbol is intended to alert the user to the presence of uninsulated dangerous voltage within the product’s enclosure that may be of sufficient magnitude to constitute a risk of electric shock to persons.
- Page 3 Avocent, the Avocent logo, AMX, AMWorks, OSCAR and The Power of Being There are trademarks or registered trademarks of Avocent Corporation or its affliates. All other marks are the property of their respective owners. © 2003 Avocent Corporation. All rights reserved.
- Page 4 USA Notification Warning: Changes or modifications to this unit not expressly approved by the party responsible for compliance could void the user's authority to operate the equipment. Note: This equipment has been tested and found to comply with the limits for a Class A digital device, pursuant to Part 15 of the FCC Rules.
-
Page 5: Table Of Contents
Table of Contents Chapter 1: Product Overview Features and Benefits ......3 Component Overview ......4 Safety Precautions . - Page 7 Product Overview Contents Features and Benefits ......3 Component Overview ......4 Safety Precautions .
-
Page 9: Chapter 1: Product Overview
Multiuser The AMX Series allows “matrix switching,” enabling multiple users to have simultaneous access to different servers and serial devices in the system. For example, an AMX system with four users accessing four different servers is a... -
Page 10: Component Overview
If two or more users need access to the same server or serial device, they can share access through the AMX Series units. Sharing enables multiple users to switch to the same server at the same time. All connected users can see the server’s video, but only one user can enter data at any given moment. -
Page 11: The Amx Switch
Chapter 1: Product Overview • Avocent matrix intelligent module(s) (AMIQ or AMIQ-SRL) • UTP cables The quantity and type of components you receive depends on the specific configuration you order. The AMX switch The AMX switch provides the framework for the AMX system. The AMX5000 allows eight users to connect to up to 32 computers and occupies only 1U of rack space. - Page 12 AMX Series Installer/User Guide AMX5010 Switch UTP Cables 64 Servers AMIQ Module AMX5110 User Station 16 Users Figure 1.2: Typical AMX Configuration The AMX intelligent module The AMIQ provides the primary interface between an attached device (KVM switch or PS/2, Sun or USB server) and the AMX system. It provides all Keep Alive, keyboard emulation, DDC (Digital Data Channel) and AMX support in a server-powered convenient module format.
-
Page 13: Safety Precautions
To avoid potentially fatal shock hazard and possible damage to equipment, please observe the following precautions: • Do not use a 2-wire extension cord in any Avocent product confi guration. • Test AC outlets at the server and monitor for proper polarity and grounding. - Page 14 AMX Series Installer/User Guide Rack mount safety considerations • Elevated Ambient Temperature: If installed in a closed rack assembly, the operation temperature of the rack environment may be greater than room ambient. Use care not to exceed the rated maximum ambient temperature of the unit.
- Page 15 Installation Contents Getting Started ......11 Installing an AMX System ....12 Installing a Tiered AMX System .
-
Page 17: Chapter 2: Installation
AMX Series Installer/User Guide • AMWorks software and user guide on CD • AMX Series Quick Install Guide Supplied with the AMX user station The following items are supplied with the AMX user station: • AMX5100, AMX5110 or AMX5120 user station •... -
Page 18: Installing An Amx System
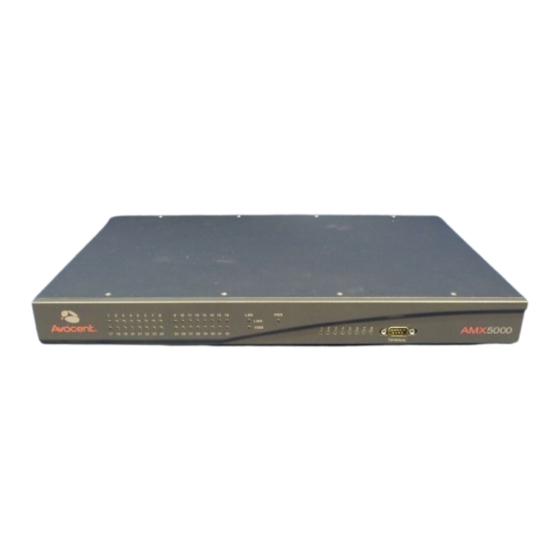
AMX Series Installer/User Guide Optionally you may need: • AMWorks software available on the included CD and through download from Avocent Installing an AMX System Figure 2.1 illustrates one possible configuration for your AMX switch. Follow the detailed set of procedures following Figure 2.1 to install the AMX system. - Page 19 Chapter 2: Installation Installing the AMX switch The AMX switch is the central hub of your AMX system. All users and computers are connected through it. Figure 2.2: AMX5000 Switch Figure 2.3: AMX5010 Switch Rack mounting your AMX switch You can either place your AMX switch on your rack shelf or rack mount your unit into an EIA standard rack.
- Page 20 AMX Series Installer/User Guide Figure 2.4: AMX5000 Rack Mounting Diagram Figure 2.5: AMX5010 Rack Mounting Diagram To install the rack mounting bracket: Remove the two side screws closest to the front from each side of your AMX switch. Line up the holes in the brackets with the holes on the sides of the AMX switch.
- Page 21 Chapter 2: Installation To install a new single AMX switch: Plug the supplied power cord into the back of the AMX switch and then into an appropriate power source. Connect a terminal or PC running terminal emulation software (such as ®...
- Page 22 Once the AMX switch is installed, you can begin attaching servers or serial devices to it. All are connected to the AMX through the use of AMIQ modules. For information on connecting other Avocent KVM switches to the AMX, see Installing a Tiered AMX System later in this chapter.
- Page 23 Chapter 2: Installation Connect one end of a UTP cable into the RJ-45 port on your AMIQ module. Route the cable to your AMX switch and connect the other end to one of the available RJ-45 server ports. When the attached computer is powered and a valid UTP connection is made to an AMX switch, the green light on the AMIQ will illuminate.
- Page 24 AMX Series Installer/User Guide Connecting users to the AMX Once all servers are connected, you can begin to connect users. Users are connected to the AMX system through the AMX user station. AC Power Connection to KVM Access AMX Switch Figure 2.8: AMX5100 User Station Rear Panel...
- Page 25 Chapter 2: Installation Locate the power cord that shipped with the user station. Plug it into the power socket on the rear of the unit. Plug the other end into an appropriate AC wall outlet. The two LEDs above the UTP port connectors on the AMX5110 and AMX5120 show the activity status of each port.
-
Page 26: Installing A Tiered Amx System
AMX Series Installer/User Guide Installing a Tiered AMX System Multiple KVM switches can be connected to provide access to additional servers. Figure 2.10 illustrates one possible configuration for your AMX. Follow the detailed set of procedures following Figure 2.10 to successfully install your tiered AMX system. -
Page 27: Configuring The Amx Database
3. Route a UTP cable from the AMIQ to the primary AMX switch and connect it to an available server port. NOTE: The AMX switch can be used with all Avocent KVM switches. Switching to a port with an attached KVM switch that is not an AMX switch requires the activation of the On-Screen Display (OSD) of that unit to continue the switch. - Page 28 AMX Series Installer/User Guide...
- Page 29 Basic Operations Contents Power Up and LEDs ......25 User Operation ......26 OSCAR Overview .
-
Page 31: Chapter 3: Basic Operations
Chapter 3: Basic Operations Chapter 3: Basic Operations Power Up and LEDs AMX5000 or AMX5010 There are three groups of LEDs on the front panel of your AMX5000 or AMX5010 switch. Each green LED in the left group corresponds to a server port. -
Page 32: User Operation
AMIQ-SRL loses power. User Operation Controlling your system at the local port The AMX user station uses Avocent’s patented OSCAR interface, featuring intuitive menus to configure your system and select servers. OSCAR is easily accessed and always available at the desktop. - Page 33 Apply Local Scan Dwell Time Apply [3..99] Log out Cancel Figure 3.3: OSCAR User Tab Enter your new password and verify it in the fi elds provided. NOTE: Should you lose your password, please contact Avocent Technical Support for assistance.
-
Page 34: Oscar Overview
You can access the servers by double-clicking on Matrix System in the list and then logging in. Shared If two or more users need to access the same server, they can share access to it through the AMX Series switch. Sharing means that multiple consoles can view... - Page 35 Chapter 3: Basic Operations a server channel at the same time, but only one can enter data through the keyboard or mouse at any given moment. When the active console stops all keyboard and mouse activity, another console can take control of the server. Private When you select your server after clicking the Private radio button, no other user station in the system can switch to your selected server.
- Page 36 AMX Series Installer/User Guide You may choose to select an alternative OSD hotkey sequence by selecting one of the options listed in the pull-down menu. You can use the default, Ctrl+Ctrl (L-R), as the OSD hotkey sequence and then access OSCAR by pressing either the left or right Ctrl key twice.
-
Page 37: Selecting Servers
Chapter 3: Basic Operations Selecting Servers Use the Target tab in the OSCAR dialog box to connect to servers. When you connect to a server, the AMX reconfigures the keyboard and mouse to the appropriate settings for the selected server. To select a server: 1. -
Page 38: Keyboard Translation
AMX Series Installer/User Guide To set the scan dwell time: 1. Press Ctrl+Ctrl to launch OSCAR. 2. Click the User tab. OSCAR Target User Console Username: 0123456789abcde Password Current Confirm Apply Local Scan Dwell Time Apply [3..99] Log out Cancel Figure 3.5: User Tab... - Page 39 Chapter 3: Basic Operations PS/2 Keyboard to Sun Computer Stop Find Again Props Power Undo Command Front keypad * Compose Copy NUMLOCK Help Open keyboard / Mute Paste keyboard - Vol - keyboard + Vol + Sun keyboards have a Power key used to power the workstation. PS/2 keyboards may have a Sleep key to place the computer in a stand-by or power saving mode.
- Page 40 AMX Series Installer/User Guide...
- Page 41 Advanced Operations Contents User Maintenance ......37 Server Maintenance ......39 Console Maintenance .
-
Page 43: Chapter 4: Advanced Operations
Chapter 4: Advanced Operations Chapter 4: Advanced Operations User Maintenance The AMX system can be configured to support up to 128 users. Each user is identified by a unique name and password and can be assigned full, view only or no rights to servers attached to the AMX. These actions, as well as deleting and editing users once they are configured, are performed through the Admin menu and require that the user be logged in under the Admin user. - Page 44 AMX Series Installer/User Guide OSCAR Target User Console Figure 4.2: Editing a User Click the username that you wish to edit, then click the Edit User button. Change the user’s name or password as needed. When all changes are complete, click OK.
-
Page 45: Server Maintenance
Chapter 4: Advanced Operations NOTE: The default setting for a user’s access rights is none. After confi guring all servers, click the OK button. To enforce user login: As a security measure, the AMX can be configured to automatically force users to log in. -
Page 46: Console Maintenance
AMX Series Installer/User Guide NOTE: It is only possible to edit servers that are attached to the AMX system and powered. Enter the new name for the server. If the selected AMIQ is attached to a USB computer, select the appropriate keyboard layout. - Page 47 Chapter 4: Advanced Operations OSCAR Target User Console Keyboard United Kingdom Layout OSD Hotkey Cmd Line Hotkey Numlock + Quick switch hotkey Screen Saver Logout Inactivity Time 00 : 00 (HH:MM) Apply Cancel Ports Switch1 -Port 21 Figure 4.4: The Console Tab The current keyboard layout will be displayed.
-
Page 48: Command Line
AMX Series Installer/User Guide Select your new sequence and click Apply. The selected sequence changes from blue to black text. To change the Command Line hotkey sequence: Press Ctrl+Ctrl to launch OSCAR. Click the Console tab. The current Command Line hotkey sequence will be displayed. Click the double arrow to the right of the Command Line hotkey sequence to scroll through available options. - Page 49 Chapter 4: Advanced Operations Quick switch hotkey The quick switch hotkey enables you to connect to the next server on the list by selecting a quick switch hotkey sequence. To use the quick switch hotkey: Press Ctrl+Ctrl to launch OSCAR. Click the Console tab.
- Page 50 AMX Series Installer/User Guide...
- Page 51 Terminal Operations Contents Accessing the Terminal Menu ....47...
-
Page 53: Chapter 5: Terminal Operations
Chapter 5: Terminal Operations Chapter 5: Terminal Operations Accessing the Terminal Menu Each AMX5000 or AMX5010 can be configured at the unit level through the TERMINAL port. All terminal commands are accessed through a terminal or PC running terminal emulation software. To access the Terminal Applications menu: Connect a terminal or PC running terminal emulation software (such as HyperTerminal) to the confi... - Page 54 CAUTION: This password places your AMX terminal in a secure mode. This password should be guarded like any network password and care should be taken to avoid forgetting or misplacing it. Should you lose your password, please contact Avocent Technical Support for assistance.
- Page 55 Appendices Contents Appendix A: Technical Specifications ... 51 Appendix B: Using AMIQ-SRL Modules ..56 Appendix C: Technical Support ....61...
-
Page 57: Appendices
Appendices Appendices Appendix A: Technical Specifications AMX5000 Product Specifi cations Server Ports Number Connectors RJ-45 AMX interconnect User Ports Number Connectors RJ-45 AMX interconnect Network Connection Number Type Ethernet, 10BaseT, 100BaseT Connector RJ-45 Terminal Port Number Type RS-232 serial Connector DB9 male Dimensions Dimensions (H x W x D) 4.45 x 43.2 x 28.1 cm 1 U form factor... - Page 58 AMX Series Installer/User Guide AMX5010 Product Specifi cations Server Ports Number Connectors RJ-45 AMX interconnect User Ports Number Connectors RJ-45 AMX interconnect Network Connection Number Type Ethernet, 10BaseT, 100BaseT Connector RJ-45 Terminal Port Number Type RS-232 serial Connector DB9 male Dimensions Dimensions (H x W x D) 4.45 x 43.2 x 28.1 cm 2 U form factor...
- Page 59 Appendices AMX User Station (AMX5100, AMX5110, AMX5120) Product Specifi cations Server Ports Number 1: AMX5100; 2: AMX5110 and AMX5120 Connectors RJ-45 AMX interconnect User Ports Number Type PS/2, Sun and VGA video Connectors 6-pin miniDIN, PS/2 keyboard and mouse; 8-pin miniDIN, Sun keyboard and mouse; 15HDD female Dimensions Dimensions (H x W x D) 4.45 x 27.9 x 29.2 cm 1U form factor...
- Page 60 AMX Series Installer/User Guide AMIQ Module Product Specifi cations Server Ports Number AMIQ-PS/2: 4; AMIQ-VSN: 2; AMIQ-WSN: 2 AMIQ-USB: 2 Type AMIQ-PS/2, AMIQ-VSN, AMIQ-WSN, AMIQ-USB Connectors AMIQ-PS/2: 6-pin miniDIN, PS/2 keyboard and mouse; 15HDD male, VGA video; RJ-45 AMX interconnect AMIQ-VSN: 8-pin miniDIN, Sun keyboard and mouse;...
- Page 61 Appendices AMIQ-SRL Module Product Specifi cations Server Ports Number Type Connectors 9-pin D-sub female User Ports Number Connectors RJ-45 AMX interconnect Serial Ports Type Emulation VT100 Baud Rate 115200, 57600, 38400, 19200, 9600, 2400, 1200, 300 bits per second Parity Even, Odd, None Flow Control None, CTS/RTS or XOn/XOff...
-
Page 62: Appendix B: Using Amiq-Srl Modules
AMX Series Installer/User Guide Appendix B: Using AMIQ-SRL Modules The AMIQ-SRL module is a serial-to-VGA converter which permits VT100- capable devices to be viewed from the AMX local port. The actual serial data is not accessed, but is merely displayed. All serial data coming from the target device is displayed in a VT100 window, placed into a video buffer and sent to the AMX unit as though it came from a VGA server. - Page 63 Appendices mode, AMX and CD lines are turned off for one-half second and then turned on each time a module is selected or deselected. The default value is Always on. • Enter Sends: This option enables you to specify the keys that are trans- mitted when Enter is pressed.
- Page 64 AMX Series Installer/User Guide • Clear History Key Sequence: This option allows you to defi ne the key com- bination that clears the history buffer while in History mode. The default key sequence is Ctrl-F11. • Break Key Sequence: This option allows you to confi gure the key combi- nation that generates a break condition.
- Page 65 Appendices Using History mode History mode allows you to examine the contents of the history buffer, which contains the events that have occurred. The AMIQ-SRL maintains a buffer containing 24 x 18 lines of output. When the history buffer is full, it will add new lines at the bottom of the buffer and delete the oldest lines at the top of the buffer.
-
Page 66: Language Support
AMX Series Installer/User Guide AMIQ-SRL pinouts The AMIQ-SRL pinouts are provided in the following table. AMIQ-SRL Pinouts DB9-F Host Signal Signal Flow SRL Signal Name/Description Name/Description DCD - Data Carrier Detect Out of SRL DTR - Data Terminal Ready RXD - Receive Data... -
Page 67: Appendix C: Technical Support
Appendix C: Technical Support Our Technical Support staff is ready to assist you with any installation or operating issues you encounter with your Avocent product. If an issue should develop, follow the steps below for the fastest possible service: Check the pertinent section of this manual to see if the issue can be resolved by following the procedures outlined. - Page 68 AMX Series Installer/User Guide...
- Page 69 Appendices...
- Page 70 AMX Series Installer/User Guide...
- Page 71 LIMITED WARRANTY Avocent Corporation warrants to the original retail purchaser that this product is and will be free from defects in materials and workmanship for a period of 24 months from the date of purchase. Additionally, all Avocent products carry an unconditional thirty-day satisfaction guarantee. If, for any reason, you are dissatisfi...
- Page 72 For Technical Support: Email: support@avocent.com www.avocent.com Avocent International Ltd. Avocent Corporation Avocent House, Shannon Free Zone 4991 Corporate Drive Shannon, County Clare, Ireland Huntsville, Alabama 35805-6201 USA Tel: +353 61 715 292 Tel: +1 256 430 4000 Fax: +353 61 471 871...
Need help?
Do you have a question about the AMX Series and is the answer not in the manual?
Questions and answers