Table of Contents
Advertisement
Quick Links
Advertisement
Table of Contents

Related Manuals for Grundig DSR 1510


Summary of Contents for Grundig DSR 1510
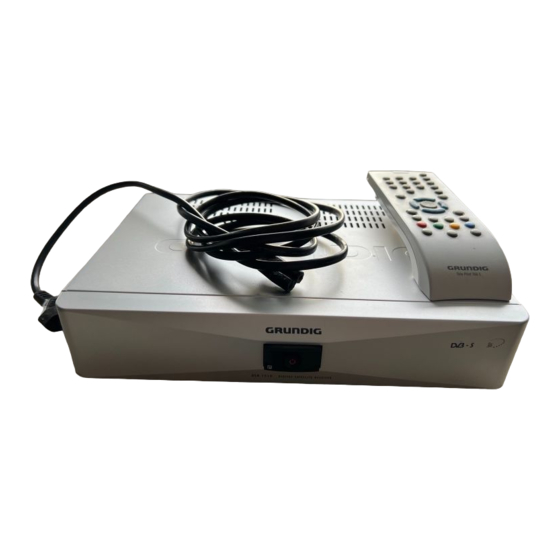
- Page 1 DIGITAL SATELLITE RECEIVER DSR 1510 DEUTSCH ENGLISH...
-
Page 2: Table Of Contents
CONTENTS ____________________________________________ General information Packing contents Digital satellite reception Special features of your digital receiver Set-up and safety Overview The front of the digital receiver The back of the digital receiver The remote control 10-11 Connection and preparation Connecting the satellite antenna Connecting the television Connecting a video recorder Connecting an AV receiver or hi-fi system... - Page 3 CONTENTS _________________________________________________ 27-31 Additional functions Setting the menu language Deleting stations automatically Preset satellite stations Automatic station search Manual station search 30-31 Timer functions 32-33 Special settings Resetting the digital receiver to its original state Updating the digital receiver software Selecting the remote control level 34-36 Information...
-
Page 4: General Information
Euro/AV (Scart) cable Power cord Operating manual Digital satellite reception In order to use your new DSR 1510 digital receiver you need a digital-compatible satellite antenna, which must be installed and aligned to the required satellites (for example Astra and EutelSat/Hotbird). -
Page 5: Special Features Of Your Digital Receiver
GENERAL INFORMATION ______________________________ Special features of your digital receiver The DSR 1510 digital receiver can receive and process all unen- crypted digital satellite stations. This digital receiver has a built-in digital receiver unit for satellite stations. The receiver unit converts the signals from digital satellite stations to provide outstanding audio and picture quality. -
Page 6: Set-Up And Safety
This digital receiver is designed to receive, record and play back DSR 1510 DIGITAL SATELLITE RECEIVER video and audio signals. Any other use is expressly prohibited. When setting up the digital receiver, make sure it is in a horizontal position and that the mains socket is easily accessible. -
Page 7: Overview
OVERVIEW ____________________________________________ The front of the digital receiver DSR 1510 DIGITAL SATELLITE RECEIVER Switches the digital receiver to standby mode and off again. • (red) Lights up: The digital receiver is in standby mode. Flashes: No input signal. -
Page 8: The Back Of The Digital Receiver
OVERVIEW _________________________________________________ The back of the digital receiver Antenna socket for the satellite antenna. INPUT SAT Left/right stereo sockets (cinch) for hi-fi system. AUDIO OUT Video signal output socket (FBAS) for television VIDEO OUT or AV receiver. Audio output sockets for digital audio signal (cinch) DIGITAL for digital multi-channel amplifier. -
Page 9: The Remote Control
Switches to radio mode. Opens the »Record timer« menu. Opens the »Subtitles« menu. Opens the »Sound« menu. Switches to operating a second GRUNDIG DR, TV digital receiver, GRUNDIG television or GRUNDIG DVD player. Keep the appropriate button (»DR«, »TV«, »DVD«) pressed down. -
Page 10: Connection And Preparation
CONNECTION AND PREPARATION DEC. - AV 2 AUDIO EURO - AV 1 Connecting the satellite antenna Connect the antenna cable of the satellite antenna to the »INPUT SAT« socket on the digital receiver (screw connector, F connector). Connecting the television Plug the Euro-AV (Scart) cable supplied into the »EURO AV1 TV«... -
Page 11: Connecting An Av Receiver Or Hi-Fi System
CONNECTION AND PREPARATION _________________ Connecting an AV receiver or hi-fi system Plug a standard cinch cable into the »VIDEO OUT« and »AUDIO OUT L R« sockets (left/right) on the digital receiver and the corresponding input sockets on the AV receiver or hi-fi system. Connecting a digital multi-channel amplifier Plug a standard cinch cable into the »DIGITAL AUDIO... -
Page 12: Settings
SETTINGS ______________________________________________ The menu This digital receiver has a very comprehensive, user-friendly menu system. The menu is displayed on the television screen. The digital receiver responds to many functions which you select on the remote control with informative menus and icons on the tele- vision screen. -
Page 13: Assigning Preset Stations
SETTINGS _________________________________________________ Assigning preset stations The digital receiver is already programmed with the stations from the Astra 19.2° East, Eutelsat/Hot Bird 13° East , Turksat 1C, Sirius 2/3, Amos and Hellas Sat 2 satellites. Menüsprache The following settings allow you to select the menu language, the Español Deutsch country where you are operating the digital receiver and the main... -
Page 14: Editing The Station List
SETTINGS _________________________________________________ Editing the station list You can change the order of preset stations as required and delete stations you do not need. Edit Channel Lists In the main menu, select »Channel lists« with »P+« or »P-« Channel list and press »OK« to confirm. Favorites Select »Channel list«... -
Page 15: Editing The List Of Favourite Stations
SETTINGS _________________________________________________ Editing the list of favourite stations You can change the order of preset stations as required and delete stations you do not need. You can select your favourite stations and save them in the list of favourites. Edit Channel Lists Channel list In the main menu, select »Channel lists«... -
Page 16: Setting The Local Time
SETTINGS _________________________________________________ Setting the local time To ensure that the TV guide always shows the current programmes at the right time, you must enter the difference between your local time and GMT (Greenwich Mean Time at longitude “0”). Installation All times given by the TV guide are then converted to your local Menu language time. -
Page 17: Adjusting The Digital Receiver To The Television Set
SETTINGS _________________________________________________ Adjusting the digital receiver to the television set Specifying the video signal at the Euro AV (TV) Installation output Menu language Channel search You can choose between the settings »CVBS« (normal picture Video output quality), »RGB« (high picture quality) »Y/C« (S-Video signal) and Time »YUV«... - Page 18 SETTINGS _________________________________________________ Selecting the television picture conversion If you have a 4:3 format television or flat screen, the following settings are available: »Pan&Scan« for wide-screen playback without black bars on the top and bottom edges of the screen. »Letterbox« for wide-screen playback with black bars on the top and bottom edges of the screen.
-
Page 19: Adjusting The Digital Receiver To The Lnb Configuration Of The Satellite Antenna
SETTINGS _________________________________________________ Adjusting the digital receiver to the LNB configuration of the satellite antenna The digital receiver has been factory set so that it is ready for operation, without time-consuming adjustment, with most satellite antennas and LNB configurations. Installation Changes in this menu have a direct effect on the reception charac- Menu language Channel search teristics of the digital receiver and should therefore only be made by... -
Page 20: Audio Settings
SETTINGS _________________________________________________ Audio settings In the main menu, select »Settings« with »P-« or »P+« and Audio settings press »OK« to confirm. Audio channel English Audio output Stereo Select »Audio« by pressing »OK«. Volume adjustment – The »Audio settings« menu appears. Digital output PCM Format Note:... -
Page 21: Volume Adjustment
SETTINGS _________________________________________________ Volume adjustment You can set the standard volume here. This is the volume of the device after switching on. Audio settings Select »Volume adjustment« by pressing »P-« or »P+« and English Audio channel press »OK« to confirm. Audio output Stereo Volume adjustment Press »... -
Page 22: Basic Functions
BASIC FUNCTIONS ______________________________ Switching on and off Press » « to switch on the digital receiver from standby mode. Press » « to switch the digital receiver to standby mode. – The mode indicator lights up red. Mode selection You can choose between TV and radio modes. Press »... -
Page 23: Muting The Sound
BASIC FUNCTIONS ______________________________________ Muting the sound Press » « on the remote control to mute the sound. Press » « on the remote control to switch the sound on again. – You can hear the sound at the volume previously set. Selecting stations from lists You can select stations from various lists (e.g. -
Page 24: Tv Guide
BASIC FUNCTIONS ______________________________________ TV guide The TV guide provides information on the current station such as the title and descriptions of the current and next programmes. Press »TV-G« to view the station information. – All today’s programmes are shown. TV Guide Note: Monday, 11.07.2005 9:15 - 9:30... -
Page 25: Teletext Mode
TELETEXT MODE ___________________________________ Teletext Teletext is a service offered by some broadcasters which is provided along with the video and audio signals, is converted by the digital receiver and can be displayed on the TV screen. Select the television station whose teletext pages you want to see. - Page 26 TELETEXT MODE __________________________________________ Opening the main page Press »OK« to show symbols and » « (blue) to show the main page (page 100). Opening a sub-page directly If the selected teletext page contains additional pages, the number of the current sub-page and the total number of pages are dis- played.
-
Page 27: Additional Functions
ADDITIONAL FUNCTIONS _________________ Setting the menu language Press »i« to open the main menu. Select »Installation« with »P-« or »P+« and press »OK« to Menu language confirm. Deutsch Language English Select »Menu language« with »P-« or »P+« and press »OK« Français to confirm. -
Page 28: Preset Satellite Stations
ADDITIONAL FUNCTIONS _____________________________ Preset satellite stations This digital receiver has been programmed at the factory with most digital TV and radio stations on the Astra 19.2° East, EutelSat/ Hotbird 13° East, Turksat 1C, Sirius 2/3, Amos and Hellas Sat 2 satellites. -
Page 29: Manual Station Search
ADDITIONAL FUNCTIONS _____________________________ Manual station search If the station search does not find a particular station, you can look for it using the manual search. Make sure you enter all the parame- ters of the station you are looking for correctly. You can find the latest transponder information on the teletext pages of various broadcasters, in a current satellite TV magazine or on the internet. -
Page 30: Timer Functions
ADDITIONAL FUNCTIONS _____________________________ Timer functions You can set your digital receiver to switch off at a selected time or to Timer program a recording on a connected video recorder. A total of Sleep timer 10 recording timers are available. Record timer Entering the switch-off time In the main menu, select »Timer«... - Page 31 ADDITIONAL FUNCTIONS _____________________________ Programming the recording timer In the main menu, select »Timer« with »P-« or »P+« and press Record timer »OK« to confirm. Timer No. (1...10) 13:33 h Start Time Select »Record timer« with »P-« or »P+« and press »OK« to 11/07/2005 Date confirm.
-
Page 32: Special Settings
SPECIAL SETTINGS ______________________________ Resetting the digital receiver to its original state This function enables you to delete the station lists and all custom settings. In the main menu, select »Installation« with »P-« or »P+« and press »OK« to confirm. Special functions Select »Special functions«... -
Page 33: Selecting The Remote Control Level
SPECIAL SETTINGS ______________________________ Selecting the remote control level If you are operating two digital receivers with a the TP 766 S remote control, you must enter a separate remote control level for each digital receiver. In the main menu, select »Installation« with »P-« or »P+« and press »OK«... -
Page 34: Information
9- or a 15-pin D-SUB socket, and a 9-pin D-SUB plug for connection to the receiver. You can use this connection for software updates and for uploading and downloading other data. You can find more information on the internet at www.grundig.com. -
Page 35: Technical Data
INFORMATION ___________________________________________ Technical data This product fulfils the European directives 89/336/EEC, 73/23/EEC and 93/68/EEC. This device conforms to the safety regulation DIN EN 60065 and therefore the international safety regulation IEC 60065. TV/radio stations: 4000 in total Number of satellites: Reception range: 950 –... -
Page 36: Troubleshooting
INFORMATION ___________________________________________ Troubleshooting If a fault occurs, first refer to this information before you take the digital receiver for repair. If you are unable to rectify the fault using the information given here, contact your local dealer or service specialist. Under no circumstances should you attempt to repair the digital receiver yourself, as this will invalidate the guarantee. - Page 37 Grundig Multimedia B.V. • De Boelelaan 7 • NL-1083 HJ Amsterdam • http://www.grundig.com 05/28 72011 800 7500...
Need help?
Do you have a question about the DSR 1510 and is the answer not in the manual?
Questions and answers