Table of Contents
Advertisement
Quick Links
Advertisement
Table of Contents

Related Manuals for Grundig DSR 1750 MICRO


Summary of Contents for Grundig DSR 1750 MICRO
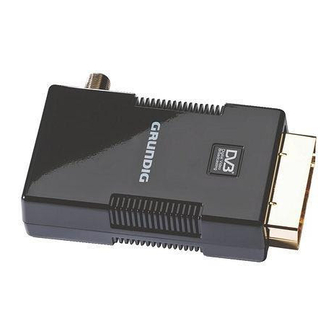
- Page 1 DIGITAL SATELLITE RECEIVER DSR 1750 MICRO...
-
Page 2: Table Of Contents
CONTENTS ____________________________________________ General information Packing contents Receiving digital satellite channels Special features of your Digital Satellite Receiver Set-up and safety Overview The Digital Satellite Receiver The infrared receiver The remote control 9-10 Connection/preparation Connecting the antenna Connecting the television Connecting the infrared receiver Connecting the power supply unit Inserting batteries into the remote control 11-17... - Page 3 Resetting the digital receiver to its original state Updating the digital receiver software Changing remote control levels 34-37 Upgrading the television Connecting a GRUNDIG television with the Digi 200 G2 chassis Installing on the GRUNDIG television set 36-37 Operating the GRUNDIG television remote control 38-40...
-
Page 4: General Information
Infrared receiver Operating manual Receiving digital satellite channels In order to use your new DSR 1750 MICRO digital receiver you need a digital-compatible satellite antenna, which must be installed and aligned to the desired satellites (for example Astra and EutelSat/Hotbird). -
Page 5: Special Features Of Your Digital Satellite Receiver
GENERAL INFORMATION __________________ Special features of your Digital Satellite Receiver The DSR 1750 MICRO digital receiver can receive and process all unencrypted digital channels. This digital receiver has a built-in digital receiver unit for satellite channels. The receiver unit converts the signals from digital satellite channels to provide outstanding audio and picture quality. -
Page 6: Set-Up And Safety
SET-UP AND SAFETY ___________________________ To ensure that this high-quality and user-friendly digital receiver provides you with many years of entertainment, please observe the following instructions: This digital receiver set is designed to receive video and audio signals. Any other use is expressly prohibited. When setting up the device, make sure the mains plug is easily accessible. -
Page 7: Overview
OVERVIEW ____________________________________________ The Digital Satellite Receiver Antenna socket for the satellite antenna. IR remote Connection socket for infrared receiver Connection socket for the enclosed power supply 12 VDC, 18 W max. unit. Scart connector (output) for connection to TV. EURO AV The infrared receiver The infrared receiver receives the infrared signals for the remote control and forwards the commands by wire to the receiver. -
Page 8: The Remote Control
RADIO Displays the time. Switches the sound from stereo to mono; Calls up options (not available for all stations). Switches to operating a second GRUNDIG DR, TV digital receiver, GRUNDIG television or GRUNDIG DVD player. Keep the appropriate button (»DR«, »TV«, »DVD«) pressed down, then press the required button. -
Page 9: Connection/Preparation
CONNECTION/PREPARATION __________ Connecting the antenna Connect the antenna cable of the satellite antenna to the » « socket on the digital receiver (screw connector, F connector). Connecting the television Plug the digital receiver into the corresponding scart socket on the television (use enclosed scart extension if required). -
Page 10: Connecting The Infrared Receiver
CONNECTION/PREPARATION __________ Connecting the infrared receiver Plug the infrared receiver into the »IR remote« socket. Connecting the power supply unit Insert the plug of the enclosed power supply unit into the »12 VDC« socket of the digital receiver. Insert the power supply unit into the wall socket. Notes: Do not insert the power supply unit of your device into the sock- et until you have connected the television and the antenna. -
Page 11: Basic Settings
BASIC SETTINGS __________________________________ The menu This digital receiver has a very comprehensive, user-friendly menu system. The menu is displayed on the television screen. The digital receiver responds to many functions which you select on the remote control with informative menus and icons on the tele- vision screen. -
Page 12: Initial Setup
BASIC SETTINGS __________________________________ Initial setup There are several way to set stations on your Digital Satellite Receiver In option 1, you select the menu language for your device, the country in which your Digital Satellite Receiver is situated and any alterations required for your TV device. -
Page 13: Setting Stations, Option 1
BASIC SETTINGS __________________________________ Setting stations, Option 1 Switch on the television and select the preset channel for the digital receiver. Switch on the digital receiver by pressing » «. – The »Erstinstallation« page appears when the device is first switched on. Press »OK«... - Page 14 BASIC SETTINGS __________________________________ Setting stations, Option 2 Switch on the television and select the preset channel for the digital receiver. Switch on the digital receiver by pressing » «. – The »Erstinstallation« page appears when the device is first switched on. Press »OK«...
- Page 15 BASIC SETTINGS __________________________________ – »DiSEqC sequence«; Here you can select whether the information on DiSEqC 1. 0 is to be transmitted once, twice or three times. – »Position A« to »Position D«; You can enter various satellites here – regardless of the receiver.
-
Page 16: Editing Channel Lists
BASIC SETTINGS __________________________________ Editing channel lists You can delete any stations you do not require in the channel list. If you delete a station in the channel list, it is automatically deleted from the favourites lists too. You can copy your favourite stations to four separate lists of favourites. - Page 17 BASIC SETTINGS __________________________________ Sorting stations in the favourite lists In the main menu, select »Sort Channels« using »P+« or »P-« and press »OK« to confirm. – The overview of favourites lists appears. Select the desired favourites list using »P-« or »P+« and press »OK«...
-
Page 18: Basic Functions
BASIC FUNCTIONS ______________________________ Switching on and off Switch on the television and select the preset channel for the digital receiver. Switch on the digital receiver from standby mode with » «. – The mode indicator lights up green. Switch the digital receiver to standby mode with » «. –... -
Page 19: Adjusting The Volume
BASIC FUNCTIONS ______________________________ Switching from the current station to the previous The digital receiver remembers the station which was last selected, provided it was selected for at least one second. Press »A/B« to switch from the current station to the previous one. -
Page 20: Electronic Tv Guide
BASIC FUNCTIONS ______________________________ TV guide The electronic TV guide offers an overview of all programmes that will be broadcast in the next week on the current station. The option depends on the broadcaster. Press »TV-G« to view the station information. –... -
Page 21: Teletext Mode
TELETEXT MODE ___________________________________ Teletext Select the television station whose teletext pages you want to see. Press »TXT« to call up teletext. – After a short time, teletext page 100 appears on the television screen. Note: You may have to press »OK« so that teletext appears. Select the teletext page with »1 …... -
Page 22: Settings
SETTINGS ______________________________________________ Video settings Press » « to open the main menu. Select »Box Settings« with »P+« or »P-« and press »OK« to confirm. Select »Video settings« with »P-« or »P+« and press »OK« to confirm. Note: Additional operations are explained in the following sections. Selecting the television picture format If you have a 16:9 format television or flat screen, select the »16:9/Widescreen TV«... -
Page 23: Language Settings
SETTINGS ______________________________________________ Selecting AFD The transmitted screen format can differ from the displayed screen format. AFD recognises and corrects the display when switched on. Select »AFD Automatic« by pressing »P-« or »P+«. Press » « or » « to switch AFD on or off. Teletext With this function you can select whether teletext should be dis- played on the receiver or the television. - Page 24 SETTINGS ______________________________________________ Selecting the preferred audio language You can set a preferred language for all programmes. Select »Audio Language« with »P-« or »P+«. Press » « or » « to select the desired language. Selecting a second audio language If the programme is not broadcast in the language selected in »Audio language«, the »Second audio language«...
-
Page 25: Menu Settings
SETTINGS ______________________________________________ Menu settings Press » « to open the main menu. – The main menu is displayed. Select »Box Settings« with »P+« or »P-« and press »OK« to confirm. – The »Box Settings« menu appears. Select »Menu settings« with »P+« or »P-« and press »OK« to confirm. -
Page 26: Miscellaneous Settings
SETTINGS ______________________________________________ Miscellaneous settings Press » « to open the main menu. – The main menu is displayed. Select »Box Settings« with »P+« or »P-« and press »OK« to confirm. – The »Box Settings« menu appears. Select »Miscellaneous Settings« with »P-« or »P+« and press »OK«... -
Page 27: Timer Functions
TIMER FUNCTIONS ______________________________ You can set a connected video recorder to record a programme. A total of 8 recording timers are available. Press » « to open the main menu. In the main menu, select »Timer« with »P-« or »P+« and press »OK«... -
Page 28: Additional Functions
ADDITIONAL FUNCTIONS _________________ Security functions Press » « to open the main menu. – The main menu is displayed. Select »Security« with »P+« or »P-« and press »OK« to con- firm. Enter the PIN code »0000« using »1...0« and press »OK« to confirm. -
Page 29: Automatic Station Search
SPECIAL SETTINGS ______________________________ Searching for new stations This Digital Satellite Receiver was preprogrammed at the factory with most digital TV and radio stations on the Astra 19.2° East, EutelSat/Hotbird 13° East and Turksat 1C satellites. To see which satellite stations have been preprogrammed, open the channel list. -
Page 30: Special Settings
SPECIAL SETTINGS ______________________________ Manual station search If the station search does not find a particular station automatically, it can search for it using the manual search. To do this all the parameters for the station must be correctly entered. You can find the latest transponder information on the teletext pages of various broadcasters, in a current satellite TV magazine or on the Internet. -
Page 31: Specifying The Order Of Stations In The Channel List
SPECIAL SETTINGS ______________________________ Specifying the order of stations in the channel list You can set the sequence in which channels are displayed. For this you can choose between »None«, »Z to A«, »A to Z« or »Provider«. Press » « to open the main menu. –... -
Page 32: Resetting The Digital Receiver To Its Original State
SPECIAL SETTINGS ______________________________ Resetting the digital receiver to its original state This function enables you to delete the channel lists and all custom settings. Press » « to open the main menu. Select »Box Settings« with »P-« or »P+« and press »OK« to confirm. -
Page 33: Changing Remote Control Levels
SPECIAL SETTINGS ______________________________ Changing remote control levels If you are operating two digital receivers with the TP 766 S remote control, you must enter a separate remote control level for each digital receiver. Changing to remote control level 2 Press »DR« and » « simultaneously for around five seconds until “Change to remote control level 2?”... -
Page 34: Upgrading The Television
UPGRADING THE TELEVISION __________ Connecting a GRUNDIG television with the Digi 200 G2 chassis You can upgrade a television for this digital receiver with the G2 chassis (Digi 200) as of software version “Ver SG21603-010 xxxxxx”. “xxxxxx” stands for the date the software was created. The date is not important for the compatibility. -
Page 35: Installing On The Grundig Television Set
UPGRADING THE TELEVISION __________ Installing on the GRUNDIG television set Switch on the television. EASY DIALOG Open the »EASY DIALOG« menu by pressing » «. 1 Settings 2 Preset list Select »Installation« with »P+« or »P-« and press »OK« to 3 Installation confirm. -
Page 36: Operating The Grundig Television Remote Control
UPGRADING THE TELEVISION __________ Operating the GRUNDIG television remote control Note: The receiver must be connected and installed at the G bus on the television set via the communication line. Switches the television off (standby). Switches the television on from standby mode. - Page 37 »4«, »5«, »6« for a GRUNDIG DVD recorder. »1«, »4«, »7« for a GRUNDIG digital receiver (remote control level 1). »2«, »5«, »8« for a GRUNDIG digital receiver (remote control level 2). »3«, »6«, »9« for a GRUNDIG digital receiver with a hard disc (PDR).
-
Page 38: Information
INFORMATION _____________________________________ Displaying station reception properties Select a channel using »P+« or »P-« or else from the channel list. Press » « to open the main menu. Select »Technical Information« with »P-« or »P+« and press »OK« to confirm. Select »Channel Information« with »P-« or »P+« and press »OK«... -
Page 39: Technical Data
INFORMATION _____________________________________ Technical data This product fulfills the European directives 2004/108/EEC and 2006/95/EEC. This device conforms to the safety regulation DIN EN 60065 (VDE 0860) and therefore the international safety regulation IEC 60065. TV/radio stations: 4000 in total Predefined satellites: Reception area: 950 –... -
Page 40: Troubleshooting
INFORMATION _____________________________________ Troubleshooting If a fault occurs, first refer to this information before you take the digital receiver for repair. If you are unable to rectify the fault using the information given here, contact your local dealer or service specialist. Under no circumstances should you attempt to repair the digital receiver yourself, as this will invalidate the guarantee. - Page 41 Grundig Multimedia B.V. Atrium, Strawinskylaan 3105 NL-1077 ZX Amsterdam http://www.grundig.com • • 07/37 72011 801 6500...
Need help?
Do you have a question about the DSR 1750 MICRO and is the answer not in the manual?
Questions and answers