Table of Contents
Advertisement
Advertisement
Table of Contents
Troubleshooting

Subscribe to Our Youtube Channel
Related Manuals for Magma P13RR


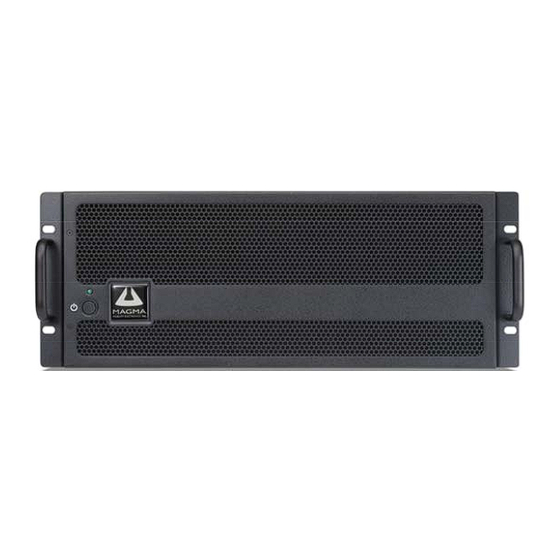
Summary of Contents for Magma P13RR
- Page 1 PCI Expansion Chassis User's Guide 13 Slot PCI Expansion Model: P13R Model: P13RR...
- Page 2 Magma. Limitation of Liability Information presented by Magma in this guide is believed to be accurate and reliable. However, Magma assumes no responsibility for its use. No license is granted by implication or otherwise to any rights of Magma.
-
Page 3: Table Of Contents
M A G M A T a b l e o f C o n t e n t s PREFACE ..................... III What’s in this Guide ................iii Advisories ....................iv Safety Instructions..................iv When Working Inside a Computer ............v Protecting Against Electrostatic Discharge ..........vi CHAPTER 1 INTRODUCTION ............ - Page 4 HOW TO GET MORE HELP........28 Frequently Asked Questions (FAQ)............28 Contacting Technical Support .............. 28 Magma Debug Utility................... 29 PCIScope Software Utility ................30 Returning Merchandise to Magma ............32 APPENDIX A BUS HIERARCHY............. 33 Bus Hierarchy..................33 APPENDIX B NEED MORE SLOTS?..........
-
Page 5: Preface
Chapter 5: Provides general maintenance information. Chapter 6: Provides troubleshooting assistance. Chapter 7: Explains where to get technical support. Appendix A: Explains Bus Hierarchy. Appendix B: How to connect multiple Magma systems to one PC. Appendix C: .Provides information about Compliance. Preface... -
Page 6: Advisories
Disclaimer: We have attempted to identify most situations that may pose a danger, warning, or caution condition in this manual. However, Magma does not claim to have covered all situations that might require the use of a Caution, Warning, or Danger indicator. -
Page 7: When Working Inside A Computer
Refer to the installation instructions in this manual for precautions and procedures. If you have any questions, please contact Magma Technical Support. WARNING High voltages are present inside the expansion chassis when the unit’s power cord is plugged into an electrical outlet. Disconnect the power cord from its source before removing the system cover. -
Page 8: Protecting Against Electrostatic Discharge
Static electricity can harm system boards. Perform service at an ESD workstation and follow proper ESD procedure to reduce the risk of damage to components. Magma strongly encourages you to follow proper ESD procedure, which can include wrist straps and smocks, when servicing equipment. -
Page 9: Chapter 1 Introduction
Chapter 1 Introduction General Specifications Magma's 13 Slot PCI Expansion System is a general-purpose bus expansion system for the Peripheral Component Interconnect (PCI) local bus. The expansion bus is fully compliant with the PCI Local Bus Specification. The PCI expansion system consists of an expansion bus... -
Page 10: Parts List
Power supply cord Host Card (PCI is standard) User’s Manual The Magma PCI expansion cable uses a 68-pin connector; however, it is NOT an “off-the- shelf” SCSI cable. The Magma PCI expansion cable is a custom cable designed specifically for PCI Expansion. -
Page 11: Chapter 2 Hardware Installation
STOP If your Magma expansion chassis was not purchased directly from Magma, you must check to ensure that it doesn’t contain any pre- installed PCI cards. Check the rear side of the chassis to see if any PCI cards are visible in the slots. -
Page 12: Before You Begin
M A G M A Before you Begin The power supply is auto-switching. This means that it will automatically switch to match whatever source power you are using. Since all products ship with a US Standard 115V power cord, you will need to use a power cord adapter for non-US Standard 115V power sources. -
Page 13: Attach Pci Expansion And Power Cable
NOTE If at all possible, plug all power cords from the Magma expansion chassis and your host computer into a shared power strip, preferably one that has surge and noise suppression circuitry built into it. -
Page 14: Recheck The Installation
Applying Power Correctly Starting Up: You must apply power to the Magma expansion chassis BEFORE you power up your computer. This will allow the higher numbered PCI buses in the PCI bus hierarchy to be at a stable state when the host system issues its master power-on bus reset. -
Page 15: Chapter 3 Verify Installation
M A G M A CHAPTER 3 Verify Installation The Magma Host Card is not visible to the Windows’ Device Manager or the Apple System Profiler until the Expansion System has been successfully connected and properly powered on. Therefore, you will... - Page 16 PCIe Controller. Any 3 Party PCI cards installed in the chassis will appear below one of the PCI-to-PCI bridges. If everything is OK, then the Magma Expansion System installation is complete. You can now proceed to Chapter 4...
-
Page 17: Mac Os X
When using Mac OS X no additional software or drivers are needed. As long as you are using Mac OS X Version 10.2.2 or newer, the operating system should automatically recognize the Magma expansion chassis. Select “About This Mac” under the Apple Icon Then click the “More Info”... - Page 18 Then restart the Magma expansion chassis followed by the computer. Next, try to verify the installation again, as shown above. If you are still having problems, contact Magma Technical Support at (858) 530-2511. Chapter 3...
-
Page 19: Rd Party Pci Cards
This chapter provides information on how to install 3 Party PCI cards into your Magma expansion chassis. More details on the installation of individual cards are provided by the card’s manufacturer. This chapter is provided as a simple guide to help you install your PCI cards in the chassis. -
Page 20: Install Pci Cards In Pci Expansion Chassis
M A G M A Next, slide the enclosure cover backwards, disengaging it from the guides at the front of the enclosure, by firmly grasping the rear cover lip over the card I/O area and pulling the cover backward about ½” and then lifting the cover off. - Page 21 IMPORTANT The sheer number of PCI cards and device drivers available makes it impossible for Magma to fully test and certify all available PCI cards for use in the Magma expansion chassis. Our best advice to you in this regard is to insist on full PCI Specification compliance from your card and system vendors.
-
Page 22: Install Hard Drive(S)
25- 30 minutes. Use caution when touching the Load Resistor. System Should Be Up and Running Apply power to the Magma expansion chassis first, then power up the computer. Use the procedures detailed in Chapter 3 to confirm the card installation(s) in the Windows Device Manager or Apple System Profiler. -
Page 23: Finishing Touches
These sets come in various lengths to accommodate different racks. Contact Magma for more information, or to order a set. When ordering, replace the “XX” in the part number with your required kit size (18, 24, 26, or 28 inches). -
Page 24: Chapter 5 Troubleshooting
Troubleshooting Locate the Problem If you are having trouble with the Magma expansion system, verify that all cards are seated properly and all cables are connected properly. Be sure you followed the instructions in earlier sections of this User Guide. -
Page 25: My Computer Can't Find The Pci Expansion System
If the expansion system is not visible in your Windows Device Manager or your Apple System Profiler at all, you will need to turn off your computer (first) and then the Magma expansion chassis (second) and test all cords and cables to ensure you have everything connected correctly. -
Page 26: When Nothing Works
4 (Install 3 Party PCI Cards) as necessary to verify that you have a valid installation of the Magma expansion system and that you have correctly installed your 3 Party PCI card(s) and their associated drivers (as required). If it powers up OK, but nothing works, check the computer’s Device Manager or System Profiler to see if the expansion system has been found. -
Page 27: My Computer Hangs During Power Up
If your computer “hangs” while being turned on and you can’t even start, follow these simple steps to try to fix this problem: Shut off the computer (first) and then the Magma expansion system and verify that all cards and cables are installed correctly. -
Page 28: My Pci Card Doesn't Work
Ethernet card that has drivers built into the operating system. (Using this “type of card” will avoid any future questions about drivers possibly being installed incorrectly.) Turn on the Magma expansion chassis, and then turn on the computer. Chapter 6... -
Page 29: Support For 3 Rd Party Pci Cards
If the is still visible, the problem may be with the Magma expansion system. Please contact Magma Technical Support for further guidance and/or a replacement product. If an error shows on any of the PCIe to PCI Bridge Connections, call Magma Technical Support immediately. -
Page 30: Windows Error Codes
Party PCI Card driver. If necessary, contact the PCI Card’s manufacturer for updated PNP compatible drivers. If all else fails, contact Magma Technical Support for further assistance. On the Bridge: If you receive error code 12 on the first PCI to PCI Bridge, call Magma Technical Support. - Page 31 On the PCI to PCI Bridge: Magma Technical Support Other Codes On the PCI Card: Card Manufacturer’s Technical Support, after first verifying that the Magma expansion system is installed properly. If you are still having problems, contact Magma Technical Support for more help. Chapter 6 Maintenance...
-
Page 32: Chapter 6 Chassis Maintenance
BEFORE you attempt to perform any maintenance tasks. General Chassis Cleaning The environment where your Magma chassis is operating is a key element to how often you will need to perform a general cleaning of your Magma Expansion chassis. To perform a routine general cleaning of... -
Page 33: Hot-Swappable" Power Supply
If your chassis is extremely dirty and you would like professional help with getting it clean, you can contact Magma Support for instructions and costs on shipping the chassis back for cleaning. Finally, clean the air filter following the instructions later in this chapter. -
Page 34: Cleaning The Air Filter
In order to ensure the safety and efficiency of your expansion system, it is recommended that you keep a spare power supply module on hand – just in case. Protect yourself, keep a spare. Order your spare power supply module from Magma – PN 40- 00022-01. Cleaning the Air Filter The chassis is equipped with an air filter that is easy to remove and clean. - Page 35 M A G M A Next, open the faceplate and remove the foam filter, located behind the faceplate, and clean it with a solution of warm water and mild dish soap. Finally, replace the filter and faceplate. Secure faceplate with four Phillips screws.
-
Page 36: Chapter 7 How To Get More Help
Chapter 7 How to Get More Help Frequently Asked Questions (FAQ) You can visit the Magma Technical Support FAQ pages on the Internet www.magma.com/support/ Contacting Technical Support Our support department can be reached by fax at (858) 530-2733 or by phone at (858) 530-2511. -
Page 37: Magma Debug Utility
Magma Debug Utility Occasionally, Magma Technical Support may request Windows users to produce and email a Magma debug log file to help them resolve your problem. This file should be included as an attachment when submitting a request at www.magma.com/support. -
Page 38: Pciscope Software Utility
If you are experiencing problems setting up your system, you should run PCIScope before contacting the Magma Technical Support Group. With the Magma expansion chassis powered up and connected to your computer, load and launch the PCIScope application. The PCIScope Program will be installed on your computer and a window similar to the one shown below will appear. - Page 39 You should save this data as a file on your computer. Please include your name and date as part of the file name with an extension of “.bpd.” Then email this file to support@magma.com if you are experiencing configuration problems.
-
Page 40: Returning Merchandise To Magma
Magma will return any product that is not accompanied by an RMA number. Please note that Magma WILL NOT accept COD packages, so be sure to return the product freight and duties-paid. -
Page 41: Bus Hierarchy
The following figure is representative of the PCI Bus hierarchies for the Magma Expansion System. This figure pictorially conveys the overall PCI bus topology of the 13-Slot System. In this example, the Magma Host Card is the 1 PCI Bus. This PCI Bus is never visible to the Windows Device Manager or the Apple Profiler. -
Page 42: Appendix Abus Hierarchy
M A G M A In general, it is not possible to predict the actual Bus numbers. We only know how they increment starting from the Magma Host Card. The key point in the figure of the PCI Bus topology is that the connecting cable between the Host Interface Card and the backplane is actually a PCI bus itself. -
Page 43: Appendix Bneed More Slots
In a desktop computer, the bios enumerates automatically behind PCI bridges. In the Magma configuration, the bios finds the Magma host card in a PCI slot. The bios configures it, and then looks beyond it to find any PCI cards installed in the expansion chassis. -
Page 44: Fan-Out
M A G M A The 4 and 7 Slot Magma Expansion Systems each add two (2) PCI to PCI Bridges to the PCI Local Bus. The 13 Slot adds three (3) PCI to PCI Bridges to the PCI Local Bus. The 6 Slot adds one (1) bridge. -
Page 45: Verify Your Configuration
M A G M A PCI Expansion PCI Expansion 4, 7, 13Slot Chassis 4, 7, 13Slot Chassis Host Card Host Card Magma Expansion Proprietary Cable Expansion Cable PCI Expansion 4, 7, 13Slot Chassis Host Card The Fan-OutConfiguration is the recommended solution . It typically... -
Page 46: Daisy-Chaining
Daisy- Chaining Expansion Systems PCI Expansion 4, 7, 13Slot Chassis Host Card Proprietary Expansion Cable Magma Expansion Cable PCI Expansion Host Card Simply pla ce anotherHost Expansion Card into a vacant PCI slot on the 1st Expansion System. Then connect #1to #2 using the Expansion C able. -
Page 47: Verify Your Configuration
M A G M A Verify your configuration Before you start installing your PCI cards (refer to Chapter 4 Install Cards and Drives for more information), you should confirm that everything is in proper working order. Refer to Chapter 3 Verify Installation for guidance in verifying the proper installation of your Expansion System. -
Page 48: Pci Card Conflicts
M A G M A Obviously, you will need to keep an eye on your system performance and make any adjustments that may be required, either to PCI card location or to Expansion System configuration, to obtain maximum performance. PCI Card Conflicts If you determine that one PCI card is interfering with the operation of another card, first try reorganizing the cards on the motherboard. -
Page 49: Finding The Problem Card
If you have already reinstalled and reseated everything according to instructions in Chapter 2, and the PCI to PCI Bridge is still not visible in the Apple System Profiler, call Magma Technical Support. Appendix B Need More Slots? -
Page 50: Appendix Ccompliance
Cet appareil numériqué de la classe A est conformé à la norme NMB- 003 du Canada The product(s) described in this manual complies with all applicable European Union (CE) directives. Magma will not retest or recertify systems or components that have been reconfigured by customers. - Page 51 M A G M A Appendix C Compliance...
- Page 52 Magma 9918 Via Pasar, San Diego, CA 92126, USA Phone (858) 530-2511 • Fax (858) 530-2733 www.magma.com Manual P/N 09-09913-01 Rev A...
Need help?
Do you have a question about the P13RR and is the answer not in the manual?
Questions and answers