Table of Contents
Advertisement
Contents
Product Specifications ............................................2
Operation ..................................................................3
Thermostat Control Screen Function Control
Buttons ....................................................................... 4
Minimized Display Mode .......................................... 5
Menu Map .................................................................6
User Settings ...........................................................7
Set Clock .................................................................... 7
Filter Service ............................................................. 8
Maint Service ............................................................. 9
Screen Timeout ........................................................ 10
F/C Settings ..............................................................11
Sensor Calibration ................................................... 12
Backlite/Display ....................................................... 13
Usage Graph ..........................................................14
ESM Setpoints .......................................................15
Thermostat
Model TZEMT400BB32MAA
User Guide
ZWave Install ..........................................................16
Inclusion ................................................................... 16
Exclusion .................................................................. 16
Inclusion and Exclusion .......................................... 16
Thermostat Info .....................................................17
Installer Settings ....................................................18
System Settings ....................................................... 19
Thermostat Recovery Operation ............................. 19
Mechanical Settings ................................................ 20
Fan Cycler Settings ................................................. 20
Schedules ...............................................................21
Installation ..............................................................24
Warranty .................................................................25
Index .......................................................................26
1
Advertisement
Table of Contents

Related Manuals for Trane TZEMT400BB32MMA


Summary of Contents for Trane TZEMT400BB32MMA
-
Page 1: Table Of Contents
Thermostat Model TZEMT400BB32MAA User Guide Contents Product Specifications ..........2 ZWave Install ............16 Inclusion ..............16 Operation ..............3 Exclusion ..............16 Thermostat Control Screen Function Control Inclusion and Exclusion .......... 16 Buttons ............... 4 Thermostat Info .............17 Minimized Display Mode .......... 5 Menu Map ..............6 Installer Settings ............18 User Settings ............7... -
Page 2: Product Specifications
Product Specifications Specification Description Product Model: TZEMT400BB32MAA Product: Thermostat for Heating and Cooling HVAC System control. Z-Wave™ RF communications enabled Thermostat Size: 5.7” wide x 4.0” height x 1.2” depth Display: Graphical LCD, 2.75” x 1.5”, 64x128-pixel Backlight: Yes, Blue/white, Controllable, on, off, timeout Contrast: Adjustable on screen Buttons:... -
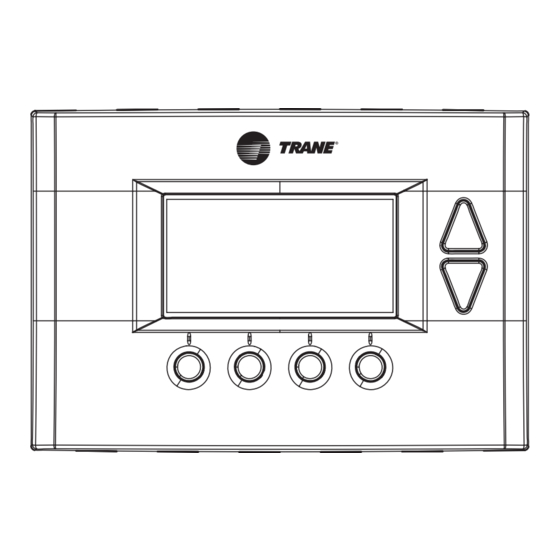
Page 3: Operation
Operation The model TZEMT400BB32MAA thermostat provides typical thermostat control of a central heating and cool- ing HVAC system. This thermostat also features a Z-Wave™ module for remote control. Ambient Temperature Display Clock Display 11:15 PM Sys O Setpoint 77 H Up/Down Buttons 74 C Filter... - Page 4 Thermostat Function Control Buttons 11:15 PM Sys O 77 H 74 C Filter AUTO AUTO MENU MODE Menu Button System Fan Mode Schedule Mode Button Button Mode Button Button Description Menu Other thermostat menus can be accessed by pressing the MENU button.
-
Page 5: Minimized Display Mode
Minimized Display Mode Optionally, you can set the thermostat to show only the temperature in minimized display mode. This mode can be enabled or disabled in the Users Settings screen. Î See Screen Timeout on page for more information. -
Page 6: Menu Map
Menu Map The menus are accessed by pressing the MENU button on the main screen. A. "User Settings" F. "Installer Settings" (hidden) 1. Set Clock 1. Display Lock 2. Filter Service 2. System Settings a. Mechanical Settings 3. Maint. Service 1. -
Page 7: User Settings
User Settings A.1 Set Clock The Set Clock screen allows you to set the thermostat’s internal clock. Î If the clock has been reset by an extended power outage, press the MENU button, scroll to the User Settings button and select, select the Set Clock screen and set clock. -
Page 8: Filter Service
Filter Service The Filter Service screen will show the accumulated Filter Runtime hours as well as the Service Interval that will be used to trigger a Filter Message. Any type of HVAC operation that causes the HVAC system fan to run will cause the Filter Runtime value to increase. -
Page 9: Maint Service
Maint Service The Maintenance Service screen shows the accumulated Heat and Cool Runtime hours as well as the Service Interval that will be used to trigger a Maintenance Message. Any HEAT or COOL type of HVAC operation will cause the respective Runtime values to increase. When the combined HEAT and COOL Runtime hours equals the Service Interval hours, a “Maint”... -
Page 10: Screen Timeout
Screen Timeout This is the time before any screen reverts to the Minimized Screen (temperature display only), after you stop pushing buttons. Minimized Screen feature is disabled by setting this time to “0”. User Settings Set Clock Filter Service Maint Service Screen Timeout Done Select... -
Page 11: F/C Settings
F/C Settings The F/C Settings screen is use to select the temperature display mode. Fahrenheit (F) or Celsius (C) are the two available modes. F/C Settings F/C Mode Done Change the Temperature Mode Press the MENU button. User Settings Select Scroll to and press the button. -
Page 12: Sensor Calibration
Sensor Calibration The Sensor Calibration screen is used to change the temperature calibration of the internal temperature sensor. The temperature calibration can be changed by +/- 7 degrees. When the Sensor Calibration screen is selected, the current temperature calibration is displayed. In the example screen, the calibrated temperature is 77 and the number of degrees of offset being applied is 1. -
Page 13: Backlite/Display
Backlite/Display The Backlite/Display screen is used to set the backlight time-out and contrast. Backlite Timeout is the time (in seconds) from the last button press to the backlight going out. The time-out can be set between zero (0) and one hundred and twenty (120) seconds. Thirty (30) is the default setting. When set to zero (0), the backlight will remain always on. -
Page 14: Usage Graph
Usage Graph The Usage Graph shows daily heating and cooling runtime hours for a week. Heating time (Hrs) Tue Wed Thu Fri Done Cool The button in the lower right corner will change depending on what is being displayed. When the heating time is displayed, the button will read Cool. -
Page 15: Esm Setpoints
ESM Setpoints Energy Saving Mode Energy Saving Mode (ESM) Setpoints are the setpoints used when the schedule is select- ed in the Schedule Mode screen. Energy Saving Mode Setpoings ESM - Heat ESM - Cool Done Adjust ESM Setpoints MENU 1. -
Page 16: Zwave Install
ZWave Install Z-Wave™ controllers from various manufacturers may support the Z-Wave™ Thermostat General V2 Device class used by the Trane Z-Wave™ Thermostat. The following procedure will allow the thermostat to be added to a Z-Wave™ network. Î If you are using a controller that is not a Schlage bridge, consult the instructions that came with the controller to find out how to enroll a new device. -
Page 17: Thermostat Info
Thermostat Info The Thermostat Info screen displays information about the thermostat and the system the thermostat controls. This information will be helpful if you need to contact customer support. Thermostat Info TZEMT400BB32 Ver: 01.00.10 Thermostat Info TZEMT400BB32 Ver: 01.00.10 ZVER: 02.00.9 ZNID: 004 ZVER: 02.00.9 ZNID: 004... -
Page 18: Installer Settings
Installer Settings Î The Installer Settings screen is a hidden screen designed for installer use only. Do not change any settings in this screen unless you are a qualified service technician. Installer Settings Display Lock System Settings Max Heat SP Min Cool SP Done Î... -
Page 19: System Settings
System Settings Î Changing these settings will affect the operation of the heating/cooling system. To view and edit these settings: Press the MENU button. Press and hold the two middle buttons simultaneously until the Installer Settings menu is displayed. Scroll to System Settings and press the Select button. -
Page 20: Mechanical Settings
Mechanical Settings Î Changing these settings will affect the operation of the heating/cooling system. To view and edit these settings: 1. Press the MENU button. 2. Press and hold the two middle buttons simultaneously until the Installer Settings menu is displayed. 3. -
Page 21: Schedules
Schedules Scheduling is usually controlled by your Z-Wave system. See the instructions that came with your Z-Wave sys- tem for more information. However, scheduling may also be controlled by the thermostat. Î The Schedules menu is hidden by default, but may be enabled in the Installer Settings. See Enable/Disable the Schedules Menu on page 19 for more information. - Page 22 Load a Preset Schedule There are two possible schedules that may be loaded: Preset Comfort and Preset Energy Star. These schedules may not be changed. When a schedule is loaded, it changes the current Heat and Cool schedule settings. You can then edit the Heat and Cool schedule, if necessary.
- Page 23 Copy a Day Schedule MENU Press the button. Scroll to Schedules and press the Select button. Scroll to Heat and Cool and press the Select button. The day of the week is displayed at the top of the screen. Press the Next button until the day you want to copy is displayed. Next Highlight the small in the lower right corner by pressing the left arrow () button once.
-
Page 24: Installation
Installation For complete installation instructions, browse to part2.schlage.com and download Trane Thermostat Installation Instructions. -
Page 25: Warranty
Purchased Product. Trane’s maximum liability hereunder is limited to the Original Purchase Price of the Purchased Product. No action arising out of any claimed breach of this warranty by Trane may be brought by the Original Purchaser more than one (1) year after the cause of action has arisen. -
Page 26: Index
Index Symbols Menu 2nd Stage Cool 20 Enable Button 4 2nd Stage Heat 20 Recovery 19 Menu Map 6 Schedule 19 Min Cool SP 18 Schedules 21 Minimized Display 5 Energy Star Disable 10 Adjust Schedule 22 Mode 5 Backlight 13 ESM (Energy Savings Mode) Setpoints Minimum Off Time 18 Contrast 13... -
Page 27: Thermostat Control Screen Function Control Buttons
Settings Fan Cycler 20 Installer 18 Mechanical 20 User 7 Specifications 2 System Mode 4 System Settings 19 T-Sense Match 18 Temperature Display 3 Mode 11 Temperature Mode Change 11 Thermostat control screen 3 Thermostat Control Screen Function Control Buttons 4 Thermostat Info 17 Type 20 Usage Graph 14... -
Page 28: Fcc Notice
FCC Notice FCC ID WIBTZW008 INFORMATION TO USER This device complies with Part 15 of the FCC Rules. Operation is subject to the following two conditions: (1) This device may not cause harmful interference, and (2) This device must accept any interference received, including interference that may cause undesired operation.
Need help?
Do you have a question about the TZEMT400BB32MMA and is the answer not in the manual?
Questions and answers