Table of Contents
Advertisement
Quick Links
Advertisement
Table of Contents

Subscribe to Our Youtube Channel
Related Manuals for AEG Electrolux BP5003021M


Summary of Contents for AEG Electrolux BP5003021M
- Page 1 BP5003021 User manual Oven...
-
Page 2: Table Of Contents
Display GREAT BRITAIN & IRELAND - GUARANTEE/ Buttons CUSTOMER SERVICE CLOCK FUNCTIONS WWW.ELECTROLUX.COM Setting the DURATION or END Subject to change without notice SAFETY INFORMATION Before the installation and use, read this manual carefully: • For your personal safety and the safety of your property... -
Page 3: Children And Vulnerable People Safety
Safety information • For the respect of the environment • For the correct operation of the appliance. Always keep these instructions with the appliance also if you move or sell it. The manufacturer is not responsible if incorrect installation or use results in damage. Children and vulnerable people safety •... -
Page 4: Electrical Connection
Safety information Electrical connection • The appliance must be earthed. • Make sure that the electrical data on the rating plate agree with your domestic power supply. • Information on the voltage is on the rating plate. • Always use a correctly installed shockproof socket. •... -
Page 5: Risk Of Fire
Safety information • Do not clean the appliance with steam cleaners, high-pressure cleaners, sharp objects, abrasive cleaning agents, abrasive sponges and stain removers • If you use an oven spray, follow the instructions from the manufacturer. • Do not clean the glass door with abrasive cleaning agents or metal scraper. Heat resistant surface of the inner glass can break and shatter. -
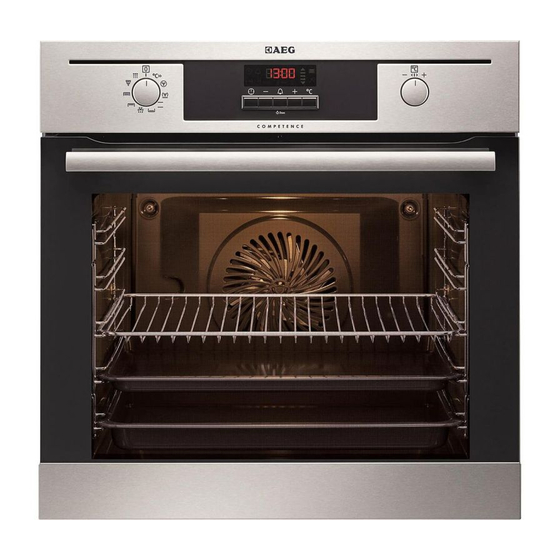
Page 6: Product Description
Product description PRODUCT DESCRIPTION General overview Control panel Control knob for oven functions Power indicator Electronic programmer Control knob for temperature Temperature indicator Heating element Lamp Rear wall heating element Bottom heat Shelf rails, removable Shelf positions... -
Page 7: Oven Accessories
Before first use Oven accessories • Nonstick oven shelf For cookware, cake tins, roasts. • Flat baking tray For cakes and biscuits. • Combi tray Set of Combi tray has the roasting pan and the inlay grid. Use the inlay grid only with the roasting pan. BEFORE FIRST USE WARNING! Refer to "Safety information"... -
Page 8: Initial Cleaning
Daily use Initial Cleaning • Remove all parts from the appliance. • Clean the appliance before first use. Refer to chapter "Care and Cleaning". First connection to the mains After first connection to the mains all symbols in the display are on for some seconds. For the subsequent few seconds the display shows software version. -
Page 9: Rapid Heat-Up Function
Daily use Oven function Application True Fan Cooking To bake maximum on three oven levels at the same time. Decrease the oven temperatures (20-40 °C) compared with Conventional. And to dry food. Pizza Setting To bake on one oven level food with a more intensive browning and a crispy base. -
Page 10: Buttons
Clock Functions Buttons Button Function Description CLOCK To set the clock function. MINUS, PLUS To set a value for temperature or time MINUTE MINDER To set the minute minder. To switch ON/OFF light in oven cavity, hold button more than 3 seconds TEMPERATURE To check temperature inside the oven cavity. -
Page 11: Setting The Minute Minder
Using the Accessories A sound operates after the time ends for 2 minutes. symbol and time setting flash in the display. The oven stops. 6. Press any button or open the oven door to stop the sound. If you press button during setting hours for DURATION , the appliance goes to setting of the END... -
Page 12: Installing The Oven Accessories
Using the Accessories Installing the Oven Accessories Put in the slide-in accessories so that the double side edges are at the back of the oven and point down to the bottom. Push the slide-in accessories between the guide-bars of one of the oven levels. -
Page 13: Additional Functions
Additional Functions You can use the combi tray to grill flat dishes in large quantities and to toast: • Put the inlay grid inside the roasting pan so that the supports of the oven shelf point downwards. • Put the roasting pan in the oven at the nec- essary level. -
Page 14: Helpful Hints And Tips
Helpful hints and tips The Automatic switch-off works with all oven functions, except Light, Low temperature cooking, Food sensor, Duration, End, Time delay. HELPFUL HINTS AND TIPS Inner side of door In some models on the inner side of the oven door you can find: •... - Page 15 Helpful hints and tips Cakes/pastries/breads on baking trays Type of baking Oven function Oven level Temperature °C Time Hours:Mins. Plaited bread/ Conventional 170-190 0:30-0:40 bread crown Cooking Christmas stollen Conventional 0:40-1:00 160-180 Cooking Cream puffs/ Conventional 0:15-0:30 160-170 eclairs Cooking Swiss roll Conventional 0:10-0:20...
-
Page 16: Multileveled Baking
Helpful hints and tips Type of baking Oven function Oven level Temperature °C Time Hours:Mins. Short bread/ Pas- Conventional 0:20-0:30 try Stripes Cooking Biscuits made with sponge mix- True Fan Cooking 150-160 0:15-0:20 ture Pastries made with egg white, True Fan Cooking 80-100 2:00-2:30 merungues... -
Page 17: Tips On Baking
Helpful hints and tips True Fan Cooking True Fan Cooking Time Type of baking Shelf positions from bottom Temperature in °C Hours:Mins. 2 levels 3 levels Biscuits made with sponge mix- 160-170 0:25-0:40 ture Biscuits made with egg white, 80-100 2:10-2:50 meringues Macaroons... -
Page 18: Roasting With Turbo Grill
Helpful hints and tips Bakes and gratins Dish Oven function Shelf position Temperature °C Time Hours:Mins. Conventional Pasta bake 180-200 0:45-1:00 Cooking Conventional Lasagne 180-200 0:25-0:40 Cooking Vegetables au Turbo Grill or True 160-170 0:15-0:30 gratin Fan Cooking Baguettes topped Turbo Grill or True with melted 160-170... - Page 19 Helpful hints and tips Veal Type of meat Quantity Oven function Shelf position Temperature Time mins. °C Roast veal 1 kg Turbo Grill 160-180 90-120 Knuckle of 1.5-2 kg Turbo Grill 160-180 120-150 veal Lamb Type of meat Quantity Oven function Shelf position Temperature Time mins.
- Page 20 Helpful hints and tips Fish (steamed) Type of meat Quantity Oven function Shelf position Temperature Time mins. °C Whole fish 1-1.5 kg Conventional 210-220 40-60 Cooking Slow Grill Grilling time (mins.) Food to be grilled Oven level 1st side 2nd side Roast beef Filet of beef Chateaubriaud...
-
Page 21: Preserving
Helpful hints and tips Type of baking Shelf position Temperature °C Time Mins. Apple cake, covered 150 - 170 50 - 60 Vegetable pie 160 - 180 50 - 60 Unleavened bread 10 - 20 Puff pastry flan 45 - 55 160 - 180 Flammekuchen (Pizza- 15 - 25... -
Page 22: Drying
Care and cleaning Vegetables Cooking time until Continue to cook at Preserve Temperature in °C simmering in mins. 100°C in mins. 160-170 50-60 5-10 Carrots Cucumbers 160-170 50-60 Mixed pickels 160-170 50-60 5-10 Kohlrabi, peas, aspara- 160-170 50-60 15-20 1) Leave standing in oven when switched off Drying Vegetables Oven level... -
Page 23: Pyrolytic Cleaning
Care and cleaning • To clean metal surfaces use a usual cleaning agent • Clean the oven interior after each use. Thus you can remove dirt more easily and it does not burn on. • Clean stubborn dirt with a special oven cleaner. •... -
Page 24: Oven Lamp
Care and cleaning Removing the shelf rail 1. Pull the front of the shelf rail away from the side wall. 2. Pull the shelf rail from the back of the side wall to remove it. To install the shelf rail follow the procedure in reverse. -
Page 25: What To Do If
What to do if… CAUTION! Be careful when you remove the door from the appliance. The door is heavy! Removing the oven door 1. Open the oven door as far as it goes. 2. Fully press clamping levers (A) on the two door hinges. - Page 26 What to do if… Problem Possible cause Solution The oven does not heat up The appliance is switched off Switch on the appliance The oven does not heat up The clock is not set Set the clock. Refer to "Setting the clock"...
-
Page 27: Installation
Installation INSTALLATION WARNING! Refer to "Safety information" chapter. The built-in unit must meet the stability requirements of DIN 68930. 560 min. 530 min. 590 min. max. R1200 mm... -
Page 28: Disposal
Disposal alternativ 100 H05VV-F H05RR-F min. 1600 mm 90 º 2x3,5x25 DISPOSAL The symbol on the product or on its packaging indicates that this product may not be treated as household waste. Instead it should be taken to the appropriate collection point for the recycling of electrical and electronic equipment. -
Page 29: Great Britain & Ireland - Guarantee/Customer Service
SERVICE Standard guarantee conditions We, Electrolux, undertake that if within 12 months of the date of the purchase this Elec- trolux appliance or any part thereof is proved to be defective by reason only of faulty workmanship or materials, we will, at our option repair or replace the same FREE OF CHARGE for labour, materials or carriage on condition that: •... -
Page 30: Www.electrolux.com
• The appliance guarantee is personal to the original purchaser of the appliance and cannot be transferred to another user. • The appliance is installed and used in accordance with instructions issued by Electrolux and is only used within the home, i.e. is not used for commercial purposes. - Page 31 Industriestrasse 10, CH-5506 Mägenwil Slovenija +38 61 24 25 731 Gerbičeva ulica 98, 1000 Ljubljana Slovensko +421 (02) 32141334 Electrolux Slovakia s.r.o., Electrolux Do- máce spotrebiče SK, Seberíniho 1, 821 03 Bratislava Suomi www.electrolux.fi Sverige +46 (0)771 76 76 76 Electrolux Service, S:t Göransgatan 143,...
- Page 32 www.aeg-electrolux.com/shop...
Need help?
Do you have a question about the BP5003021M and is the answer not in the manual?
Questions and answers