Table of Contents
Advertisement
Quick Links
Advertisement
Table of Contents

Related Manuals for AUDIOLINE 703


Summary of Contents for AUDIOLINE 703
- Page 1 Manual...
- Page 2 PQRS WXYZ...
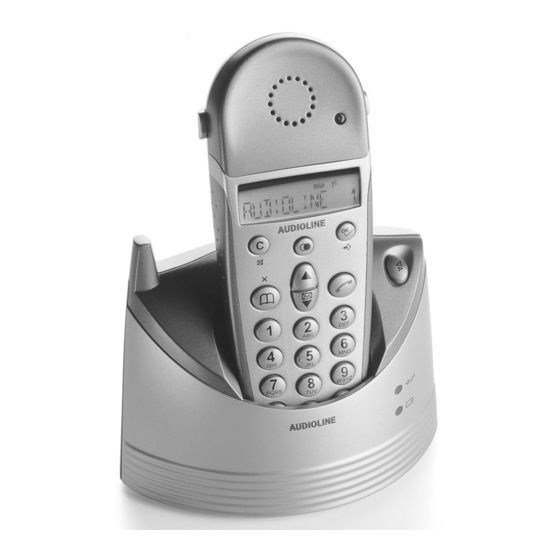
- Page 3 English (see page 4-26) 1 Mute/Erase button 6 CID and Scroll (down) button 2 CID and Scroll (UP) button 7 Talk button 3 Phone book/Back button 8 Redial button 4 Recall (R) and Off/On button 9 OK/Menu button 5 Intercom 10 Lineindicator...
-
Page 4: Table Of Contents
English Index Installation System Settings Unpacking......5 Base unit ringer signal ..18 Connection ......5 De-registering another Belt clip ....... 6 handset ....... 18 Battery ........ 6 PIN number......18 Turning the Handset Dialling method....19 On/Off......... 6 R Button Time..... 19 Battery charge indicator .. -
Page 5: Installation
English Installation Unpacking The package contains: - Handset - Mains adapter - Base unit - Line cord - 2 NiMH rechargeable batteries Models with extra handset (+1) also include an additional handset, batteries, charger and adapter. IMPORTANT! Only use with the supplied power adapter/s. Connect correct adapter according to indication. Connection 1. -
Page 6: Belt Clip
English Installation Belt clip A belt clip is fi tted to the back of the handset allowing the handset to be attached to a belt, waistband or similar. Battery The telephone is supplied with environmentally friendly nickel metal hydride (NiMH) batteries – 2 x AAA 1.2V. As with all batteries, performance may degrade over time;... -
Page 7: Battery Charge Indicator
English Installation Battery charge indicator The symbol in the display indicates when it is time to recharge the batteries. The indicator has three segments, which disappear as the battery charge decreases. When the batteries are running low, a warning tone will be heard. -
Page 8: The Display
English Installation The Display Indicator Function Phone Book. Key Lock. Menu. Indicates that a call is connected. External call. Intercom Function. Battery charge indicator. Message indication can be erased manually by turning off the handset. Numbers in Caller ID log (CID). Answered call in number memory. -
Page 9: Operation
English Operation IMPORTANT Please note when programming all references to press = to press and then immediately release the button. Making a call 1. Enter the required telephone number. Mistakes can be erased using C. 2. Press the telephone number will now be dialled. the telephone number will now be dialled. -
Page 10: Mute Button
English Operation Mute button The microphone can be muted during a call by pressing . Press again to re- activate the microphone. MUTE will be displayed for as long as the function is active. Paging Pressing on the base unit will activate the paging signal on the handset. This function is used to help locate the handset or to page the person carrying the handset. -
Page 11: Caller Identifi Cation
English Caller Identifi cation Explanation of Caller ID Caller ID allows you to see who is calling before you answer a call, and see who has called in your absence. If a name is attached to the telephone number and stored in the phone book, the name will be displayed. - Page 12 English Caller Identifi cation Erase number 1. Press 2. Scroll to the required telephone number. 3. Press C to erase the individual selected entry, alternatively press and hold C until DELETE ALL? is displayed. 4. Press to confi rm to confi rm Transferring Numbers to the Phone Book 1.
-
Page 13: Menu
English Menu Description of the menu system The telephone has a menu system, controlled by the following buttons: Access to the menu system. Move one step forward and/or confi rm selected option. Scroll through the menu alternatives. Used to go back one step or to exit the menu system Used to erase. -
Page 14: Phone Book
English Phone Book Using the Phone Book Use the phone book to store telephone numbers and names. A stored telephone number can be dialled using fewer keystrokes than if dialled manually. If you subscribe to a Caller ID service, the name/number of the caller will be shown while receiving an incoming call (for those numbers stored in the Phone book). - Page 15 English Phone Book Dialling from the Phone book 1. Press 2. Scroll through the phone book. It is also possible to perform a quick- search, press the number button corresponding to the fi rst letter of the name required one or more times, see the table on page 14. 3.
-
Page 16: Handset Settings
English Handset settings Warning tones You can switch on or off the unit’s various warning signals. KEYTONE Heard when the buttons are pressed. LOW BATTERY Heard when the battery is running low. OUT RANGE Heard if the headset is taken out of range. 1. -
Page 17: User Name
English Handset settings User Name The text displayed in standby mode can be customised. Maximum 10 characters. 1. Press 2. Scroll to HANDSET. Press 3. Scroll to NAME. Press 4. Delete the name using C, press the number button corresponding to the fi rst letter of the name required one or more times, see the table on page 14. -
Page 18: System Settings
English System Settings Base unit ringer signal You can select an alternate ringer volume and melody type for the base unit. 1. Press 2. Scroll to SETUP. Press 3. Scroll to BASE VOLUME or BASE MELODY. Press 4. Scroll to the required setting. Press to save. -
Page 19: Dialling Method
English System Settings Dialling method You can select either tone or pulse dialling, the standard setting is tone. In normal domestic use, this setting should not require changing. 1. Press 2. Scroll to SETUP. Press 3. Scroll to DIAL MODE. Press 4. -
Page 20: Registration
English Registration Select Base Unit You can manually select which base unit you wish the handset to communicate with, alternatively the unit can automatically select which base unit to communicate with (AUTO). 1. Press 2. Scroll to REGISTER. Press 3. Scroll to SELECT BASE. -
Page 21: Expanded System
English Expanded System General Information DECT (Digital Enhanced Cordless Telephone) is a digital method of transmission for cordless telephones. You can: Use up to 2 handsets with the same base unit. Make internal calls (intercom) and transfer calls between connected handsets using the same base unit. -
Page 22: Intercom
English Expanded System Intercom When using more than one handset with the same base unit, calls can be made internally between the handsets, referred to as internal calls, or intercom. Intercom calls can only be made between handsets connected to the same base unit 1. -
Page 23: Other
English Other Troubleshooting Check that the telephone cord is undamaged and properly plugged in. Disconnect any additional equipment, extension cords and other telephones. If the problem is resolved, the fault is with the other equipment. Test the equipment on a known working line. If the product works then the fault is probably with the line. -
Page 24: Guarantee
English (Guarantee UK Only) If you cannot resolve the fault using the faultfi nder section, technical support is available on the Premium Rate Number: 0906 302 0114. Calls cost 50 pence per minute (prices correct at the time of going to press), and is operational between 9AM - 5PM Monday-Friday excluding Bank Holidays. -
Page 25: Australia And New Zealand
English Other Australia and New Zealand Products permitted for connection to the telephone network are marked with in Australia and in New Zealand. These marks indicate the products comply with the regulations and can be used without concern in the country of purchase. - Page 26 English Other REN (RN for New Zealand) The REN (Ringer Equivalence Number) or (RN) is of signifi cance only if you wish to connect more than 1 telephone to your telephone line. A standard telephone line has a maximum REN capacity of 3 (RN of 5). It is possible to connect 3 devices with a REN of 1 (RN of 1) with no degradation to the product’s performance.
- Page 28 English Version 1.0...
Need help?
Do you have a question about the 703 and is the answer not in the manual?
Questions and answers