Subscribe to Our Youtube Channel
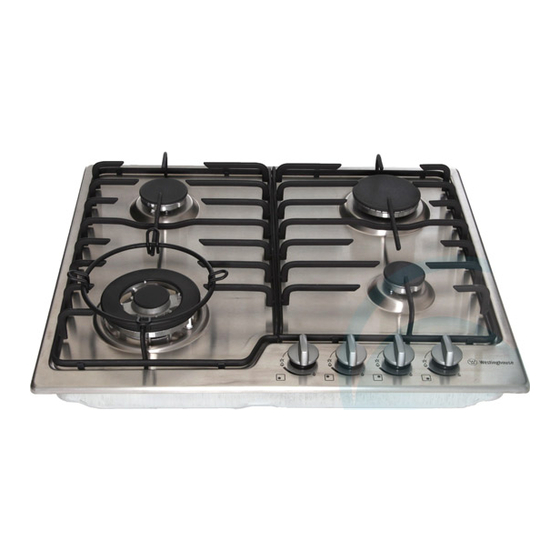
Summary of Contents for Westinghouse GHP16S
- Page 1 USER MANUAL GHP16S, GHP16W, GHP17S, GHP17W, GHP765S, GHP775S, GHP95S, GHP95W, GHP795S GAS COOKTOPS...
-
Page 2: Table Of Contents
CONTENTS CONGRATULATiONS CONTENTS Congratulations and thank you for choosing our Product. Important safety instructions . . . . . . . . . . . . . . . . . . . . . 3 We are sure you will find your new cooktop a pleasure Installation and use summary . -
Page 3: Important Safety Instructions
SAFETY iMPORTANT SAFETY iNSTRUCTiONS WARNING er manual carefully and store in a Please read the us This appliance is not intended for use by persons handy place for later reference. The symbols you will (including children) with reduced physical, sensory see in this booklet have these meanings: or mental capabilities, or lack of experience and knowledge, unless they have been given... -
Page 4: Installation And Use Summary
iNSTALLATiON & USE iNSTALLATiON USiNG YOUR COOKTOP TE: You must read these warnings carefully before Gas controls turn anticlockwise from ‘Off’ and Note: installing or using the cooktop. If you need assistance, have limited movement. contact your Customer Care Department. The manufacturer will not accept liability, should the Figure 2 instructions below or any other safety instructions... -
Page 5: Cleaning And Care
CLEANiNG & CARE Pots and pans Stainless steel All common pots and pans: aluminium, stainless steel, Note: Ensure any oil is cleaned off the hob before first use, cast iron, ceramic, etc., may be used on your new gas otherwise it may cause the hob to turn a yellowish colour. model cooktop. -
Page 6: Troubleshooting
TROUBLESHOOTiNG If you have a problem with the cooktop, check the table below. You may be able to solve the problem and this will save you from paying for a service call. You will have to pay for a service call even in the warranty period if the problem is one listed below. -
Page 7: Installation Instructions
iNSTALLATiON iNSTALLATiON iNSTRUCTiONS nce must be installed by an authorised person This applia CAUTION and in compliance with : 1. AS 5601 ‘Gas Installations’ (Australia) or NZS 5261 Cooktops are supplied for use with natural gas (NG). ‘Installation of Gas Burning Appliances and Equipment’ To use on LPG the injectors MUST be changed using (New Zealand) or the relevant installation code for the conversion kit supplied. -
Page 8: Installation Procedure
iNSTALLATiON iNSTALLATiON PROCEDURE ench cutout should be made as per cutout combustible surface 1. The b Figure 5–60cm models dimensions in Figure 4. 2. Adjacent walls, cupboards and protection for combustible materials. 131mm Ensure that the appliance is installed with Section 5.12.1 of AS 5601 (Australia) or section 14.1 of NZS 5261 (New Zealand), regarding clearances to combustible surfaces and materials,... - Page 9 iNSTALLATiON Figure 6–60cm models Figure 7 seal trivet benchtop 10mm clamp burner box screw Figure 8–60cm and 75cm models 11mm 11mm clamp location clamp location Figure 6–75cm models 10mm clamp location Bottom view clamp location 86mm 86mm Figure 8–90cm models Figure 6–90cm models possible clamp locations 10mm...
-
Page 10: Gas Connection
GAS CONNECTiON GAS CONNECTiON OPERATiON ON N.G./S.N.G. pliance is supplied for use with Natural Gas. This ap Regulator However, it can be converted for use with LPG. An appliance regulator is provided. The regulator must be Refer to LP conversion on pages 12 and 13. positioned so that the pressure test nipple is accessible when the appliance is installed. - Page 11 If the regulator appears to not be performing satisfactorily, Checking the gas supply then check the following points. 1. Check the manometer zero point is correct. 2. Connect the manometer to the cooktop pressure point. 1. If the outlet pressure is consistently too low then the This is located on the regulator.
-
Page 12: Lpg Conversion
LPG CONVERSiON Under these conditions the outlet pressure should not CAUTION vary from the nominal outlet pressure of 2.60kPa by more than +/– 0.52kPa. 8. If the regulator appears to not be performing ppliance is fitted with Natural Gas burner injectors. This a satisfactorily then check the following points. -
Page 13: Electrical Connection
ELECTRiCAL CONNECTiON (220-240 volts) The appliance is supplied with a standard 7.5Amp Figure 10 service cord terminated by a 3-pin plug for connection Hex nut assembly, to a standard household socket. The electrical supply fully screwed down is required to power the electronic ignition system. NOTE: It will be necessary for servicing purposes to disconnect the electrical power supply. -
Page 14: Testing Appliance Operation
TESTiNG APPLiANCE OPERATiON t the appliance and ensure that it After installation, tes WARNING operates correctly before handing it over to the customer. Servicing must only be carried out by an authorised The following procedure is recommended: service person. 1. Turn on the gas and electricity supply and attempt ignition on all burners, both separately and in Injector sizes required for various gas types are shown in combination. -
Page 15: Warranty
WARRANTY FOR SALES IN AUSTRALIA AND NEW ZEALAND APPLIANCE: WESTINGHOUSE 4 & 5 BURNER GAS COOKTOPS This document sets out the terms and conditions of product warranties for Electrolux (a) The Appliance is damaged by: branded appliances. It is an important document. Please keep it with your proof of... - Page 16 The Electrolux Group to consumers including delivery, home service and spare parts. Westinghouse. We are part of the Electrolux family. Share more of our thinking at www.electrolux.com © 2008 Electrolux Home Products Pty Ltd ABN 51 004 762 341 Print code: WMANIGCTUM Issue Date: Jun 08 Part number: 305 4423 Rev.1...


Need help?
Do you have a question about the GHP16S and is the answer not in the manual?
Questions and answers