Table of Contents
Advertisement
Quick Links
Advertisement
Table of Contents
Troubleshooting

Related Manuals for Garmin STREET PILOT 7200


Summary of Contents for Garmin STREET PILOT 7200
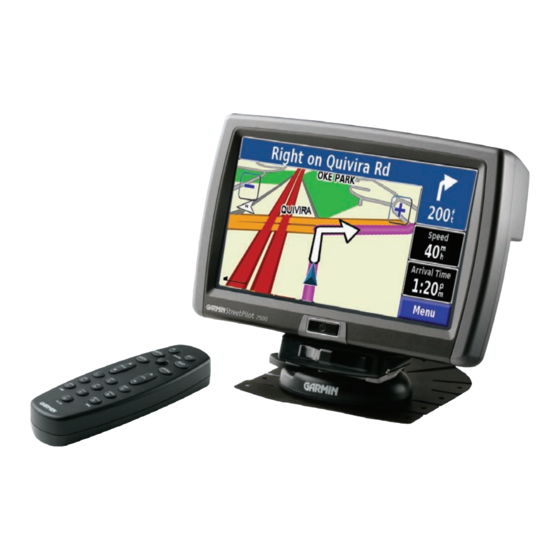
- Page 1 Owner’s Manual StreetPilot 7200/7500 portable car navigation...
- Page 2 Information in this document is subject to change without notice. Garmin reserves the right to change or improve its products and to make changes in the content without obligation to notify any person or organization of such changes or improvements. Visit the Garmin Web site (www.garmin.com) for current updates and supplemental information concerning the use and operation of this and other Garmin products.
- Page 3 StreetPilot 7200/7500 needs service or you would 913/397.8200 or 800/800.1020, Monday–Friday, like to buy additional maps. 8 AM–5 PM Central Time. You can also visit the Garmin Serial Number: ___ ___ ___ ___ ___ ___ ___ ___ Web site at www.garmin.com/support.
-
Page 4: Table Of Contents
Saving Coordinates ......8 Deleting All Saved Routes ....18 Setting a Home Location ..... 9 Stopping Your Route ......18 Contact Garmin ........i Finding Saved Places ......9 Adding a Detour to a Route ....18 Serial Number ........i Editing Saved Places ...... - Page 5 Viewing Traffic Events ....... 35 DR Cable Wiring ....... 51 Avoiding Traffic ........36 Custom POIs (Points of Interest) ..52 Severity Color Code ......36 Using the Garmin Travel Guide ..53 ™ Traffic Symbols ......... 37 Technical Specifications ....54 Changing the Traffic Settings ....
-
Page 6: Preface
REFACE Warning This manual uses the term Warning to indicate a potentially hazardous situation, which, if not avoided, could result in death or serious injury. Failure to avoid the following potentially hazardous situations could visual sightings, and maps. For safety, always resolve any discrepancies or result in an accident or collision resulting in death or serious injury. -
Page 7: Caution
Important Information MAP DATA INFORMATION: One of the goals of Garmin is to provide customers with the most complete and accurate cartography that is available to us at a reasonable cost. We use a combination of governmental and private data sources, which we identify in product literature and copyright messages displayed to the consumer. -
Page 8: Caring For Your Streetpilot
Cleaning the Unit • Do not expose the unit to water or other forms Clean the unit’s outer casing using a cloth dampened of moisture; the Street Pilot 7200/7500 is not with a mild detergent solution and then wipe dry. Avoid waterproof. -
Page 9: Find It And Go
T AND T AND Use the StreetPilot 7200/7500 to find your destination and go to it. Finding a Restaurant ➊ Touch Where To? ➋ Touch Food, Hotel…. ➌ Touch Food & Drink. ➍ Touch a food category. ➎ Touch the place. ➏... -
Page 10: Following Your Route
T AND Following Your Route Follow the route to your destination using the map. As you travel, your StreetPilot guides you to your destination with voice prompts, arrows, and directions along the top of the map. If you depart from the original route, your StreetPilot recalculates the route and provides new route instructions. -
Page 11: Where To
HERE TO HERE Finding an Address From the Menu page, touch Where To? Touch Address. ➊ ➋ ➌ Touch a country. Touch Select City/Postal Enter the city or postal code Code. and then touch Done. ➍ ➎ ➏ Touch the correct city or Enter the address number Select the address, if postal code. -
Page 12: Finding A Place Using The Map
HERE TO Finding a Place Using the Map Tips for Browsing the Map View Map. You can From the Menu page, touch • Touch the map and drag to view different parts of also touch Where to? > Browse Map. Touch and the map. -
Page 13: Understanding The Information Page
HERE TO Understanding the Information Page Finding Recently Found Places When you find a location, select it in the search results Your StreetPilot stores the last 50 places you have found list to open the item’s information page. in Recent Finds. ➊... -
Page 14: Finding Places In A Different Area
HERE TO Finding Places in a Different Area Narrowing Your Search You can search for locations in a different area, such as a To narrow your search, you can spell part of the name of different city or near your destination. the location you are searching for. -
Page 15: My Locations
OCATIONS OCATIONS Saving Places You Find Saving Your Current Location View Map. After you have found a place you want to save, select it From the Menu page, touch in the results list. ➊ Touch anywhere on the map. ➊ Touch Advanced. -
Page 16: Saving Coordinates
OCATIONS Saving Coordinates If you know the geographic coordinates of your destination, you can use your StreetPilot to navigate to any location using its latitude and longitude coordinates. From the Menu page, touch Where To? > My Locations > Coordinates. Entering the Coordinates ➋... -
Page 17: Setting A Home Location
OCATIONS Setting a Home Location Where To? You can set a Home Location for the place you return to most often. From the Menu page, touch ➊ Touch Home. ➋ Select an option. ➌ Touch Save Home. Where To? Home. After you set your Home Location, touch and then touch Finding Saved Places... -
Page 18: Editing Saved Places
OCATIONS Editing Saved Places Tools My Data > Favorites. From the Menu page, touch > ➊ Edit/Review Favorites. ➋ ➌ Touch Edit. Touch Touch the item you want to edit. ➍ Touch the item you want to edit. Name—enter a new name for the location using the on-screen keyboard. Location—edit the location of the place;... -
Page 19: Deleting A Saved Place
OCATIONS Deleting a Saved Place Tools My Data > Favorites. From the Menu page, touch > ➊ Touch Delete Favorites. ➋ Touch Selection. ➌ Touch a saved location. ➍ Touch Delete. Selection—touch each location and delete them each individually. Category—select one category to delete all of the locations assigned to that category. -
Page 20: Viewing The Map And Using The Tools
IEWING THE AP AND SING THE OOLS IEWING THE AP AND SING THE OOLS Viewing the Map Page From the Menu page, touch View Map to open the map. Touch an area of the map to see additional information, as shown below. -
Page 21: Trip Computer
IEWING THE AP AND SING THE OOLS Trip Computer Turn List The Trip Computer indicates your current speed and The Turn List displays a list of turn-by-turn instructions provides helpful statistics about your trip. for your entire route as well as arrival information. To view the Trip Computer, select Speed Arrival... -
Page 22: Gps Info Page
Satellite signal even better position accuracy. To learn about WAAS and strength bars EGNOS, visit www.garmin.com/aboutGPS/waas.html. The sky view shows the satellites you are receiving. The Traffic Info Page satellite signal strength bars indicate the strength of each To use the traffic features, you need an FM Traffic satellite you are receiving. -
Page 23: Creating And Editing Routes
REATING AND DITING OUTES REATING AND DITING OUTES Creating a New Saved Route From the Menu page, touch Tools > My Data > Routes. ➊ ➋ ➌ Touch Create New Touch a method and touch Touch a method and touch Saved Route. -
Page 24: Editing A Saved Route
REATING AND DITING OUTES Editing a Saved Route Tools My Data > Routes. From the Menu page, touch > ➊ Edit/Review Routes. ➋ ➌ Touch Edit. Touch Touch the route to edit. ➍ Touch the item to edit. Rename—enter a new name for the route using the on-screen keyboard. Edit/Review Points—add, arrange, remove, re-order, and review points in the route. -
Page 25: Adding Midpoints (Stops) To Your Route
REATING AND DITING OUTES Adding Midpoints (Stops) to Your Route You can add midpoints (also called via points or stops) to your route as you create it, as described on page 15. You can also add points to your route when you edit the route, as described below. Follow the steps on the previous page to begin editing the route. -
Page 26: Saving The Active Route
REATING AND DITING OUTES Saving the Active Route Adding a Detour to a Route Tools My Data From the Menu page, touch > > If you need to take a detour from your current route, Routes > Save Active Route. open the Menu page and touch Detour. -
Page 27: Adding Avoidances
REATING AND DITING OUTES Adding Avoidances Settings Navigation Avoidance Setup. Select the road type to avoid. Touch From the Menu page, touch > > > to view more road types to avoid. Creating Custom Avoids ➊ Touch Add New Avoid Area ➋... -
Page 28: Using The Logs
SING SING Adjusting the Track Log Using the Mileage Logs As you travel, the StreetPilot creates a bread crumb trail You can keep four different mileage logs of your travels. (track log) of your movement. From the Menu page, From the Menu page, touch Tools >... -
Page 29: Loading Files On Your Streetpilot
7200/7500 OADING ILES ON OADING ILES ON TREET ILOT Step 2: Connect AC Power Your StreetPilot can store files, such as MP3 music files, custom POIs, and splash screen images. Using the Connect the enclosed AC power cable to the power USB Mass Storage mode, copy and paste files to the connector on the right side of the StreetPilot. -
Page 30: Step 4: Connect The Usb Cable
2. Connect the larger end of the USB cable to an available USB port on your computer. To transfer files to your StreetPilot, touch USB Mass Storage. If you would like to use MapSource or update your software, touch Garmin Mode. Connecting the USB Cable StreetPilot 7200/7500 Owner’s Manual... -
Page 31: Step 6: Transfer Files
USB Mass Storage mode, open My Computer. Open your computer’s desktop. your “GARMIN” drive or SD drive. Highlight the file 2. Browse your computer for the file you want to that you want to delete from your StreetPilot and press copy. -
Page 32: Step 7: Eject And Unplug The Usb Cable
7200/7500 OADING ILES ON Step 7: Eject and Unplug the USB Drive Storage Capacity To view available space for your “GARMIN” drive, Cable Properties right-click on the drive name and select from When you are finished transferring files, double-click the shortcut menu. -
Page 33: Using Ximage To Customize Your Splash Screen
ILES ON Using xImage to Customize Your If you are connected to several network drives, the “GARMIN” drive might not appear. To display the drive, Splash Screen right-click on a network drive and click Disconnect. xImage allows you to exchange images between your computer and your StreetPilot. -
Page 34: Listening To Music And Audible Books
ISTENING TO USIC AND UDIBLE OOKS ISTENING TO USIC AND UDIBLE OOKS Playing MP3 Files ➊ Touch Tools. ➋ Touch Music Player. ➌ Touch Source to select mode. Touch Browse. ➍ Touch a category. ➎ Touch Play All. ➏ Enjoy the good music! StreetPilot 7200/7500 Owner’s Manual... -
Page 35: Playing Music From An External Device (Line In)
ISTENING TO USIC AND UDIBLE OOKS Playlist Using the MP3 Player Touch to view all of the songs in the playlist. To start playing the playlist from a different song, touch the song. Touch the album cover to view information about the song, artist, and album. -
Page 36: Listening To Audible Books
ISTENING TO USIC AND UDIBLE OOKS Listening to Audible Books Your StreetPilot provides several sample audible books. These sample books are only portions of the book; to hear an entire book, purchase it from Audible.com; see pages 30–32. ➊ Touch Tools. ➋... - Page 37 ISTENING TO USIC AND UDIBLE OOKS Moving around the Book Using Bookmarks To create a bookmark, touch and touch Save. To view your bookmarks, touch and then touch a bookmark. Touch Play to listen to the book from the Edit bookmark.
- Page 38 Audible.com account. After you create an account, 3. In the “Choose your device” window, click the download AudibleManager to your personal computer. box next to “Garmin” to place a check mark in the You can purchase a book now or any time. box. Click Next.
-
Page 39: Connecting The Usb Cable
ISTENING TO USIC AND UDIBLE OOKS Loading Audible Books to Your StreetPilot 4. Enter your Audible user name and password. Click Next. After following the steps on the previous page, you are ready to load an audible book to your StreetPilot. 5. - Page 40 1. From your computer’s desktop, double-click the AudibleManager icon to open AudibleManager. 3. Select the book title. Click Add to Garmin StreetPilot 7200/7500 in the top left corner. Go to My Library Online 2.
-
Page 41: Watching Videos
IDEOS Watching a Video Your StreetPilot accepts PAL composite video. You need an A/V adapter cable available from Garmin or an electronics store. Your video device may require an additional adapter cable. 1. Connect the small end of the A/V adapter cable... -
Page 42: Using A Backup Camera
A backup camera does not provide a comprehensive view of the entire rear area of a vehicle. You should always look around outside your vehicle and use your mirrors to confirm rearward clearance. Garmin cannot be held responsible for injuries, collisions, or accidents resulting from backup camera usage. -
Page 43: Traffic Information
Traffic Info. Select For more information about the FM Traffic Receiver, an item in the Traffic Events list to view the details. visit the Garmin Web site (www.garmin.com). For Touch Near… to view traffic at a different location. participating FM subscription providers and covered cities, refer to www.garmin.com/fmtraffic. -
Page 44: Avoiding Traffic
RAFFIC NFORMATION Avoiding Traffic The map page displays a when there is a traffic event on your current route or on the road you are driving. When you are following a route, touch the to avoid the traffic. ➊ ➋ ➌... -
Page 45: Traffic Symbols
RAFFIC NFORMATION Traffic Symbols the subscription to display the expiration date. To add a subscription, touch Subscription. See the next page North International for information about adding an FM Traffic subscription. Meaning American Symbols Symbols Symbols on Map—change the symbols used to indicate Road Condition the type of traffic event. -
Page 46: Adding An Fm Traffic Receiver Subscription
Your FM Traffic Receiver may have a trial subscription or you may be in an area with free service. You can also add subscriptions to expand your service area. Write down your FM Traffic Receiver’s unit ID. Go to www.garmin.com /fmtraffic to purchase a traffic subscription and get a 25-character traffic subscription code. -
Page 47: Customizing Your Streetpilot
USTOMIZING TREET ILOT USTOMIZING TREET ILOT Adjusting the Volume Customizing the General Settings From the Menu page, touch Volume. Touch the Settings General. From the Menu page, touch > to adjust the volume of the speaker. Touch Mute silence the audio output. From the Menu page, touch Settings >... -
Page 48: Customizing The Audio Settings
USTOMIZING TREET ILOT Voice Language—change the language for all voice Text Language—change the on-screen text to the prompts and messages. Touch the voice you want to selected language. Changing the text language does not use and touch OK. To delete that voice from your change the language of map data or user-entered data. - Page 49 USTOMIZING TREET ILOT Touch Screen Tone—turn on or off the tone sounded Input Type—select the video input type: DVD/video each time you touch the screen. Backup Camera. For more information about setting up the backup camera, see page Keypress Tone—turn on or off the tone sounded each Detection Response—select how the StreetPilot time you press a button on the remote.
- Page 50 USTOMIZING TREET ILOT Customizing Proximity Alerts see page 53. For more information about loading files to your StreetPilot, see page From the Menu page, touch Settings > General > Proximity Alerts to adjust the notifications for custom Changing Your Time Settings POIs you have loaded on the StreetPilot.
-
Page 51: Changing The Map Settings
USTOMIZING TREET ILOT Map Datum—select the map datum to be used by your Turning Safe Mode Off and On StreetPilot. If you are navigating and comparing the GPS From the Menu page, touch Settings > General > Safe coordinates to a map, chart, or other reference, set the Mode. - Page 52 USTOMIZING TREET ILOT Orientation—change the perspective of the map. Map Data Fields—adjust the size and content of the data fields shown on the Map page. Select None • 2D North Up—display the map in 2 dimensions (2- remove the data fields to see more of the map. Select D) with North at the top.
-
Page 53: Changing The Navigation Settings
USTOMIZING TREET ILOT Changing the Navigation Settings Off-Route Recalculation—set the way the unit responds when off the route. You can silence the “off- Settings Navigation. From the Menu page, touch > route, recalculating” message here. Vehicle—specify your vehicle type. Continuous Auto Routing—enable or disable the Preference—select a preference for route calculations. -
Page 54: Changing The Screen Settings
USTOMIZING TREET ILOT Changing the Screen Settings FM Traffic Receiver—if you have a FM Traffic Receiver, you can view the FM Traffic Receiver’s unit Settings Screen. From the Menu page, touch > ID. Connect the FM Traffic Receiver to the StreetPilot. Brightness—select Manual and then touch Next. -
Page 55: Appendix
PPENDIX PPENDIX Using the Remote Control The alphanumeric remote control operates using two AAA batteries. To use the remote, aim it toward the Power button on the front of the StreetPilot. (Zoom) In—zooms into the map. Thumb Stick—highlights options and moves the map pointer. -
Page 56: Looking At The Streetpilot
PPENDIX Looking at the StreetPilot Front Mini-USB connector Touch screen (for USB cable or FM Traffic Receiver) SD card slot A/V in Power button Audio out (for external (aim the remote here) (for headphones audio or video or Line out) device) Left Side Right Side... -
Page 57: Installing The Streetpilot
PPENDIX Installing the StreetPilot To attach the mounting plate to your dashboard: 1. Clean the area where you want to place the To attach the mounting cradle to the StreetPilot: mount with rubbing alcohol. Dry with a clean dry 1. Place the two tabs on the cradle into the two cloth. - Page 58 PPENDIX To slide the puck into the mounting base: To remove the puck from the mounting cradle: 1. Slide the cradle’s locking lever to the left, swing the cradle backward, and pull the cradle off of the StreetPilot. Locking 2. Remove the two screws from the front of the lever on the cradle.
-
Page 59: Dr Cable Wiring
DR connector. WARNING: The terms of the Garmin Warranty 2. Plug the end of the DR cable into the connector. require that the DR cable be installed by Garmin- Push the plug in until it is fully seated. authorized, licensed installers. -
Page 60: Custom Pois (Points Of Interest)
From the Menu page, touch Settings > Navigation > After downloading your POI database, use the Garmin Dead Reckoning Setup > Settings. > POI Loader to install the POIs into your unit. The POI Loader is available at www.garmin.com/products/sp7500... -
Page 61: Using The Garmin Travel Guide
Touch Save to save this location in your Using the Garmin Travel Guide ™ Favorites. Much like a paper travel guide, the Garmin Travel Touch More to view more information about the Guide provides detailed information about places, such location. -
Page 62: Technical Specifications
PPENDIX Technical Specifications For a complete list of specifications, visit www.garmin .com/products/sp7500 for the 7500 and www.garmin Size: 5.6” W x 3.2” H x 2.0” D (14.3 x 8.0 x 5.0 cm) .com/products/sp7200 for the 7200. Weight: 0.93 lb (420 g) Contact your local waste disposal department for Display: 7”... -
Page 63: Updating The Software
MCX connector located on the back Click Download next to the unit software. Read and of the unit. To purchase, go to the Garmin Web site at agree to the terms. Click Download. Select www.garmin.com/products/sp7500 for the 7500 and Open). -
Page 64: Fcc Compliance
“outdoor” AGREEMENT CAREFULLY. requirements. Garmin grants you a limited license to use the software embedded in this Operation of this device is subject to the following conditions: (1) This device (the “Software”) in binary executable form in the normal operation device may not cause harmful interference, and (2) this device must of the product. -
Page 65: Usb Interface Troubleshooting
Try the solution listed above. I cannot find any drives If you have several network drives mapped on your computer, Windows may named “GARMIN” in my have trouble assigning drive letters to your StreetPilot drives. Follow the list of drives. - Page 66 PPENDIX 1. Open My Computer. How can I rename my 2. Select the drive you want to rename. StreetPilot drives? 3. Right-click your mouse and select Rename. 4. Type the new name and press the Enter key. 1. Plug in the USB cable to the StreetPilot and your computer. 2.
-
Page 67: Streetpilot Troubleshooting
PPENDIX StreetPilot Troubleshooting Problem/Question Solution/Answer The touch screen is not Calibrate the screen. Press Menu on the remote. Use the remote to select responding to my taps. Settings > Display > Recalibrate. Follow the on-screen instructions. The audio levels are From the Menu page, touch Volume >... -
Page 68: Customizing The Map Data Fields
PPENDIX Customizing the Map Data Fields You can customize the information that appears in the data fields on the Map page. From the Menu page, touch Settings > > > Map Data Fields. ➊ ➋ ➌ Touch Wide or Thin. Touch a preprogrammed Touch the data field you 1/2, 2/2, 1/3? -
Page 69: Limited Warranty
To obtain warranty service, contact your local Garmin authorized dealer or call Garmin Product Support for shipping instructions and an RMA This Garmin product is warranted to be free from defects in materials or tracking number. The unit should be securely packed with the tracking workmanship for one year from the date of purchase. -
Page 70: Index
StreetPilot to Dead Reckoning (DR) eject USB bookmarks your computer cable 34, 51 elevation, entering playing contact Garmin for backup camera erase all user data transferring continuous auto routing software setup for DR expanding your search audio version coordinates... - Page 71 Recent Finds position icon license agreement limited warranty GARMIN drive narrowing your search re-order points in route location, editing Garmin Travel Guide navigating a saved route recalculating the route 18, 45 longitude coordinates general settings navigation settings recently found places...
- Page 72 NDEX trip computer adding points to storing the unit restoring settings creating unit ID reverse light polarity deleting 16, 18 FM Traffic Receiver technical specifications setting 34, 52 editing StreetPilot text language Reverse Light Switch navigating 22, 24 time Connection saving use indoors touch screen...
- Page 74 For the latest free software updates (excluding map data) throughout the life of your Garmin products, visit the Garmin Web site at www.garmin.com. © Copyright 2006 Garmin Ltd. or its subsidiaries Garmin International, Inc. 1200 East 151 Street, Olathe, Kansas 66062, U.S.A.
Need help?
Do you have a question about the STREET PILOT 7200 and is the answer not in the manual?
Questions and answers