
Related Manuals for Intellinet 524995


Summary of Contents for Intellinet 524995
-
Page 1: Usb Adapter
WIRELESS 300N DUAL-BAND USB ADAPTER USER MANUAL MODEL 524995 INT-524995-UM-0311-01... - Page 2 WASTE ELECTRICAL & ELECTRONIC EQUIPMENT Disposal of Electric and Electronic Equipment (applicable in the European Union and other European countries with separate collection systems) ENGLISH This symbol on the product or its packaging indicates that this product shall not be treated as household waste. Instead, it should be taken to an applicable collection point for the recycling of electrical and electronic equipment.
- Page 3 Thank you for purchasing the INTELLINETTM Wireless 300N Dual-Band USB Adapter, Model 524995. This is a compact high-speed adapter that allows you to connect your notebook or desktop PC to wireless networks at speeds faster than ever before. Connect to a wireless network with link speeds of up to 300 Mbps using the latest in wireless a/n dual-band technology to transfer or receive digital images, videos and MP3 files, .
- Page 4 CAUTION: Any changes or modifications not expressly approved by the party responsible for compliance could void the user’s authority to operate the equipment. This device complies with Part 15 of the FCC Rules. Operation is subject to the following two conditions: (1) This device may not cause harmful interference;...
-
Page 5: Table Of Contents
TABLE OF CONTENTS section page Hardware ....................6 Installation ..................6 Windows 7 ...................6 Systems Other Than Windows 7 ..........7 Configuration ..................9 Network ..................11 Profile ....................11 Profile Configuration ............. 13 Profile Authentication & Encryption (Security) ...... 14 802.1x Setting / Certification ..........18 802.1x Setting / CA Server ............ -
Page 6: Hardware
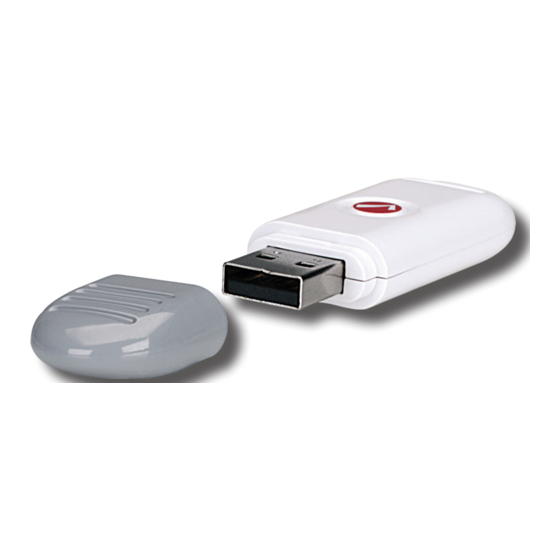
HARDWARE COMPONENTS WPS button Link/Activity LED Protective cap LED INDICATORS If the Radio On/Off function is turned off (see WPS Configuration), the wireless LAN function is disabled and the Link/Activity LED remains unlit. If the Radio On/Off function is turned on, the Link/Activity LED will indicate the status of the function as indicated below. -
Page 7: Systems Other Than Windows 7
3. Windows 7 will detect the new hardware and try to connect to the Internet to download the latest driver. This may take a minute or so depending on your Internet connection. 4. The installation is completed. You do not need to install any driver or software from the installation CD. - Page 8 Installation.” Read the license agreement that displays; select “I accept the terms of the license agreement”; click “Next” to continue. 4. On the Setup Type screen, select “Install driver and INTELLINET WLAN Utility.” Select “Install driver only” if you prefer to use the Windows integrated WLAN function.
-
Page 9: Configuration
CONFIGURATION The configuration utility — which displays automatically once the adapter is connected — is a powerful application that helps you configure the adapter and monitor link status and statistics during the communication process. This adapter will auto-connect to the wireless device that has the better signal strength and no wireless security setting. - Page 10 2. Click “Change advanced settings.” 3. Uncheck “Use Windows to configure my wireless network settings” to enable the utility for the adapter. NOTE: If “Wireless Zero Configuration Tool” is enabled, you can only configure the advanced settings or check the link status and statistics from the configuration utility of the adapter.
-
Page 11: Network
NETWORK When you open the configuration utility, the system scans all the channels to find access points/stations within the accessible range of the adapter and automatically connect to the wireless device with the highest signal strength. On the Network screen, all the networks nearby are listed. You can change the connection to another network or add one of the networks to your own profile list. - Page 12 Encryption and Network Type. Add, Edit, Delete: Click the corresponding button to add, edit or delete the selected profile(s). Clicking “Add” displays the Add Profile screen, which presents 1) Configuration and 2) Authentication and Encryption (Security). Import/Export: You can export individual wireless profiles to your hard drive with the export function.
-
Page 13: Profile Configuration
Extra Info: This field displays the link status. Channel: This field displays the number of the radio channel and the frequency used for the networking. Link Speed (Mbps): These fields display the transmission (Tx) and the reception (Rx) rates of the network. The maximum transmission rate is 54 Mbps. -
Page 14: Profile Authentication & Encryption (Security)
only the device with the same SSID can interconnect to the adapter. To add a nearby network to the profile list, pull down the menu to view all the networks that can be selected. Power Save Mode: The two power-saving functions are available only when Network Type (see below) is set to “Infrastructure.”... - Page 15 identified) are allowed to connect to each other. • LEAP: This is a pre-EAP, Cisco-proprietary protocol with many of the features of EAP protocols. Cisco controls the ability of other vendors to implement this protocol, so it should be selected for use only when a limited vendor choice for client, access point and server products is not a concern.
- Page 16 or PSK, technology. It also includes a new advanced encryption mechanism using the Advanced Encryption Standard (AES). AES is required for corporate or government users. The difference between WPA and WPA2 is that WPA2 provides data encryption via AES. In contrast, WPA uses the Temporal Key Integrity Protocol (TKIP).
- Page 17 in the wireless network. There are two types of key length: 64-bit and 128-bit. Assign a default encryption key (Key#1 to Key#4) by clicking on the corresponding radio button. To fill in each text field: • 64-bit: Input 10-digit hex values (in the A-F, a-f and 0-9 range) or 5-digit ASCII characters (a-z and 0-9) as the encryption keys.
-
Page 18: 802.1X Setting / Certification
802.1 etting eRtiFiCation EAP Method: The EAP authentication protocols supported by this adapter require that settings be consistent with the wireless access points or routers that the adapter is intended to connect. • PEAP & TTLS: These protocols are similar and easier to use than TLS (below) in that they specify a stand-alone authentication protocol to be used within an encrypted tunnel. -
Page 19: 802.1X Setting / Ca Server
802.1 / Ca S etting eRveR Use certificate chain: When the Extensible Authentication Protocol (EAP) authentication type — such as TLS, TTLS or PEAP — is selected and requires certification to tell the client what credentials to accept from the authentication server in order to verify the server, you need to enable this function. -
Page 20: Statistics
Allow Machine Authentication: Select this option to authenticate the computer, not the user. Authentication Type: Select the time at which wireless network authentication will take place: • Pre-logon: Before the user logs in to the operating system. • Post-logon: After the user logs in to the operating system. STATISTICS This screen enables you to view/compare the transmit and receive statistical information of the connection. - Page 21 Wireless Mode: Select the operation mode from the drop-down menu. • 2.4G: The adapter can be operated in 802.11b/g/n wireless networks. • 5G: The adapter can be operated in 802.11a/n wireless networks. • 2.4 + 5G: The adapter can be operated in 802.11a/b/g/n wireless networks.
-
Page 22: Wmm
mutually authenticate with a new AP by performing a complete LEAP authentication, including communication with the main RADIUS server. When a wireless LAN is configured for fast re-association, however, LEAP-enabled client devices roam from one access point to another without involving the main server. Using Cisco Centralized Key Management (CCKM), an access point configured to provide wireless domain services (WDS) takes the place of the RADIUS server and authenticates the client so quickly that there is no perceptible delay... -
Page 23: About
WMM Enable: Click the check box (then click “Apply”) to enable the WMM function, which then lets you configure the WMM Power Save and Direct Link Setup functions. • WMM – Power Save Enable: Click the check box to enable, then click “Setting”... -
Page 24: Pbc
Two WPS configuration methods are available when you click to display this screen: PBC (push-button configuration) and PIN Code (an option for older APs not equipped with the WPS push button but which may be transformed into a WPS-enabled access point through a firmware upgrade). pBC (p utton onFiguRation... -
Page 25: Pin Code
Information: Click to display a pop-up window describing a selection. Detail: Click to show details of a selected WPS-enabled access point. Export Profile: Click to save a highlighted connection on the list as a profile, which will display on the WPS Profile list and which can be retrieved in the Profile menu. -
Page 26: Access Point / Sta+Ap Modes
2. Click “PIN.” After a short period (up to a minute), if a wireless access point with the correct PIN code is found, you’ll be connected to that access point. NOTE: As with PBC, you may need to click “PIN” a number of times to make a connection. - Page 27 Wireless Mode: Selects the wireless mode supported by the AP. Use MAC Address: Click to create a unique SSID based on the adapter’s MAC address. Security Setting: Click to further configure WLAN authentication and security settings. (See the separate Security Setting section below.) Country Region Code: Channel availability varies from country to country;...
-
Page 28: Security Setting
being connected to by unauthorized users. Allow BW 40 MHz: Check this box to allow BW 40 MHz capability. Tx Burst: Check this box to accelerate the data transmit rate. It may not work with all wireless access points and wireless devices. Default: Click to use the default value. - Page 29 • Open: No authentication is needed within the wireless network. • WPA-PSK: This is a special mode designed for home and small business users who do not have access to network authentication servers. In this mode, known as Pre-Shared Key, you manually enter the starting password in your access point or gateway, as well as in each wireless station in the network.
-
Page 30: Access Control
5-digit ASCII characters (a-z and 0-9) as the encryption keys. For example: “0123456aef” or “test1.” • 128-bit: Input 26-digit hex values (in the A-F, a-f and 0-9 range) or 13-digit ASCII characters (“a-z” and “0-9”) as the encryption keys. For example: “01234567890123456789abcdef“ or “administrator.” Show Password: The password will be displayed in clear text instead of with asterisks. -
Page 31: Mac Table
Access List: Displays all the MAC address that have been added. • Add: Add the MAC address to the access list. • Delete: Delete the selected MAC address from the access list. • Remove All: Remove all MAC addresses from the access list. Apply: Click to apply the setting change(s). -
Page 32: Statistics
STATISTICS This screen displays the transmit and receive statistical information of the AP. Click “Reset Counters” to clear the data. ABOUT This screen displays basic information about the utility, including the MAC address. MAC Table AP / STA+AP... -
Page 33: Specifications
SPECIFICATIONS Standards - 11b: 17 dBm +/- 1.5 dBm • IEEE 802.11a (54 Mbps Wireless • Transmit power 5 GHz: LAN) - 11n: 12 dBm +/- 1.5 dBm • IEEE 802.11b (11 Mbps Wireless - 11a: 12 dBm +/- 1.5 dBm LAN) •... - Page 34 INTELLINET NETWORK SOLUTIONS offers a complete line ™ of active and passive networking products. Ask your local computer dealer for more information or visit www.intellinet-network.com Copyright © INTELLINET NETWORK SOLUTIONS All products mentioned are trademarks or registered trademarks of their respective owners.
Need help?
Do you have a question about the 524995 and is the answer not in the manual?
Questions and answers