
Related Manuals for Bosch PHW206FAU


Summary of Contents for Bosch PHW206FAU
- Page 1 This cooktop is for use with Natural Gas and Universal LPG PHW206FAU PPH626B90A PHL206FAU PPQ726B90A Robert Bosch Hausgeräte GmbH Carl-Wery-Straße 34 81739 München Cod. 9000005546 C Internet:: http://www.bosch-hausgeraete.de...
- Page 2 Dear customer, We would like to thank and congratulate you for your choice. This practical modern appliance has been made using materials of the highest quality, which have been put through the strictest of Quality Controls during manufacture and meticulously tested to ensure that they meet all of your cooking demands.
-
Page 3: Table Of Contents
CONTENT Safety considerations For your safety What to do if yo smell gas Warnings Installation Preparing to install Clearances Installation of cooktop into Kitchen bench Installation procedure Connection Electrical connection Gas connection Conversion front Nat. Gas to Universal LPG To change injectors Injector size chart Minimum flame adjustment Operating instructions... -
Page 4: Safety Considerations
Safety considerations For your safety • If the information in this manual is not followed exactly, a fire or explosion may result causing property damage, personal injury or death. • Do not store articles on or against this appliance. • Do not store flammable material near this appliance. •... - Page 5 11.The surfaces on heating and cooking appliances get hot when in use. Be careful. Keep children away from the appliance. 12.Only use your appliance for the preparation of food and never for room-heating purposes. 13.This appliance leaves the factory set for the gas supply indicated on the data plate.
-
Page 6: Installation
Installation Statutory This installation must conform with the following: requirements • Manufacturer’s Installation instructions • Local Gas Fitting Regulations • Municipal Building Codes, • AGA Installation Code for Gas Burning Appliances. (AS 5601 - 2004 - Gas Installations). • S.A.A. Wiring Code •... -
Page 7: Clearances
Clearances A range hood fitted above the top must be installed according to the installation instructions for the range hood. A minimum distance of 650 mm is required for a range hood and 750 mm for an exhaust fan. Any adjoining wall surface situated within 200mm from the edge of any hob burner must be a suitable non-com- bustible material for a height of 150mm for the entire length of the hob. - Page 8 3. Place the hotplate on top of the bench cut-out and press down firmly on all edges at the same time to ensure that the hob is resting on its entire perimeter. 4 .Once the hob is fitted you should turn the clips and tighten the screw as shown in Fig.
-
Page 9: Connection
Installation continued Connection Electrical: An electrical 10 amp socket needs to be within 1 m of the hotplate to allow electrical connection. The socket must remain accessible after installation of the appliance. Important note: This appliance is connected to the mains (240 VAC) by means of the connecting lead which must be fixed to the kitchen unit to prevent it from coming into contact with hot parts of the hob (or an oven installed underneath) and remain accessible after... -
Page 10: Gas Connection
There are two ways to carry out the connection to the main gas line: A. The hotplate can be connected with rigid pipe as specified in AS5601 table 3.1. B. Flexible Hose: If installing with a hose assembly, install with a hose assembly that complies with AS/NZS 1869 (AGA Approved), 10mm ID, class Bor D, no more than 1,2m long and in accordance with AS5601. -
Page 11: Conversion Front Nat. Gas To Universal Lpg
Coverting the cooktop To change injectors from Nat.Gas to All work involved in installation, setting and adaptation Universal LPG to a different gas type must be carried out by authorised personnel from our Service Centre and must comply with current regulations and the conditions laid down by the local gas company. -
Page 12: Injector Size Chart
Minimum flame adjustment. 1 T urn the control knob to minimum. 2 Remove the control knob from the valve spindle. Refer Fig. Apply pressure with the tip of the screwdriver to release the thread toward the tap's adjusting screw. Refer Fig.10. 4 The adjustment screw is positioned at the rear lower section of the valve. -
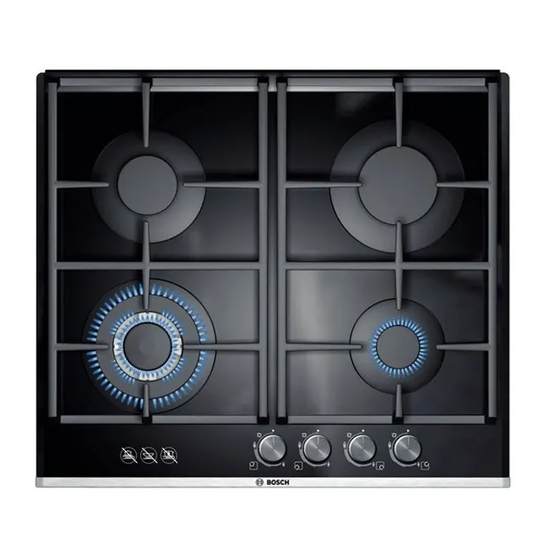
Page 13: Operating Instructions
Operating instructions Burner locations 1. Medium burner 4. Small burner 2. Medium burner 5. Rapid burner 3. Wok burner 6. Control Knobs Depress control knob and turn anti-clockwise to “High Burner ignition & flame”position. Hold the knob down for a few seconds control until the flame ignites. -
Page 14: User Instructions
User Instructions User Instructions Boiling burners Use “High flame” setting to bring the pan to the boil, then adjust the flame between “High flame” and “Low flame” to maintain the required pan temperature. Important: The use of a cooktop leads to the production of heat and moisture in the kitchen .For this reason make sure that the room is properly ventilated.Keep natural ventilation openings,... - Page 15 Cooking recommendations Very high /High Medium Wok burner Boiling, grilling, Reheating and keeping browning, and Asian things hot, cooked and food (wok). pre-cooked dishes. Large Steaks, omelettes, Rice, white Steaming, burner frying. sauce and and ragout. vegetables. Medium Steaming potatoes, Reheating, keeping burner fresh vegetables,...
-
Page 16: Warnings Concerning Cooking
Warnings concerning cooking: DON'Ts Always use suitably sized Do not use small recepta- receptacles on each bur- cles on large burners. The ner. This helps avoid ex- flame should not touch the cessive gas consumption sides of receptacles. and prevents receptacles from getting tarnished. -
Page 17: Cleaning And Maintenance
Cleaning and maintenance: Cleaning and maintenance: Cleaning and maintenance: DON'Ts Do not use scouring Do not use scouring Do not use scouring Once the appliance is cold, clean it with a spon- powder, over cleaner powder, over cleaner powder, over cleaner ge and soapy water. -
Page 18: Service
Service It is not always necessary to call the Service Centre. In Trouble shooting some cases, you may be able to solve the problem chart yourself. This table contains some useful information. Important: Only authorised personnel from the Service Centre are qualified to work on the main gas and electric systems. -
Page 19: Wiring Diagram
Wiring diagram A. Switch B. Blue wire C. Brown wire D. Terminal E. Ignition module PHL206FAU PPH626B90A PPQ726B90A 30,30 39,00 35,50 42, 00 6962 6962 Made in Spain Made in Spain...
Need help?
Do you have a question about the PHW206FAU and is the answer not in the manual?
Questions and answers