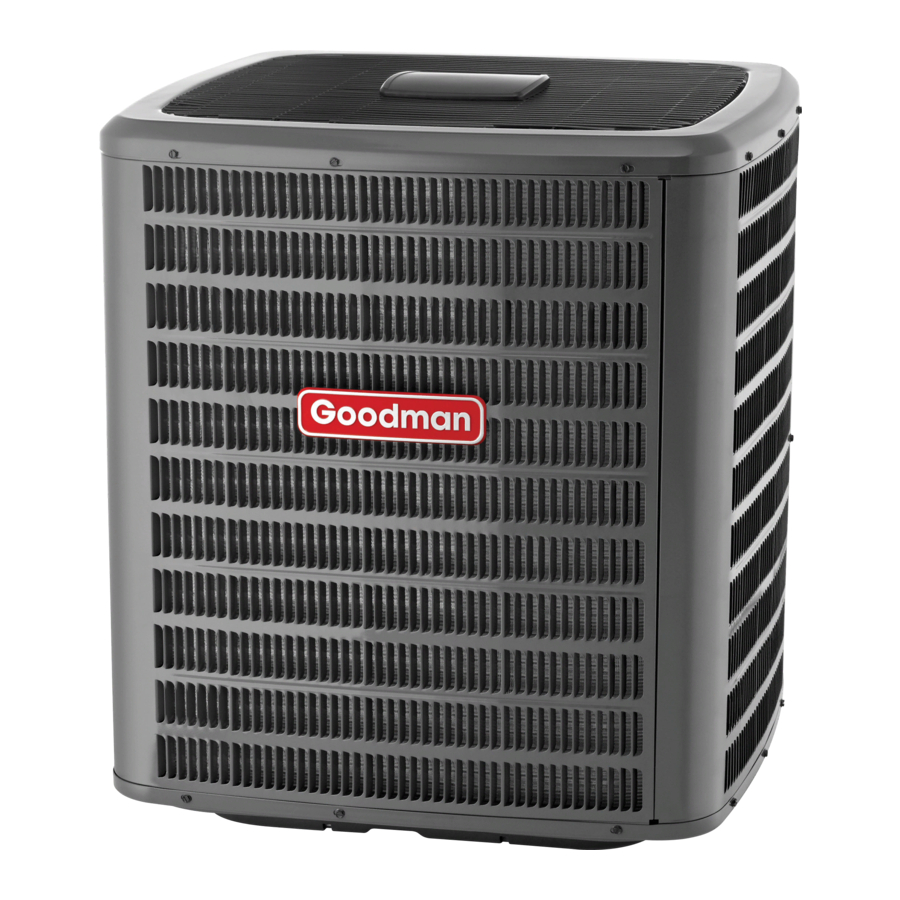
Service Instructions SSX, ASX, GSX, DSX Condensing Units, SSZ, ASZ, GSZ DSZ Split System Heat Pumps with R-410A Refrigerant Blowers, Coils, & Accessories This manual is to be used by qualified, professionally trained HVAC techni- cians only. Goodman does not assume any responsibility for property...
IMPORTANT INFORMATION IMPORTANT INFORMATION ... 2 - 3 PRODUCT IDENTIFICATION ... 4 - 11 ACCESSORIES ... 13 - 23 PRODUCT DESIGN ... 25 - 27 SYSTEM OPERATION ... 28 - 32 Pride and workmanship go into every product to provide our customers with quality products. It is possible, however, that during its lifetime a product may require service.
IMPORTANT INFORMATION SAFE REFRIGERANT HANDLING While these items will not cover every conceivable situation, they should serve as a useful guide. WARNING EFRIGERANTS ARE HEAVIER THAN AIR. HEY CAN "PUSH OUT" THE OXYGEN IN YOUR LUNGS OR IN ANY ENCLOSED SPACE. POSSIBLE DIFFICULTY IN BREATHING OR DEATH: •...
PRODUCT IDENTIFICATION M odel # G oodman S plit Z R410A Heat Pum p 13 Seer R410A heat pump units. Initial GSZ13**1AA release with Regal Beloit motor. G oodman S plit Z R410A Heat Pum p 13 Seer R410A heat pump units. Initial GSZ13**1AB release with Broad Ocean m otor.
Page 5
PRODUCT IDENTIFICATION Model # A mana® Brand S plit Z R410A heat pump 13 Seer heat pump units. Initial release ASZ130**1AA of Amana® Brand 13 SEER Heat Pump R410A. A mana® Brand S plit Z R410A heat pump 14 Seer heat pump units. Initial release ASZ140**1AA of Amana®...
Page 6
PRODUCT IDENTIFICATION Model # G oodman S plit X Condenser 13 Seer condensing units. Introduction of Goodman 13 GSX130**1AA SEER R-410A Condensers with Regal Beloit motors Goodman Split X Condenser 13 Seer condensing units. Introduction of Goodman 13 GSX130**1AB SEER R-410A Condensers with Broad Ocean motors. G oodman S plit X Condenser 13 Seer condensing units.
Page 7
PRODUCT IDENTIFICATION Model # Amana® Brand S plit X Condenser 13 Seer condensing units. Initial release new models ASX130**1AA of Amana® Brand Deluxe 13 SEER AC R410A conditioners. Amana® Brand S plit X Condenser 13 Seer condensing units. Introduction of Amana® ASX130**1BA Brand 13 SEER R-410A Condensers, using Quantum Leap Coils.
Page 8
PRODUCT IDENTIFICATION Model # A Single Piece R Multi-Position PSC Motor Unpainted Flowrater Introducation ARUF****16AA of new 13 SEER Air Handler Models. All Models will be suitable for use with R- 22 and R-410A A Single Piece R Multi-Position PSC Motor Unpainted Flowrater.Revision ARUF364216AB replaces the current spot welded blower housing with the same cinched or crimped design used on the 80% furnace line.
Page 9
PRODUCT IDENTIFICATION Model # AEPF****16AA AEPF****16BA AEPF****16BB AEPF****16CA AEPF****1BA AEPF313716AA ASPF313716AA ASPF****16AA ASPF****16BA AWUF****1AA AWUF****16AA AWUF3005-101AA AWUF****1BA AWUF370**16AA AWUF****16BA ACNF****1AA ACNF****16AA ACNF****1BA AH**-1* Single Piece Air Handlers A Single Piece E Multi-Position Variable-Speed P ainted F lowrator. Introducation of new 13 SEER Air Handler Models. All Models will be suitable for use with R-22 and R-410A A Single Piece E Multi-Position Variable-Speed P ainted F lowrator.
Page 10
PRODUCT IDENTIFICATION Model # M odular B lower R Multi-Position PSC Motor. Introduces module blower with PSC MBR****AA-1AA blower motor. M odular B lower E Multi-Position Variable-Speed. Introduces module blower with MBE****AA-1AA variable speed blower motor. M odular B lower E Multi-Position Variable-Speed.Revision introduces new models MBE****AA-1BA adding lower kw hit kits on the S&R plate Model #...
Page 13
PRODUCT IDENTIFICATION PRODUCT TYPE: A: Air Handler CABINET FINISH: U: Unpainted P: Paited N: Uncased APPLICATION C: Ceiling Mount PSC Motor D: Downflow PSC Motor E: Multi-Position Varible-Speed Motor S: Energy-Efficient Motor R: Multi-Position PSC Motor T: Coated Coils W: Wall Mount PSC Motor All Airhandlers use DIRECT DRIVE MOTORS.
Page 23
ACCESSORIES ELECTRIC HEAT KIT APPLICATIONS - ARUF ARUF1729 1/16 HKR-03* HKR-05*, HKR-05C* HKR-06* HKR-08*, HKR-08C* HKR-10*, HKR-10C* HKR-15C* HKR-20C* HKR-21C* ^ HKR3-15* ^ HKR3-20* * Revision level that may or may not be designated C Circuit breaker option ^ Heat kit requires three-phase power supply Air handler must either be on medium or high speed Air handler must be on high speed For static pressure of 0.6 or higher, air handler must be on medium or high speed...
Page 24
ACCESSORIES ELECTRIC HEAT KIT APPLICATIONS - AEPF HKR-05*, HKR-05C* HRK-08*, HKR-08C HKR-10*, HKR-10C HKR-15C* HKR-20C* HKR-21C Revision level that may or may not be designated C Circuit Breaker option This heater kit can be used ONLY for 1000 CFM or higher applications This heater kit can be used ONLY for 1200 CFM or higher applications ELECTRIC HEAT KIT APPLICATIONS - ASPF HKR-03*...
The total refrigerant charge for a normal installation is factory installed in the condensing unit. GSX, GSZ, ASX, ASZ, SSX, SSZ and DSX, DSZ models are available in 1 1/2 through 5 ton sizes and use R-410A refrigerant.
Page 26
PRODUCT DESIGN The ASX [16 & 18], ASZ [16 & 18], DSX16 and DSZ16 series split system units use a two-stage scroll compressor. The two-step modulator has an internal unloading mechanism that opens a bypass port in the first compression pocket, effectively reducing the displacement of the scroll.
PRODUCT DESIGN CAPACITY CONTROL During the compression process, there are several pockets within the scroll that are compressing gas. Modulation is achieved by venting a portion of the gas in the first suction pocket back to the low side of the compressor thereby reducing the effective displacement of the compressor.
SYSTEM OPERATION COOLING The refrigerant used in the system is R-410A. It is a clear, colorless, non-toxic and non-irritating liquid. R-410A is a 50:50 blend of R-32 and R-125. The boiling point at atmo- spheric pressure is -62.9°F. A few of the important principles that make the refrigeration cycle possible are: heat always flows from a warmer to a cooler body.
SYSTEM OPERATION DEFROST CYCLE The defrosting of the outdoor coil is jointly controlled by the defrost control board and the defrost thermostat. Solid State Defrost Control During operation the power to the circuit board is controlled by a temperature sensor, which is clamped to a feeder tube entering the outdoor coil.
Page 31
SYSTEM OPERATION EXPANSION VALVE/CHECK VALVE ASSEMBLY EXPANSION VALVE/CHECK VALVE ASSEMBLY IN COOLING OPERATION IN HEATING OPERATION ® Most expansion valves used in current Amana Brand Heat Pump products use an internally checked expansion valve. This type of expansion valve does not require an external check valve as shown above. However, the principle of operation is the same.
Page 32
SYSTEM OPERATION AFE18-60A CONTROL BOARD DESCRIPTION The AFE18 control is designed for use in heat pump applica- tions where the indoor coil is located above/downstream of a gas or fossil fuel furnace. It will operate with single and two stage heat pumps and single and two stage furnaces. The AFE18 control will turn the heat pump unit off when the furnace is turned on.
TROUBLESHOOTING CHART Com plaint No Cooling P OS SIBLE CAUSE DOTS IN ANALYSIS GUIDE INDICATE "P OS SIBLE CAUSE" • Pow er Failure • • • Blow n Fus e • Unbalanced Pow er, 3PH • Loose Connec tion • • • • • • Shorted or Broken Wires Open Fan Ov erload •...
SERVICING S-1 CHECKING VOLTAGE 1. Remove outer case, control panel cover, etc., from unit being tested. With power ON: WARNING Line Voltage now present. 2. Using a voltmeter, measure the voltage across terminals L1 and L2 of the contactor for the condensing unit or at the field connections for the air handler or heaters.
SERVICING 4. Check the continuity of the thermostat and wiring. Repair or replace as necessary. Resistance Heaters 1. Set room thermostat to a higher setting than room temperature so both stages call for heat. 2. With voltmeter, check for 24 volts at each heater relay. Note: BBA/BBC heater relays are DC voltage.
SERVICING S-4 CHECKING TRANSFORMER AND CONTROL CIRCUIT HIGH VOLTAGE! Disconnect ALL power before servicing or installing. Multiple power sources may be present. Failure to do so may cause property damage, personal injury or death. A step-down transformer (208/240 volt primary to 24 volt sec- ondary) is provided with each indoor unit.
SERVICING S-7 CHECKING CONTACTOR AND/OR RELAYS HIGH VOLTAGE! Disconnect ALL power before servicing or installing. Multiple power sources may be present. Failure to do so may cause property damage, personal injury or death. The compressor contactor and other relay holding coils are wired into the low or line voltage circuits.
5. If not as above, replace the relay. S-10 COPELAND COMFORT ALERT™ DIAGNOSTICS Applies to ASX /ASZ and DSX/DSZ units Comfort Alert™ is self-contained with no required external sensors and is designed to install directly into the electrical box of any residential condensing unit that has a Copeland Scroll™...
SERVICING Status LED Status LED Description Green “POWER” Module has power Red “TRIP” Thermostat demand signal Y1 is present, but the compressor is not running Yellow “ALERT” Long Run Time Flash Code 1 Compressor is running extremely long run cycles Yellow “ALERT”...
SERVICING S-11 CHECKING LOSS OF CHARGE PROTECTOR (Heat Pump Models) The loss of charge protector senses the pressure in the liquid line and will open its contacts on a drop in pressure. The low pressure control will automatically reset itself with a rise in pressure.
SERVICING The discharge check valve closes off high side pressure to the compressor after shut down allowing equalization through the scroll flanks. Equalization requires only about ½ second. To prevent the compressor from short cycling, a Time Delay Relay (Cycle Protector) has been added to the low voltage circuit.
SERVICING S-16A CHECKING FAN AND BLOWER MOTOR WINDINGS (PSC MOTORS) The auto reset fan motor overload is designed to protect the motor against high temperature and high amperage condi- tions by breaking the common circuit within the motor, similar to the compressor internal overload. However, heat gener- ated within the motor is faster to dissipate than the compres- sor, allow at least 45 minutes for the overload to reset, then retest.
SERVICING S-16C CHECKING ECM MOTOR WINDINGS HIGH VOLTAGE! Disconnect ALL power before servicing or installing. Multiple power sources may be present. Failure to do so may cause property damage, personal injury or death. 1. Disconnect the 5-pin and the 16-pin connectors from the ECM power head.
Page 47
SERVICING Cooling/Heat Pump Operation Model Switch 5 Switch 6 MBE1200 MBE1600 MBE2000 Table 3 THERMOSTAT “FAN ONLY” MODE During Fan Only Operations, the CFM output is 30% of the cooling setting. CFM TRIM ADJUST Minor adjustments can be made through the dip switch combination of 7-8.
SERVICING S-16E BLOWER PERFORMANCE DATA SPEED STATIC HIGH MEDIUM NOTE: External static is for blower @ 230 Volts. It does not include Coil, Air Filter or Electric Heaters. S-16F CHECKING GE X13 The GE X13 Motor is a one piece, fully encapsulated, 3 phase brushless DC (single phase AC input) motor with ball bearing construction.
SERVICING S-17 CHECKING COMPRESSOR WARNING Hermetic compressor electrical terminal venting can be dangerous. When insulating material which supports a hermetic compressor or electrical terminal suddenly disintegrates due to physical abuse or as a result of an electrical short between the terminal and the compressor housing, the terminal may be expelled, venting the vapor and liquid contents of the compressor housing and system.
SERVICING Do not use a low voltage output instrument such as a volt- ohmmeter. HI-POT COMPRESSOR GROUND TEST 3. If a ground is indicated, then carefully remove the com- pressor terminal protective cover and inspect for loose leads or insulation breaks in the lead wires. 4.
SERVICING 3. Connect good capacitors of the right MFD and voltage rating into the circuit as shown. 4. With power ON, close the switch. WARNING Line Voltage now present. A. If the compressor starts and continues to run, the cause for failure is somewhere else in the system.
SERVICING 3. Check the temperature at which the control opens its contacts by raising the temperature of the control. Part # 0130M00009P which is used on 2 and 2.5 ton units should open at 60°F ± 5°F. Part # 0130M00001P which is used on 3 thru 5 ton units should open at 75°F ±...
Page 53
SERVICING 1.4 The compressor and condenser fan are turned off and after a 65 second delay off, the relay on the EBTDR board is de-energized and the blower is turned off. 2.0 Heating Operation 2.1 On a demand for heat, the room thermostat energizes “W1”...
MBE/AEPF WITH SINGLE STAGE GSX, ASX AND SSX CONDENSERS When used with a single stage GSX, SSX and ASX condens- ers, dip switch #4 must be set to the on position on the VSTB inside the MBE/AEPF. The “Y” output from the indoor thermostat must be connected to the yellow wire labeled “Y/...
SERVICING remove the 24Vac from HR2. The contacts on HR2 will open between 30 to 70 seconds and heater elements #3 and #4 will be turned off and the blower motor will change to low speed. On most digital/electronic thermostats, “W2” will re- main energized until the first stage demand “W1”...
Page 56
MBE/AEPF WITH TWO STAGE ASX & DSX CONDENSERS 1.0 COOLING OPERATION When used with the ASX & DSX two stage condens- ers, dip switch #4 must be set to the OFF position on the VSTB inside the MBE/AEPF. The “Y1” output from the indoor thermostat must be connected to the purple wire labeled “Ylow/Y1”...
Page 57
SERVICING For the 3 and 4 heater elements to operate on a second stage heat demand, the PJ4 jumper on the VSTB inside the MBE/AEPF must be cut. With the PJ4 jumper cut, the VSTB will run the blower motor on low speed on a “W1” only demand.
SERVICING The outdoor fan will change to high speed operation. If the “Y2” demand is present and becomes satisfied, the thermostat will remove the “Y2” demand and the VSTB will remove the 24Vac from “Y/Y2” at the heat pump. The blower will drop to 60% of the programmed cfm and the outdoor fan will change to low speed.
SERVICING Alternately, the system CFM can be determined by operating the electric heaters and indoor blower WITHOUT having the compressor in operation. Measure the temperature rise as close to the blower inlet and outlet as possible. If other than a 240V power supply is used, refer to the BTUH CAPACITY CORRECTION FACTOR chart below.
SERVICING 2. Using an ohmmeter, test across the fuse link for continu- ity - no reading indicates the link is open. Replace as necessary. NOTE: The link is designed to open at approximately 333°F. DO NOT WIRE AROUND - determine reason for failure. S-62 CHECKING HEATER ELEMENTS WARNING Disconnect ALL power before servicing.
SERVICING IMPORTANT NOTE: Because of the potential damage to compressors, do not allow suction pressure at service valve to drop below 20 PSIG when pumping unit system down for repair. Outdoor section, depending on line set length and amount of charge in system, may not be able to hold the entire system charge.
SERVICING CAUTION Use refrigerant certified to AHRI standards. Used refrigerant may cause compressor damage and will void the warranty. Most portable machines cannot clean used refrigerant to meet AHRI standards. CAUTION Operating the compressor with the suction valve closed will void the warranty and cause serious compressor damage.
SERVICING S-106 OVERFEEDING Overfeeding by the expansion valve results in high suction pressure, cold suction line, and possible liquid slugging of the compressor. If these symptoms are observed: 1. Check for an overcharged unit by referring to the cooling performance charts in the servicing section. 2.
SERVICING 4. Review the technical information manual or specification sheet for the model being serviced to obtain the design subcooling. 5. Compare the hi-pressure reading to the "Required Liquid Line Temperature" chart (page 43). Find the hi-pressure value on the left column. Follow that line right to the column under the design subcooling value.
SERVICING 2. Remove the orifice or tube strainer assembly and re- place. 3. Replace liquid line drier, evacuate and recharge. CHECKING EQUALIZATION TIME During the "OFF" cycle, the high side pressure bleeds to the low side through the fixed orifice restriction device. Check equalization time as follows: 1.
SERVICING NOTE: At least twelve (12) inches of the suction line immediately out of the compressor stub must be discarded due to burned residue and contaminates. 1. Remove compressor discharge line strainer. 2. Remove the liquid line drier and expansion valve. 3 Purge all remaining components with dry nitrogen or carbon dioxide until clean.
Page 70
SERVICING 4. Two-Stage Condensing Unit: The maximum length of tubing must not exceed 80 feet where indoor coil is located above the outdoor unit. NOTE: When the outdoor unit is located above the indoor coil, the maximum vertical rise must not exceed 25 feet.
SERVICING Mounting the condensing unit above the evaporator coil will require oil traps at equal intervals along the suction line. Install 1 oil trap for a height difference of 15-25 feet between indoor and outdoor units. Install 2 oil traps for a difference of 26-50 feet, 3 for 51-100 feet, and 4 for 101-150 feet.
SERVICING 3. Add the two readings together. TOTAL EXTERNAL STATIC NOTE: Both readings may be taken simultaneously and read directly on the manometer if so desired. 4. Consult proper table for quantity of air. If external static pressure is being measured on a furnace to determine airflow, supply static must be taken between the "A"...
ACCESSORIES WIRING DIAGRAMS ALL FUEL SYSTEM AFE18-60A CONTROL BOARD POWER SUPPLY INPUT FURNACE DEMAND OUTPUT BLOWER FAN DEMAND OUTPUT POWER SUPPLY INPUT (COMMON) SECOND STAGE FURNACE DEMAND OUTPUT COMPRESSOR OUTPUT SECOND STAGE COMPRESSOR OUTPUT REVERSING VALVE OUTPUT POWER SUPPLY OUT TO THERMOSTAT CALL FOR REVERSING VALVE...
Page 74
ACCESSORIES WIRING DIAGRAMS 10kw and Below, One Stage Electric Heat THERMOSTAT EMERGENCY HEAT RELAY OT/EHR18-60 15kw and Above, Two Stage Electric Heat THERMOSTAT EMERGENCY HEAT RELAY OT/EHR18-60 Note: When using a Thermostat with only one stage for electric heat (W2), tie white and brown wires from air handler together.
Page 75
ACCESSORIES WIRING DIAGRAMS 15kw and Above with Two OT/EHR18-60's, Two Stage Electric Heat and Two Stage Thermostat OT/EHR18-60 #1 THERMOSTAT EMERGENCY HEAT RELAY OT/EHR18-60 #2 THERMOSTAT EMERGENCY HEAT RELAY Typical Wiring Schematics for OT/EHR18-60 (Outdoor Thermostat & Emergency Heat Relay). This wiring diagram is for reference only.
Page 76
ACCESSORIES WIRING DIAGRAMS HTR1 ONE (1) ELEMENT ROWS NOTE: WHEN INSTALLING HEATER KIT, ENSURE SPEED TAP DOES NOT EXCEED MINIMUM BLOWER SPEED (MBS) SPECIFIED FOR THE AIRHANDLER/HEAT ER KIT COMBINATION ON THIS UNIT'S S&R PLATE. AFTER INSTALLING OPTIONAL HEAT KIT, MARK AN "X" IN THE MARK ACCORDING TO NUMBER OF HEATER ELEMENT ROWS INSTALLED.
Page 77
ACCESSORIES WIRING DIAGRAMS HTR2 HTR3 HTR4 EQUIPMENT GROUND USE COPPER OR ALUMINUM WIRE Typical Wiring Schematic MBR Blower with Electric Heat. This wiring diagram is for reference only. Not all wiring is as shown above. Refer to the appropriate wiring diagram for the unit being serviced. HIGH VOLTAGE! DISCONNECT ALL POWER BEFORE SERVICING OR INSTALLING THIS UNIT.
Page 78
ACCESSORIES WIRING DIAGRAMS HTR1 ONE (1) ELEMENT ROWS AFTER INSTALLING OPTIONAL HEAT KIT, MARK AN "X" IN THE MARK ACCORDING TO NUMBER OF HEATER ELEMENT ROWS INSTALLED * SEE NOTE 7 C ONDEN SER TH ERM O STAT L OW VOLTAGE Y/Y2 YCO N FIEL D CON NEC TION...
Page 79
ACCESSORIES WIRING DIAGRAMS HTR2 HTR1 HKR Heat Kit Typical Wiring Schematic MBE Blower with Electric Heat. Refer to the appropriate wiring diagram for the unit being serviced. HIGH VOLTAGE! DISCONNECT ALL POWER BEFORE SERVICING OR INSTALLING THIS UNIT. MULTIPLE POWER SOURCES MAY BE PRESENT. FAILURE TO DO SO MAY CAUSE PROPERTY DAMAGE, PERSONAL INJURY OR DEATH.
Page 80
ACCESSORIES WIRING DIAGRAMS HTR1 ONE (1) ELEMENT ROWS NOTE: WHEN INSTALLING HEATER KIT, ENSURE SPEED TAP DOES NOT EXCEED MINIMUM BLOWER SPEED (MBS) SPECIFIED FOR THE AIRHANDLER/HEAT ER KIT COMBINATION ON THIS UNIT'S S&R PLATE. AFTER INSTALLING OPTIONAL HEAT KIT, MARK AN "X" IN THE MARK ACCORDING TO NUMBER OF HEATER ELEMENT ROWS INSTALLED.
Need help?
Do you have a question about the ASX and is the answer not in the manual?
Questions and answers