
Subscribe to Our Youtube Channel
Related Manuals for GMC GTX24250


Summary of Contents for GMC GTX24250
- Page 1 INSTRUCTION MANUAL Cordless Drill/Driver • Melbourne • Perth • Auckland • Hong Kong • Shanghai • Taipei • New York • Verona • London • Paris GTX18250, GTX24250 050531 ED5 JJ...
-
Page 2: Table Of Contents
Know your product Fitting and removing the battery pack Battery charging To obtain the best life for the battery Battery indicator LED Work area light Using the drill Forward/reverse switch Adjustable torque Inserting and removing bits Adjustable side handle Drilling... -
Page 3: Environmental Protection
Nominale Battery Charge: Charger: 230-240V ~ 50Hz Charging time: 1 Hour Drill no load speed: 0-550 min Torque settings: 21 Positions Drill chuck capacity: 10mm Keyless Weight: 2.1kg GTX24250 230-240V ~ 50Hz 1 Hour 0-900 min 21 Positions 10mm Keyless 2.4kg... -
Page 4: Safety Instructions
Safety instructions WARNING. Read and understand all instructions. Failure to follow all instructions listed below may result in electric shock, fire and/or serious injury. The term “power tool” in all of the warnings below refers to your mains-operated (corded) power tool or battery-operated (cordless) power tool. -
Page 5: Additional Safety Instructions For Drills
Ensure that the lighting is adequate. • Do not put pressure on the drill, such that it slows the motor down. Allow the drill bit to cut without pressure. You will get better results and you will be taking better care of your tool. -
Page 6: Additional Safety Instructions For The Charger
If in doubt, do not plug in the tool. Using a power source with a voltage less than the nameplate rating is harmful to the motor. The tool must be used only for its prescribed purpose. Any use other than those mentioned in this Manual will be considered a case of misuse. -
Page 7: Additional Safety Instructions For The Battery Pack
• To reduce the risk of an electric shock, unplug the charger from the power supply before attempting to clean it. Removing the battery alone does not reduce the risk. • Never attempt to connect two chargers together. • Do not store or use the tool and battery pack in locations where the temperature may reach or exceed 104°F (40°C) such as alongside sheds or metal structures in the summer. -
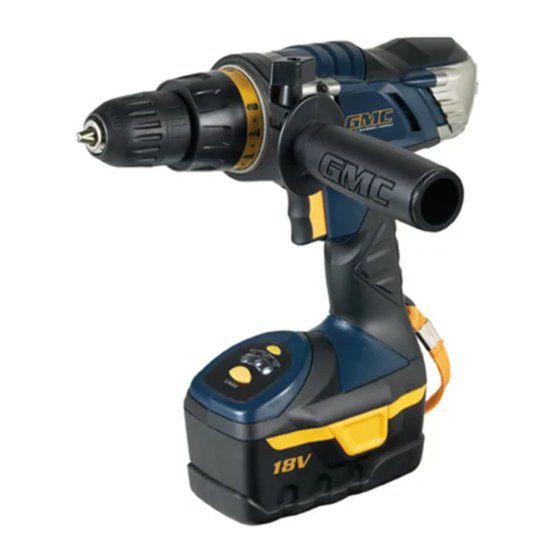
Page 8: Know Your Product
Know your product This drill is mainly used for drilling in wood or metal sheet and screwdriving. Use the tool and accessories only for intended applications. All other applications are expressly ruled out. 1. Keyless chuck 2. Torque collar 3. Trigger with variable speed control 4. -
Page 9: Fitting And Removing The Battery Pack
Fitting and removing the battery pack To remove the battery pack from the drill firmly press the battery release tabs (7) at either side of the battery pack, and slide the battery backward out of the tool. To install the battery pack, align rails, on the tool with the... -
Page 10: Battery Indicator
For drilling, always use the use the Drill position by aligning the Drill symbol with the triangular indicator on the front face of the drill near the torque collar. -
Page 11: Inserting And Removing Bits
4. To remove the drill bit, hold the rear section of the chuck firmly and rotate sharply the front section of the chuck in a anti-clockwise direction, sufficiently enough to allow the drill bit to be removed. -
Page 12: Chuck Replacement
To remove the screw, turn it in a clockwise direction. The chuck can now be removed by unscrewing it anti-clockwise. If you have trouble removing the chuck take the drill to your nearest authorised service centre for chuck replacement. Caution. - Page 13 Carefully read the entire Instruction Manual Before returning this product for a Warranty Claim or any other reason Please Call 1300 880 001 (Australia) or 0800 445 721 (New Zealand) When you make your call, please have the following information at hand: •...
Need help?
Do you have a question about the GTX24250 and is the answer not in the manual?
Questions and answers